热门标签
热门文章
- 1概念:推理 训练 模型 safetensors ckpt_safetensors和ckpt有什么区别
- 2QGIS中安装Python第三方库_osgeo4w shell
- 3CGAL例程:点云数据三维重建_点云三维重建
- 4Jenkins忘记密码的修复方法(Windows/Linux)
- 5TransReID: Transformer-based Object Re-Identification
- 6games101笔记——01基础变换
- 7CentOS服务器安装 node.js 和 express 及创建express项目 和vue项目的部署_centos vue安装node.js
- 8TensorFlow学习笔记——TensorFlow入门_tensor flow
- 9skmultiflow使用自己的csv文件训练模型并保存实验结果
- 10三维点云处理之点云配准_点云匹配
当前位置: article > 正文
vsomeip 快速入门_ubuntu安装vsomeip
作者:Cpp五条 | 2024-02-24 23:26:31
赞
踩
ubuntu安装vsomeip
vsomeip 快速入门
1. 下载仓库
git clone https://github.com/COVESA/vsomeip.git
- 1
2. 编译
2.1 安装相关依赖
我的ubuntu 版本是20.04,所以以ubuntu 20.04为例。
vsomeip依赖 Boost,所以我们要先安装 Boost(版本在1.55-1.74之间),官方文档上对应的boost包版本过低。
sudo apt-get install gcc g++ make
sudo apt install cmake
sudo apt-get install libboost-system-dev libboost-thread-dev libboost-log-dev
sudo apt-get install asciidoc source-highlight doxygen graphviz
- 1
- 2
- 3
- 4
2.2 编译vsomeip
cd vsomeip
mkdir build
cd build
cmake -DENABLE_MULTIPLE_ROUTING_MANAGERS=1 ..
make
sudo make install
- 1
- 2
- 3
- 4
- 5
- 6
运行上述命令进行编译vsomeip库,其中运行make之后的编译很慢,大约需要四五分钟,耐心等待就好。
2.3 编译hello_world example
clone 下载的vsomeip中自带一个demo hello_world,我们先编译对应的helloworld程序
Helloworld程序的编译方法也可以查看自带的readme vsomeip/examples/hello_world/readme
回到build目录下,执行下列命令:
cmake --build . --target hello_world
cd ./examples/hello_world/
make
sudo make install
sudo ldconfig
- 1
- 2
- 3
- 4
- 5
运行后编译就完成。
3. 运行
编译完成之后,会在对应的编译目录下生成对应helloworld的二进制程序:hello_world_client和hello_world_service
此时不能安装readme里面写的执行
Running Hello World Example
---------------------------

The Hello World Example should be run on the same host.
The network addresses within the configuration files need to be adapted to match
the devices addresses.

To start the hello world client and service from their build-directory do:

HOST1:
VSOMEIP_CONFIGURATION=../helloworld-local.json \
VSOMEIP_APPLICATION_NAME=hello_world_service \
./hello_world_service

HOST1:
VSOMEIP_CONFIGURATION=../helloworld-local.json \
VSOMEIP_APPLICATION_NAME=hello_world_client \
./hello_world_client
- 1
- 2
- 3
- 4
- 5
- 6
- 7
- 8
- 9
- 10
- 11
- 12
- 13
- 14
- 15
- 16
- 17
- 18
我们在 …/ 目录下并不能找到 helloworld-local.json这个文件。
所以我们需要将 vsomeip/examples/hello_world/helloworld-local.json 文件复制到二进制文件生成的目录下才能执行。
复制后,vsomeip/buuld/examples/hello_world的目录结构为:

下面运行
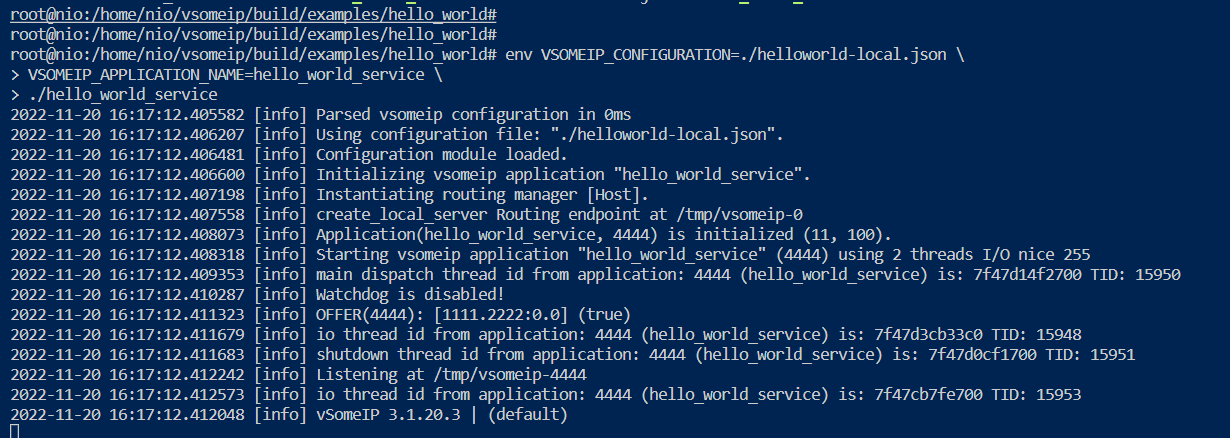
HOST1运行service:
env VSOMEIP_CONFIGURATION=./helloworld-local.json \
VSOMEIP_APPLICATION_NAME=hello_world_service \
./hello_world_service

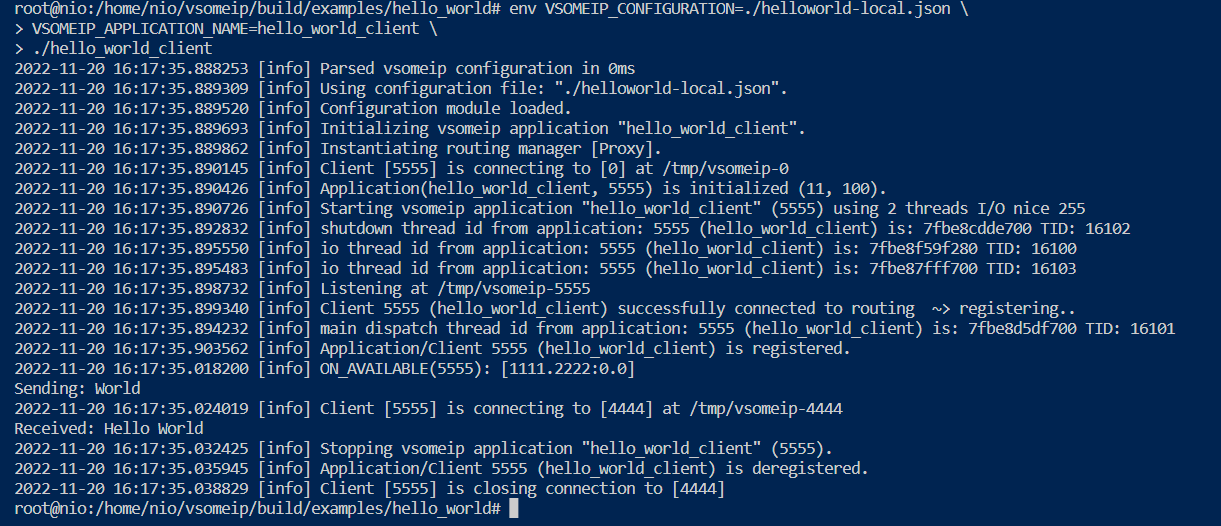
HOST1运行client:
env VSOMEIP_CONFIGURATION=./helloworld-local.json \
VSOMEIP_APPLICATION_NAME=hello_world_client \
./hello_world_client
- 1
- 2
- 3
- 4
- 5
- 6
- 7
- 8
- 9
运行结果如下:


此时,一个简单的vsomeip cilent端和service端的通信就搭建完成了。
声明:本文内容由网友自发贡献,不代表【wpsshop博客】立场,版权归原作者所有,本站不承担相应法律责任。如您发现有侵权的内容,请联系我们。转载请注明出处:https://www.wpsshop.cn/w/Cpp五条/article/detail/136750
推荐阅读
相关标签


