
- 1TPM如何培养员工成为设备的主人?
- 2(4-4)文本分类与情感分析算法:卷积神经网络(CNN)_cnn文本情感分类
- 3基于 Docker 的 python grpc quickstart
- 4人工智能前沿成科技竞争新高地
- 5Python 排序1_rst=0 for i in range(len(nums) - 1): for j in rang
- 6【io.net】问题汇总_discord tier怎么获得
- 7SSE结合SpringBoot_小程序 sse
- 8提高外贸网站排名的6个关键步骤
- 9docker-compose部署hadoop集群(高可用)—— 筑梦之路_dockercompose分布式高可用hadoop hive集群
- 10探索CSS世界中的色彩艺术:从基础到实战
JS 实现区块链分布式网络_代码实现分布式区块链网络
赞
踩
JS 实现区块链网络
这里主要 JS 实现区块链 实现的部分继续下去,对 Blockchain 这个对象有一些修改,如果使用 TS 的话可能要修改对应的 interface,但是如果是 JS 的话就无所谓了。
需要安装的依赖有:
-
express
-
body-parser
现在的 express 已经不内置 body-parser,需要作为单独的依赖下载
-
request
不下载会报错,是使用 request-promise 所需要的依赖
-
request-promise
可选的依赖包包括:
- concurrently
- nodemon
这两个主要为了方便热更新,详情参考:TypeScript 服务端热更新
⚠️:request 和 request-promise 已经 deprecated 了,具体 reference 可以参考 Request’s Past, Present and Future,以及 request 的代替品可以在这里查看:Alternative libraries to request
实现网络
单独的一个节点所要提供的功能有:
- 返回当前的 blockchain
- 添加新的交易
- 挖矿
package.json 的配置就不多提了,我是 yarn+concurrently+nodemon 的搭配。
基础设定如下:
-
index.ts
import express from 'express'; import bodyParser from 'body-parser'; const bitcoin = new Blockchain(); const app = express(); app.use(bodyParser.json()); app.use(bodyParser.urlencoded({ extended: false })); app.listen(3331, () => { console.log(`Listening on port 3331...`); });- 1
- 2
- 3
- 4
- 5
- 6
- 7
- 8
- 9
- 10
- 11
- 12
这个时候服务器就起来了,是时候实现对应的 API 功能了。
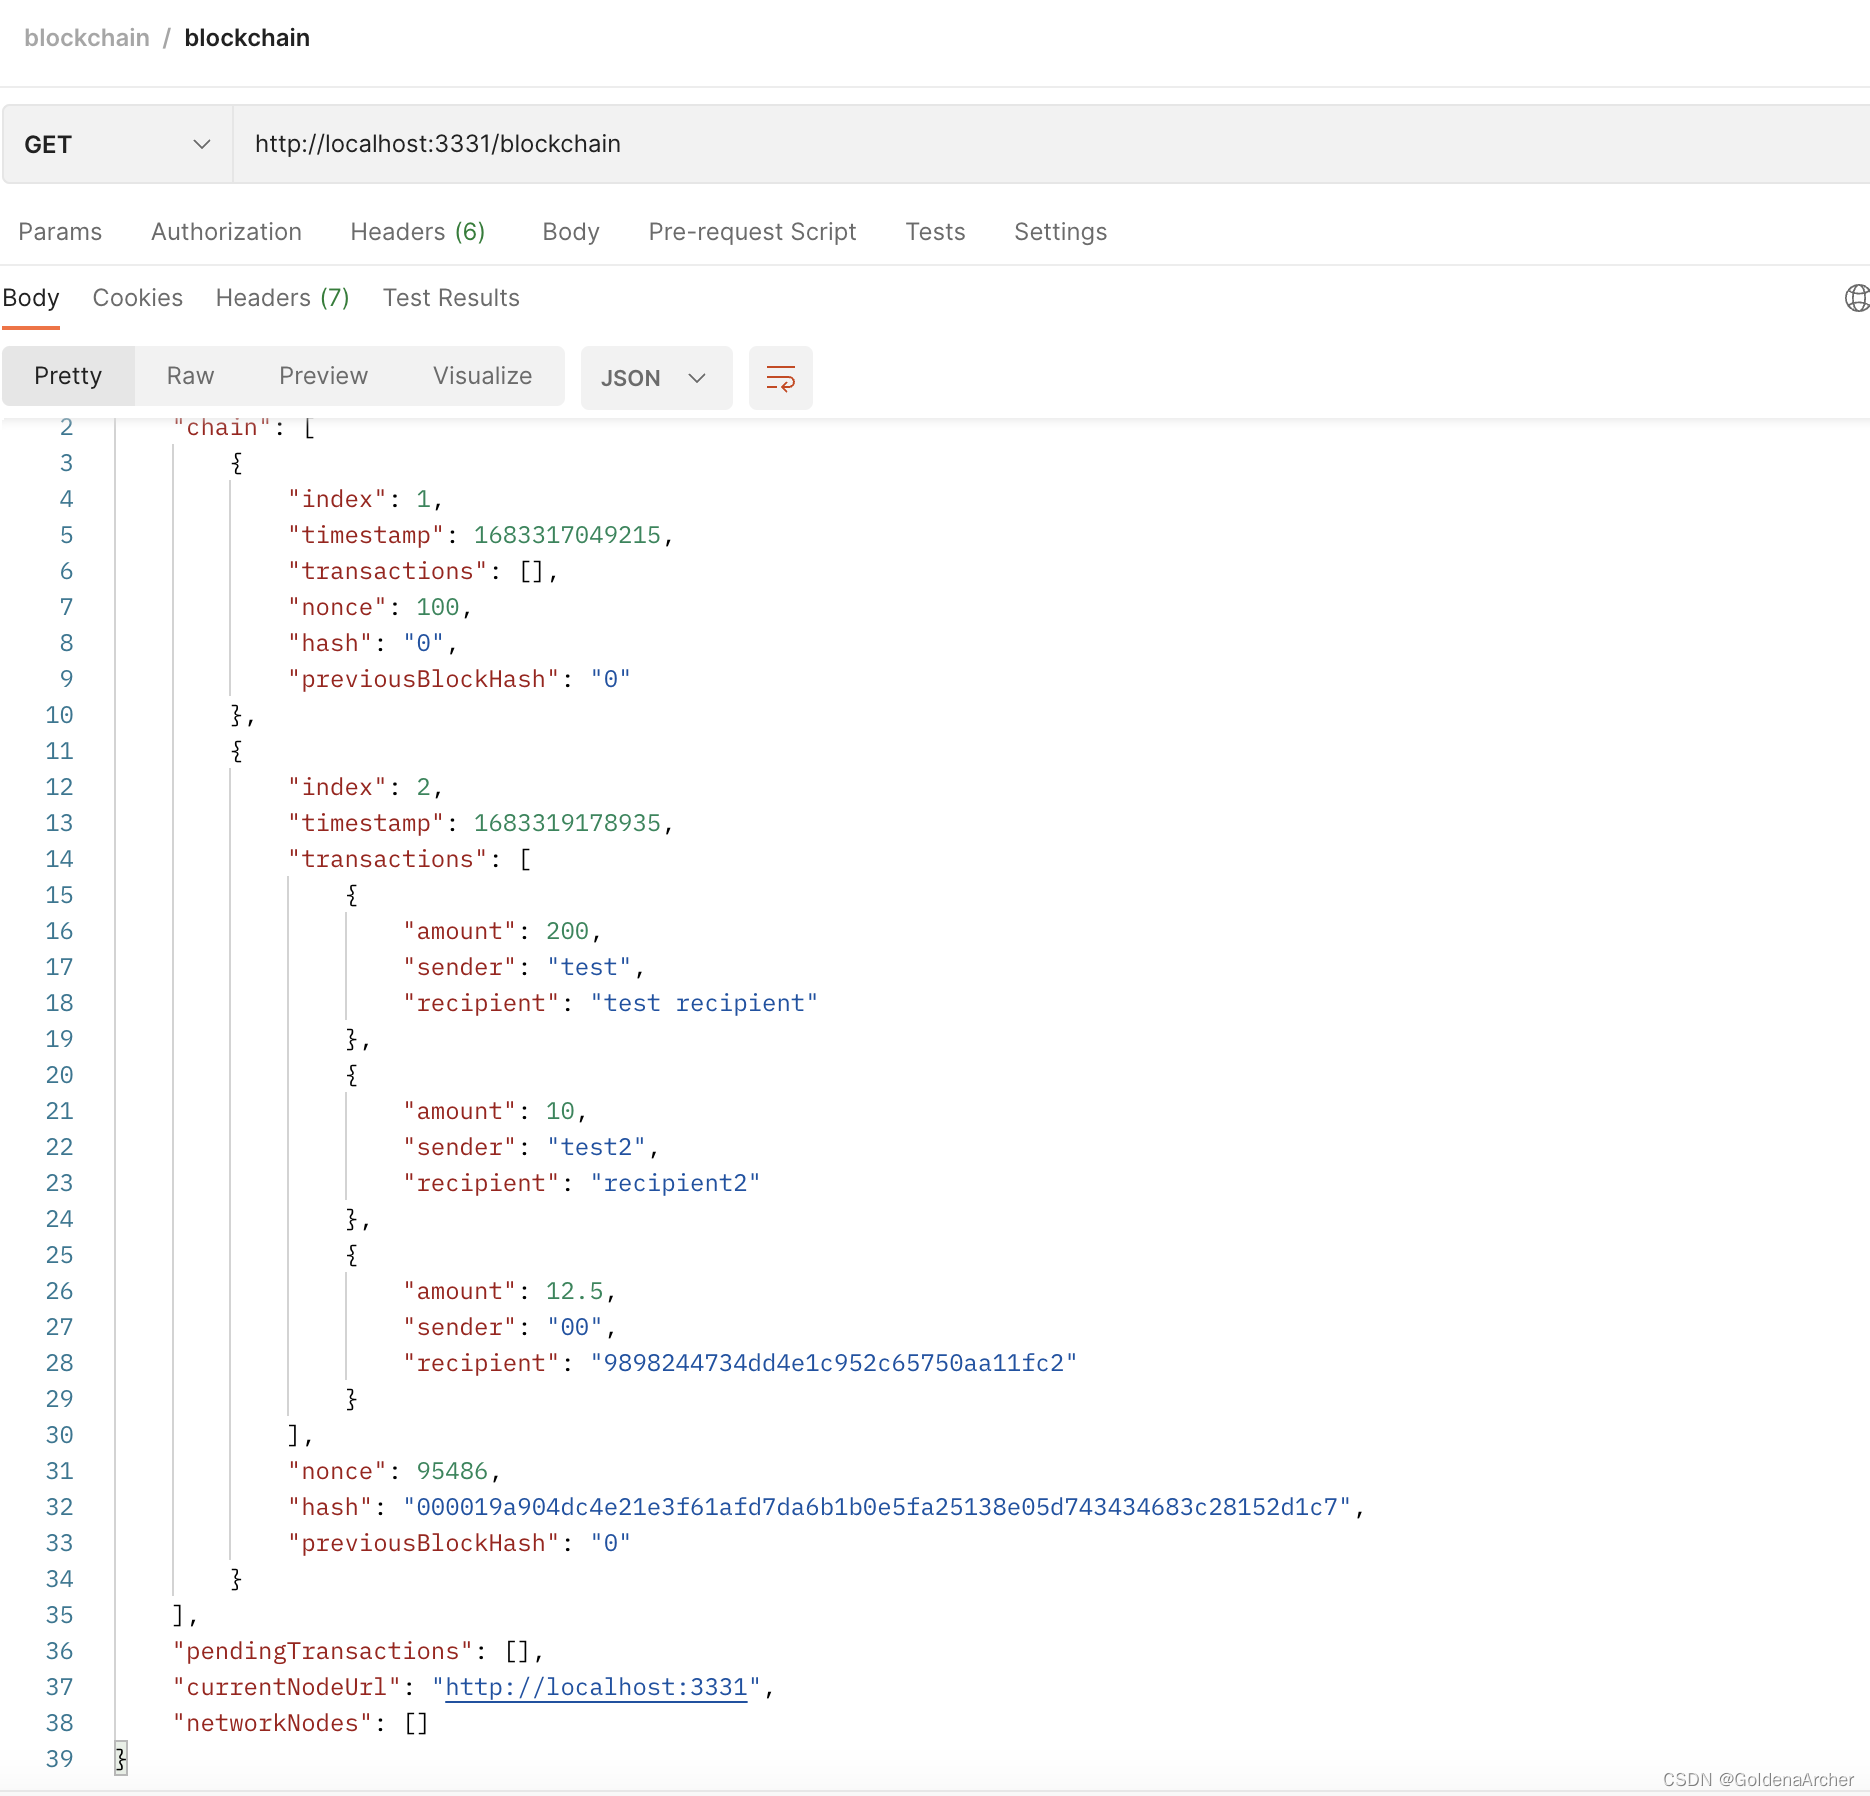
get blockchain
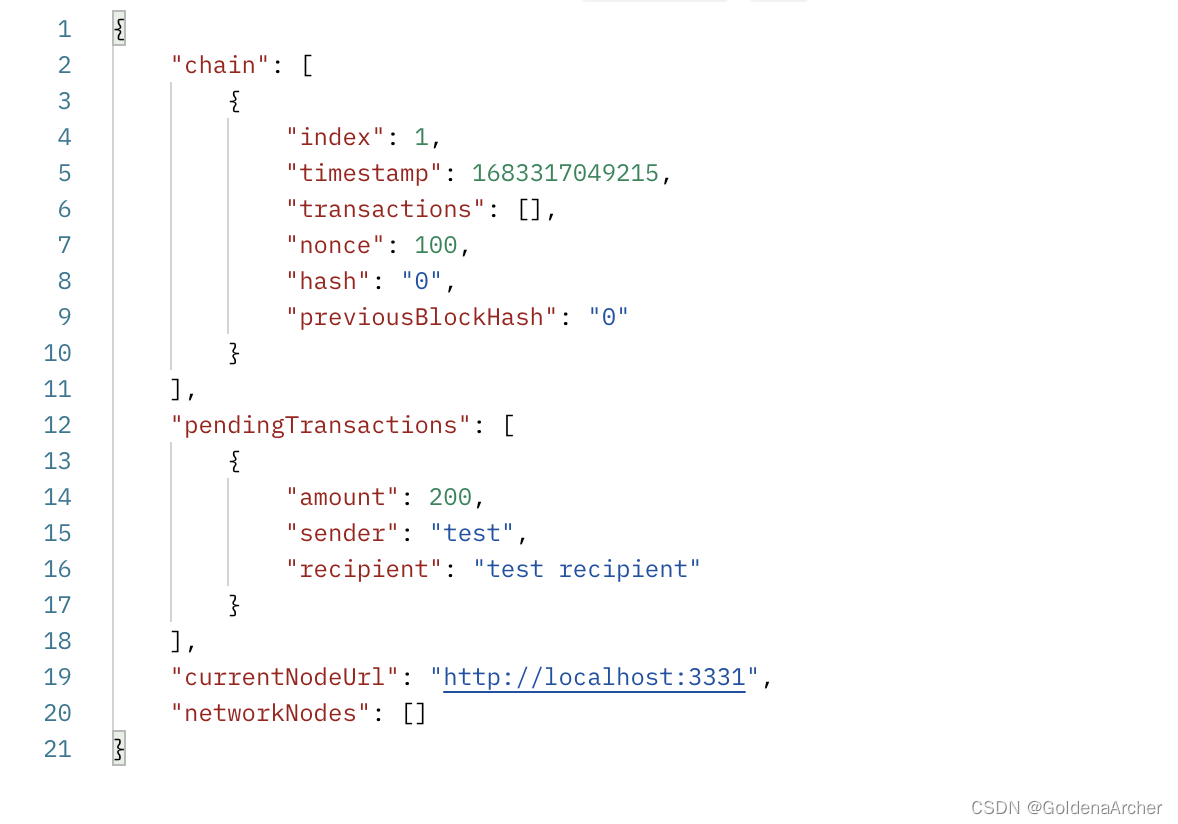
第一个 API 的实现特别简单,只需要返回当前的 blockchain 即可:
app.get('/blockchain', (req, res) => {
  res.send(bitcoin);
});
- 1
- 2
- 3
post transaction
这里是创建 transaction 的 API,基础的业务逻辑是从 request body 中获取交易的数额和交易双方的信息,随后创建一个新的 transaction,实现方法如下:
app.post('/transaction', (req, res) => {
  const { amount, sender, recipient } = req.body;

  const blockIdx: number = bitcoin.createNewTransaction(
    amount,
    sender,
    recipient
  );

  res.json({ message: `transaction will be added in block ${blockIdx}` });
});
- 1
- 2
- 3
- 4
- 5
- 6
- 7
- 8
- 9
- 10
- 11
测试结果如下:
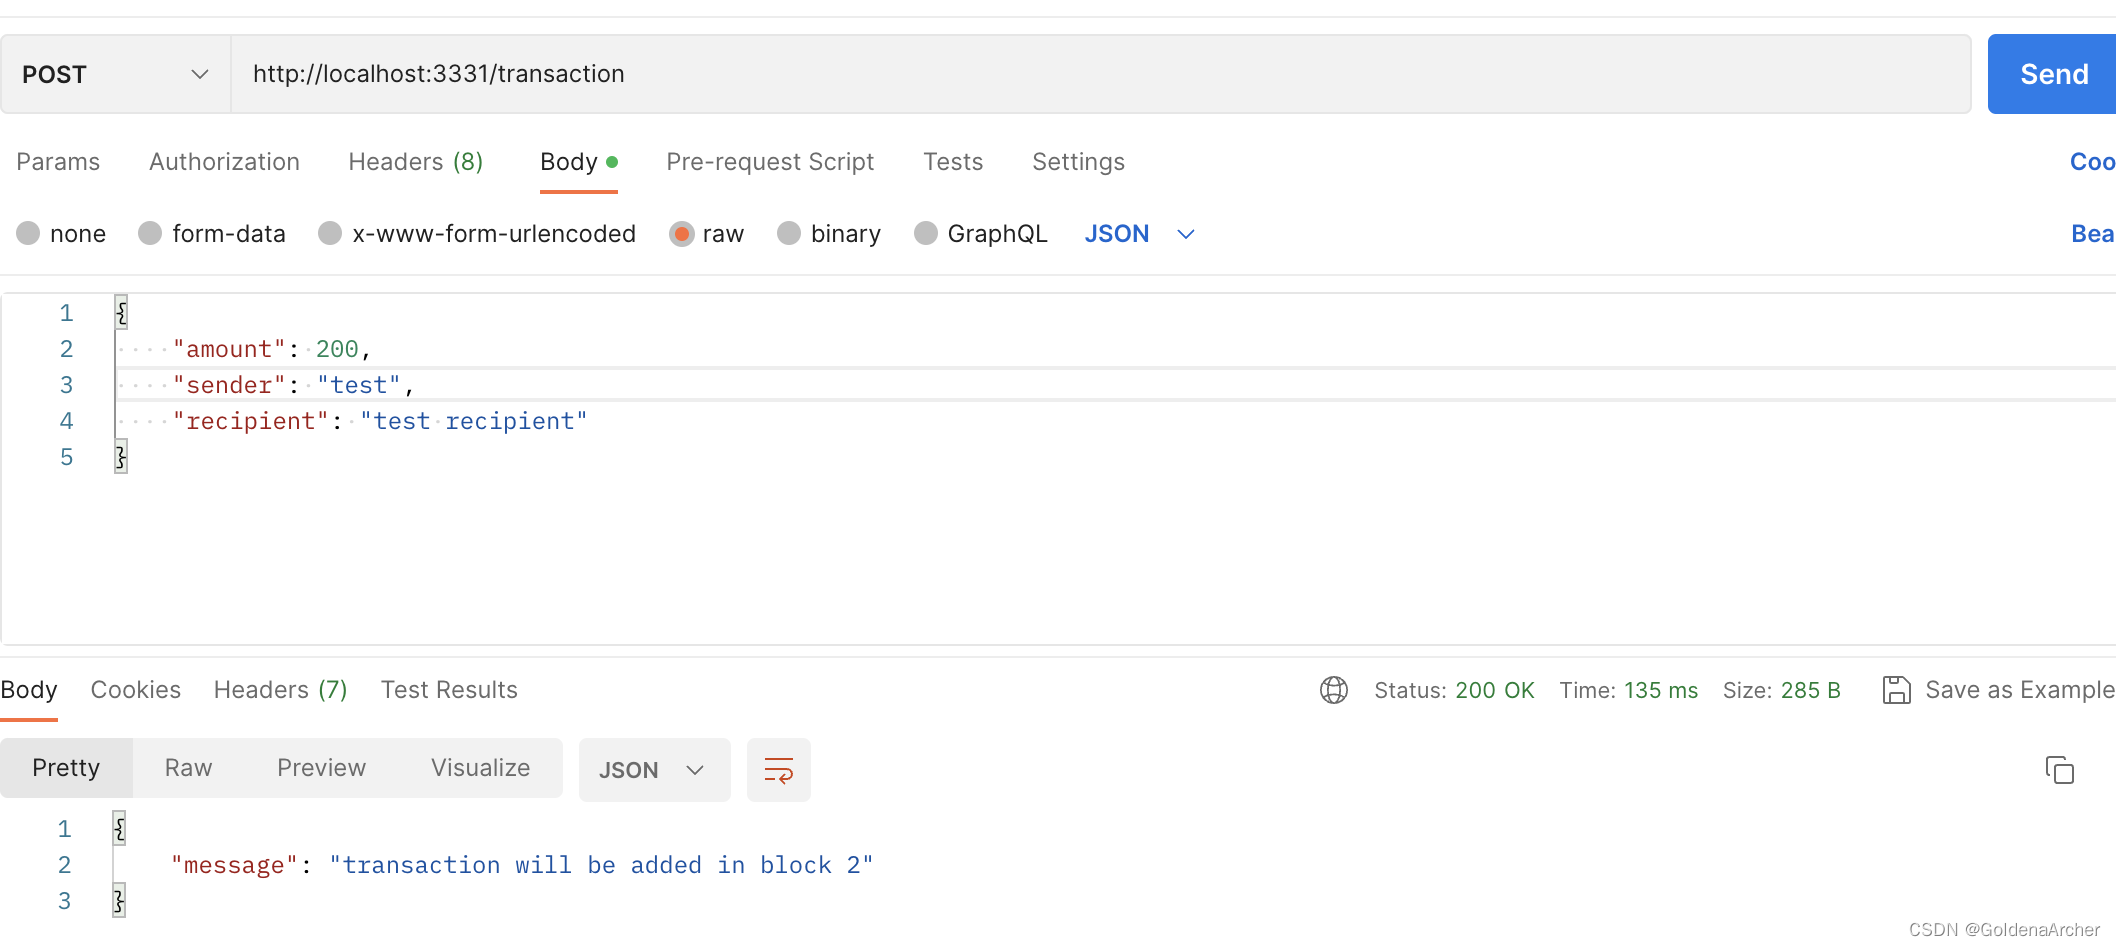
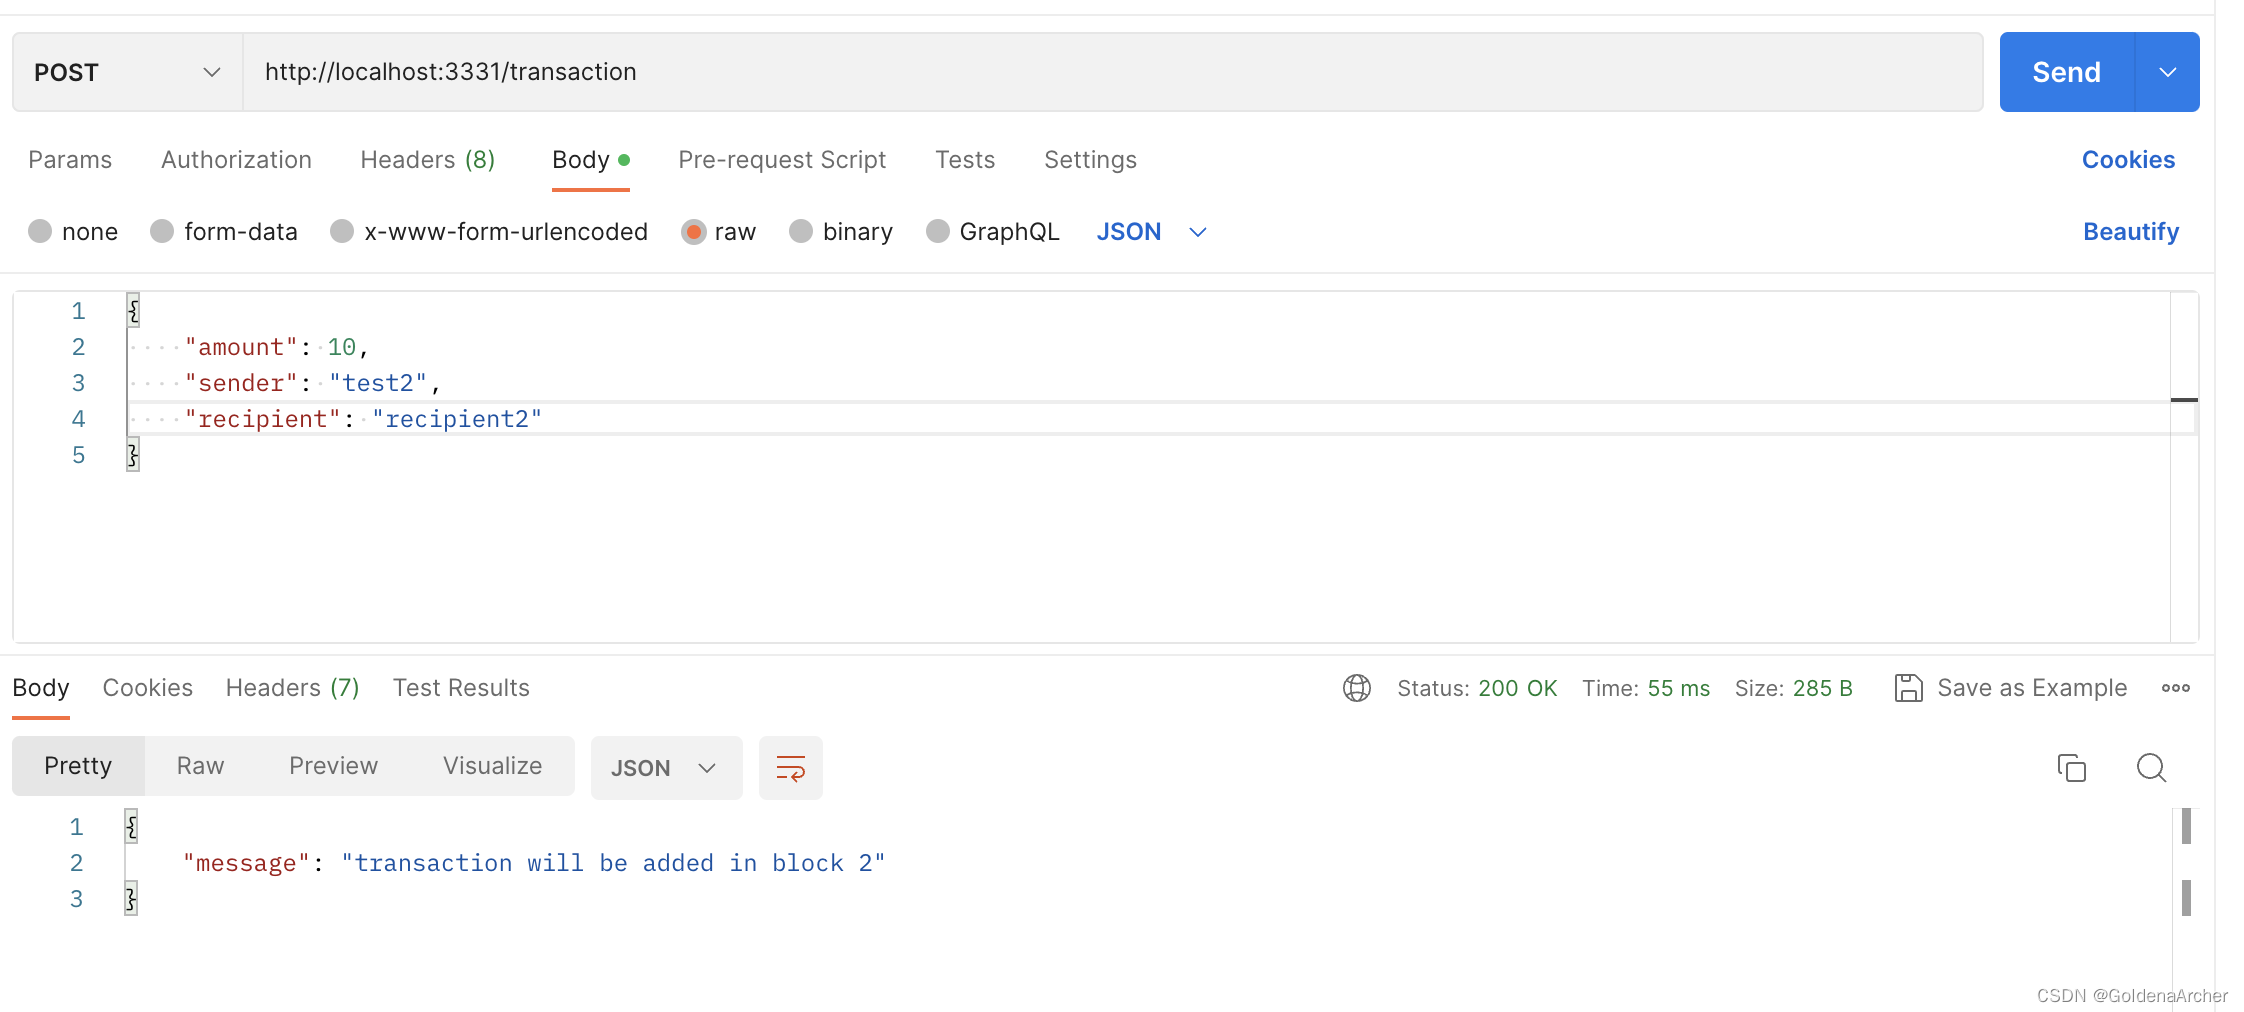

⚠️:重复一下,在当前 block 没有被 mine 之前,所有的 transaction 都会被推到当前 block 中。
get mine
这是整个单节点上业务逻辑最复杂的一部分,同样也需要修改一下 blockchain 的实现(如果用的是 ts)。
要成功的挖出当前的 block,基础的业务逻辑如下:
- 获取整个 blockchain 上最后一个 block
- mine 这个 block,一直获取到正确的 nonce
- 创建一个新的交易去奖励当前的矿工
- 创建一个新的 block
当然,这里所需的功能在 blockchain 对象中已经实现了。
接下来就根据上面的步骤实现挖矿的功能:
// 我没有用 uuid,而是直接使用内置的 crypto 去实现生成随机的 uuid 的功能
import crypto from 'crypto';

const nodeAddress = crypto.randomUUID().split('-').join('');

app.get('/mine', (req, res) => {
  // 1. 获取当前 blockchain 上最后的 block
  const lastBlock = bitcoin.getLastBlock();
  // 2. 开始 mine,一直到获取正确的 nonce
  //    2.1 在 mine 之前也需要获取对应的数据
  const prevBlockHash = lastBlock.hash;
  //    这里是更新的地方,之前的 blockData 的数据结构 为 Transaction | Transaction[],这里更新一下
  const currBlockData = {
    transactions: bitcoin.pendingTransactions,
    index: lastBlock.index + 1,
  };
  const nonce = bitcoin.proofOfWork(prevBlockHash, currBlockData);
  const blockHash = bitcoin.hashBlock(prevBlockHash, currBlockData, nonce);

  // 3. 创建新的 transaction 去奖励当前的矿工
  //    这里的收件方为当前 network 地址(随机生成)
  bitcoin.createNewTransaction(12.5, '00', nodeAddress);

  // 4. 创建新的 block
  const newBlock = bitcoin.createNewBlock(nonce, prevBlockHash, blockHash);

  res.json({ message: 'New block mined successfully', block: newBlock });
});

- 1
- 2
- 3
- 4
- 5
- 6
- 7
- 8
- 9
- 10
- 11
- 12
- 13
- 14
- 15
- 16
- 17
- 18
- 19
- 20
- 21
- 22
- 23
- 24
- 25
- 26
- 27
- 28
blockchain 修改的部分为:
interface BlockData {
  index: number;
  transactions: Transaction[];
}

// 修改 currBlockData 的数据类型就好,其他地方不用变
class Blockchain {
  hashBlock = (
    prevBlockHash: string,
    currBlockData: BlockData,
    nonce: number
  ) => {
    // ...
  };

  proofOfWork = (prevBlockHash: string, currBlockData: BlockData) => {
    // ...
  };
}
- 1
- 2
- 3
- 4
- 5
- 6
- 7
- 8
- 9
- 10
- 11
- 12
- 13
- 14
- 15
- 16
- 17
- 18
- 19
这样就实现完了,沿用上面的结果,测试如下:
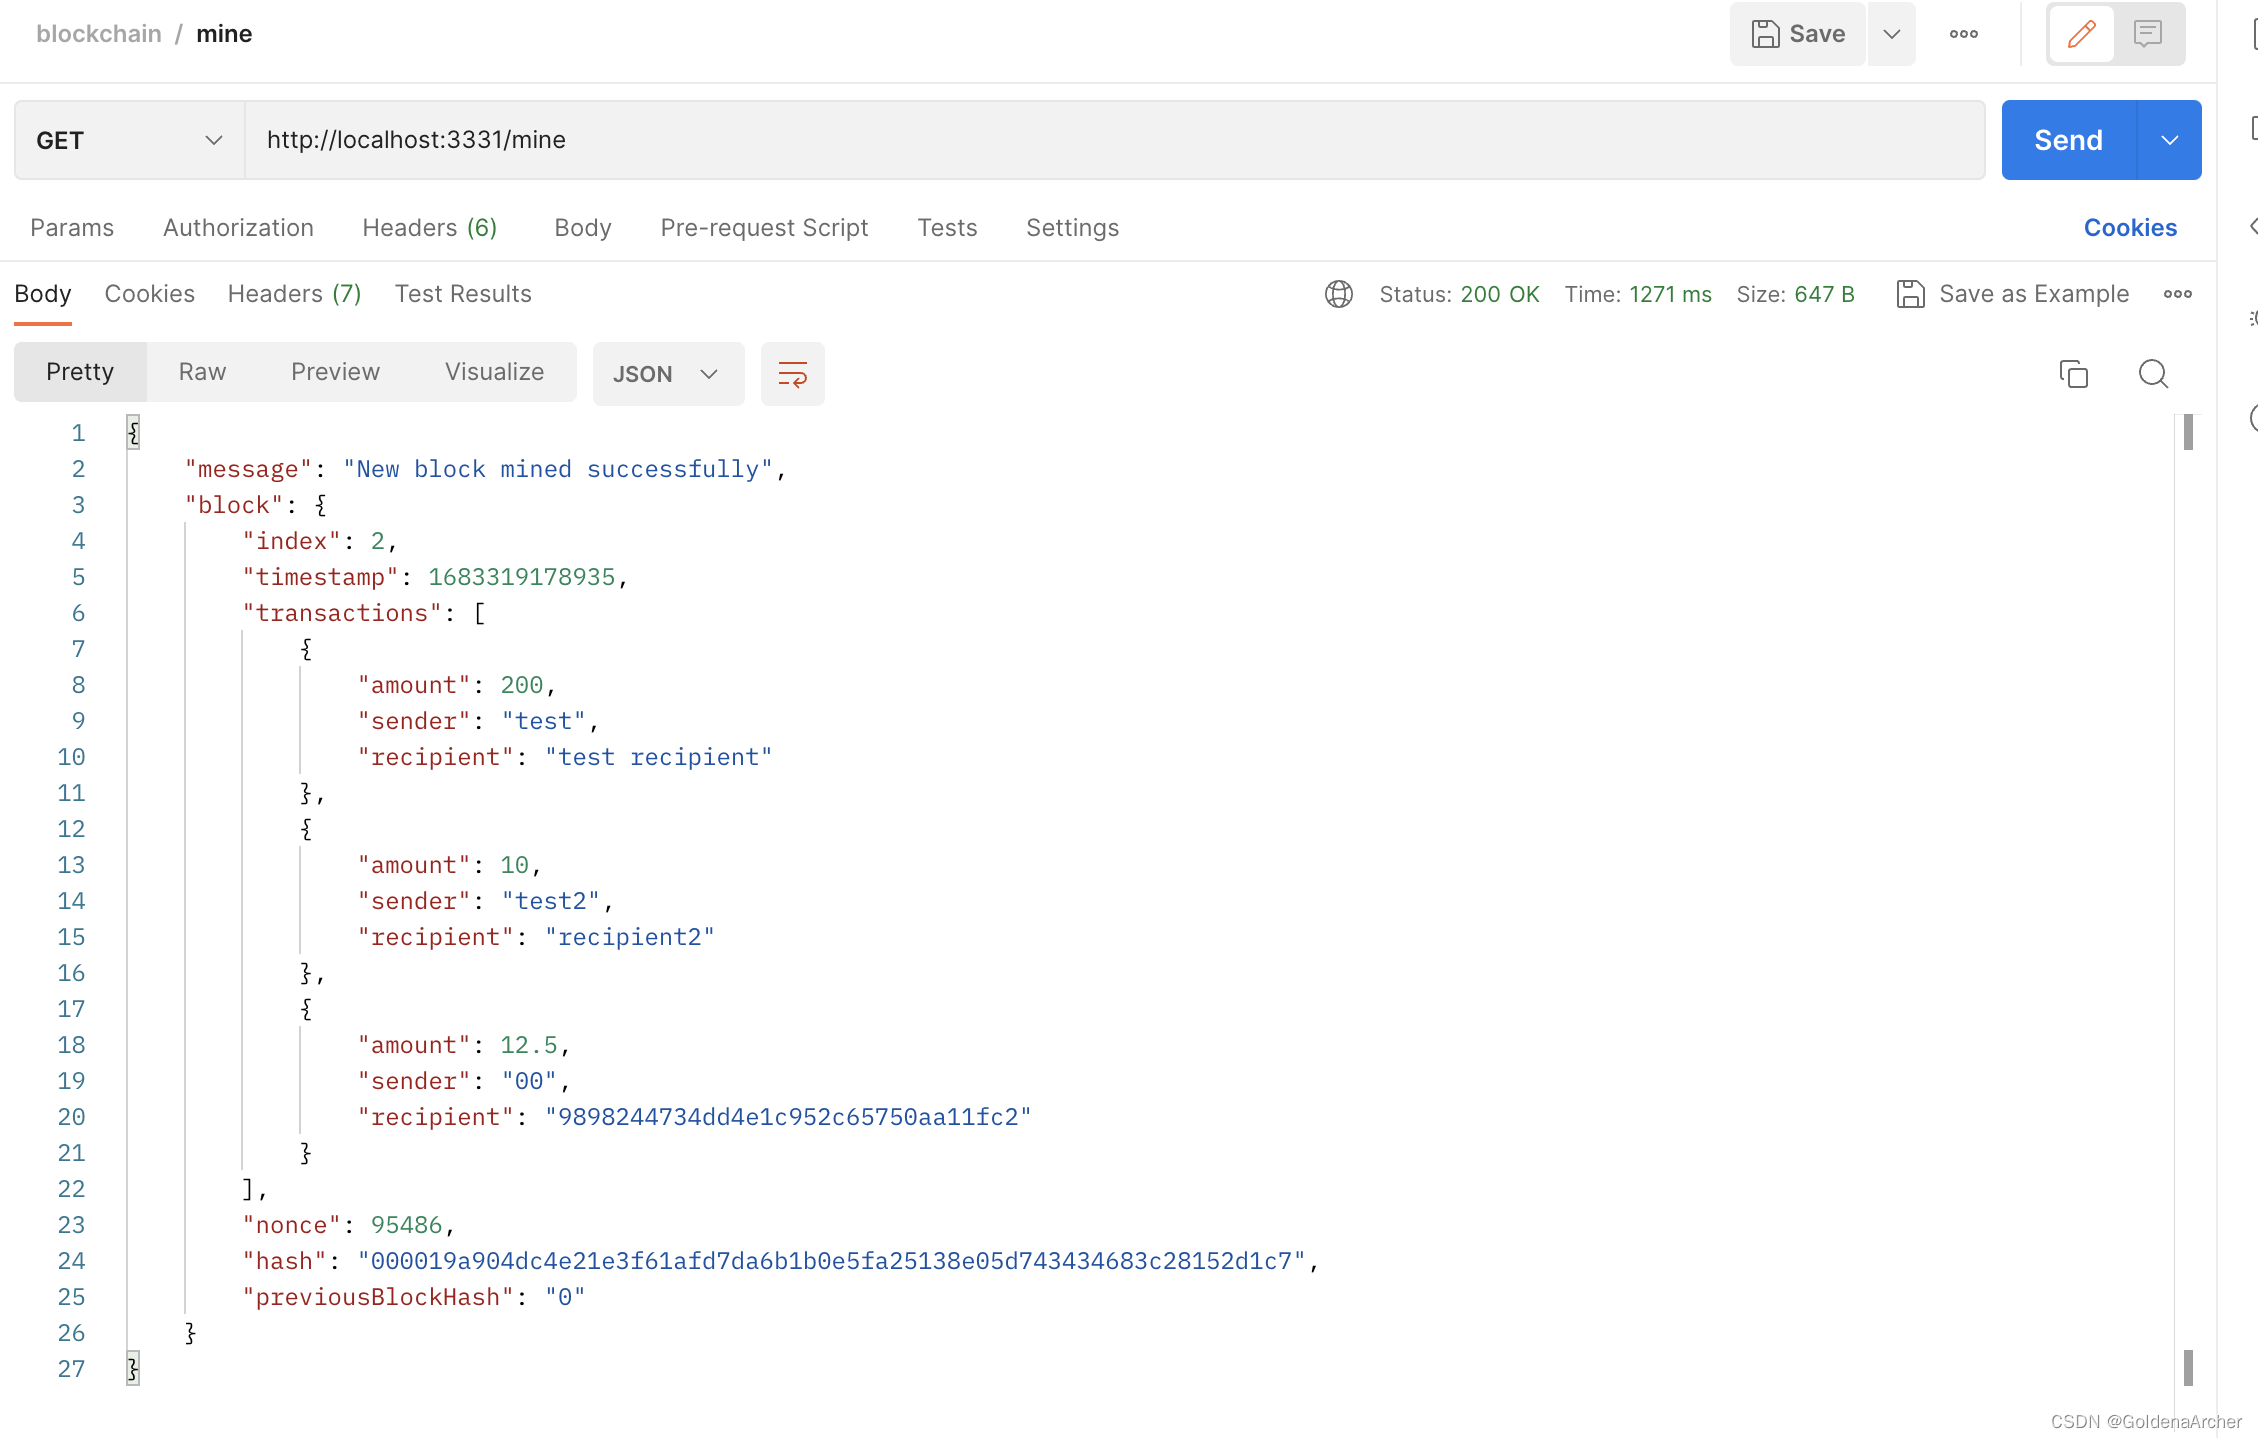
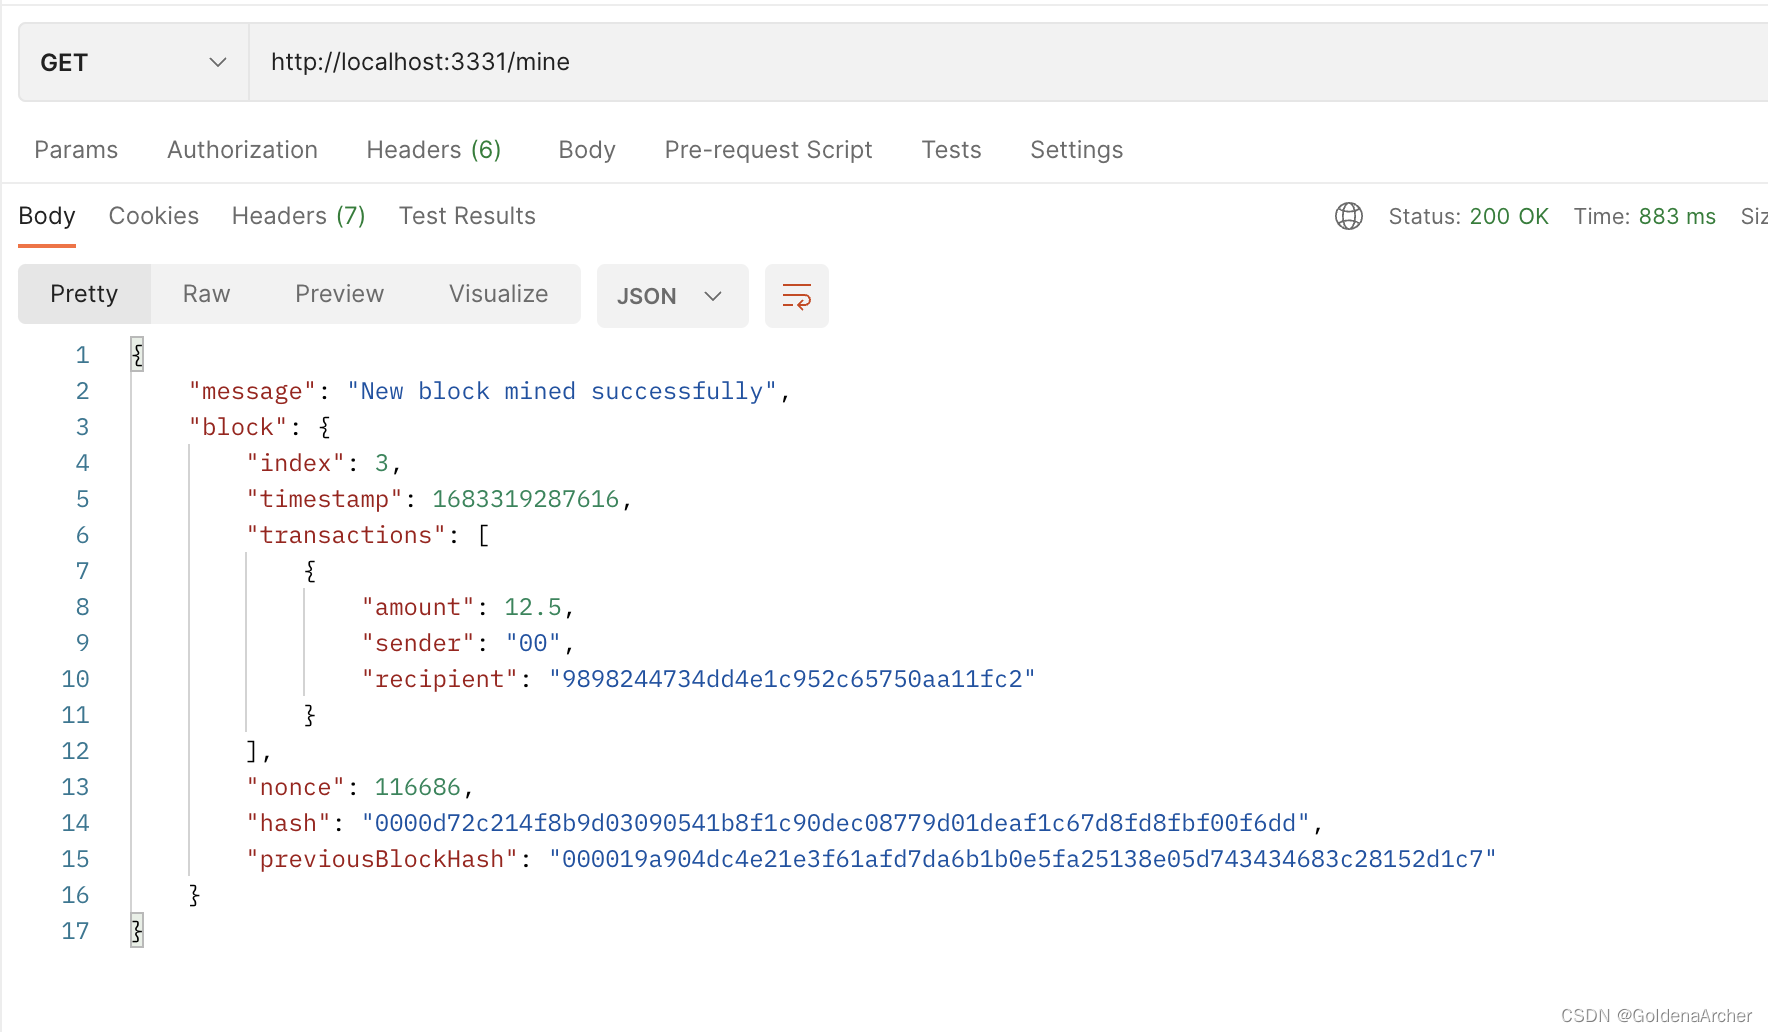
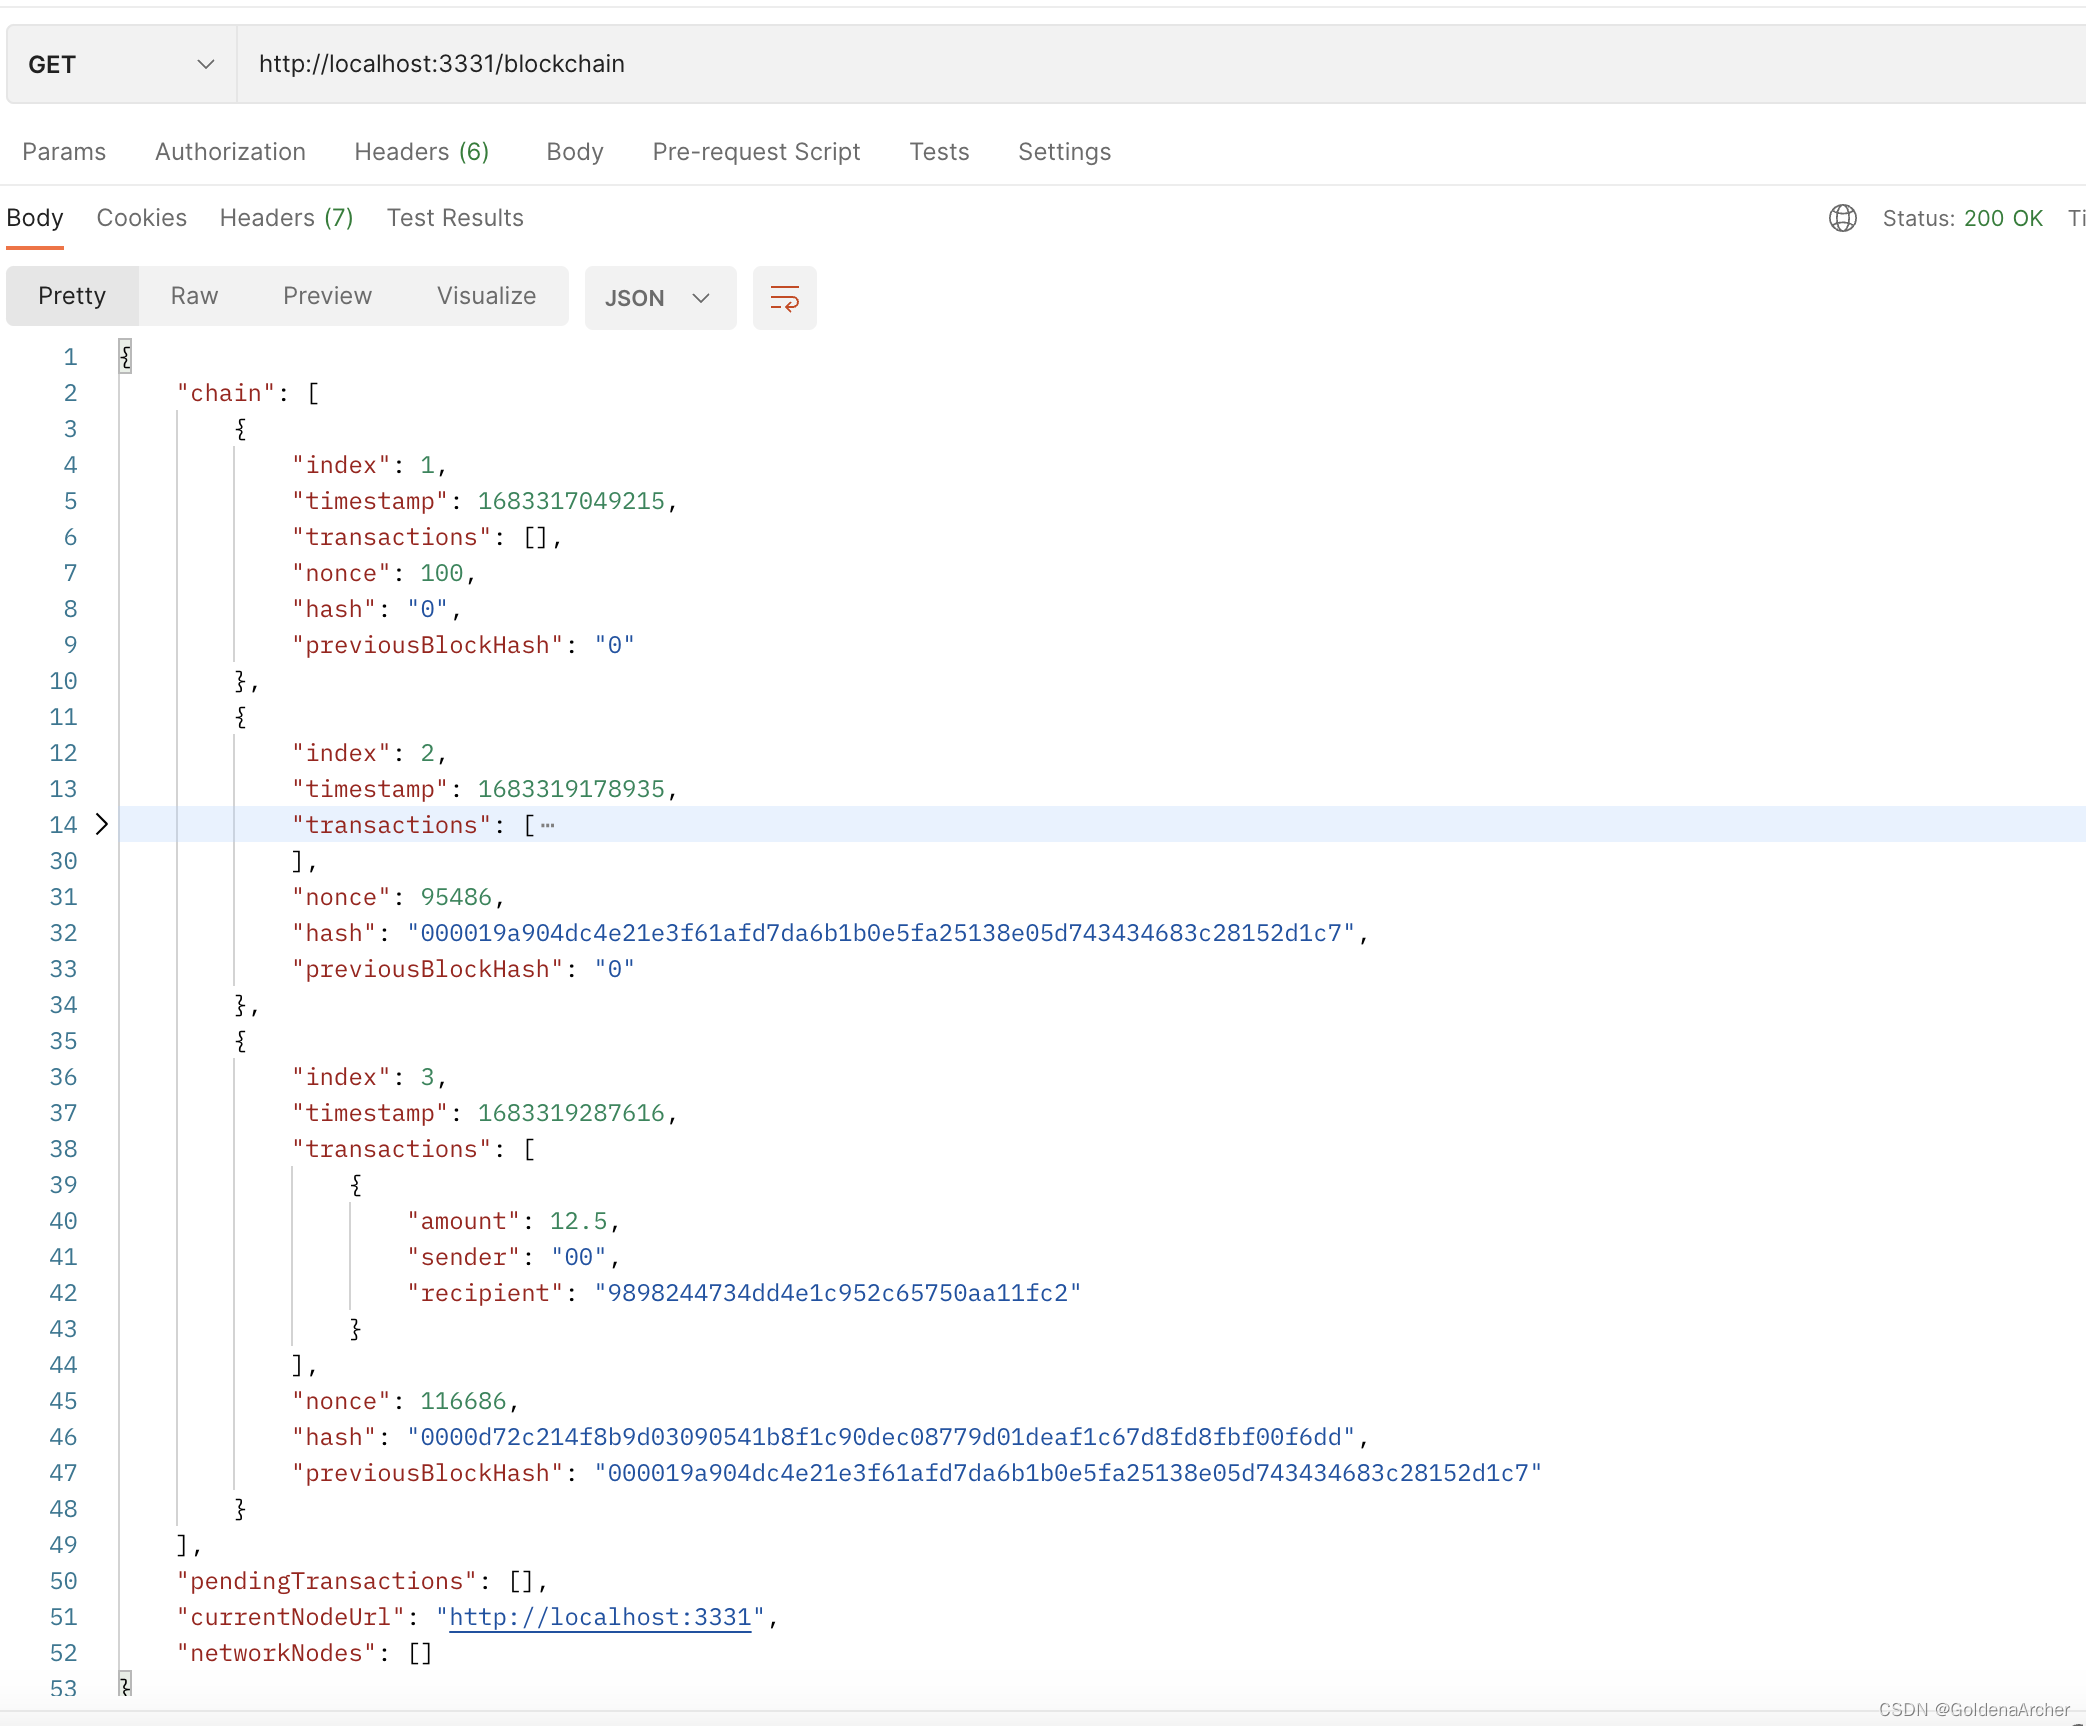
⚠️:每次 mine 都至少会创建 1 个 transaction,就是奖励当前挖矿人的奖励
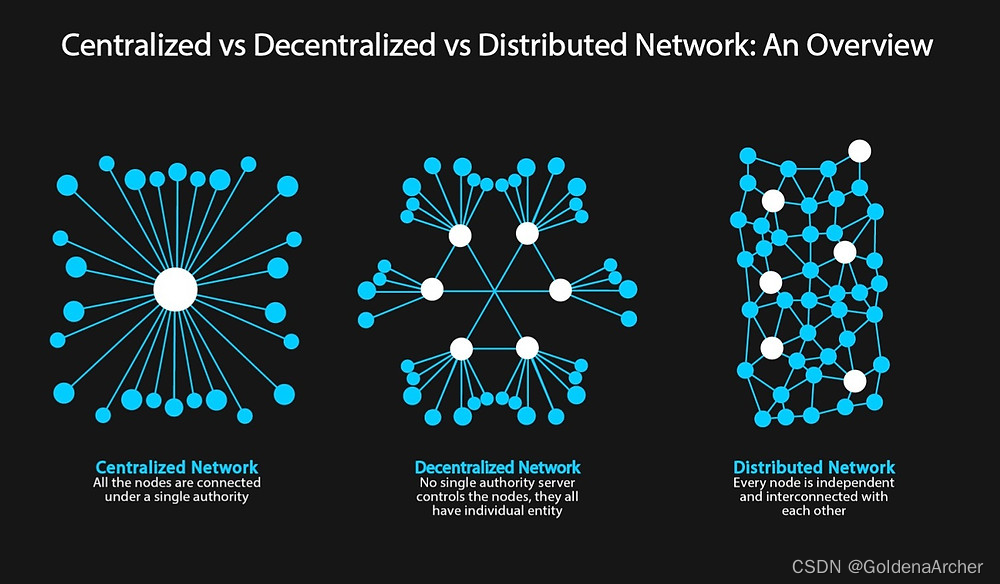
实现去中心化区块链网络
区块链的一个特点就在于每一个结点都可以成为一个中心,所以每个结点都能够访问其他的结点:
捋一下要做到这一点的流程:
-
每一个结点都需要群组去保存所有链接的结点
-
当一个新的结点 A 加入这个家庭的时候,它要通知其他的结点,将结点 A 加到其他结点已经存在的群组中
-
当其他的结点成功注册了结点 A,将 A 加到了自己的通讯录中
-
结点 A 也需要将其他的结点加到自己的通讯录中
接下来就根据这个逻辑去实现去中心化网络
修改配置和数据结构
首先修改 blockchain 对象,当前 blockchain 应该获取当前的网络,并能够存储相关联的网络,修改如下:
const currentNodeUrl = process.argv[3];

class Blockchain {
  // ...
  currentNodeUrl: string;
  networkNodes: string[];

  constructor() {
    this.chain = [];
    this.pendingTransactions = [];
    // arbitrary values
    this.createNewBlock(100, '0', '0');

    this.currentNodeUrl = currentNodeUrl;
    this.networkNodes = [];
  }
}
- 1
- 2
- 3
- 4
- 5
- 6
- 7
- 8
- 9
- 10
- 11
- 12
- 13
- 14
- 15
- 16
- 17
这里将会使用 process.argv[3] 直接获取当前 node 的 url,因此,下一步就是修改配置文件,将 node url 作为命令行参数:
{
  "scripts": {
    "node_1": "concurrently \"tsc -w\" \"nodemon dist/index.js 3331 http://localhost:3331\"",
    "node_2": "concurrently \"tsc -w\" \"nodemon dist/index.js 3332 http://localhost:3332\"",
    "node_3": "concurrently \"tsc -w\" \"nodemon dist/index.js 3333 http://localhost:3333\"",
    "node_4": "concurrently \"tsc -w\" \"nodemon dist/index.js 3334 http://localhost:3334\"",
    "node_5": "concurrently \"tsc -w\" \"nodemon dist/index.js 3335 http://localhost:3335\""
  }
}
- 1
- 2
- 3
- 4
- 5
- 6
- 7
- 8
- 9
again,这里用了 ts+nodemon+concurrently,所以这么修改的,如果不用一样的配置,可能需要自己想办法修改一下参数的问题。
运行结果如下:

这样当前网络上就有 5 个不相关联的结点正在运行了。
post register node
这一步其实是实现的步骤 3,也就是其他结点接受一个参数,并且将结点 A 加到自己的通讯录中。对于当前结点来说,它只需要知道 A 的地址,并且判断:
- 这个我是不是 A
- 我是不是已经加过 A 了
如果二者都不满足,那么当前结点就将 A 加入通讯录中。
app.post('/register-node', (req, res) => {
  const newNodeUrl = req.body.newNodeUrl,
    // 我没加过 A
    nodeNotAlreadyPresent = !bitcoin.networkNodes.includes(newNodeUrl),
    // 我不是 A
    notCurrentNode = bitcoin.currentNodeUrl !== newNodeUrl;

  if (nodeNotAlreadyPresent && notCurrentNode)
    bitcoin.networkNodes.push(newNodeUrl);

  // 这个也可以加到 if 里面,else 里面的信息表示没有已经存在或是自己
  res.json({ message: 'New node registered successfully.' });
});
- 1
- 2
- 3
- 4
- 5
- 6
- 7
- 8
- 9
- 10
- 11
- 12
- 13
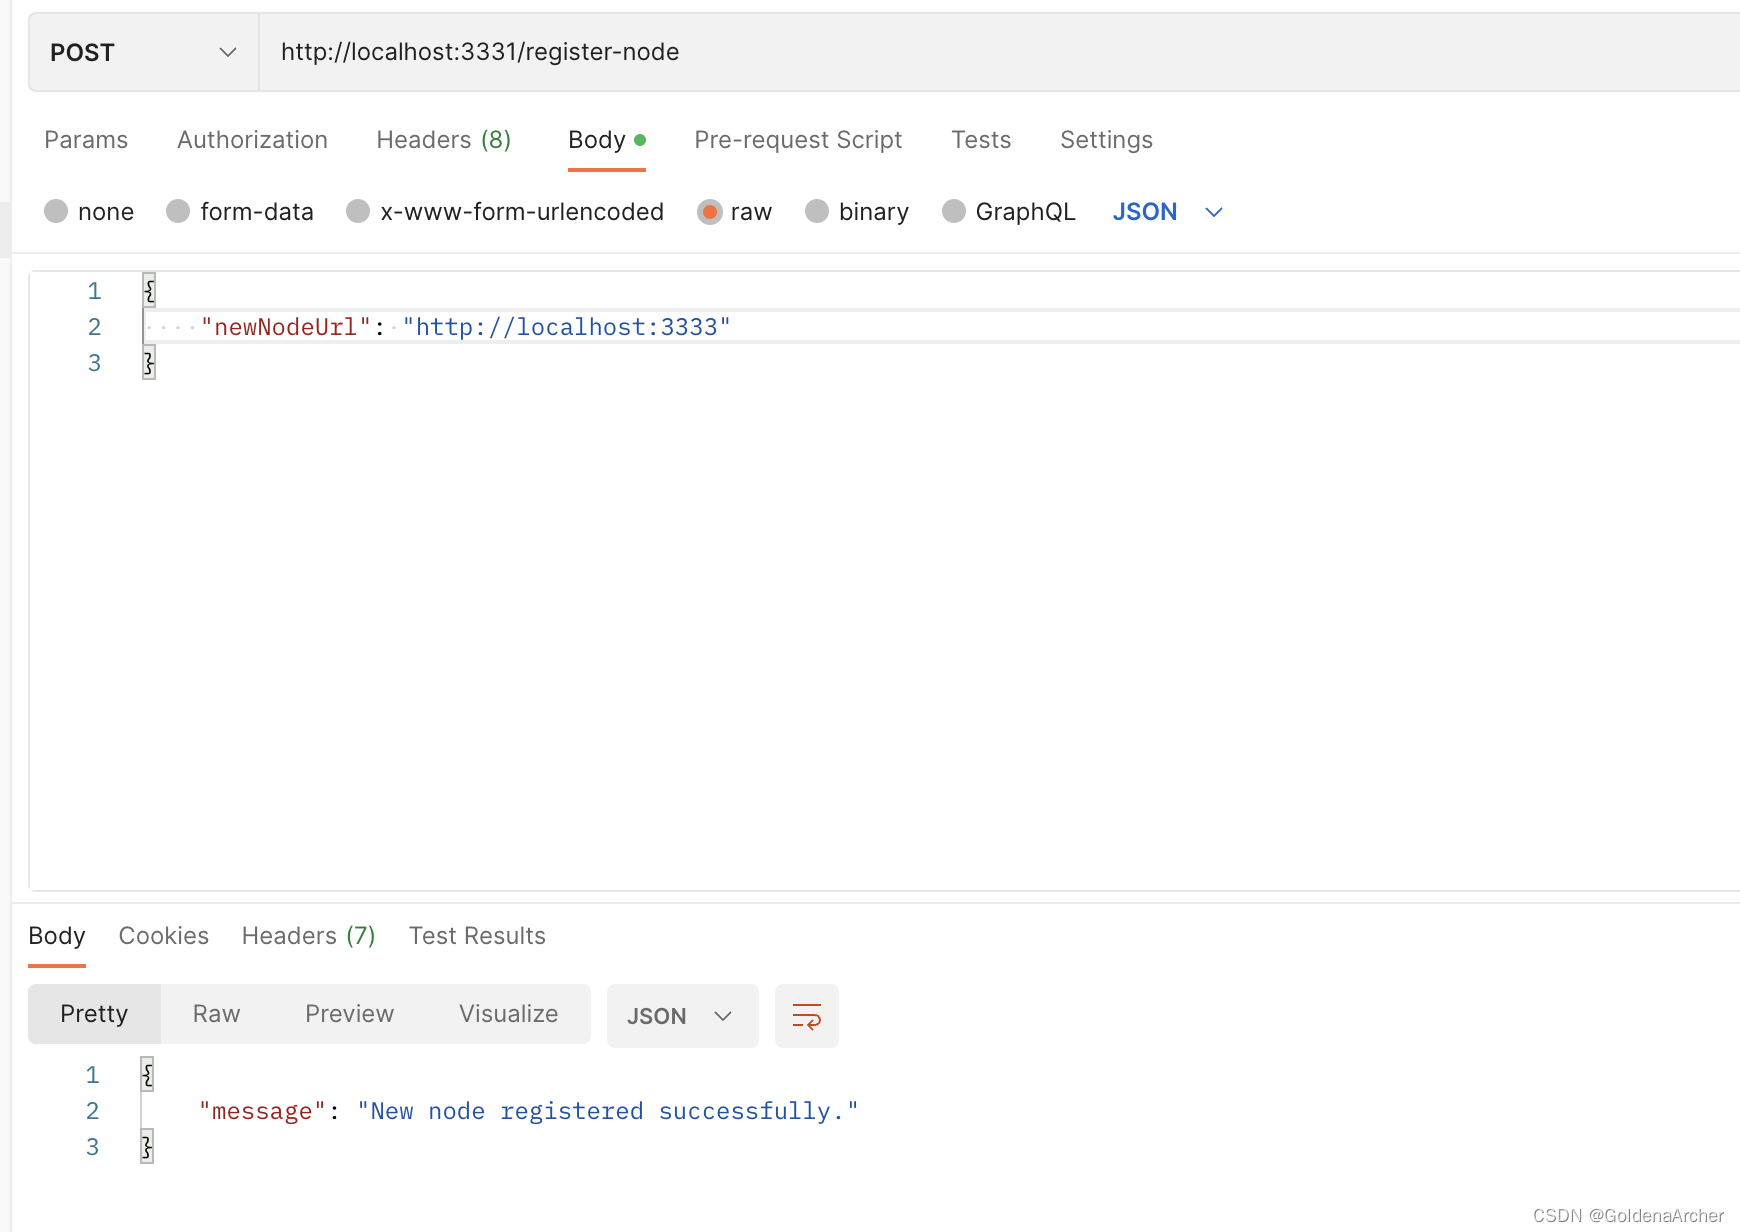
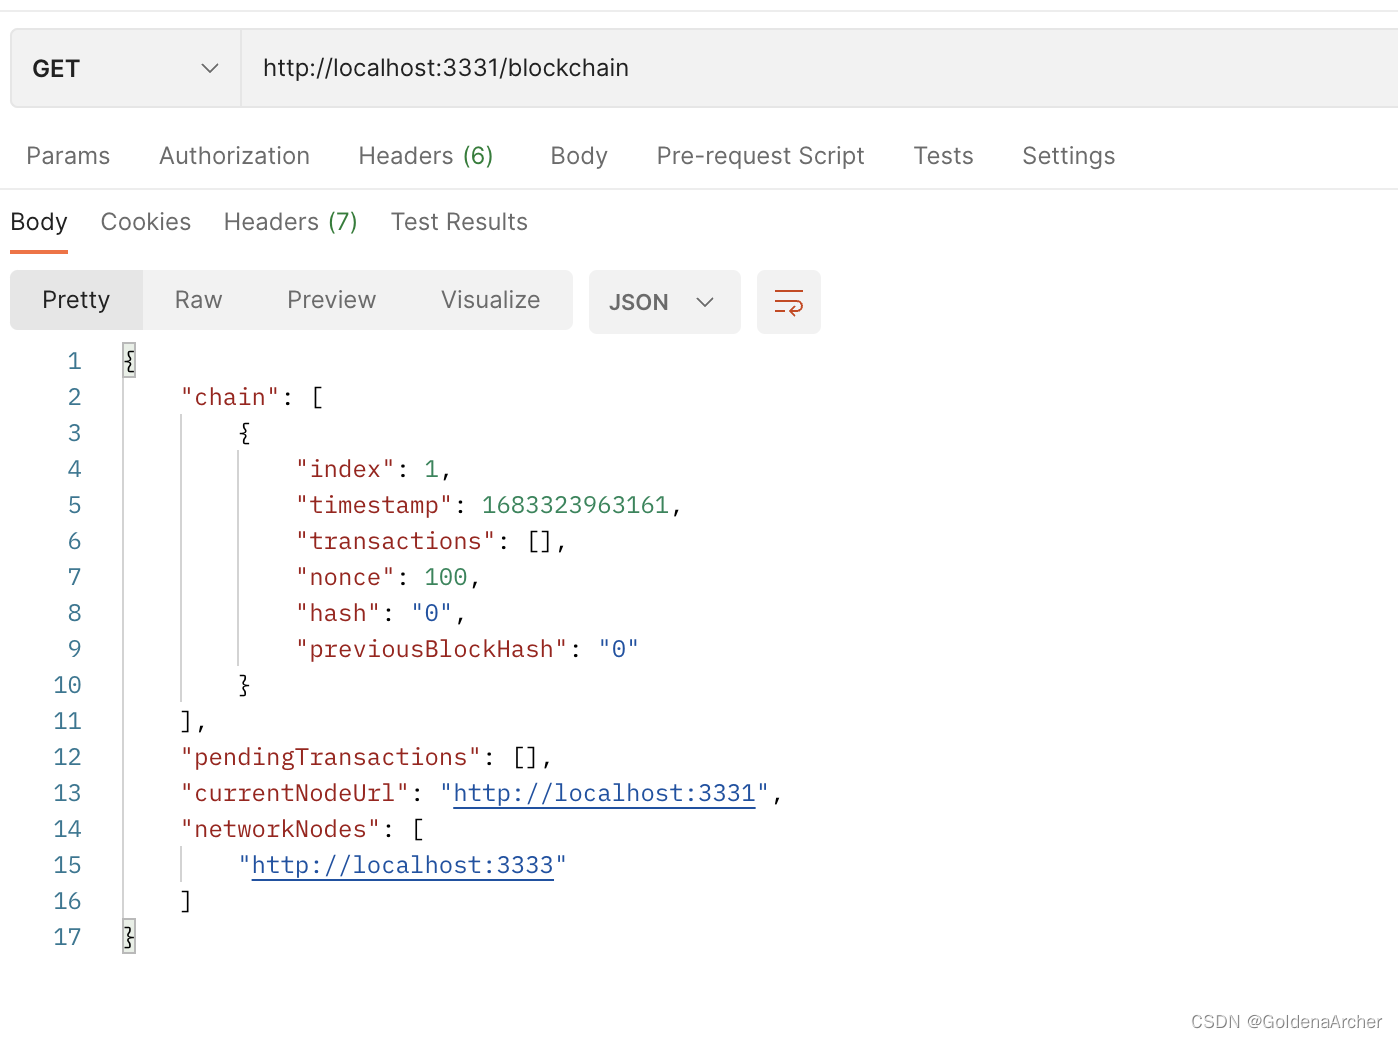
这里 3331 收到了 3333,所以 3331 会将 3333 加到自己的通讯录中,而 3333 暂时还没有将 3331 加到自己的通讯录中。
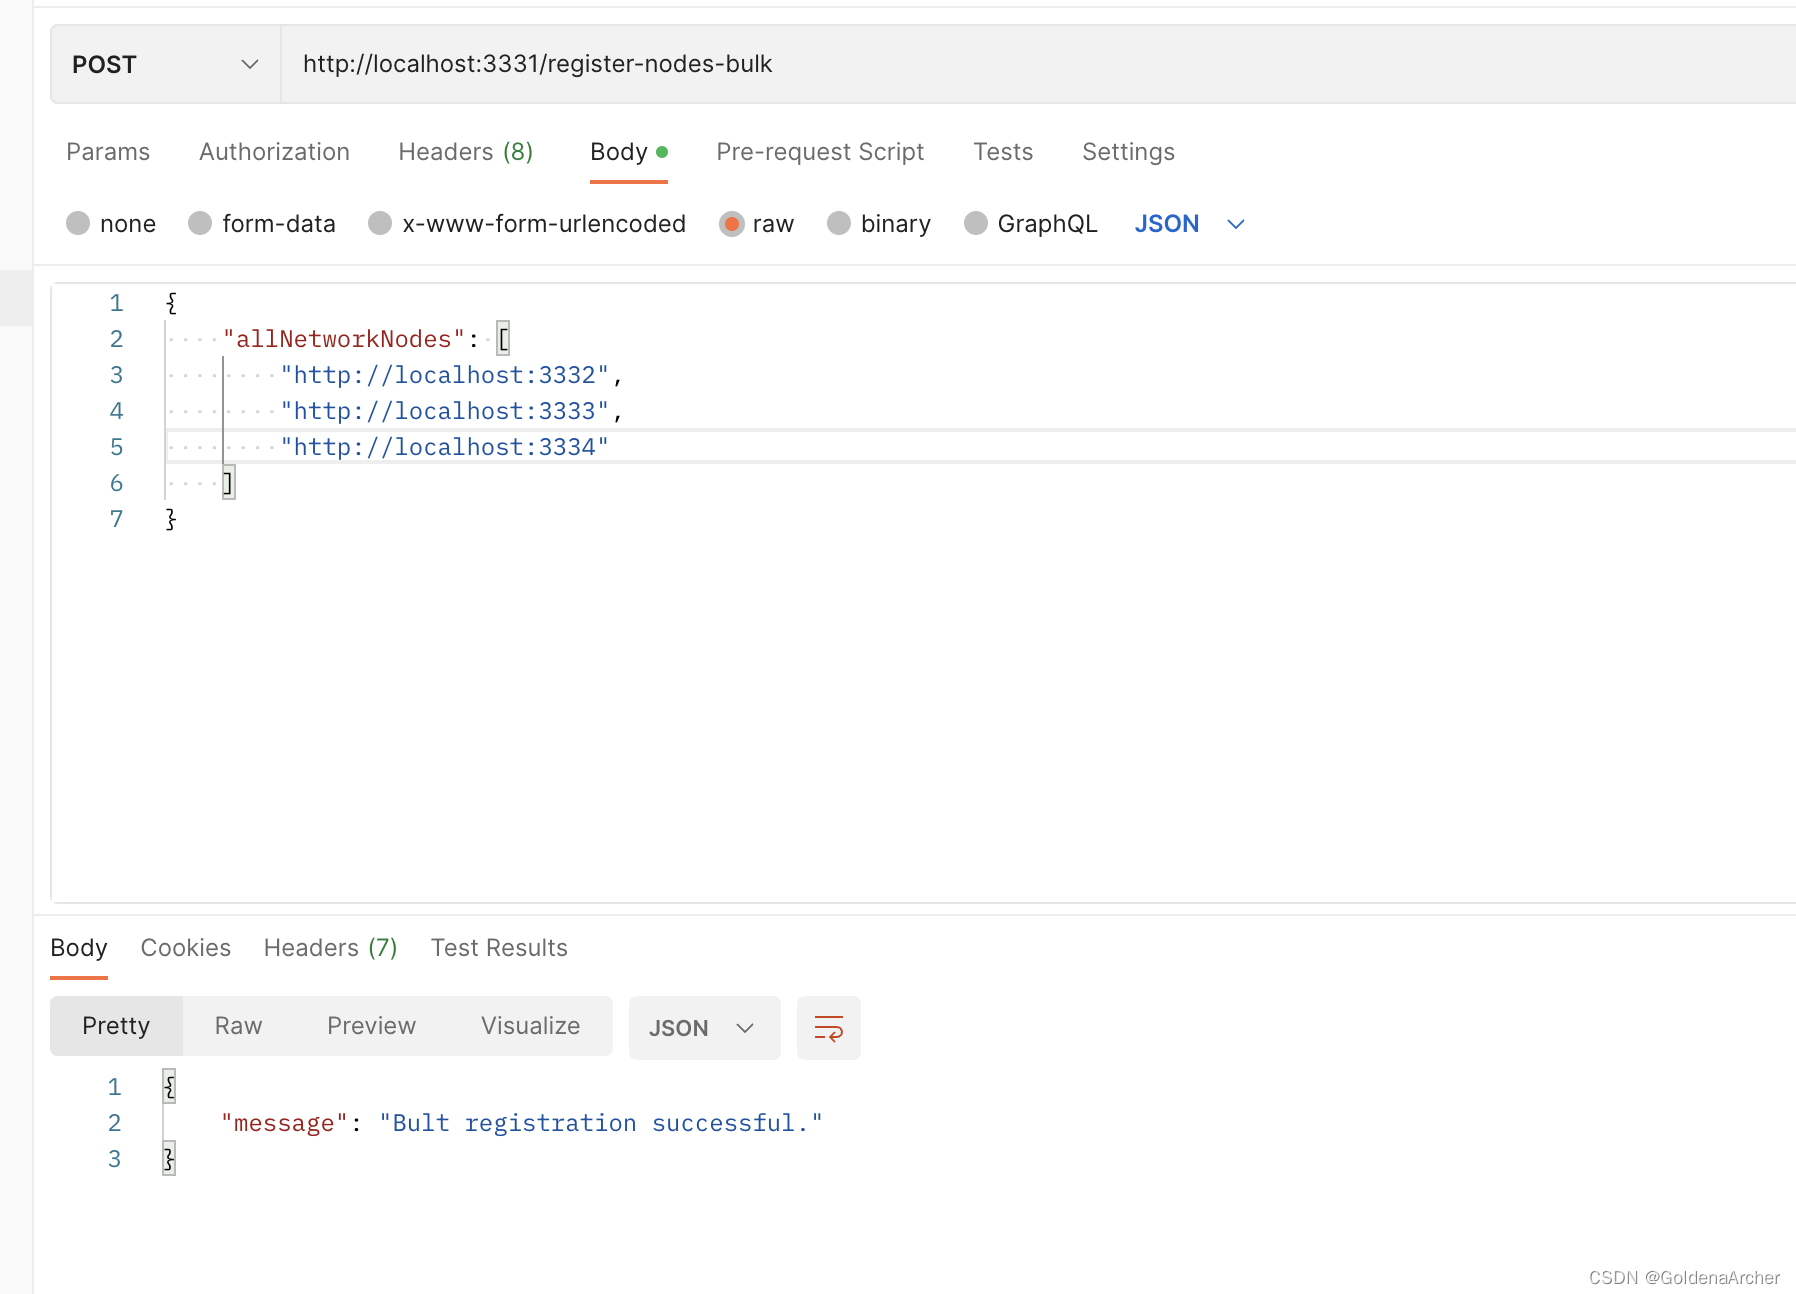
post register nodes bulk
这一步是滴 4 步,即其他的结点已经将 A 加到通讯录中了,A 也要将其他的结点加到通讯录中,所以这里接受的参数是一个数组。
实现如下:
app.post('/register-nodes-bulk', (req, res) => {
  const allNetworkNodes: string[] = req.body.allNetworkNodes;
  allNetworkNodes.forEach((networkNodeUrl) => {
    const nodeNotAlreadyPresent =
        !bitcoin.networkNodes.includes(networkNodeUrl),
      notCurrentNode = bitcoin.currentNodeUrl !== networkNodeUrl;

    if (nodeNotAlreadyPresent && notCurrentNode)
      bitcoin.networkNodes.push(networkNodeUrl);
  });
  res.json({ message: 'Bult registration successful.' });
});
- 1
- 2
- 3
- 4
- 5
- 6
- 7
- 8
- 9
- 10
- 11
- 12
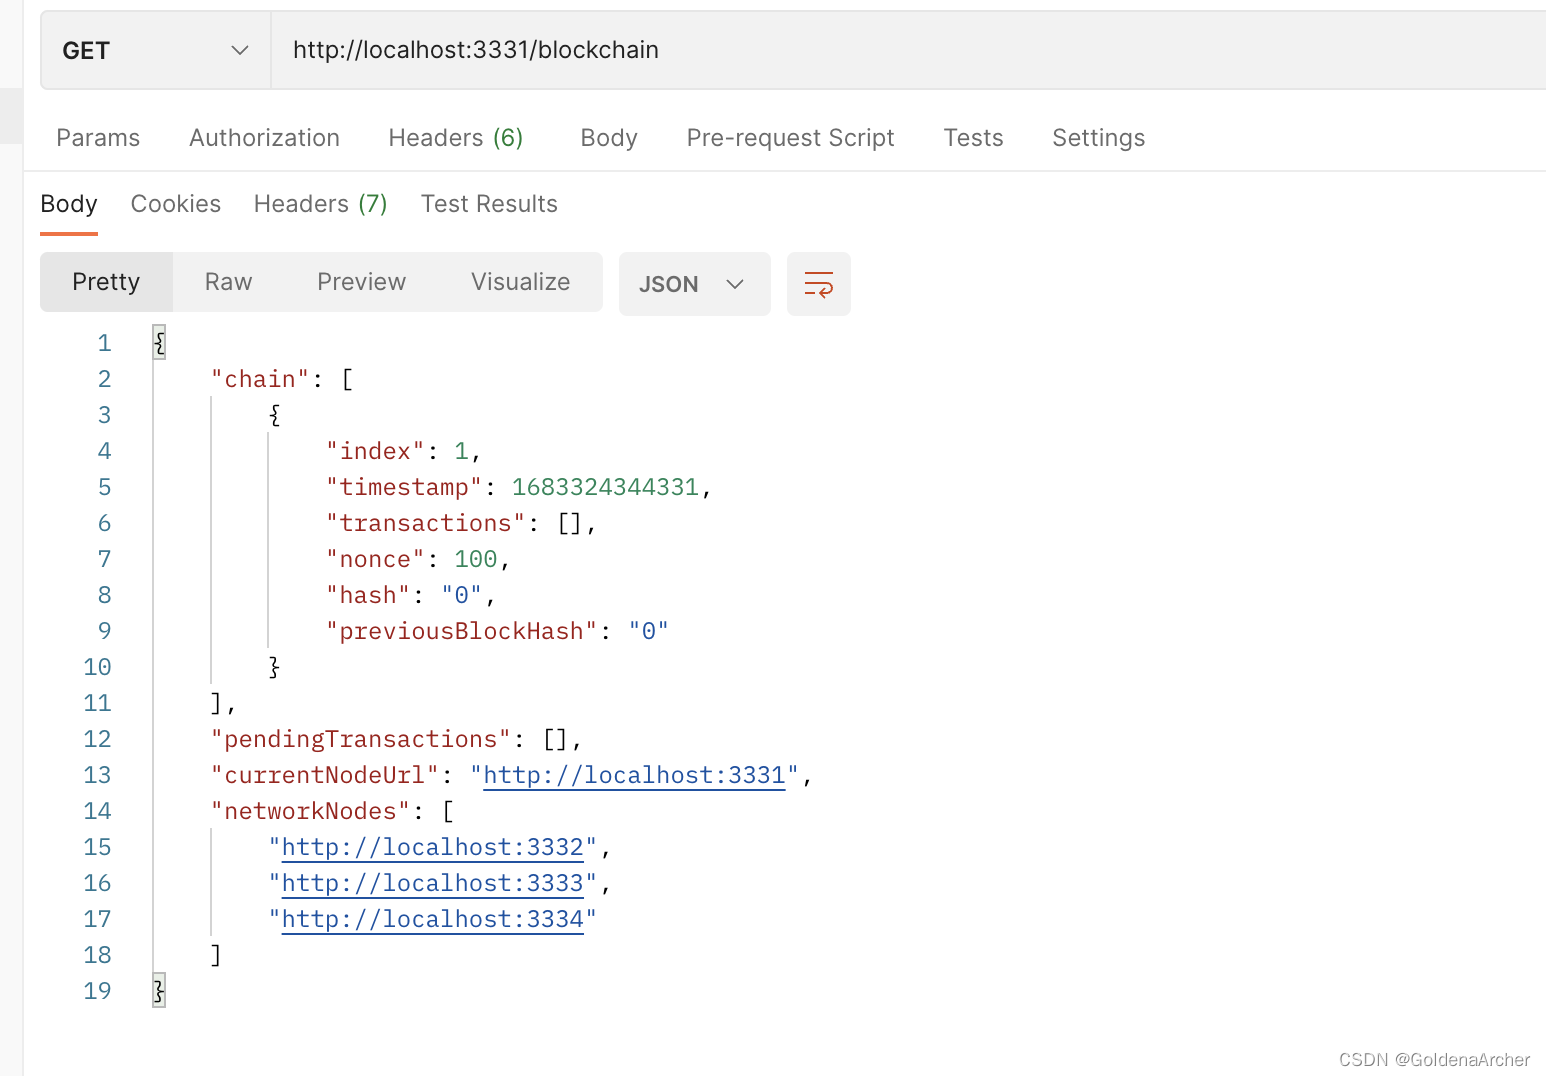
测试如下:
这两个细节都完成了,现在可以跳回去补全第 2 步了。
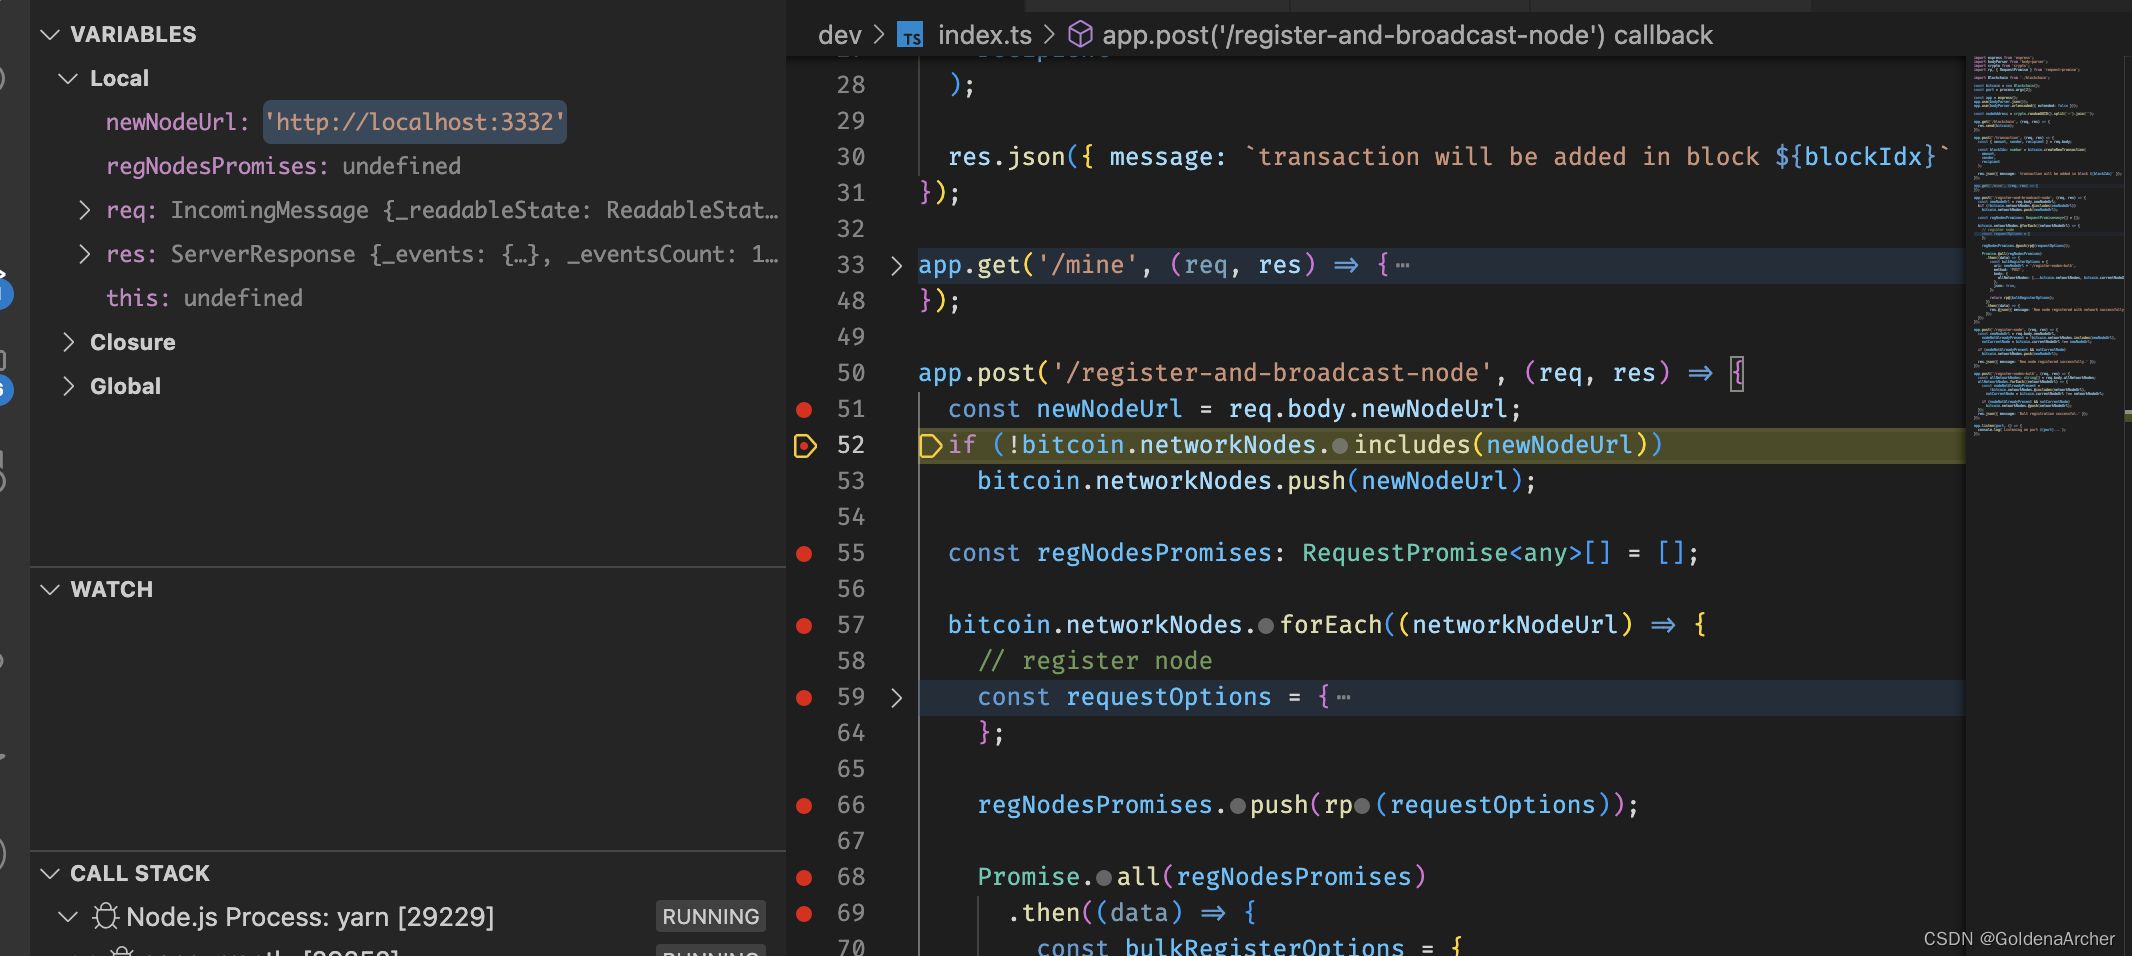
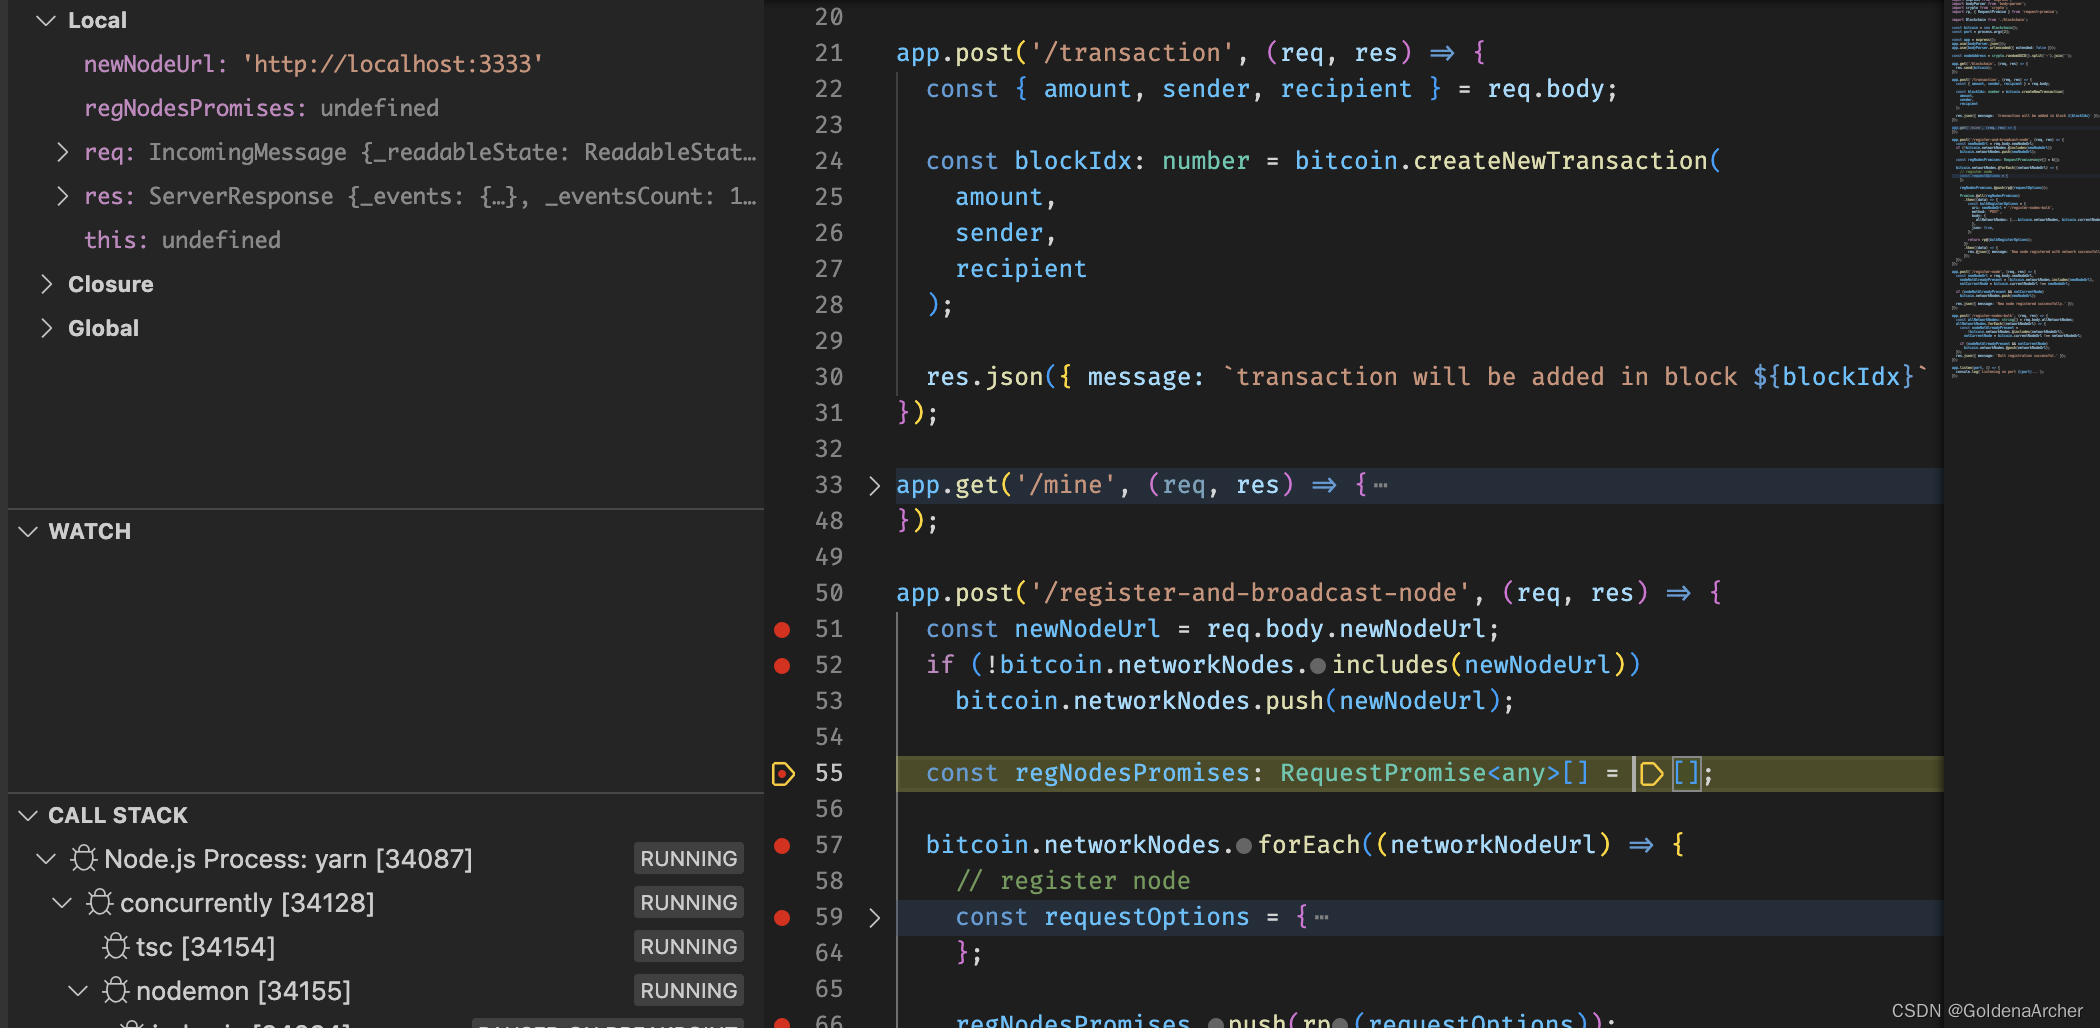
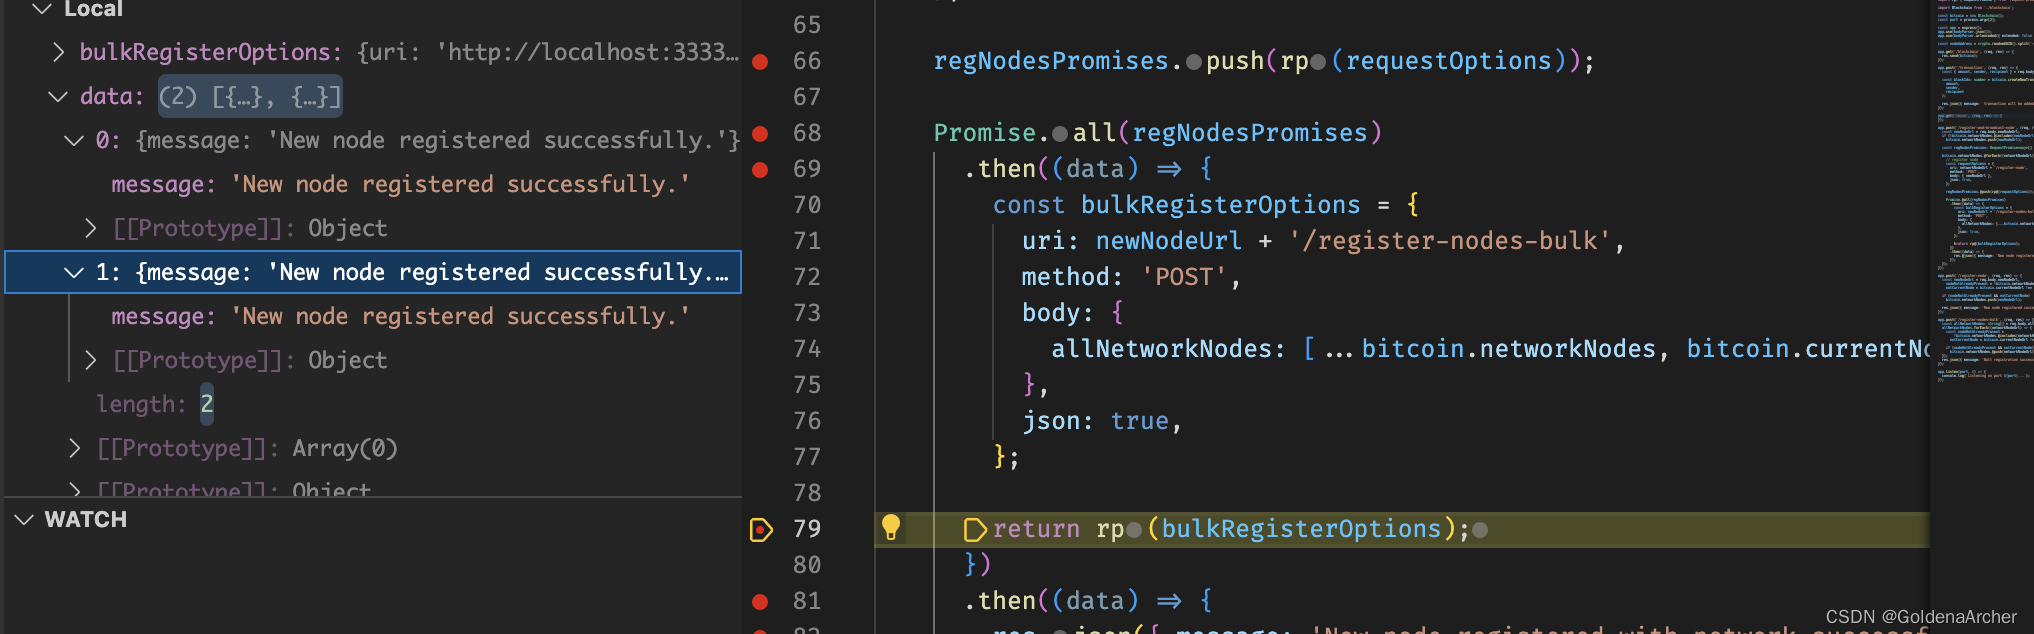
post register & broadcast
实现如下:
app.post('/register-and-broadcast-node', (req, res) => {
  const newNodeUrl = req.body.newNodeUrl;
  if (!bitcoin.networkNodes.includes(newNodeUrl))
    bitcoin.networkNodes.push(newNodeUrl);

  const regNodesPromises: RequestPromise<any>[] = [];

  bitcoin.networkNodes.forEach((networkNodeUrl) => {
    // register node
    const requestOptions = {
      uri: networkNodeUrl + '/register-node',
      method: 'POST',
      body: { newNodeUrl },
      json: true,
    };

    regNodesPromises.push(rp(requestOptions));
  });

  Promise.all(regNodesPromises)
    .then((data) => {
      const bulkRegisterOptions = {
        uri: newNodeUrl + '/register-nodes-bulk',
        method: 'POST',
        body: {
          allNetworkNodes: [...bitcoin.networkNodes, bitcoin.currentNodeUrl],
        },
        json: true,
      };

      return rp(bulkRegisterOptions);
    })
    .then((data) => {
      res.json({ message: 'New node registered with network successfully.' });
    });
});
- 1
- 2
- 3
- 4
- 5
- 6
- 7
- 8
- 9
- 10
- 11
- 12
- 13
- 14
- 15
- 16
- 17
- 18
- 19
- 20
- 21
- 22
- 23
- 24
- 25
- 26
- 27
- 28
- 29
- 30
- 31
- 32
- 33
- 34
- 35
- 36
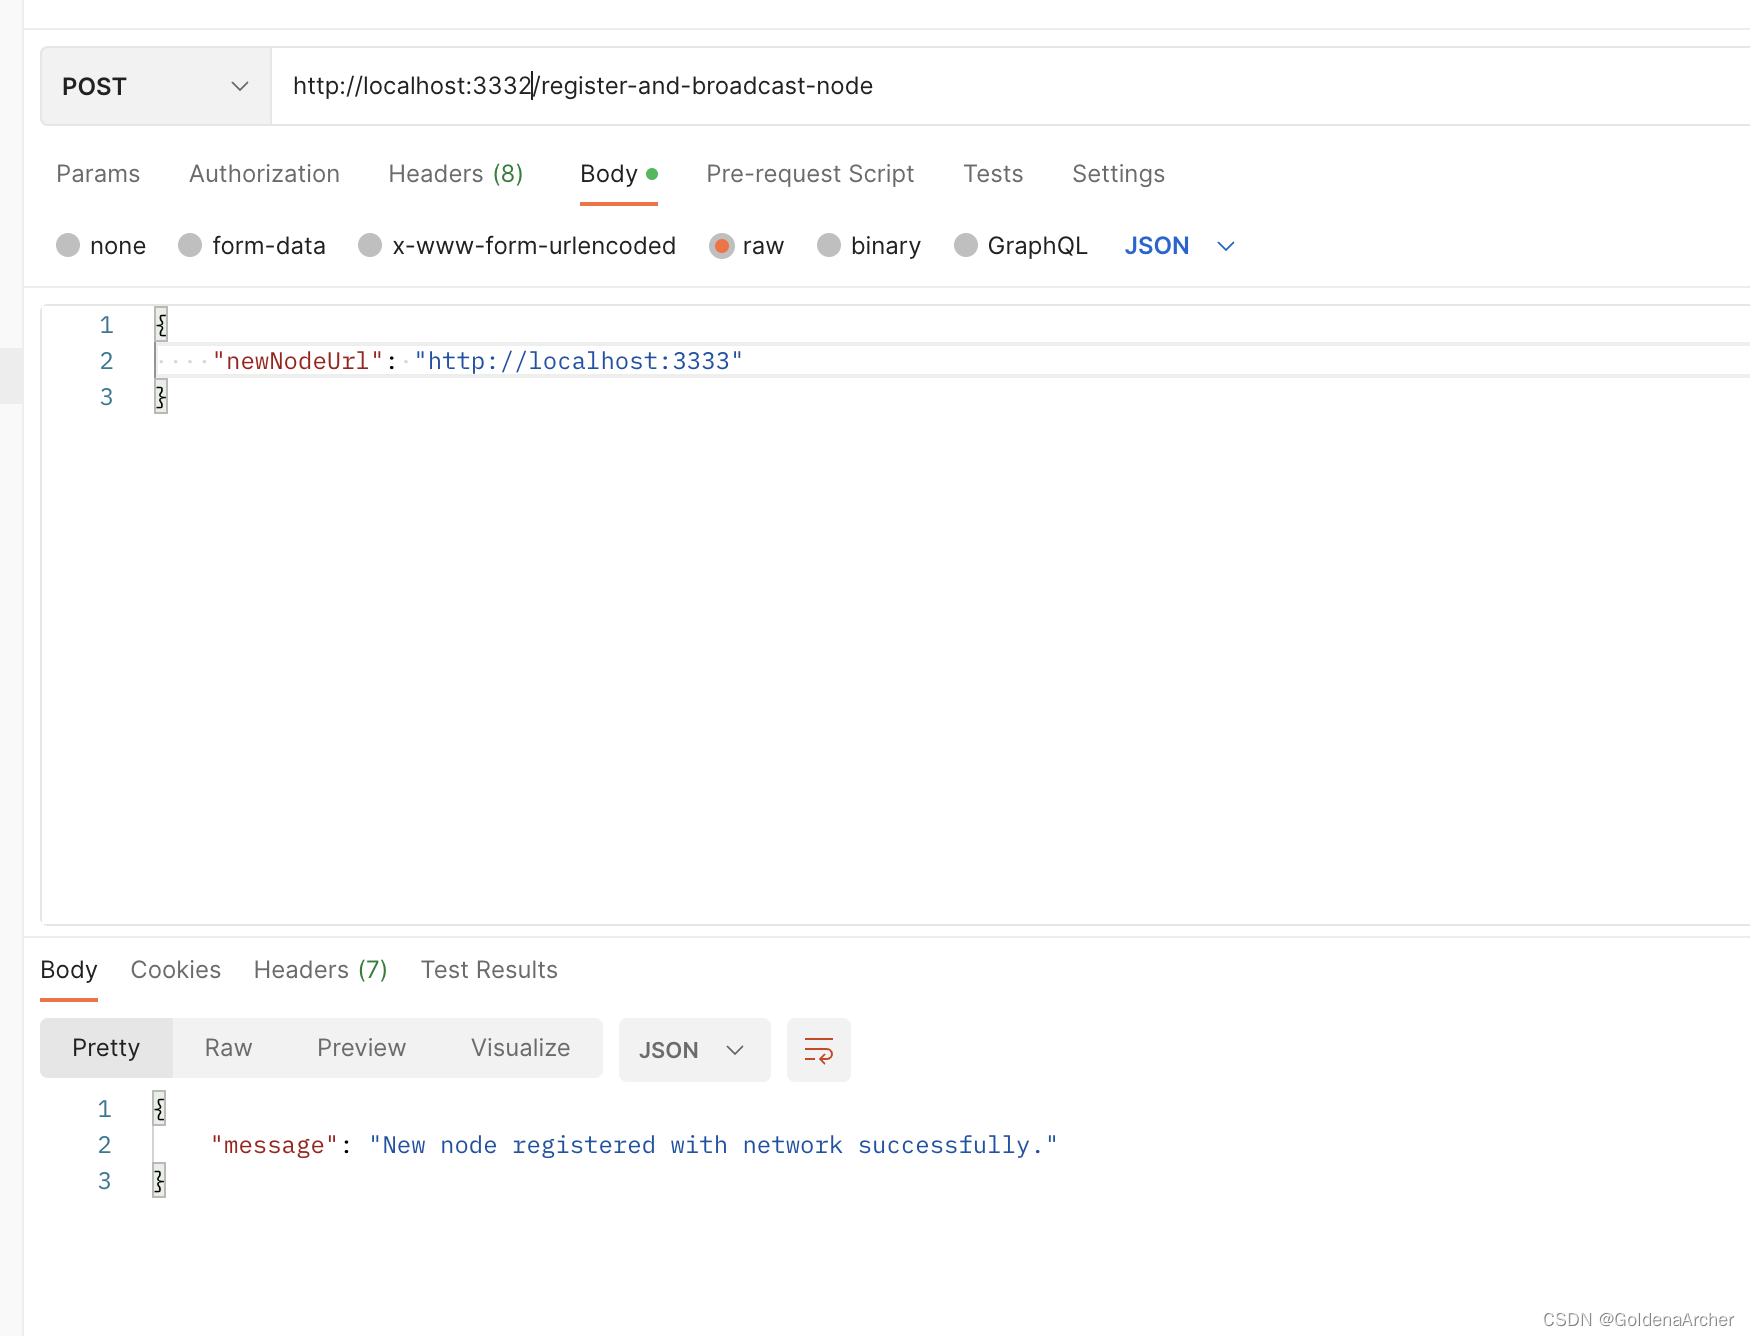
测试结果如下:

这里 3331 和 3332 作为两个单独的结点被连接在了一起了,从逻辑上可以理解声 3332 加入到了 3331 的群组中。
3331 所在群组通过判断,发现 3332 不在自己的群组中,所以它们决定把 3332 加到各自成员中的通讯录中(即所有群组成员都调用一次 /register-node)。

成功哦那个 3332 将组群内的成员加到自己的通讯录中,最后返回调用成功。
这个时候再尝试让 3333 加入 3332(即 3332 和 3331)所在的群组中:
同样的步骤:
3333 先尝试加入这个家庭:
3331 和 3332 接收了新成员:
成功后 3333 将 3331 和 3332 加入到自己的通讯录中,完成加入。
现在的问题就是,每一个结点有着单独一个 blockchain 的 instance,而在现实生活中,所有的网络节点都在同一个区块链上工作。
下一步就会尝试解决这个问题。


