
- 1Spark大数据技术与应用
- 2Logstash + Kafka + python的分钟级数据实时抽取_kafka数据抽取
- 3Linux:DNS的多向解析配置_b610 dns
- 4L1和L2正则化
- 5关于从git上拉下来的代码左下角有一个黄色的闹钟解决办法
- 6Java 性能瓶颈分析工具 你知道几个?_com.alibaba.dubbo.remoting.exchange.support.defaul
- 7跟随Facebook的足迹:社交媒体背后的探索之旅
- 8基于python的微博情感分析与文本分类系统的设计与实现_微博语言情感分析系统设计的目标与原则
- 9大语言模型(LLMs)综合调研
- 10浅析C#数据结构—ArrayList、List类(三)_c# arraylist 结构体
个人笔记:chatterbot聊天机器人(二)——chatterbot与Web设计_chatter bot
赞
踩
目录
前言
另外需要安装的库:flask(pip install flask)
文件结构
| chatterbot(floder) | |
| templates(folder) | html_chatter.py |
| index.html | |
代码文件
一、Python脚本部分(html_chatter.py)
- from flask import Flask, render_template, request, jsonify
- from chatterbot import ChatBot
- from chatterbot.trainers import ListTrainer
- # import nltk
-
- # 下载必要的NLTK数据(如果尚未下载)
- # nltk.download('averaged_perceptron_tagger')
- # nltk.download('punkt')
- # nltk.download('stopwords')
-
- app = Flask(__name__)
-
- # 创建一个新的ChatBot实例
- chatterbot = ChatBot("Training Example")
- trainer = ListTrainer(chatterbot)
-
- trainer.train(["早上好!", "你好"])
- trainer.train(["中午好!", "午安!"])
-
- @app.route("/")
- def home():
- return render_template("index.html") # 您的HTML文件名
-
- @app.route("/get")
- def get_bot_response():
- user_input = request.args.get('msg') # 获取从网页传来的用户消息
- return str(chatterbot.get_response(user_input)) # 返回聊天机器人的响应
-
- if __name__ == "__main__":
- app.run(debug=True)

二、HTML部分(index.html)
- <!DOCTYPE html>
- <html>
- <head>
- <title>Chatbot</title>
- <script src="https://code.jquery.com/jquery-3.6.0.min.js"></script>
- <style>
- body {
- background-image: url('https://ts1.cn.mm.bing.net/th/id/R-C.55be8a43def725035afb006bc9688da2?rik=ggcaQsrgXvpGyQ&riu=http%3a%2f%2fpic.bizhi360.com%2fbbpic%2f7%2f6107.jpg&ehk=BmF5KiA3SNRYj%2fh6ptcCYZ6EUUfkxvcsr13cRy4cXpQ%3d&risl=&pid=ImgRaw&r=0'); /* 替换为你的图片URL */
- background-size: cover; /* 图片尺寸为覆盖整个元素 */
- background-repeat: no-repeat; /* 防止图片重复 */
- background-position: center; /* 图片定位在元素中间 */
- font-family: 'Helvetica Neue', Arial, sans-serif;
- }
- #chatbox {
- max-width: 600px;
- margin: 0 auto;
- border: 1px solid #ccc;
- background-color: #fff;
- padding: 20px;
- border-radius: 5px;
- margin-top: 5%;
- overflow-y: auto;
- height: 500px;
- }
- #user_input {
- bottom: 0;
- width: 80%;
- margin: 1em;
- padding: 8px;
- border-radius: 4px;
- border: 1px solid #ccc;
- font-size: 14px;
- }
- button {
- background-color: #07c160;
- border: none;
- color: white;
- padding: 8px 16px;
- text-align: center;
- text-decoration: none;
- display: inline-block;
- font-size: 14px;
- margin: 1em;
- cursor: pointer;
- border-radius: 4px;
- }
- p {
- padding:5px;
- border-radius:10px;
- line-height:20px;
- position:relative;
- margin:10px 0;
- }
- </style>
- <script>
- function getResponse() {
- var user_input = $('#user_input').val(); // 获取用户输入
- $.get('/get', { msg: user_input }).done(function(data) {
- // 将机器人的回复添加到页面上
- $('#chatbox').append('<p>You: ' + user_input + '</p>');
- $('#chatbox').append('<p>Bot: ' + data + '</p>');
- $('#user_input').val(''); // 清空输入框
- $('#chatbox').animate({scrollTop:$('#chatbox').prop('scrollHeight')}, 500); // 自动滚动到底部
- });
- }
- // 监听输入框的回车事件
- $(document).ready(function() {
- $('#user_input').keypress(function(e) {
- if(e.which == 13) { // 回车键的键值为13
- getResponse();
- return false; // 确保表单不会提交
- }
- });
- });
- </script>
- </head>
- <body>
- <div id="chatbox">
- <!-- 在这里显示对话 -->
- </div>
- <div style="position: fixed; width: 100%; bottom: 0; background-color: #fff; padding: 10px;">
- <input type="text" id="user_input" placeholder="Say something...">
- <button onclick="getResponse()">Send</button>
- </div>
- </body>
- </html>
运行与展示
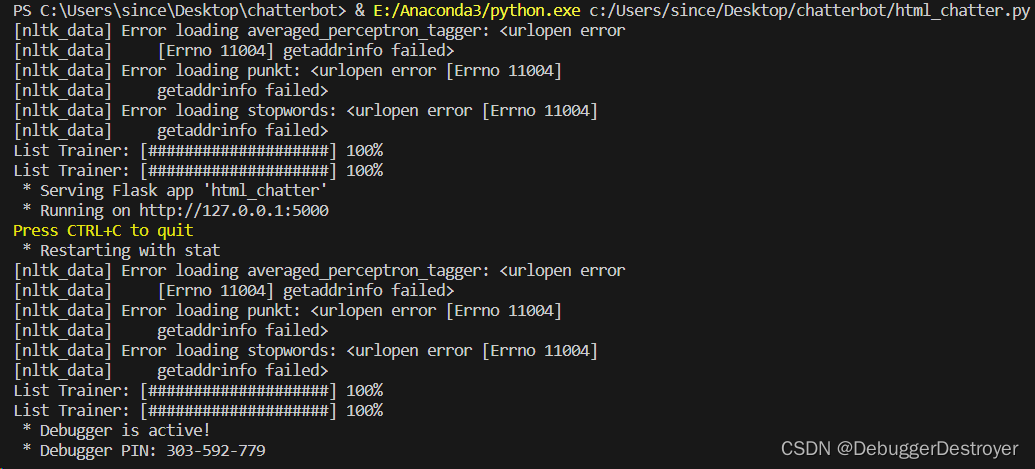
首先运行Python脚本(html_chatter.py)
运行结果:
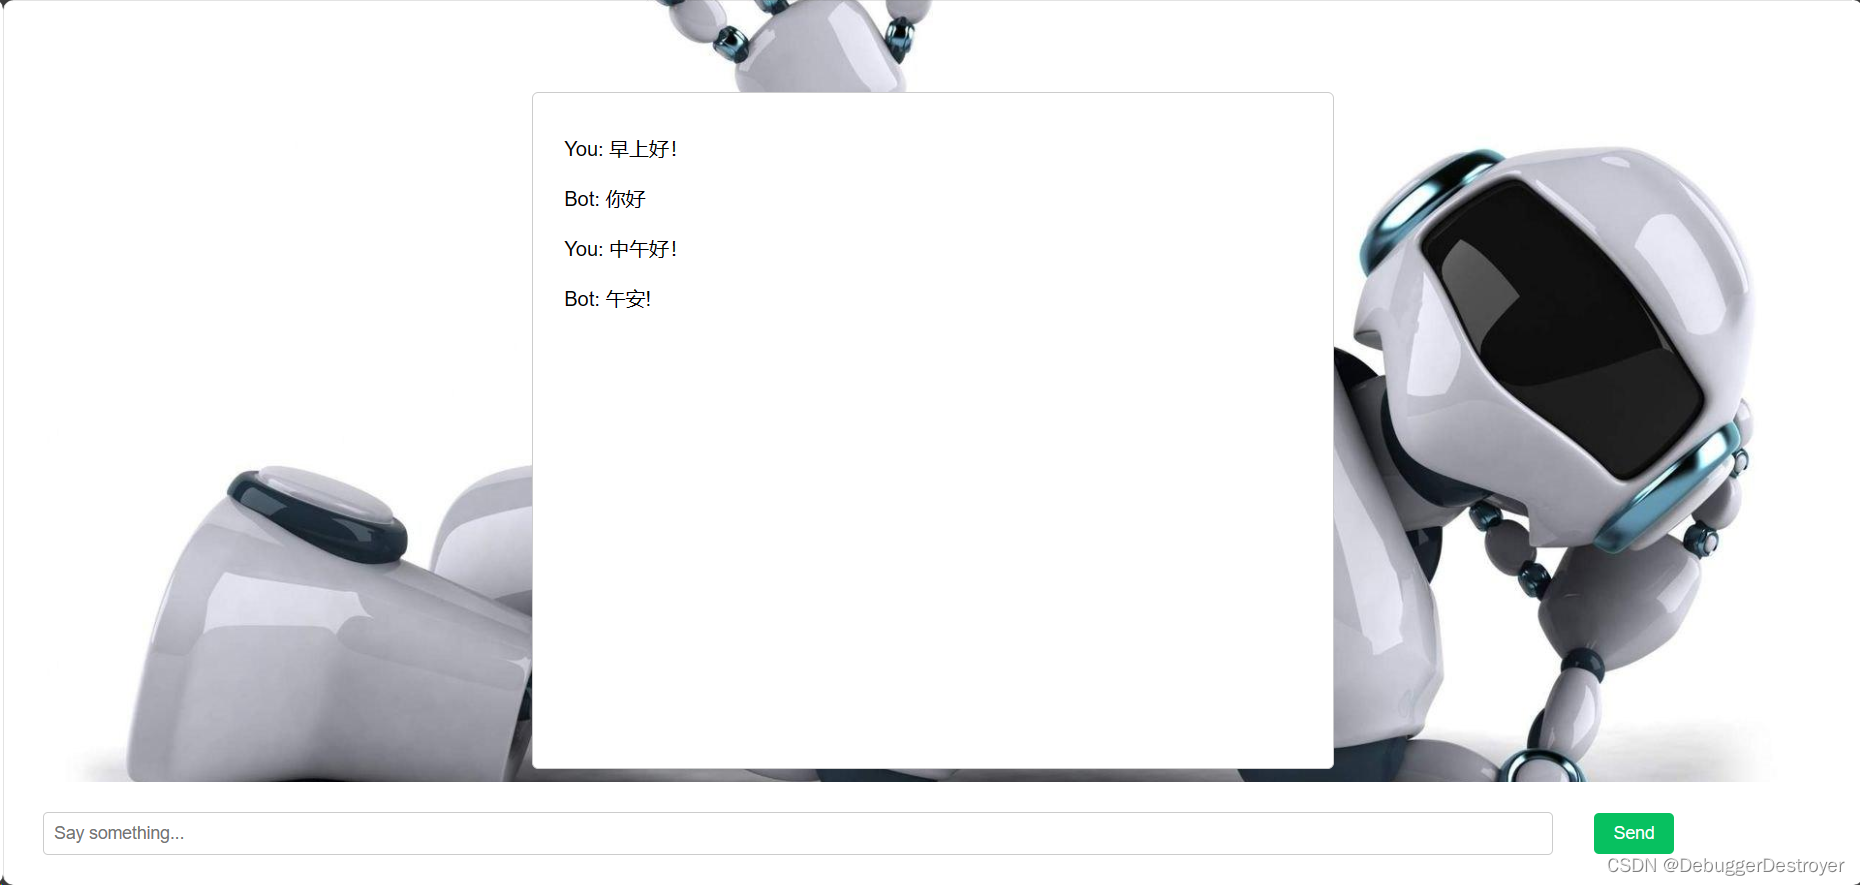
然后打开浏览器进入http://127.0.0.1:5000

然后就可以在对话框中对话了
主要代码解释
python部分:
app = Flask(__name__)
创建一个Flask应用实例,命名为app。这将是整个Web应用的核心。
@app.route("/")
这是一个Flask路由装饰器,定义了根URL(/)的处理函数。当用户访问应用的根URL时,将调用home函数。
def home()
这是/路由的处理函数。它返回一个HTML模板,用于呈现用户界面。具体的HTML模板文件的名称在render_template函数中指定。
@app.route("/get")
这是另一个Flask路由装饰器,定义了/get URL的处理函数。它用于处理用户通过Web界面输入的消息。
def get_bot_response()
这是/get路由的处理函数。它首先从HTTP请求中获取名为msg的参数,该参数包含了用户的消息。然后,它调用聊天机器人的get_response方法来获取聊天机器人对用户消息的响应。最后,将聊天机器人的响应以字符串的形式返回给Web界面。
if __name__ == "__main__":
这是Python的约定,用于检查是否运行的是当前脚本而不是被导入的模块。如果当前脚本被直接运行(而不是被导入到其他脚本中),则执行以下内容。
app.run(debug=True)
这一行代码启动Flask应用,使其开始监听HTTP请求。debug=True将启用调试模式,这意味着在应用运行期间会显示详细的错误信息。
HTML部分
function getResponse() { ... }
这是一个名为getResponse的JavaScript函数,它用于获取用户输入并向服务器发送GET请求以获取聊天机器人的回复。
var user_input = $('#user_input').val();
这行代码使用jQuery选择器$('#user_input')获取id为user_input的输入框,然后使用.val()方法获取用户输入的内容,并将其存储在user_input变量中。
$.get('/get', { msg: user_input }).done(function(data) { ... });
这行代码使用jQuery的$.get()方法向服务器发送GET请求。请求的目标URL是/get,并传递一个JS对象{ msg: user_input }作为请求的参数,参数名为msg,值为用户输入的内容。当请求完成后,执行一个回调函数。
$('#chatbox').append('<p>You: ' + user_input + '</p>');
这行代码使用jQuery选择器$('#chatbox')选择具有id为chatbox的元素,然后使用.append()方法将一个带有用户输入内容的<p>元素添加到该元素中,显示用户的输入。
$('#chatbox').append('<p>Bot: ' + data + '</p>');
这行代码使用jQuery选择器$('#chatbox')选择具有id为chatbox的元素,然后使用.append()方法将一个带有聊天机器人回复内容的<p>元素添加到该元素中,显示聊天机器人的回复。data是从服务器获取的回复数据。
$('#user_input').val('');
这行代码使用jQuery选择器$('#user_input')选择具有id为user_input的输入框,然后使用.val('')方法将输入框的值清空,以便用户可以输入下一条消息。
$('#chatbox').animate({scrollTop:$('#chatbox').prop('scrollHeight')}, 500);
这行代码使用jQuery选择器$('#chatbox')选择具有id为chatbox的元素,然后使用.animate()方法在500毫秒内将元素的滚动条滚动到底部,以便用户可以看到最新的聊天消息。
$(document).ready(function() { ... });
这是一个在文档加载完成后执行的jQuery事件处理程序。它确保在文档准备就绪时绑定了回车键的监听器。
$('#user_input').keypress(function(e) { ... });
这行代码使用jQuery选择器$('#user_input')选择具有id为user_input的输入框,然后使用.keypress()方法绑定一个按键事件处理程序。
if(e.which == 13) { ... }
这行代码检查按下的按键是否是回车键(键值为13)。
getResponse();
当用户按下回车键时,调用getResponse()函数来处理用户的输入。
return false;
这行代码确保表单不会提交,以避免页面刷新。

