热门标签
热门文章
- 1解决戴尔服务器按Ctrl+R无法进入磁盘阵列设置界面做Raid_服务器连接不上磁盘阵列
- 2【大模型的前世今生】从自然语言处理说起_大语言模型和自然语言处理的关系
- 3matlab估计arma garch 条件均值和方差模型
- 4Web.Release.config 替换_web.config 规则替换
- 5FFmpeg从视频中提取音频保存为mp3文件_ffmpeg 视频mp4转mp3音频
- 6Nuxt3打包部署到Linux(node+pm2安装和运行步骤+nginx代理)
- 7如何全面系统的自学Java?(附2022最新整理Java学习路线)_2024年自学java
- 8银河麒麟服务器系统PXE部署_麒麟 pxe-16
- 9Spring Security 和 SpringCloud Security 有什么区别?_spring-boot security-starter和spring-cloud security
- 10docker-compose生产实用命令说明_docker-compose up -d未找到命令
当前位置: article > 正文
SD-如何训练自己的Lora模型_sd训练自己的模型
作者:Monodyee | 2024-02-23 08:39:40
赞
踩
sd训练自己的模型
官方地址:GitHub - bmaltais/kohya_ss
尝试过mac和Ubuntu,装上后都会有问题
Windows按照官方步骤安装即可
第一步
- git clone https://github.com/bmaltais/kohya_ss.git
- cd kohya_ss
-
- python -m venv venv
- .\venv\Scripts\activate
-
- pip install torch==1.12.1+cu116 torchvision==0.13.1+cu116 --extra-index-url https://download.pytorch.org/whl/cu116
- pip install --use-pep517 --upgrade -r requirements.txt
- pip install -U -I --no-deps https://github.com/C43H66N12O12S2/stable-diffusion-webui/releases/download/f/xformers-0.0.14.dev0-cp310-cp310-win_amd64.whl
-
- cp .\bitsandbytes_windows\*.dll .\venv\Lib\site-packages\bitsandbytes\
- cp .\bitsandbytes_windows\cextension.py .\venv\Lib\site-packages\bitsandbytes\cextension.py
- cp .\bitsandbytes_windows\main.py .\venv\Lib\site-packages\bitsandbytes\cuda_setup\main.py
-
- accelerate config
第二步
- .\venv\Scripts\activate
-
- python .\tools\cudann_1.8_install.py
第三步
gui.bat第四步
打tag

第五步


这里改一下

然后开始训练

第六步
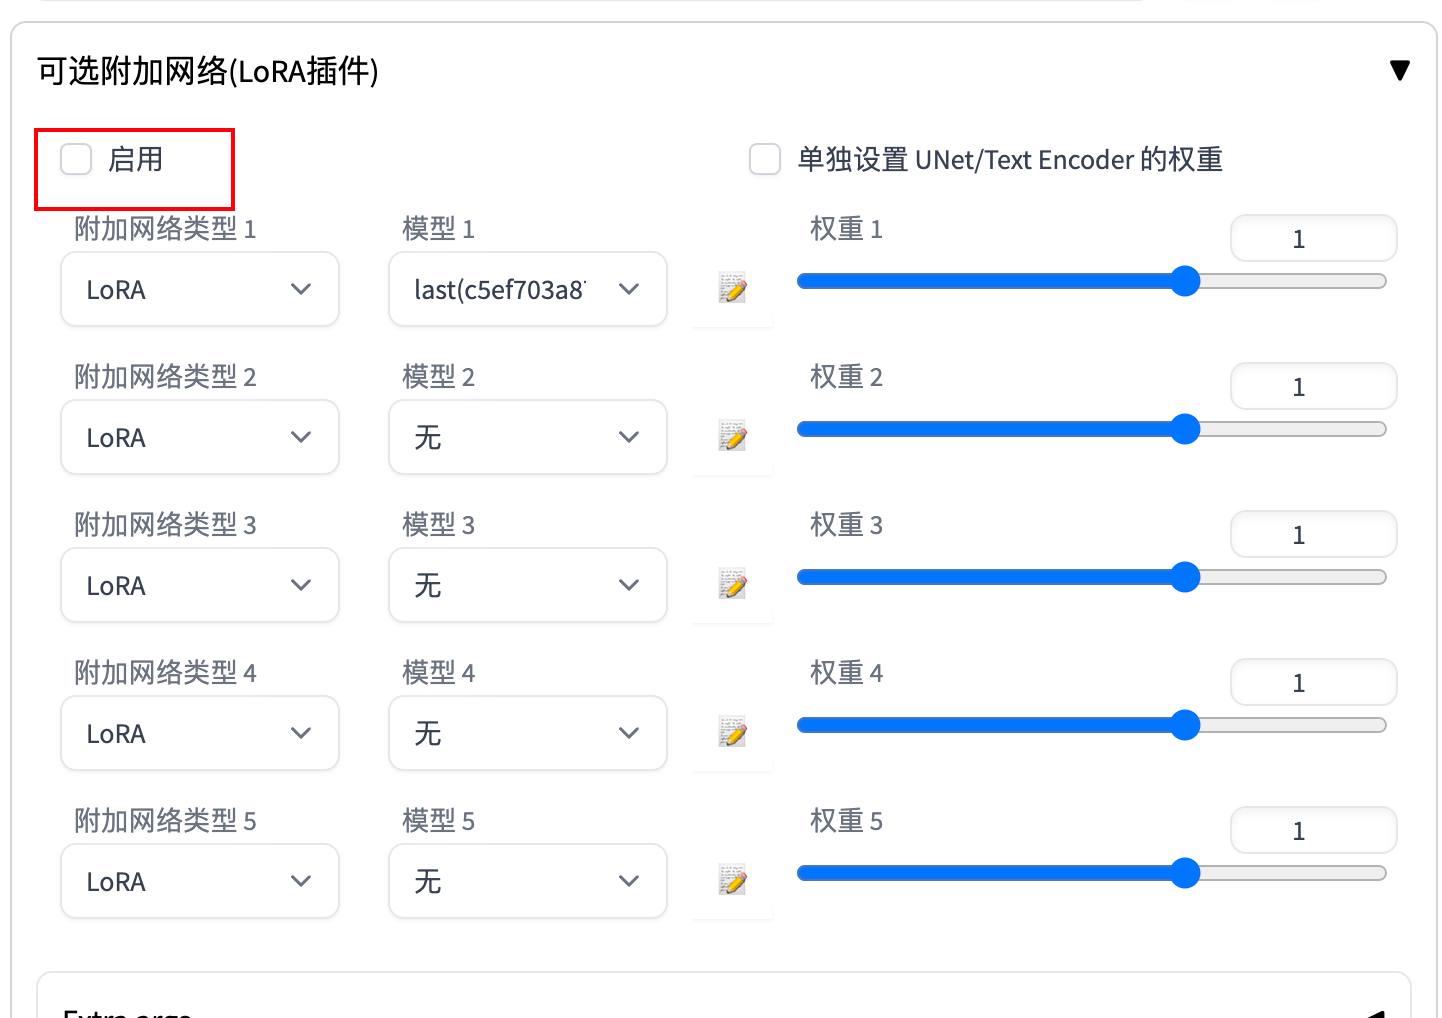
安装扩展:GitHub - kohya-ss/sd-webui-additional-networks
使用时勾上

异常点
过程中如果报错,可能的原因
1、显存不足
2、模型没下载完
3、cuda没安装
进入虚拟环境后,执行
python -c "import torch; print(torch.cuda.is_available())"结果为True说明已安装
一、安装NVIDIA CUDA
下载地址:https://developer.nvidia.com/cuda-downloads
安装方法
wget https://developer.download.nvidia.com/compute/cuda/repos/ubuntu1604/x86_64/cuda-ubuntu1604.pin sudo mv cuda-ubuntu1604.pin /etc/apt/preferences.d/cuda-repository-pin-600 sudo apt-key adv --fetch-keys https://developer.download.nvidia.com/compute/cuda/repos/ubuntu1604/x86_64/7fa2af80.pub sudo add-apt-repository "deb https://developer.download.nvidia.com/compute/cuda/repos/ubuntu1604/x86_64/ /" sudo apt-get update sudo apt-get -y install cuda二、安装NVIDIA cuDNN
下载地址:https://developer.nvidia.com/rdp/cudnn-archive
安装方法
sudo dpkg -i cudnn-local-repo-ubuntu1804-8.8.1.3_1.0-1_amd64.deb三、安装NVIDIA NCCL
下载地址:https://developer.nvidia.com/nccl/nccl-legacy-downloads
安装方法
sudo dpkg -i nccl-local-repo-ubuntu1804-2.8.4-cuda11.2_1.0-1_amd64.deb
本文内容由网友自发贡献,转载请注明出处:https://www.wpsshop.cn/w/Monodyee/article/detail/135101
推荐阅读
相关标签


