热门标签
热门文章
- 1finally块中的代码什么时候被执行?finally是不是一定会被执行?(见最后引申)_try语句中finally后面的代码段是否总被执行什么情况下不执行试举例说明。
- 2《Decoupling Representation and Classifier》笔记_nearest class mean classifier分类器权重
- 3Matlab如何高效统计多站数据中各站目标总数?用Unique函数!科研效率UpUp第2期
- 4C++(23):新增size_t字面量
- 5已解决You should consider upgrading via the ‘e: \python\python.exe -m pip install --upgrade pip’ comma
- 6python学习-第18课_base2= declarative_base() waring
- 7python按类中属性排序_python 按照类的某一属性排序
- 8五笔
- 9关于vscode中对于编译运行C++的一个问题_unable to write into user settings. please open th
- 10第十四篇【传奇开心果系列】Python的文本和语音相互转换库技术点案例示例:深度解读Azure Cognitive Services个性化推荐系统
当前位置: article > 正文
【YOLO】YOLOv8实操:环境配置/自定义数据集准备/模型训练/预测_yolov8环境配置
作者:Monodyee | 2024-02-27 06:48:33
赞
踩
yolov8环境配置
引言
源码链接:https://github.com/ultralytics/ultralytics
yolov8和yolov5是同一作者,相比yolov5,yolov8的集成性更好了,更加面向用户了
YOLO命令行界面(command line interface, CLI) 方便在各种任务和版本上训练、验证或推断模型。CLI不需要定制或代码,可以使用yolo命令从终端运行所有任务。
如果想了解yolo系列的更新迭代,以及yolov8的模型结构,推荐下面的链接:
YOLOv8详解 【网络结构+代码+实操】
笔者直接从实操入手
1 环境配置
安装pytorch、torchvision和其他依赖库
环境配置部分可以参考笔者的博客
【YOLO】YOLOv5-6.0环境搭建(不定时更新)
安装ultralytics
git clone https://github.com/ultralytics/ultralytics
cd ultralytics
pip install -e .
- 1
- 2
- 3
2 数据集准备
针对检测的数据集准备可以参考笔者的博客,这里不再赘述了
【YOLO】训练自己的数据集
3 模型训练
比起YOLOv5,YOLOv8的训练封装性更好了,有利有弊吧,参数默认值修改比较麻烦
训练指令如下:
yolo task=detect mode=train model=yolov8s.pt data=/media/ll/L/llr/DATASET/subwayDatasets/coco.yaml device=0 cache=True epochs=300 project=/media/ll/L/llr/mode name=yolov8
- 1
除了上述笔者使用的参数,其他参数说明
task: detect  # 可选择:detect, segment, classify
mode: train  #可选择: train, val, predict

# Train settings -------------------------------------------------------------------------------------------------------

model:  # 设置模型。格式因任务类型而异。支持model_name, model.yaml,model.pt
data:  # 设置数据,支持多数类型 data.yaml, data_folder, dataset_name
epochs: 300  # 需要训练的epoch数
patience: 50  # epochs to wait for no observable improvement for early stopping of training
batch: 16  # Dataloader的batch大小
imgsz: 640  # Dataloader中图像数据的大小
save: True  # save train checkpoints and predict results
save_period: -1 # Save checkpoint every x epochs (disabled if < 1)
cache: True  # True/ram, disk or False. Use cache for data loading
device:  # device to run on, i.e. cuda device=0 or device=0,1,2,3 or device=cpu
workers: 8  # 每个进程使用的cpu worker数。使用DDP自动伸缩
project: /media/ll/L/llr/model # project name
name: yolov8 # experiment name
exist_ok: False  # whether to overwrite existing experiment
pretrained: False  # whether to use a pretrained model
optimizer: SGD  # 支持的优化器:Adam, SGD, RMSProp
verbose: True  # whether to print verbose output
seed: 0  # random seed for reproducibility
deterministic: True  # whether to enable deterministic mode
single_cls: False  # 将多类数据作为单类进行训练
image_weights: False  # 使用加权图像选择进行训练
rect: False  # 启用矩形训练
cos_lr: False  # 使用cosine LR调度器
close_mosaic: 10  # disable mosaic augmentation for final 10 epochs
resume: False  # resume training from last checkpoint
min_memory: False  # minimize memory footprint loss function, choices=[False, True, <roll_out_thr>]
# Segmentation
overlap_mask: True  # 分割:在训练中使用掩码重叠
mask_ratio: 4  # 分割:设置掩码下采样
# Classification
dropout: 0.0  # 分类:训练时使用dropout

# Val/Test settings ----------------------------------------------------------------------------------------------------
val: True  # validate/test during training
split: val  # dataset split to use for validation, i.e. 'val', 'test' or 'train'
save_json: False  # save results to JSON file
save_hybrid: False  # save hybrid version of labels (labels + additional predictions)
conf:  # object confidence threshold for detection (default 0.25 predict, 0.001 val)
iou: 0.7  # intersection over union (IoU) threshold for NMS
max_det: 300  # maximum number of detections per image
half: False  # use half precision (FP16)
dnn: False  # 使用OpenCV DNN进行ONNX推断
plots: True  # 在验证时保存图像

# Prediction settings --------------------------------------------------------------------------------------------------
source:  # 输入源。支持图片、文件夹、视频、网址
show: False  # 查看预测图片
save_txt: False  # 保存结果到txt文件中
save_conf: False  # save results with confidence scores
save_crop: False  # save cropped images with results
hide_labels: False  # hide labels
hide_conf: False  # hide confidence scores
vid_stride: 1  # 输入视频帧率步长
line_thickness: 3  # bounding box thickness (pixels)
visualize: False  # 可视化模型特征
augment: False  # apply image augmentation to prediction sources
agnostic_nms: False  # class-agnostic NMS
classes:  # filter results by class, i.e. class=0, or class=[0,2,3]
retina_masks: False  #分割:高分辨率掩模
boxes: True # Show boxes in segmentation predictions

# Export settings ------------------------------------------------------------------------------------------------------
format: torchscript  # format to export to
keras: False  # use Keras
optimize: False  # TorchScript: optimize for mobile
int8: False  # CoreML/TF INT8 quantization
dynamic: False  # ONNX/TF/TensorRT: dynamic axes
simplify: False  # ONNX: simplify model
opset:  # ONNX: opset version (optional)
workspace: 4  # TensorRT: workspace size (GB)
nms: False  # CoreML: add NMS

# Hyperparameters ------------------------------------------------------------------------------------------------------
lr0: 0.01  # 初始化学习率
lrf: 0.01  # 最终的OneCycleLR学习率
momentum: 0.937  # 作为SGD的momentum和Adam的beta1
weight_decay: 0.0005  # 优化器权重衰减
warmup_epochs: 3.0  # Warmup的epoch数,支持分数)
warmup_momentum: 0.8  # warmup的初始动量
warmup_bias_lr: 0.1  # Warmup的初始偏差lr
box: 7.5  # box loss gain
cls: 0.5  # cls loss gain (scale with pixels)
dfl: 1.5  # dfl loss gain
fl_gamma: 0.0  # focal loss gamma (efficientDet default gamma=1.5)
label_smoothing: 0.0  # label smoothing (fraction)
nbs: 64  # nominal batch size
hsv_h: 0.015  # image HSV-Hue augmentation (fraction)
hsv_s: 0.7  # image HSV-Saturation augmentation (fraction)
hsv_v: 0.4  # image HSV-Value augmentation (fraction)
degrees: 0.0  # image rotation (+/- deg)
translate: 0.1  # image translation (+/- fraction)
scale: 0.5  # image scale (+/- gain)
shear: 0.0  # image shear (+/- deg)
perspective: 0.0  # image perspective (+/- fraction), range 0-0.001
flipud: 0.0  # image flip up-down (probability)
fliplr: 0.5  # image flip left-right (probability)
mosaic: 1.0  # image mosaic (probability)
mixup: 0.0  # image mixup (probability)
copy_paste: 0.0  # segment copy-paste (probability)

# Custom config.yaml ---------------------------------------------------------------------------------------------------
cfg:  # for overriding defaults.yaml

# Debug, do not modify -------------------------------------------------------------------------------------------------
v5loader: False  # use legacy YOLOv5 dataloader
- 1
- 2
- 3
- 4
- 5
- 6
- 7
- 8
- 9
- 10
- 11
- 12
- 13
- 14
- 15
- 16
- 17
- 18
- 19
- 20
- 21
- 22
- 23
- 24
- 25
- 26
- 27
- 28
- 29
- 30
- 31
- 32
- 33
- 34
- 35
- 36
- 37
- 38
- 39
- 40
- 41
- 42
- 43
- 44
- 45
- 46
- 47
- 48
- 49
- 50
- 51
- 52
- 53
- 54
- 55
- 56
- 57
- 58
- 59
- 60
- 61
- 62
- 63
- 64
- 65
- 66
- 67
- 68
- 69
- 70
- 71
- 72
- 73
- 74
- 75
- 76
- 77
- 78
- 79
- 80
- 81
- 82
- 83
- 84
- 85
- 86
- 87
- 88
- 89
- 90
- 91
- 92
- 93
- 94
- 95
- 96
- 97
- 98
- 99
- 100
- 101
- 102
- 103
- 104
- 105
- 106
- 107
- 108
- 109
- 110
4 模型预测
weight_path = "best.pt"  # 自训练的模型
imgdir = r'/media/ll/L/llr/DATASET/subwayDatasets/bjdt/images'
img_path = r'/media/ll/L/llr/DATASET/subwayDatasets/bjdt/images/L_0000018.jpg'
model = YOLO(weight_path)
results = model(img_path,show=False,save=False)  # 是否显示和保存结果数据
- 1
- 2
- 3
- 4
- 5
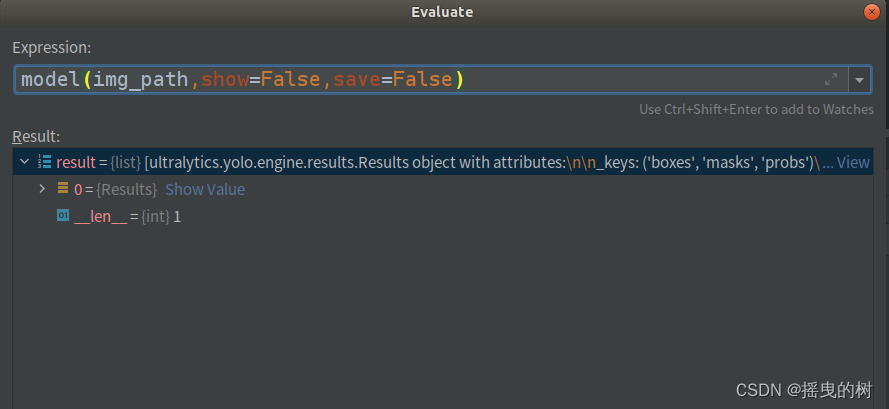
预测一张图片,results如下图所示:

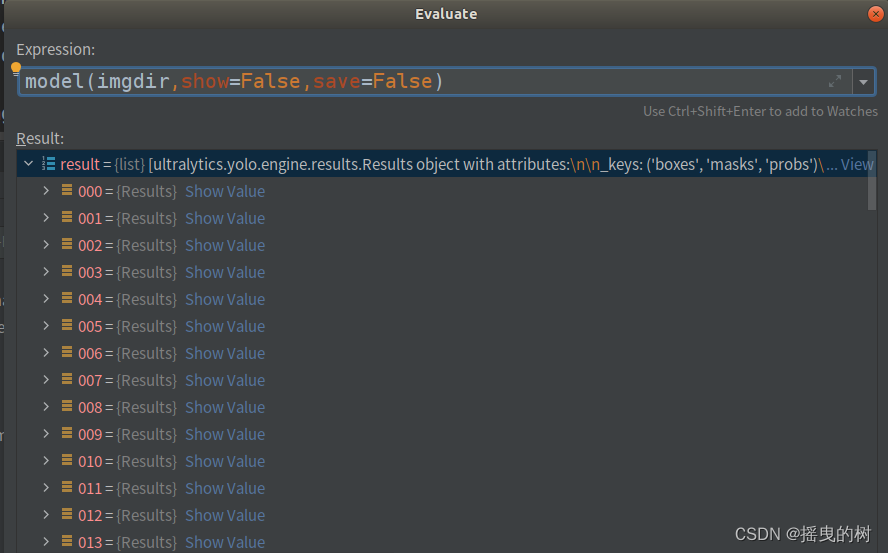
预测文件夹目录,results如图所示:

无论是一张图片还是图片目录,返回的results都是list
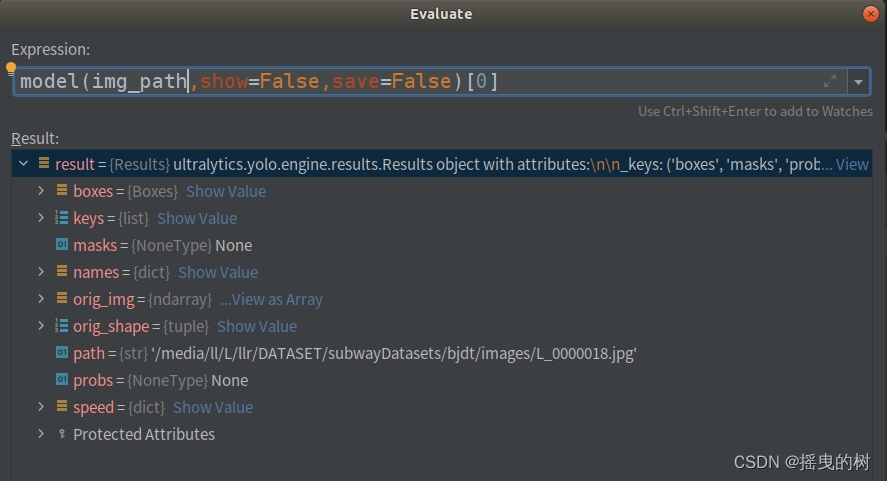
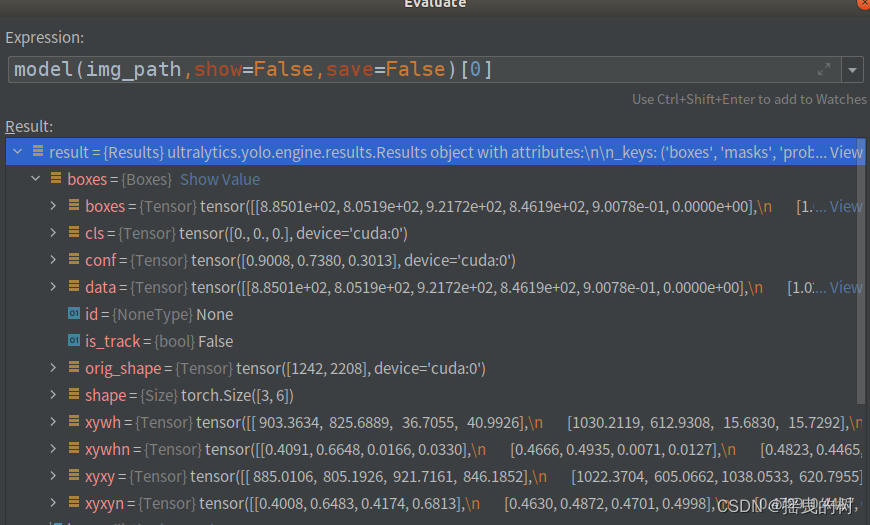
要对预测结果进行处理需要索引进去,如下图所示

结果参数说明:
 boxes:各种形式的检测框信息(xyxy、xywh、归一化的)、类别索引、置信度等
 names:类别字典
 orig_img:原图数组
 orig_shape:原图尺寸
 plots:在验证时保存图像(预测时一般为None)
 speed:处理速度
- 1
- 2
- 3
- 4
- 5
- 6


基于上述模型提供的检测结果进行后处理算法等
上述即为yolov8的快速使用
声明:本文内容由网友自发贡献,不代表【wpsshop博客】立场,版权归原作者所有,本站不承担相应法律责任。如您发现有侵权的内容,请联系我们。转载请注明出处:https://www.wpsshop.cn/w/Monodyee/article/detail/150831
推荐阅读
相关标签


