- 1Android在一个APP中通过包名或类名启动另一个APP_android 通过packagename,classname startactivity
- 2取消linux密码复杂性,Ubuntu修改密码及密码复杂度策略设置方法
- 32020 年 中英文拼写纠错开源框架梳理_youngcorrector
- 4OpenGL:VisualStudio2022配置OpenGL环境_opengl配置vs2022
- 5FFMpeg 获取音频音量、提高音量
- 6Sora引领AI生成模型新篇章,视频人工AI创造新视野
- 7OpenCV 图像处理 ------ 白平衡算法_opencv白平衡算法
- 8Android--Service之AIDL传递复杂对象_aidl 复杂对象
- 9阿里数据总监分享《阿里数据中台建设实践案例》,PPT 语音讲解!
- 10linux fork() 进程树的两种实现方法_fork进程树
小程序-uni-app:uni-app-base项目基础配置及使用 / uni-app+vue3+ts+vite+vscode_uniapp项目 中的server.config 怎么配置
赞
踩
目前(20230605)uni-app最新版本(3.8.4.20230531)
一、官网文档
二、创建项目
项目目标:vue3+ts+vite+vscode
创建以 typescript 开发的工程(如命令行创建失败,请直接访问 gitee 下载模板)
npx degit dcloudio/uni-preset-vue#vite-ts uniapp-base

本文创建成功

为了验证gitee下载下来的项目是否完全一致,下载下来看一下
除了项目名不一样,其他完全一致,两种方法均可放心使用

安装依赖
pnpm i
project.config.json增加
"miniprogramRoot": "dist/dev/mp-weixin/",
启动项目
pnpm run dev:mp-weixin

启动成功
三、热更新
修改内容后小程序开发工具重新编译后没有发现新的内容展示处理,需要manifest.json修改版本号
修改后即刻更新

四、配置别名 @ ---- src
4.1、vite.config.ts
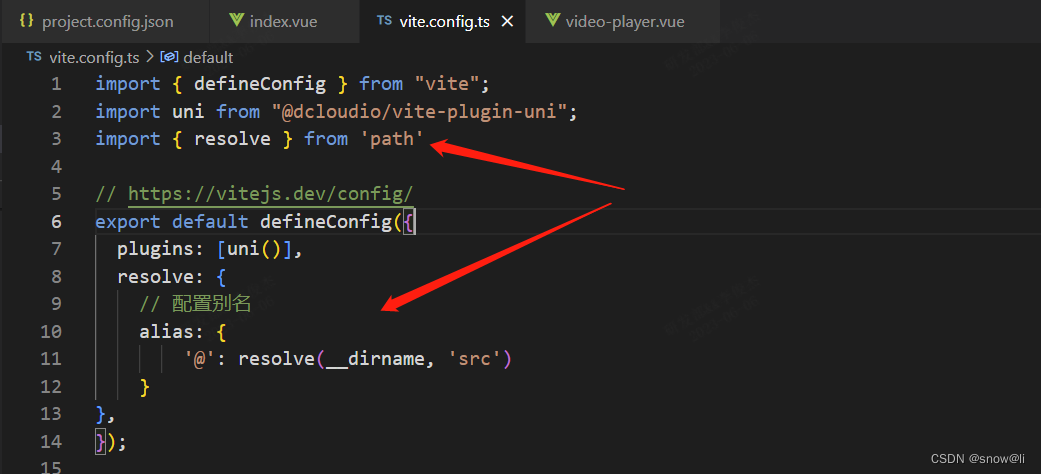
import { resolve } from 'path'
- resolve: {
- // 配置别名
- alias: {
- '@': resolve(__dirname, 'src')
- }
- },
4.2、页面使用

4.3、验证成功
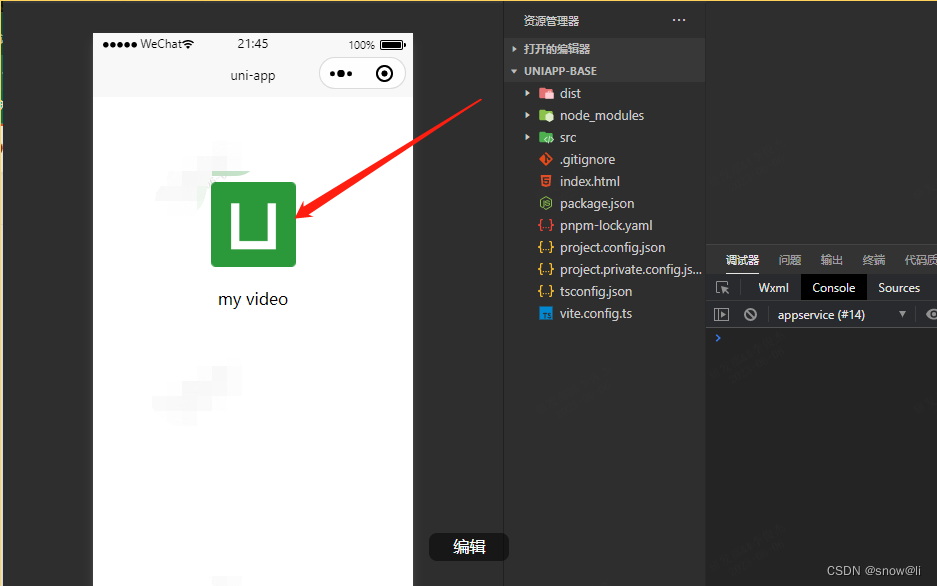
五、封装请求
- /**
- * uni-request请求封装
- * 1. 统一配置接口地址
- * 2. 统一设置超时时间/报文格式/报文加密
- * 3. 统一身份认证
- * 4. 统一处理登录超时/接口异常提示
- * 5. 统一返回接口格式
- */
- import Mock from 'mockjs'
-
- type responseType = {
- code: number
- success: boolean
- msg: string
- result: any
- }
- console.log('18env', import.meta.env)
- const request = (config: UniApp.RequestOptions) => {
- let url: string
- if (/^(http|https):\/\/.*/.test(config.url)) { // h5本地开发
- console.log('22')
- // 如果是以http/https开头的则不添加VITE_REQUEST_BASE_URL
- url = config.url
- // eslint-disable-next-line no-underscore-dangle
- } else if (Mock._mocked[import.meta.env.VITE_REQUEST_BASE_URL + config.url]) { // mock开发
- console.log('27')
- // 如果是mock数据也不添加VITE_REQUEST_BASE_URL,Mock._mocked上记录有所有已设置的mock规则
- url = import.meta.env.VITE_REQUEST_BASE_URL + config.url
- } else { // 微信小程序
- console.log('31', import.meta.env)
- /**
- * 开启mock时需要去掉mock路径,不能影响正常接口了。
- * 如果碰巧你接口是 /api/mock/xxx这种,那VITE_REQUEST_BASE_URL就配置/api/mock/mock吧
- */
- // url = import.meta.env.VITE_REQUEST_BASE_URL.replace(/\/mock$/, '') + config.url
- // 小程序使用这样的路径,否则请求报错,调试中
- url = import.meta.env.VITE_SERVER_NAME + import.meta.env.VITE_REQUEST_BASE_URL.replace(/\/mock$/, '') + config.url
- }
-
- return new Promise<responseType>((resolve, reject) => {
- uni.request({
- ...config,
- url,
- /** 统一设置超时时间 */
- timeout: config.timeout || 60000,
- header: {
- ...config.header,
- /** 统一报文格式 */
- 'Content-Type': 'application/json;charset=UTF-8'
- /** 统一身份认证 */
- // Authorization: Token
- },
- success(res) {
- // 200状态码表示成功
- if (res.statusCode === 200) {
- resolve(res.data as any)
- return
- }
- /**
- * 这里可以做一些登录超时/接口异常提示等处理
- */
- reject(res.data)
- },
- fail(result) {
- reject(result)
- }
- })
- })
- }
-
- export default {
- /**
- * get请求
- * @param url 请求地址
- * @param data 请求的参数
- * @param options 其他请求配置
- */
- get: (url: string, data?: UniApp.RequestOptions['data'], options?: UniApp.RequestOptions) => {
- return request({
- ...options,
- url,
- data,
- method: 'GET'
- })
- },
- /**
- * post请求
- * @param url 请求地址
- * @param data 请求的参数
- * @param options 其他请求配置
- */
- post: (url: string, data?: UniApp.RequestOptions['data'], options?: UniApp.RequestOptions) => {
- return request({
- ...options,
- url,
- data,
- method: 'POST'
- })
- }
- }
六、配置多环境开发及代理
6.1、定义环境变量文件

6.2、env/.env.dev
其他同理
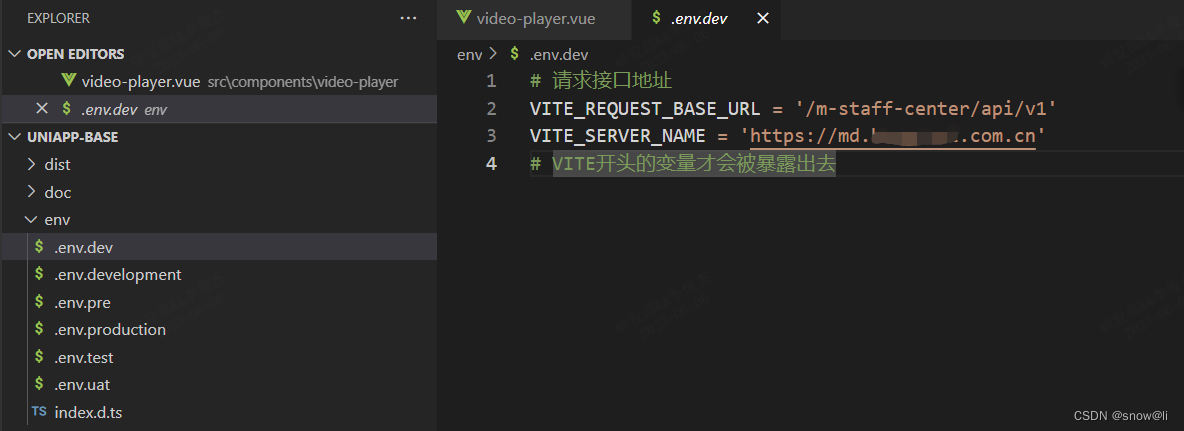
# 请求接口地址
VITE_REQUEST_BASE_URL = '/m-staff-center/api/v1'
VITE_SERVER_NAME = 'https://md.abc.com.cn'
# VITE开头的变量才会被暴露出去
6.3、index.d.ts
/** 扩展环境变量import.meta.env */
interface ImportMetaEnv {
VITE_REQUEST_BASE_URL: string,
VITE_SERVER_NAME: String
}
6.4、vite.config.ts 引入 loadEnv
import { defineConfig, loadEnv } from "vite";
使用环境变量文件
envDir: resolve(__dirname, 'env'),

6.5、配置代理
- // 开发服务器配置
- server: {
- host: '0.0.0.0', // 允许本机
- port: 3000, // 设置端口
- open: false, // 设置服务启动时自动打开浏览器
- // cors: true, // 允许跨域
- // 请求代理
- proxy: {
- '/m-staff-center': { // 匹配请求路径,localhost:3000/m-staff-center,如果只是匹配/那么就访问到网站首页了
- target: loadEnv(process.argv[process.argv.length-1], './env').VITE_SERVER_NAME, // 代理的目标地址
- changeOrigin: true, // 开发模式,默认的origin是真实的 origin:localhost:3000 代理服务会把origin修改为目标地址
- // secure: true, // 是否https接口
- // ws: true,
- // rewrite target目标地址 + '/m-staff-center',如果接口是这样的,那么不用重写
- // rewrite: (path) => path.replace(/^\/m-staff-center/, '') // 路径重写,本项目不需要重写
- // https://www.bilibili.com/video/BV1p3411J7CE?p=21
- }
- }
- },
6.6、测试接口
- <template>
- <view>my video</view>
- <button @click="apiTest">调用代理接口new</button>
- </template>
-
- <script setup lang="ts">
- import request from '@/utils/request'
- const apiTest = () => {
- request.post('/UcAuthCompany/getName').then((res: any) => {
- console.log(res)
- })
- }
- </script>
6.7、验证成功

七、配置vuex
7.1、安装vuex
pnpm add vuex
7.2、src/shime-uni.d.ts 扩展useStore声明
- // 扩展useStore声明
- import { StateType } from '@/store/index.d'
- import { InjectionKey } from 'vue'
- import { Store } from 'vuex'
-
- declare module "vue" {
- type Hooks = App.AppInstance & Page.PageInstance;
- interface ComponentCustomOptions extends Hooks {
- // 这里扩展this.$store,还可以在这里对this添加其他的声明
- $store: Store<StateType>
- }
- }
-
- declare module 'vuex' {
- export function useStore<S = StateType>(injectKey?: InjectionKey<Store<S>> | string): Store<S>
- }
7.3、定义store
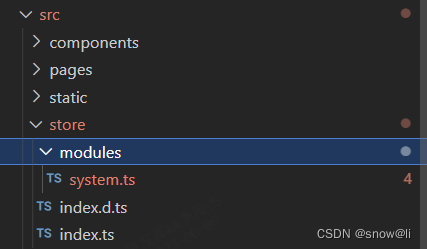
7.3.1、src/store/index.ts
- import { createStore } from 'vuex'
- import { StateType } from './index.d'
-
- // 批量引入其他module,
- const files = import.meta.globEager('./modules/*.ts') // vite的写法
- const keys = Object.keys(files)
-
- const modules: any = {}
-
- keys.forEach((key) => {
- if (Object.prototype.hasOwnProperty.call(files, key)) {
- // 提取文件的名字作为模块名
- modules[key.replace(/(\.\/modules\/|\.ts)/g, '')] = files[key].default
- }
- })
-
- /** 全局的state,这个看自己的需求,如果有用到就在createStore中添加 */
- export interface rootStateType {}
-
- export default createStore<StateType>({
- modules
- })
7.3.2、src/store/index.d.ts
- import { rootStateType } from './index'
- import { systemStateType } from './modules/system'
-
- export interface StateType extends rootStateType {
- system: systemStateType
- }
7.3.3、src/store/modules/system.ts
- import { Module } from 'vuex'
- import { rootStateType } from '@/store'
-
- export interface systemStateType {
- title: string
- }
-
- const systemModule: Module<systemStateType, rootStateType> = {
- namespaced: true,
- state: () => ({
- title: '你好,我是snow'
- }),
- mutations: {
- setTitle(state, val){
- state.title= val
- wx.setStorageSync('title', val || '0') // 持久化
- }
- }
- }
-
- export default systemModule
7.3.4、src/main.ts 挂载

- import { createSSRApp } from "vue";
- import App from "./App.vue";
- import store from './store'
- import '../mock'
-
- export function createApp() {
- const app = createSSRApp(App).use(store);
- return {
- app,
- };
- }
7.3.5、业务文件使用
- <view>{{ title }}</view>
-
-
- import { useStore } from 'vuex'
- import {reactive, ref, computed} from 'vue'
-
- const store = useStore()
- // const title = ref(store.state.system.title)
- // 使用计算属性
- const title = computed(()=>{
- return store.state.system.balance
- })
-
- // 提交mutations,如果使用了模块化,store.commit('模块名/mutations方法', '值')
- store.commit('system/setBalance', res.data.balance)
7.3.6、 验证成功

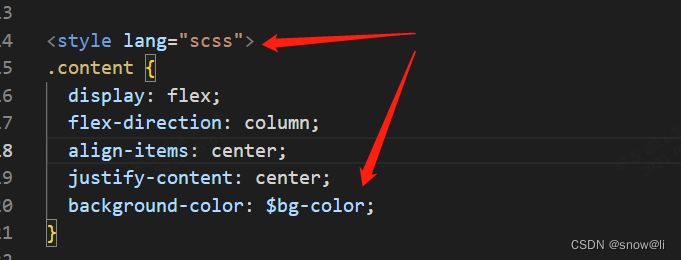
八、使用sass
8.1、安装
pnpm add sass
8.2、src/styles/global.scss定义全局变量
$bg-color: #f5f5f5;8.3、 vite.config.ts引入
- css: {
- // css预处理器
- preprocessorOptions: {
- scss: {
- // 因为uni.scss可以全局使用,这里根据自己的需求调整
- additionalData: '@import "./src/styles/global.scss";'
- }
- }
- },

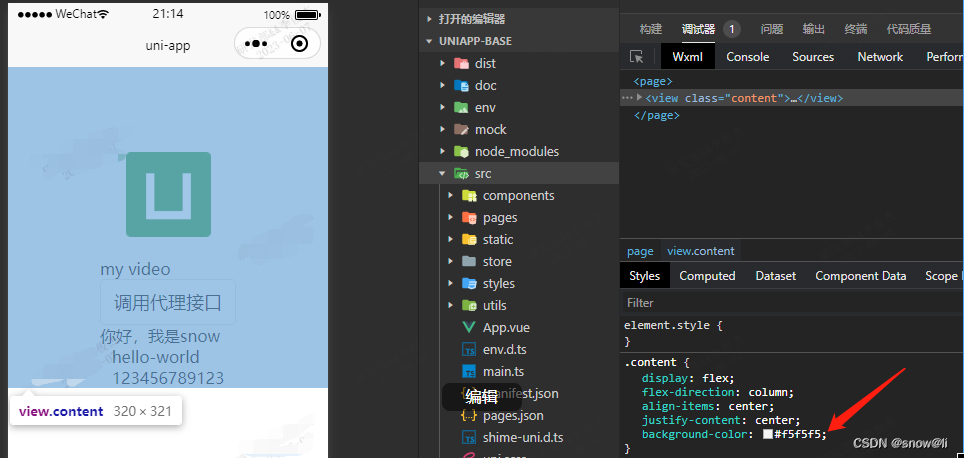
8.4、页面使用
验证成功
九、配置mockjs
十、配置头部信息
10.1、src/pages.json文件定义
- {
- "path": "pages/index/index",
- "style": {
- "navigationBarTitleText": "首页", // title
- "navigationBarTextStyle": "white", // 导航栏标题颜色 black、white两种颜色
- "navigationBarBackgroundColor": "#FF0000", // 导航栏背景色
- "enablePullDownRefresh": "false" ,// 是否开启下拉刷新
- "backgroundColor": "#F8F8F8", // 窗口的背景色
- "navigationStyle":"default" , // 导航栏样式,仅支持 default/customm,开启 custom 后,所有窗口均无导航栏
- "usingComponents": { // 引用小程序组件
- "my-component": "/path/to/my-component"
- }
- }
- },

1.02、在业务页面onLoad声明周期,函数式定义
- onLoad() {
- uni.setNavigationBarTitle({
- title:'个人中心'
- })
- }
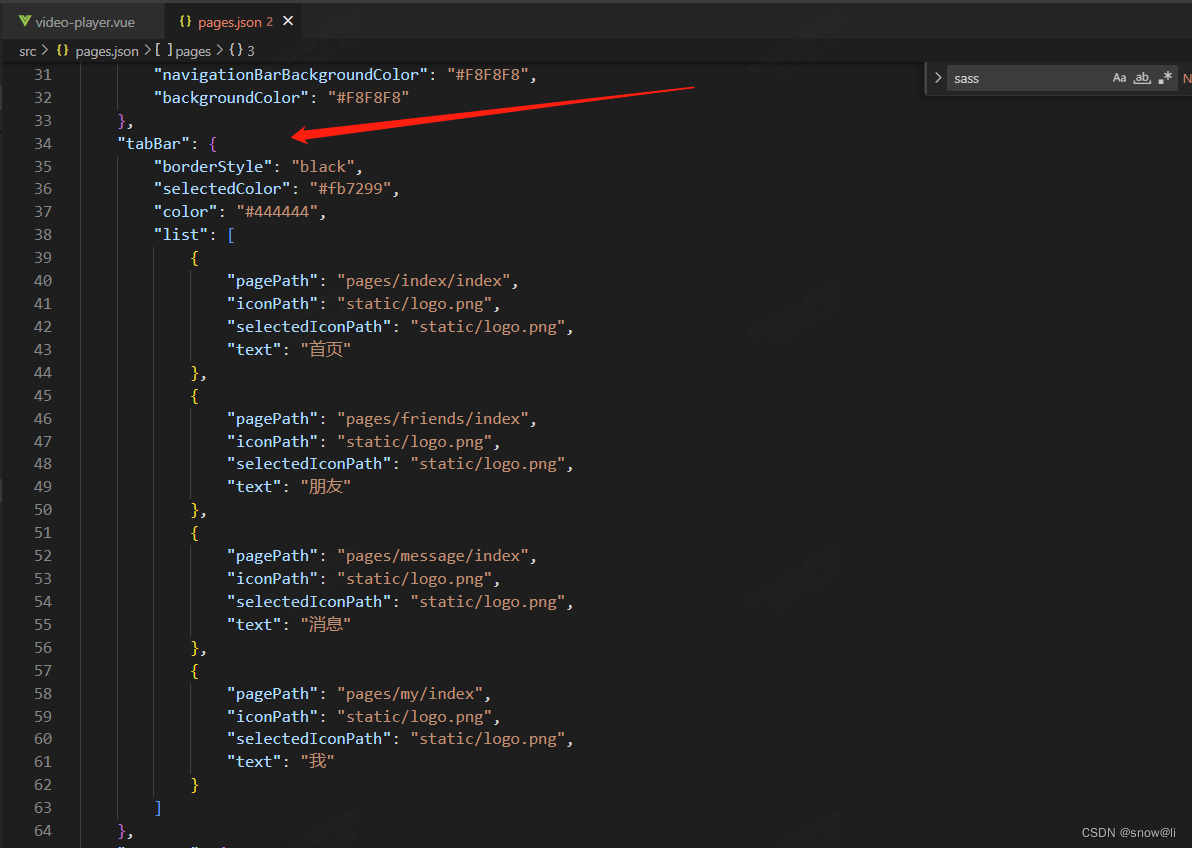
十一、配置tabbar
十二、uniapp组件
| 序号 | 组件 | 组件名 | 详细 (uni-app官网) |
| 1 | 视图容器 | view | 视图容器。 类似于传统html中的div,用于包裹各种元素内容。 如果使用nvue,则需注意,包裹文字应该使用 |
| 2 | scroll-view | 可滚动视图区域。用于区域滚动。 需注意在webview渲染的页面中,区域滚动的性能不及页面滚动。 | |
| 3 | swiper | 滑块视图容器。 一般用于左右滑动或上下滑动,比如banner轮播图。 注意滑动切换和滚动的区别,滑动切换是一屏一屏的切换。swiper下的每个swiper-item是一个滑动切换区域,不能停留在2个滑动区域之间。 | |
| 4 | match-media | media query 匹配检测节点。 类似于网页开发中使用媒体查询来适配大屏小屏,match-media是一个可适配不同屏幕的基本视图组件。可以指定一组 media query 媒体查询规则,满足查询条件时,这个组件才会被展示。 例如在match-media组件中放置一个侧边栏,媒体查询规则设置为宽屏才显示,就可以实现在PC宽屏显示该侧边栏,而在手机窄屏中不显示侧边栏的效果。 | |
| 5 | movable-area | 可拖动区域 由于app和小程序的架构是逻辑层与视图层分离,使用js监听拖动时会引发逻辑层和视图层的频繁通讯,影响性能。为了方便高性能的实现拖动,平台特封装了
即手指/鼠标按住 当然也可以不拖动,而使用代码来触发
| |
| 6 | movable-view | 可移动的视图容器,在页面中可以拖拽滑动或双指缩放。
| |
| 7 | cover-view | 覆盖在原生组件上的文本视图。 app-vue和小程序框架,渲染引擎是webview的。但为了优化体验,部分组件如map、video、textarea、canvas通过原生控件实现,原生组件层级高于前端组件(类似flash层级高于div)。为了能正常覆盖原生组件,设计了cover-view。 | |
| 8 | cover-image | 覆盖在原生组件上的图片视图。可覆盖的原生组件同cover-view,支持嵌套在cover-view里。 | |
| 9 | 基础内容 | icon | 图标。 |
| 10 | text | 文本组件。 用于包裹文本内容。 | |
| 11 | rich-text | 富文本。 支持默认事件,包括:click、touchstart、touchmove、touchcancel、touchend、longpress。 | |
| 12 | progress | 进度条。 | |
| 13 | 表单组件 | button | 按钮。 |
| 14 | checkbox | 多项选择器,内部由多个 checkbox 组成。 | |
| 15 | editor | 富文本编辑器,可以对图片、文字格式进行编辑和混排。 在web开发时,可以使用 编辑器导出内容支持带标签的 通过 富文本组件内部引入了一些基本的样式使得内容可以正确的展示,开发时可以进行覆盖。需要注意的是,在其它组件或环境中使用富文本组件导出的html时,需要额外引入这段样式,并维护 图片控件仅初始化时设置有效。 | |
| 16 | form | 表单,将组件内的用户输入的 当点击 | |
| 17 | input | 单行输入框。 html规范中input不仅是输入框,还有radio、checkbox、时间、日期、文件选择功能。在uni-app规范中,input仅仅是输入框。其他功能uni-app有单独的组件或API:radio组件、checkbox组件、时间选择、日期选择、图片选择、视频选择、多媒体文件选择(含图片视频)、通用文件选择。 | |
| 18 | label | 用来改进表单组件的可用性,使用for属性找到对应的id,或者将控件放在该标签下,当点击时,就会触发对应的控件。 for优先级高于内部控件,内部有多个控件的时候默认触发第一个控件。 目前可以绑定的控件有: | |
| 19 | picker | 从底部弹起的滚动选择器。支持五种选择器,通过mode来区分,分别是普通选择器,多列选择器,时间选择器,日期选择器,省市区选择器,默认是普通选择器。 | |
| 20 | picker-view | 嵌入页面的滚动选择器。 相对于 | |
| 21 | radio | 单项选择器,内部由多个 <radio> 组成。通过把多个radio包裹在一个radio-group下,实现这些radio的单选。 | |
| 22 | slider | 滑动选择器。 | |
| 23 | switch | 开关选择器。 | |
| 24 | textarea | 多行输入框。 | |
| 25 | 路由与页面跳转 | navigator | 页面跳转。 该组件类似HTML中的 该组件的功能有API方式,另见:uni.navigateTo(OBJECT) | uni-app官网 |
| 26 | 媒体组件 | animation-view | Lottie动画组件,动画资源参考Lottie官方链接。 |
| 27 | audio | 音频。 | |
| 28 | camera | 页面内嵌的区域相机组件。注意这不是点击后全屏打开的相机。 | |
| 29 | image | 图片。 | |
| 30 | video | 视频播放组件。 | |
| 31 | live-player | 实时音视频播放,也称直播拉流。 使用live-player 组件需注意:如果发布到小程序,需要先通过各家小程序的审核。指定类目的小程序才能使用(微信小程序类目、百度小程序类目),审核通过后在各家小程序管理后台自助开通该组件权限。 | |
| 32 | live-pusher | 实时音视频录制,也称直播推流。 | |
| 33 | 地图 | map | 地图组件。 地图组件用于展示地图,而定位API只是获取坐标,请勿混淆两者。 |
| 34 | 画布 | canvas | 画布。 |
| 35 | webview | web-view | web-view 是一个 web 浏览器组件,可以用来承载网页的容器,会自动铺满整个页面(nvue 使用需要手动指定宽高)。 |
| 36 | 拓展组件(uni-ui) | uni-app官网 | uni-app官网 |
十三、使用拓展组件
13.1、安装uni-ui
pnpm add @dcloudio/uni-ui
13.2、src/pages.json配置

13.3、页面直接使用

验证成功
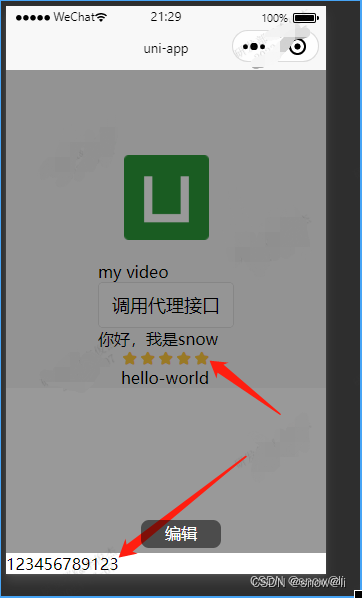
十四、组件-easycom
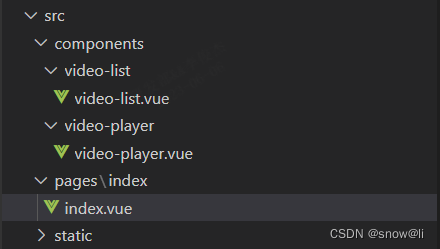
14.1、定义组件video-player
src/components/video-player/video-player.vue
规则:目录名/文件名.vue,目录名与文件名需要相同,使用时候直接使用,无需引入
- <template>
- <view>my video</view>
- </template>
- <script setup lang="ts">
- </script>
14.2、引入使用
src/pages/index/index.vue
- <template>
- <view class="content">
- <image class="logo" src="/static/logo.png" />
- <video-player></video-player>
- </view>
- </template>
-
- <script setup lang="ts">
- </script>
-
- <style>
- .content {
- display: flex;
- flex-direction: column;
- align-items: center;
- justify-content: center;
- }
-
- .logo {
- height: 200rpx;
- width: 200rpx;
- margin-top: 200rpx;
- margin-left: auto;
- margin-right: auto;
- margin-bottom: 50rpx;
- }
-
- </style>
14.3、验证成功
十五、全局文件
| 序号 | 文件 | 解释 |
| 1 | pages.json |
|
| 2 | manifest.json |
|
| 3 | package.json | uni-app 通过在 |
| 4 | vue.config.js | vue.config.js 是一个可选的配置文件,如果项目的根目录中存在这个文件,那么它会被自动加载,一般用于配置 webpack 等编译选项 |
| 5 | vite.config.js | vite.config.js 是一个可选的配置文件,如果项目的根目录中存在这个文件,那么它会被自动加载,一般用于配置 vite 的编译选项 |
| 6 | uni.scss |
|
| 7 | app.vue |
|
| 8 | main.js |
|
十六、仿 抖音/B站 视频播放
16.1、上下切换使用小程序swiper组件
16.2、判断是上滑、下滑,在下滑的事件方法内处理
16.3、current属性来定位播放哪一个,及在在swiper-item展示对应的信息
利用uniapp中模仿抖音、滑动视频组件、双击点赞、首个视频自动播放_uniapp 抖音_是小橙鸭丶的博客-CSDN博客
uniapp实现视频上下滑动功能(小程序)以及video组件的暂停和播放_uniapp video组件_^O^ ^O^的博客-CSDN博客
十七、tabbar设置数字角标

业务代码:
- uni.setTabBarBadge({ //显示数字
- index: 1, //tabbar下标
- text: '6' //数字
- })
| 序号 | 方法 | 理解 |
| 1 | uni.showTabBarRedDot | 显示 |
| 2 | uni.setTabBarBadge | 设置 |
| 3 | uni.removeTabBarBadge | 隐藏 |
十八、uniapp实现分享
- <button open-type="share" style="border: none;" plain="true" class="operate-bar__item share">
- <image :src="imagePlay.share" class="operate-bar__item__img share__img"></image>
- <view>分享</view>
- </button>
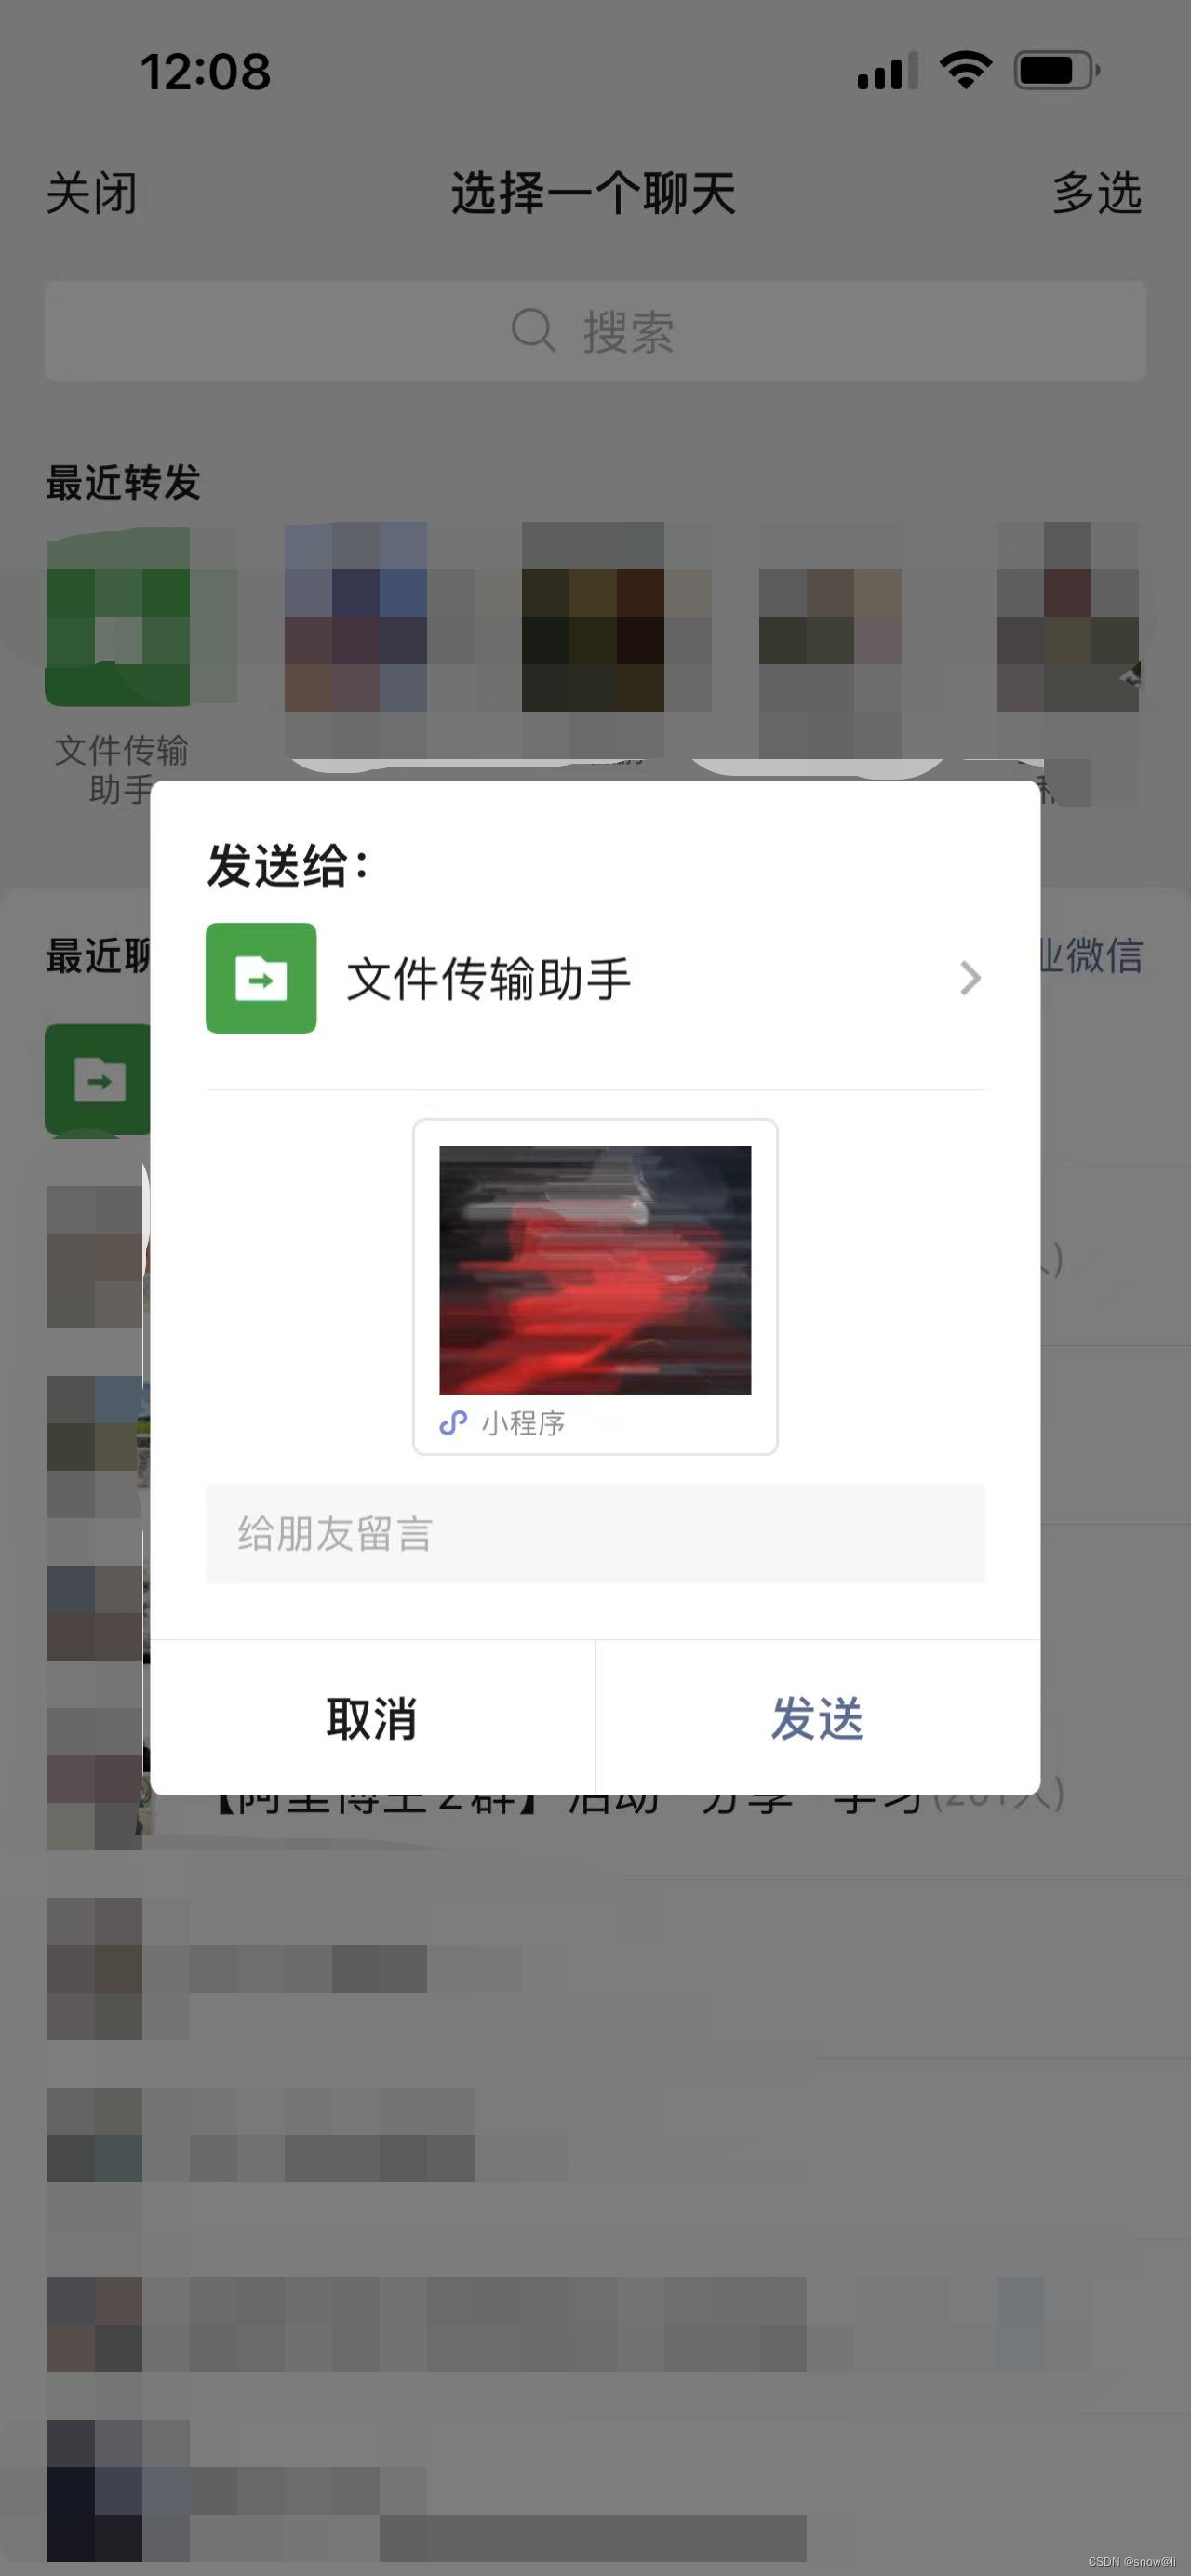
点击分享后,选择一个聊天即可
十九、页面和路由
小程序只能跳转本地页面。目标页面必须在pages.json中注册。
uni.navigateTo(OBJECT) | uni-app官网
| 序号 | 方法 | 参数 | 描述 |
| 1 | uni.navigateTo(object) | url、animationType、animationDuration、events、success、fail、complete | 保留当前页面,跳转到应用内的某个页面,使用uni.navigateBack可以返回到原页面。小程序中页面栈最多十层。超过十层页面不能跳转。 |
| 2 | uni.redirectTo(object) | url、success、fail、complete | 关闭当前页面,跳转到应用内的某个页面。 |
| 3 | uni.reLaunch(object) | url、success、fail、complete | 关闭所有页面,打开到应用内的某个页面。 |
| 4 | uni.switchTab(object) | url、success、fail、complete | 跳转到 tabBar 页面,并关闭其他所有非 tabBar 页面。 |
| 5 | uni.navigateBack(object) | delta、animationType、animationDuration、success、fail、complete | 关闭当前页面,返回上一页面或多级页面。可通过 getCurrentPages() 获取当前的页面栈,决定需要返回几层。 如果 delta 大于现有页面数,则返回到首页。 |
二十、uni.showToast
20.1、uni.showToast基础使用
- uni.showToast({
- title: `网络错误`,
- icon: 'none'
- })
20.2、 解决uni.showToast提示,一闪而过问题
在success回调里使用setTimeout

20.3、uni.showToast文字换行
\r\n 开发工具无效,真机测试有效,可以使用


二十一、uni-nav-bar/自定义导航
21.1、pages.json
- {
- "path": "pages/my/index",
- "style": { // 去掉原生导航
- "navigationStyle": "custom",
- "app-plus": {
- "titleNView": false
- }
- }
- },
21.2、业务页面
<uni-nav-bar :border="false" height="176rpx" background-color="#F1D4D8" color="#333" leftText="我的" />
21.3、使用插槽的方式/slot
vue2插槽写法:
<block slot="left">vue3插槽写法:
<block #left>- <uni-nav-bar
- :border="false"
- height="176rpx"
- background-color="#F1D4D8"
- color="#333"
- >
- <block #left>
- <!-- 设置文字高度与胶囊高度平齐 -->
- <view
- :style="{
- height: menuButtonInfo.height + 'px',
- lineHeight: menuButtonInfo.height + 'px',
- paddingTop: (menuButtonInfo.top - (menuButtonInfo.top - statuBar)) + 'px',
- fontSize: '36rpx',
- fontWeight: 500,
- textIndent: '20rpx'
- }"
- >
- <text>我的</text>
- </view>
- </block>
- </uni-nav-bar>
-
- let menuButtonInfo = uni.getMenuButtonBoundingClientRect(); // 获取的微信小程序胶囊布局位置信息在页面上的具体展现
- let statuBar:any = uni.getSystemInfoSync().statusBarHeight || 0; // 状态栏高度

测试测试,成功
21.4、使用uni-nav-bar左侧只能放下两个文字
经过调试左侧不容易增加宽度来放下更多内容

21.5、自己开发一个组件 nav-bar
- <template>
- <view
- class="nav-bar"
- :style="{
- backgroundColor: backgroundColor,
- height: (menuButtonInfo.height + statuBar + 20) + 'px',
- fontSize: fontSize,
- fontWeight: 500,
- }"
- >
- <view
- class="nav-bar__left"
- :style="{
- height: menuButtonInfo.height + 'px',
- lineHeight: menuButtonInfo.height + 'px',
- paddingTop: menuButtonInfo.top + 'px',
- textIndent: leftTextIndent,
- width: leftWidth,
- }"
- >
- <uni-icons
- v-if="showIcon"
- class="nav-bar__left__icon"
- type="back"
- size="18"
- @click="toBack"
- >
- </uni-icons>
- <text :style="{color: color, textIndent: showIcon? '10rpx' : ''}">{{ leftText }}</text>
- </view>
- <view
- class="nav-bar__title"
- :style="{
- height: menuButtonInfo.height + 'px',
- lineHeight: menuButtonInfo.height + 'px',
- paddingTop: menuButtonInfo.top + 'px',
- }"
- >
- <text :style="{color: color}">{{ titleText }}</text>
- </view>
- <view
- class="nav-bar__right"
- :style="{
- height: menuButtonInfo.height + 'px',
- lineHeight: menuButtonInfo.height + 'px',
- paddingTop: menuButtonInfo.top + 'px',
- }"
- >
- <text :style="{color: color}">{{ rightText }}</text>
- </view>
- </view>
- <!-- 占位元素 -->
- <view
- :style="{
- height: (menuButtonInfo.height + statuBar + 20) + 'px'
- }">
- </view>
- </template>
-
- <script setup lang="ts">
- import { toRefs } from 'vue'
- import { back } from '@/utils/tools'
-
- interface Props {
- icon?: string;
- showIcon?: boolean;
- leftText?: string;
- titleText?: string;
- rightText?: string;
- backgroundColor?: string;
- color?: string;
- fontSize?: string;
- leftTextIndent?: string;
- leftWidth?: string;
- }
- const props = withDefaults(defineProps<Props>(), {
- icon: 'http://211.145.63.170:18080/profile/upload/2023/07/15/doubleright@2x_20230715201840A002.png',
- boolean: false,
- leftText: '返回',
- titleText: '',
- rightText: '',
- backgroundColor: '#FF7979;',
- color: '#fff;',
- fontSize: '36rpx;',
- leftTextIndent: '30rpx;',
- leftWidth: '200rpx;'
- })
- const toBack = () => {
- back()
- }
- // 数据
- const { icon, showIcon, leftText, titleText, rightText, backgroundColor, color, fontSize, leftTextIndent, leftWidth } = toRefs(props)
- // 自定义导航的高度,文字与胶囊平齐
- let menuButtonInfo = uni.getMenuButtonBoundingClientRect(); // 获取的微信小程序胶囊布局位置信息在页面上的具体展现
- let statuBar:any = uni.getSystemInfoSync().statusBarHeight || 0; // 状态栏高度
- </script>
-
- <style lang="scss">
- .nav-bar {
- display: flex;
- position: fixed;
- left: 0;
- top: 0;
- z-index: 100;
- width: 100vw;
- &__left{
- width: 200rpx;
- overflow: hidden; // 超出部分隐藏
- text-overflow:ellipsis; // 省略号
- white-space: nowrap; // 禁止换行
- display: flex;
- &__icon{
- text{
- color: #fff!important;
- }
- }
- }
- &__title{
- flex: 1;
- text-align: center;
- }
- &__right{
- width: 200rpx;
- }
- }
- </style>

真机测试,成功。
二十二、登录/获取用户信息
22.1、button组件调用getPhoneNumber获取手机号,获取到phoneCode
<button open-type="getPhoneNumber" @getphonenumber="getPhoneNumber">去登录</button>22.2、调用wx.login获取到code
22.3、调用wx.getUserInfo获取用户信息,用户名为“微信用户”,头像为默认头像,性别为0-未知(0-未知;1-男;2-女)
22.4、通过以上两个步骤获取到的信息,调用后端接口获取token
22.5、通过点击用户名或头像,调用wx.getUserProfile(开发工具可用,手机不可用),必须通过点击事件调用,获取真正的用户昵称,头像。性别获取不到,各种方法都尝试了,获取到的是0-未知。有能获取的道友欢迎留言交流。
uniapp微信小程序最新登录获取头像、昵称_小吴在打码的博客-CSDN博客
二十三、official-account公众号关注组件
小程序:official-account公众号关注组件_微信小程序official-account_snow@li的博客-CSDN博客
二十四、防止滑动穿透
24.1、使用css的touch-action属性
在需要防止滑动穿透的元素(如弹框)的样式中,添加touch-action: none;属性即可禁止滑动事件穿透到下面的元素。
- .modal {
- position: fixed;
- top: 50%;
- left: 50%;
- transform: translate(-50%, -50%);
- background-color: #fff;
- padding: 20px;
- touch-action: none; /* 禁止滑动事件穿透 */
- }
24.2、使用vue的stop.propagation方法
在需要防止滑动穿透的元素上,添加@touchmove.stop.propagation属性,阻止滑动事件的继续传递,从而实现防止滑动穿透的效果。
- <view class="modal" @touchmove.stop.propagation>
- <!-- 弹框内容 -->
- </view>
二十五、图片预览
- // 图片预览
- previewImg(img){
- wx.previewImage({
- urls: [img], //需要预览的图片http链接列表,多张的时候,url直接写在后面就行了
- current: '', // 当前显示图片的http链接,默认是第一个
- success: function(res) {},
- fail: function(res) {},
- complete: function(res) {},
- })
- }

二十六、自定义进度条
- <view v-if="isPlayOperate" class="progress-area">
- <view class="progress-area__bar" id="progressBar" @touchstart="onDragStart" @touchmove="onDragging" @touchend="onDragEnd">
- <view class="progress-area__bar__progress" id="progress" :style="'width:' + progressBarWidth"></view>
- <view class="progress-area__bar__thumb" id="thumb" :style="'left:' + progressBarWidth"></view>
- </view>
- </view>
-
-
-
-
- // 播放进度/进度条区域
- const progressPercent = ref(0);
- const progressBarWidth = ref('0%');
- const isDragging = ref(false);
-
- // closeProgressArea() // 关闭进度条区域
- const closeProgressArea = () => {
- isPlay.value = true // 播放暂停的icon
- isPlayOperate.value = false // 关闭播放操作的弹窗
- progressPercent.value = 0 // 播放进度初始化
- progressBarWidth.value = '0%' // 播放进度初始化
- isDragging.value = false // 播放进度初始化
- }
-
- const onDragStart = ()=> {
- isDragging.value = true;
- }
-
- const onDragging = async (e: TouchEvent) => {
- let progressBarWidthValue = 0;
- let progressBarLeftValue = 0;
- let thumbWidthValue = 0;
- uni.createSelectorQuery()
- .select(`#progressBar`).boundingClientRect((rect: any) => {
- progressBarWidthValue = rect.width
- progressBarLeftValue = rect.left
- })
- .select(`#thumb`).boundingClientRect((rect: any) => {
- thumbWidthValue = rect.width
- })
- .exec(()=>{
- let offsetX = e.touches[0].clientX - progressBarLeftValue;
- if (offsetX < 0) {
- offsetX = 0;
- } else if (offsetX > (progressBarWidthValue - thumbWidthValue)) {
- offsetX = progressBarWidthValue - thumbWidthValue;
- }
- const percent = offsetX / (progressBarWidthValue - thumbWidthValue) * 100;
- progressPercent.value = percent;
- progressBarWidth.value = `${percent}%`;
- });
- }
-
- const onDragEnd = () => {
- isDragging.value = false;
- const currentTime = (progressPercent.value / 100) * progressDurationNum.value
- let seek = Number(currentTime.toString()?.split('.')[0])
- videoContext.seek(seek) // 设置当前播放的位置,该方法接受一个以秒为单位的数字参数,表示要跳转到的视频位置。
- setTimeout(()=>{
- playVideo() // 播放
- }, 100)
- };
-
-
-
- .progress-area{
- position: absolute;
- bottom: 190rpx;
- display: flex;
- align-items: center;
- width: 80vw;
- &__bar{
- position: relative;
- height: 20rpx;
- width: 100%;
- background: #f0f0f0;
- border-radius: 10rpx;
- &__progress{
- position: absolute;
- top: 0;
- left: 0;
- bottom: 0;
- background: #F1D4D8;
- border-radius: 10rpx;
- }
- &__thumb{
- position: absolute;
- top: 9rpx;
- left: 0;
- width: 40rpx;
- height: 40rpx;
- background: linear-gradient(137deg, #FF8E8E 0%, #FF5050 100%);
- border-radius: 20rpx;
- transform: translate(-50%, -50%);
- }
- }
- }
-
二十七、点右上角三个点,分享给朋友、分享到朋友圈
页面onLoad 或 onShow 执行下面方法即可
- wx.showShareMenu({
- withShareTicket:true,
- menus:['shareAppMessage','shareTimeline']
- })
二十八、复制、粘贴
- // 使用wx.setClipboardData方法将需要复制的文本放入系统剪贴板中
- wx.setClipboardData({
- data: '需要复制的文本内容',
- success: function (res) {
- wx.showToast({
- title: '复制成功',
- });
- }
- })
-
- // 使用wx.getClipboardData方法获取系统剪贴板中的文本内容。
- wx.getClipboardData({
- success: function(res) {
- console.log(res.data) // 输出剪贴板中的文本内容
- }
- })
二十九、过程记录
记录一

[plugin:vite:css] PostCSS plugin uni-app requires PostCSS 8.
https://github.com/postcss/postcss/wiki/PostCSS-8-for-end-users
解决
yarn add postcss
启动项目,问题解决了。
记录二

解决
project.config.json增加:
"miniprogramRoot": "dist/dev/mp-weixin/",

增加后,项目启动成功。
记录三
微信开发工具,小程序请求接口报错:
- errMsg: "request:fail invalid url "/m-staff-center/api/v1/login/getCurrentAppList""
- errno: 600009
解决

这样就可以了。
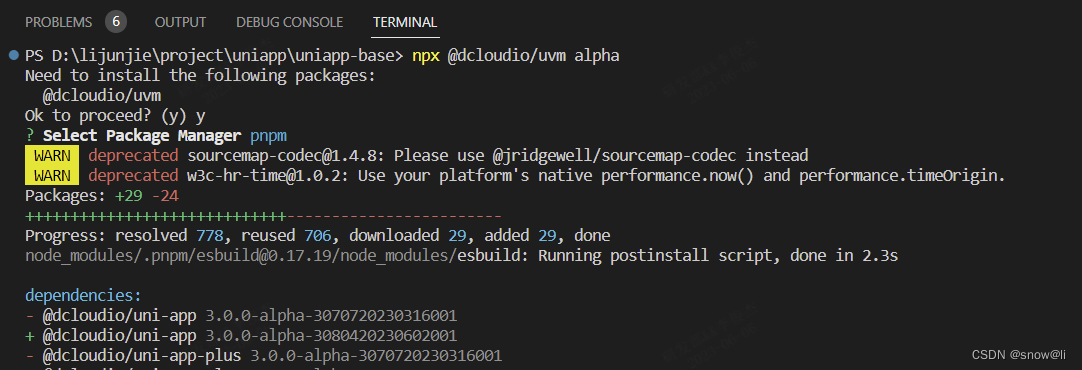
记录四

解决
根据提示进行了更新,更新后正常
记录五
Cannot find name 'wx'.ts(2304)

解决
这个错误通常是由于缺少小程序类型声明文件(d.ts)导致的。你需要在项目中引入小程序类型声明文件,解决这个报错问题。
1、安装小程序类型声明文件
npm install -D @types/wechat-miniprogram
2、 在 tsconfig.json 中配置类型声明文件路径,配置如下
- {
- "compilerOptions": {
- "types": ["wechat-miniprogram"]
- }
- }
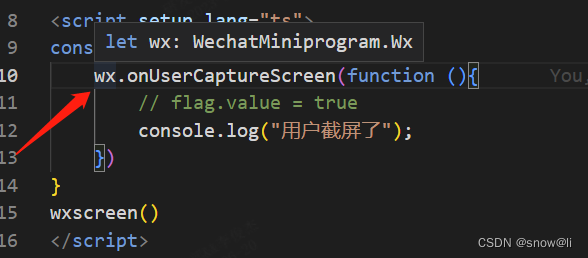
3、测试成功,鼠标放上去,出现了正确的提示。
记录六、获取url参数
- // 获取url参数
- onLoad((option: any)=>{
- console.log('54', option)
- })
记录七、[渲染层网络层错误] Failed to load media

小程序加载视频的时候提示 [渲染层网络层错误] Failed to load media | 微信开放社区
记录八、uniapp应该使用view标签还是使用div标签
使用view
记录九、小程序tabBar iconPath可以使用网络图片吗

记录十、<button>去掉边框
uniapp 微信小程序 button 按钮去除边框_uniapp button 去掉边框_周zerlinda的博客-CSDN博客
记录十一、display-multiple-items

swiper display-multiple-items 当播放数量需要大于等于设置的数量,当只有一个item时,数量不能大于1,只能是1
记录十二、实现锚点连接/锚点跳转
小程序-uniapp:实现锚点连接/锚点跳转_snow@li的博客-CSDN博客
记录十三、为什么小程序预览时必须打开‘调试工具vconsole’才能正常运行?
为什么小程序预览时必须打开‘调试工具vconsole’才能正常运行?_小程序打开调试才正常运行_ghhuidan的博客-CSDN博客
记录十四、uniapp中的@tap和@click的区别
在uniapp中,@tap和@click都是用来绑定点击事件的。它们的区别在于:
1、@tap是在touchend事件结束后触发的,而@click是在click事件结束后触发的。
2、@tap在移动设备上可以避免click事件的300毫秒延迟,所以更适合移动端使用。
3、@tap可以在控件被长按时不触发,而@click无法避免这种情况。
因此,如果你主要是开发移动端应用,建议使用@tap来绑定点击事件。如果你同时支持PC端和移动端,则可以同时使用@click和@tap来绑定点击事件,以确保能够在不同平台上都正常触发。
当uniapp编译后,所有用@click绑定的点击事件都会被转换成@tap事件,以便在移动端能够更快地响应用户操作。
这是因为在移动端,click事件有一个300毫秒的延迟,因为系统需要等待一段时间来判断用户是单击还是双击等操作。这种延迟会影响用户体验,所以uniapp默认将@click转换成@tap绑定的事件。
然而,你仍然可以在代码中使用@click来绑定点击事件,编译后会自动转换成@tap事件。如果你需要在PC端使用@click绑定点击事件,可以考虑使用条件编译等方式来针对不同平台设置不同的事件绑定。
记录十五、微信小程序的APPID和原始ID的却别
微信小程序的APPID和原始ID都是微信小程序的标识符,但是它们的作用和用途不同。
15.1、APPID(Application ID)是微信小程序的唯一标识符,每个小程序都有一个独立的APPID,类似于一个应用程序的ID,可以用来在微信公众平台上注册和管理小程序。在小程序开发中,APPID用于获取用户信息、调用微信支付等操作,也是小程序上线发布的必要条件。
15.2、原始ID(Original ID)是微信公众号和小程序的一个唯一标识符,每个公众号和小程序都有一个独立的原始ID,类似于一个账号的ID。原始ID是用于在后台操作中识别公众号和小程序的,比如获取公众号和小程序的统计数据、设置自动回复、获取二维码等。
记录十六、textarea输入字数只能输入149个,需要输入不受限制
maxlength="-1"
记录十七、小程序input键盘上出现完成按钮无法隐藏问题
qq小程序input键盘上出现完成按钮无法隐藏问题_小程序的输入法怎么有完成的按钮-CSDN博客
记录十八、scroll-view 区域滚动
小程序-uni-app:scroll-view/区域滚动、下拉刷新、上拉加载更多_uniapp scroll-view-CSDN博客
记录十九、微信小程序有分包数量和体积的限制吗
数量没限制,大小有限制,整个小程序所有分包大小不超过 20M
请问小程序分包加载有数量上限吗?最多可以多少个分包? | 微信开放社区
三十、欢迎交流指正,关注我,一起学习。
三十一、参考链接
Vue3.2在uniapp中如何接受uni.navigateTo跳转时url上携带的参数_接收navigateto参数_天才较瘦的博客-CSDN博客
利用uniapp中模仿抖音、滑动视频组件、双击点赞、首个视频自动播放_uniapp 抖音_是小橙鸭丶的博客-CSDN博客
uniapp设置小程序更新无效怎么解决-uni-app-PHP中文网
[app.json文件内容错误]app.json未找到】解决方法_app.json 文件内容错误_快乐的叮小当的博客-CSDN博客
uniapp 使用 axios_小小雨伞的博客-CSDN博客_uniapp使用axios
uniapp调取接口的方法_Front 小思的博客-CSDN博客_uniapp接口调用
uniapp自定义环境配置开发环境、测试环境、生产环境接口请求域名_吹了一夜风~的博客-CSDN博客_uniapp环境配置
uniapp设置跨域代理_一生酷到底的博客-CSDN博客_uniapp配置代理
uniapp+typeScript+vue3.0+vite_Z Y X的博客-CSDN博客
uniapp(vuecli创建) 动态配置manifest.json文件_酋长壳的博客-CSDN博客_uniapp的manifest.json
UNIAPP原生TABBAR设置并添加数字角标或小红点提示_uni.settabbarbadge_海鸥两三的博客-CSDN博客


