- 1Unity实现第一人称移动(胎教级教学)
- 2关于日期格式你必须知道的坑( yyyy-MM-dd HH:mm:ss SSS)_yyyy-mm-dd hh:mm:ss.sss
- 3ab测试算法的基本概念_ab测算法
- 4解析常用的图像彩色模型_rgb模型
- 5DevOps整合Jenkins+k8s_devops开源平台 结合jenkins
- 6软件安全测试方案设计模板-homin_安全测试方案模板
- 7浅谈单片机以太网接入方案_mcu和以太网芯片如何连接
- 8TiDB 用户账户管理_tidb查看用户
- 9学习opencv:PS滤镜—扩散_ps滤镜扩散有什么用
- 10探秘 GitHub 上的宝藏项目:LeetCode 解题利器——`ghostrong/leetcode`
惊呼!在Mac上可以跑LLaMA啦!附上详细教程
赞
踩

编|好困
源|新智元
现在,Meta最新的大语言模型LLaMA,可以在搭载苹果芯片的Mac上跑了!
前不久,Meta前脚发布完开源大语言模型LLaMA,后脚就被网友放出了无门槛下载链接,「惨遭」开放。
消息一出,圈内瞬间就热闹了起来,大家纷纷开始下载测试。
但那些手头没有顶级显卡的朋友们,就只能望模型兴叹了。
不过,问题不大。Georgi Gerganov在最近做了一个名为「llama.cpp」的项目——没有GPU也能跑LLaMA。
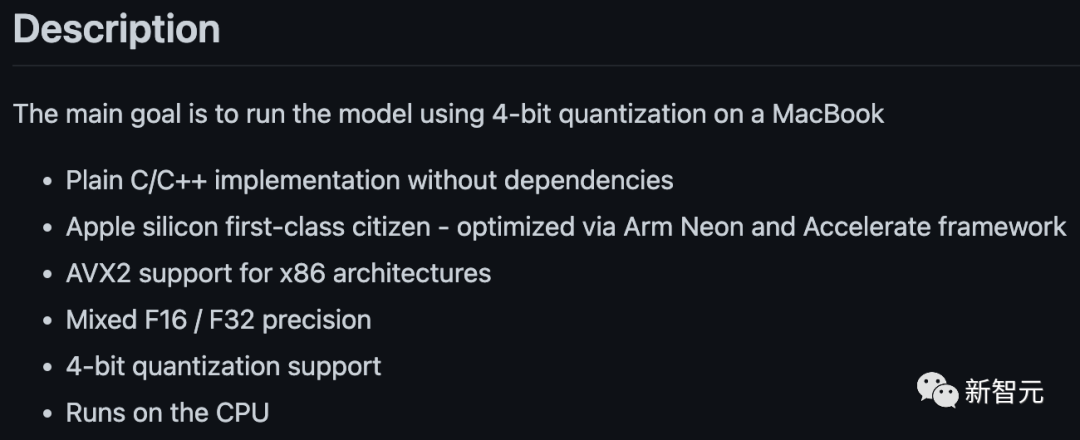
项目地址:
https://github.com/ggerganov/llama.cpp
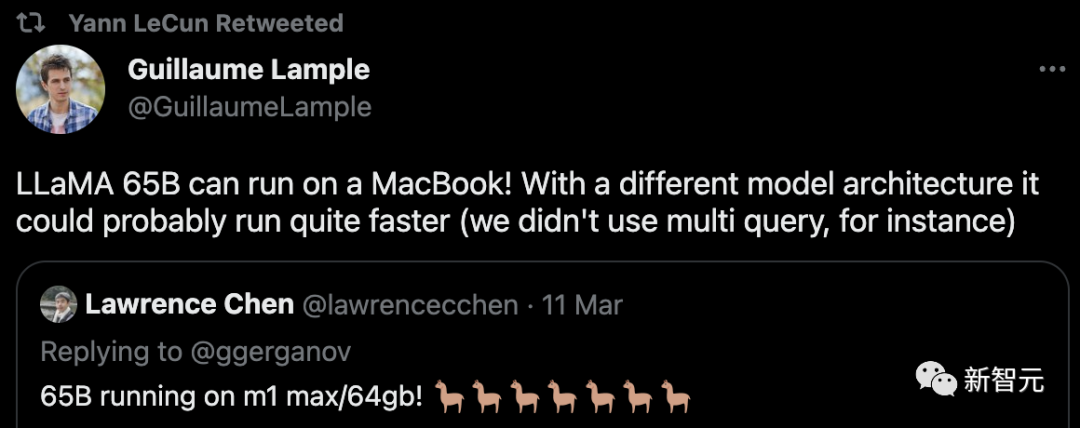
是的,这也包括搭载了苹果芯片的Mac。并且还获得了LeCun的转发支持。
在M1/M2的Mac上跑LLaMA
目前来说,比较全面的教程有两个,分别基于苹果的M1和M2处理器。

第一篇:
https://dev.l1x.be/posts/2023/03/12/using-llama-with-m1-mac/

第二篇:
https://til.simonwillison.net/llms/llama-7b-m2
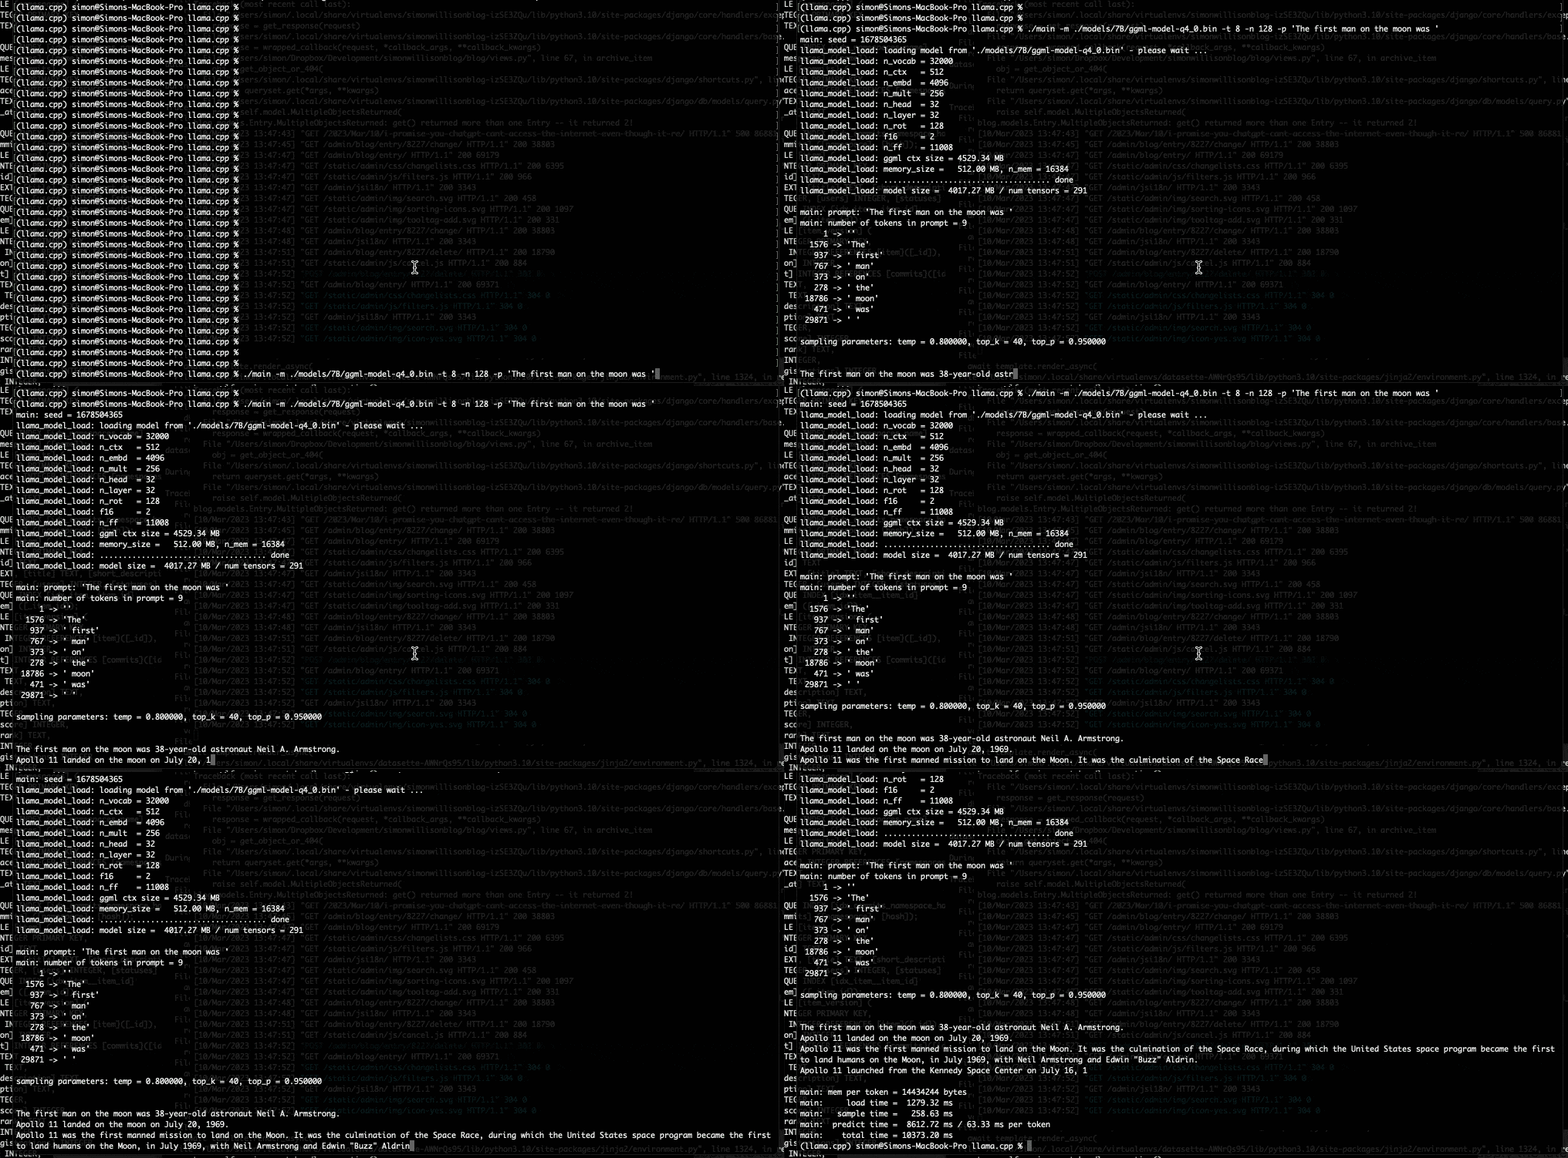
话不多说,先看效果。
比如在最小的7B模型上提问:「第一个登上月球的人是」。
很快,几秒之后,结果就出来了。
'第一个登上月球的人是'
第一个登上月球的人是38岁的宇航员Neil A. Armstrong。
1969年7月20日,阿波罗11号在月球上着陆。
阿波罗11号是第一个登陆月球的载人任务,也是太空竞赛的高潮。1969年7月,Neil Armstrong和Edwin "Buzz" Aldrin成为第一批在月球上登陆的人类。
阿波罗11号于7月16日从肯尼迪航天中心发射。
从阿姆斯特朗登月的年龄、中间名和日期来看,并没有出现明显的事实性错误。这对于如此体量的小模型来说,实属不易。
如果用下面这个提示,则可以生成了一些实用的Python代码。
-p 'def open_and_return_content(filename):'- def open_and_return_content(filename):
- """ Opens file (returning the content) and performs basic sanity checks """if os.path.isfile(filename):
- with open(filename) as f:
- content = f.read()
- return contentelse:
- print('WARNING: file "{}" does not exist'.format(filename), file=sys.stderr)
- return ''def get_file_info(filename, fullpath):
- """ Get file information (i.e., permission, owner, group, size) """
接下来,我们就来看看具体是如何实现的。
第一步:下载模型
首先要做的就是下载LLaMA模型。
你可以通过官方的表格向Meta提交申请,或者从网友分享的链接里直接获取。
总之,完成后你会看到下面这堆东西:
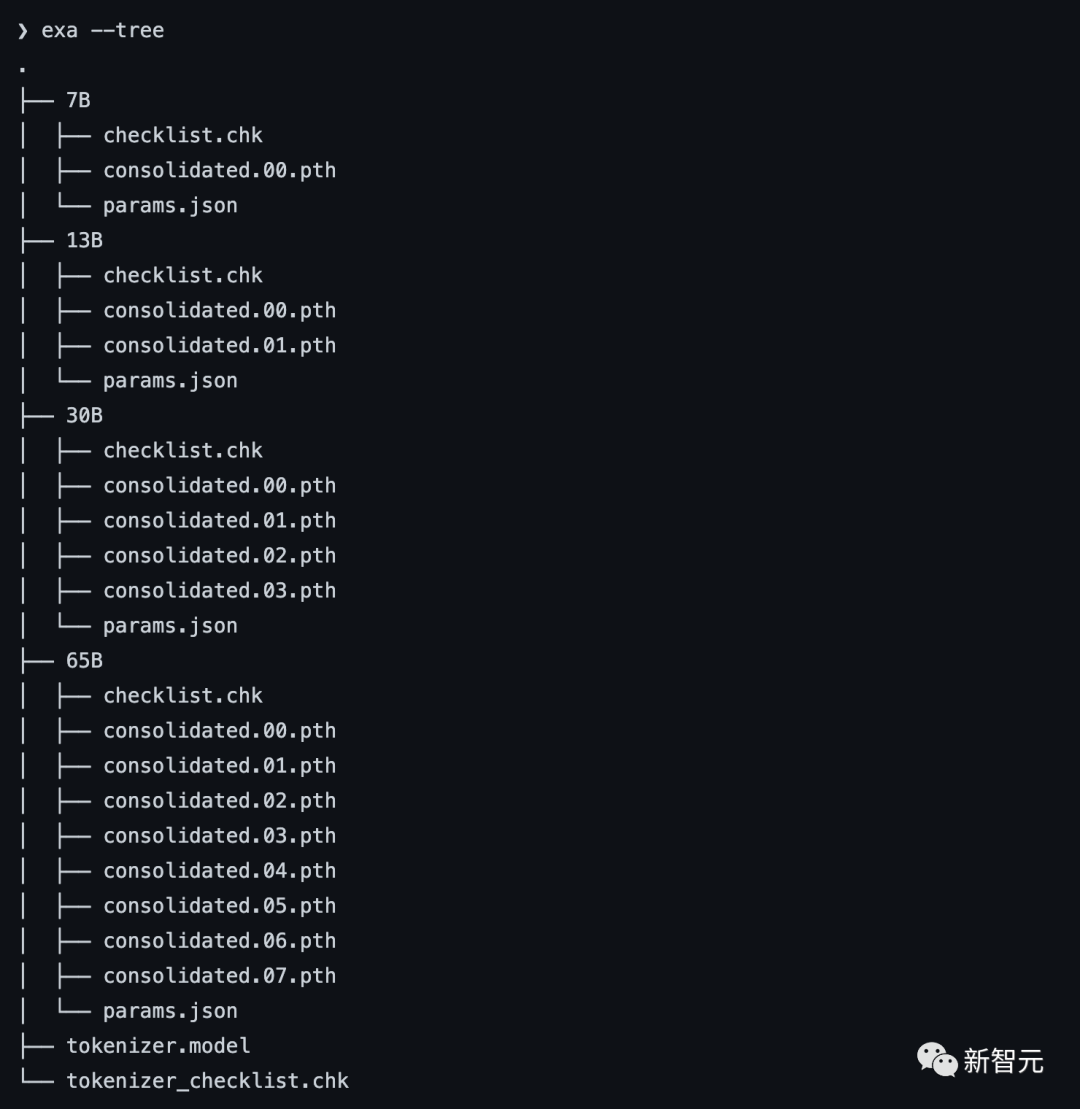
正如你所看到的,不同的模型都在不同的文件夹里。每个模型都有一个params.json,包含关于该模型的细节。比如:

第二步:安装依赖项
首先,你需要安装Xcode来编译C++项目。
xcode-select --install接下来,是构建C++项目的依赖项(pkgconfig和cmake)。
brew install pkgconfig cmake在环境的配置上,假如你用的是Python 3.11,则可以创建一个虚拟环境:
/opt/homebrew/bin/python3.11 -m venv venv然后激活venv。(如果是fish以外的shell,只要去掉.fish后缀即可)
. venv/bin/activate.fish最后,安装Torch。
pip3 install --pre torch torchvision --extra-index-url https://download.pytorch.org/whl/nightly/cpu如果你对利用新的Metal性能着色器(MPS)后端进行GPU训练加速感兴趣,可以通过运行以下程序来进行验证。但这不是在M1上运行LLaMA的必要条件。
- python
- Python 3.11.2 (main, Feb 16 2023, 02:55:59) [Clang 14.0.0 (clang-1400.0.29.202)] on darwin
- Type "help", "copyright", "credits" or "license" for more information.
- >>> import torch; torch.backends.mps.is_available()True
第三步:编译LLaMA CPP
git clone git@github.com:ggerganov/llama.cpp.git在安装完所有的依赖项后,你可以运行make:
- make
- I llama.cpp build info:
- I UNAME_S: Darwin
- I UNAME_P: arm
- I UNAME_M: arm64
- I CFLAGS: -I. -O3 -DNDEBUG -std=c11 -fPIC -pthread -DGGML_USE_ACCELERATE
- I CXXFLAGS: -I. -I./examples -O3 -DNDEBUG -std=c++11 -fPIC -pthread
- I LDFLAGS: -framework Accelerate
- I CC: Apple clang version 14.0.0 (clang-1400.0.29.202)I CXX: Apple clang version 14.0.0 (clang-1400.0.29.202)
- cc -I. -O3 -DNDEBUG -std=c11 -fPIC -pthread -DGGML_USE_ACCELERATE -c ggml.c -o ggml.o
- c++ -I. -I./examples -O3 -DNDEBUG -std=c++11 -fPIC -pthread -c utils.cpp -o utils.o
- c++ -I. -I./examples -O3 -DNDEBUG -std=c++11 -fPIC -pthread main.cpp ggml.o utils.o -o main -framework Accelerate
- ./main -h
- usage: ./main [options]
- options:
- -h, --help show this help message and exit
- -s SEED, --seed SEED RNG seed (default: -1)
- -t N, --threads N number of threads to use during computation (default: 4)
- -p PROMPT, --prompt PROMPT
- prompt to start generation with (default: random)
- -n N, --n_predict N number of tokens to predict (default: 128)
- --top_k N top-k sampling (default: 40)
- --top_p N top-p sampling (default: 0.9)
- --temp N temperature (default: 0.8)
- -b N, --batch_size N batch size for prompt processing (default: 8)
- -m FNAME, --model FNAME
- model path (default: models/llama-7B/ggml-model.bin)
- c++ -I. -I./examples -O3 -DNDEBUG -std=c++11 -fPIC -pthread quantize.cpp ggml.o utils.o -o quantize -framework Accelerate

第四步:转换模型
假设你已经把模型放在llama.cpp repo中的models/下。
python convert-pth-to-ggml.py models/7B 1那么,应该会看到像这样的输出:
- {'dim': 4096, 'multiple_of': 256, 'n_heads': 32, 'n_layers': 32, 'norm_eps': 1e-06, 'vocab_size': 32000}n_parts = 1Processing part 0Processing variable: tok_embeddings.weight with shape: torch.Size([32000, 4096]) and type: torch.float16
- Processing variable: norm.weight with shape: torch.Size([4096]) and type: torch.float16
- Converting to float32
- Processing variable: output.weight with shape: torch.Size([32000, 4096]) and type: torch.float16
- Processing variable: layers.0.attention.wq.weight with shape: torch.Size([4096, 4096]) and type: torch.f
- loat16
- Processing variable: layers.0.attention.wk.weight with shape: torch.Size([4096, 4096]) and type: torch.f
- loat16
- Processing variable: layers.0.attention.wv.weight with shape: torch.Size([4096, 4096]) and type: torch.f
- loat16
- Processing variable: layers.0.attention.wo.weight with shape: torch.Size([4096, 4096]) and type: torch.f
- loat16
- Processing variable: layers.0.feed_forward.w1.weight with shape: torch.Size([11008, 4096]) and type: tor
- ch.float16
- Processing variable: layers.0.feed_forward.w2.weight with shape: torch.Size([4096, 11008]) and type: tor
- ch.float16
- Processing variable: layers.0.feed_forward.w3.weight with shape: torch.Size([11008, 4096]) and type: tor
- ch.float16
- Processing variable: layers.0.attention_norm.weight with shape: torch.Size([4096]) and type: torch.float
- 16...
- Done. Output file: models/7B/ggml-model-f16.bin, (part 0 )

下一步将是进行量化处理:
./quantize ./models/7B/ggml-model-f16.bin ./models/7B/ggml-model-q4_0.bin 2输出如下:
- llama_model_quantize: loading model from './models/7B/ggml-model-f16.bin'llama_model_quantize: n_vocab = 32000llama_model_quantize: n_ctx = 512llama_model_quantize: n_embd = 4096llama_model_quantize: n_mult = 256llama_model_quantize: n_head = 32llama_model_quantize: n_layer = 32llama_model_quantize: f16 = 1...
- layers.31.attention_norm.weight - [ 4096, 1], type = f32 size = 0.016 MB
- layers.31.ffn_norm.weight - [ 4096, 1], type = f32 size = 0.016 MB
- llama_model_quantize: model size = 25705.02 MB
- llama_model_quantize: quant size = 4017.27 MB
- llama_model_quantize: hist: 0.000 0.022 0.019 0.033 0.053 0.078 0.104 0.125 0.134 0.125 0.104 0.078 0.053 0.033 0.019 0.022
-
- main: quantize time = 29389.45 ms
- main: total time = 29389.45 ms
第五步:运行模型
- ./main -m ./models/7B/ggml-model-q4_0.bin \
- -t 8 \
- -n 128 \
- -p 'The first president of the USA was '
- main: seed = 1678615879llama_model_load: loading model from './models/7B/ggml-model-q4_0.bin' - please wait ...
- llama_model_load: n_vocab = 32000llama_model_load: n_ctx = 512llama_model_load: n_embd = 4096llama_model_load: n_mult = 256llama_model_load: n_head = 32llama_model_load: n_layer = 32llama_model_load: n_rot = 128llama_model_load: f16 = 2llama_model_load: n_ff = 11008llama_model_load: n_parts = 1llama_model_load: ggml ctx size = 4529.34 MB
- llama_model_load: memory_size = 512.00 MB, n_mem = 16384llama_model_load: loading model part 1/1 from './models/7B/ggml-model-q4_0.bin'llama_model_load: .................................... donellama_model_load: model size = 4017.27 MB / num tensors = 291
- main: prompt: 'The first president of the USA was 'main: number of tokens in prompt = 9 1 -> '' 1576 -> 'The' 937 -> ' first' 6673 -> ' president' 310 -> ' of' 278 -> ' the' 8278 -> ' USA' 471 -> ' was' 29871 -> ' '
- sampling parameters: temp = 0.800000, top_k = 40, top_p = 0.950000
-
- The first president of the USA was 57 years old when he assumed office (George Washington). Nowadays, the US electorate expects the new president to be more young at heart. President Donald Trump was 70 years old when he was inaugurated. In contrast to his predecessors, he is physically fit, healthy and active. And his fitness has been a prominent theme of his presidency. During the presidential campaign, he famously said he
- would be the “most active president ever” — a statement Trump has not yet achieved, but one that fits his approach to the office. His tweets demonstrate his physical activity.
-
- main: mem per token = 14434244 bytes
- main: load time = 1311.74 ms
- main: sample time = 278.96 ms
- main: predict time = 7375.89 ms / 54.23 ms per token
- main: total time = 9216.61 ms
资源使用情况
第二位博主表示,在运行时,13B模型使用了大约4GB的内存,以及748%的CPU。(设定的就是让模型使用8个CPU核心)
没有指令微调
GPT-3和ChatGPT效果如此之好的关键原因之一是,它们都经过了指令微调,
这种额外的训练使它们有能力对人类的指令做出有效的反应。比如「总结一下这个」或「写一首关于水獭的诗」或「从这篇文章中提取要点」。
撰写教程的博主表示,据他观察,LLaMA并没有这样的能力。
也就是说,给LLaMA的提示需要采用经典的形式:「一些将由......完成的文本」。这也让提示工程变得更加困难。
举个例子,博主至今都还没有想出一个正确的提示,从而让LLaMA实现文本的总结。
后台回复关键词【入群】
加入卖萌屋NLP、CV、搜推广与求职讨论群
[1]https://github.com/ggerganov/llama.cpp
[1]https://dev.l1x.be/posts/2023/03/12/using-llama-with-m1-mac/
[1]https://til.simonwillison.net/llms/llama-7b-m2


