
热门标签
热门文章
- 1嘉立创提示外形不完整_嘉立创识别不出板子外形
- 2【Python】Pydantic:快速上手
- 3被迫停更的洛雪,满血复活啦_洛雪音乐复活
- 4VS2015断点调试方法_vs2015打断点
- 5AI编程-vscode安装“通义灵码”_vscode 安装通义灵码
- 6day29 贪心算法-gasStation+candy+lemonadeChange+queueReconstruction
- 73个月业余时间,实现转型AI大模型工程师和AI产品经理_转型大模型工程师
- 8Docker 基本操作 镜像操作 -- docker镜像命令_docker运行镜像命令
- 9【亲测】SpringCloud之Eureka注册中心
- 10MATLAB初始化智能算法编码-产生随机不重复整数序列矩阵_matlab矩阵不重复随机生成
当前位置: article > 正文
图像增强方法汇总OpenCV+python实现【第一部分:常用图像增强方法】_图像增强的方法有哪些
作者:weixin_40725706 | 2024-08-20 20:11:29
赞
踩
图像增强的方法有哪些
前言
图像增强是指通过各种技术手段改善图像的视觉效果,使其更适合特定的应用场景。以下是一些常见的图像增强方法。
注意:本文从广义的角度讲图像增强方法,这些图像增强方法不一定都适用于CV中AI模型训练前的图像处理
常用的图像增强方法
在CV模型的训练过程中,图像增强(Image Augmentation)是一个非常重要的技术,可以有效地增加训练数据的多样性,防止过拟合,并提高模型的泛化能力。以下是一些常用的图像增强方法,它们在训练CNN模型时非常有用:
1. 旋转(Rotation):
- 随机旋转图像一定角度。
# 图像路径,替换成你的图片路径
 image_path = '1.jpg'

 # 载入图像
 image = cv2.imread(image_path)

 # 获取图像尺寸
 (h, w) = image.shape[:2]

 # 设置旋转的中心为图像中心
 center = (w / 2, h / 2)

 # 生成一个-90到90之间的随机旋转角度
 angle = np.random.uniform(-90, 90)

 # 获取旋转矩阵,其中1.0表示图像旋转后不改变大小
 rotation_matrix = cv2.getRotationMatrix2D(center, angle, 1.0)

 # 执行旋转操作
 rotated_image = cv2.warpAffine(image, rotation_matrix, (w, h))

 # 显示原图和旋转后的图像
 cv2.imshow('Original Image', image)
 cv2.imshow('Rotated Image', rotated_image)

 # 按任意键退出
 cv2.waitKey(0)
 cv2.destroyAllWindows()

- 1
- 2
- 3
- 4
- 5
- 6
- 7
- 8
- 9
- 10
- 11
- 12
- 13
- 14
- 15
- 16
- 17
- 18
- 19
- 20
- 21
- 22
- 23
- 24
- 25
- 26
- 27
- 28
- 29
- 30
旋转效果如下:

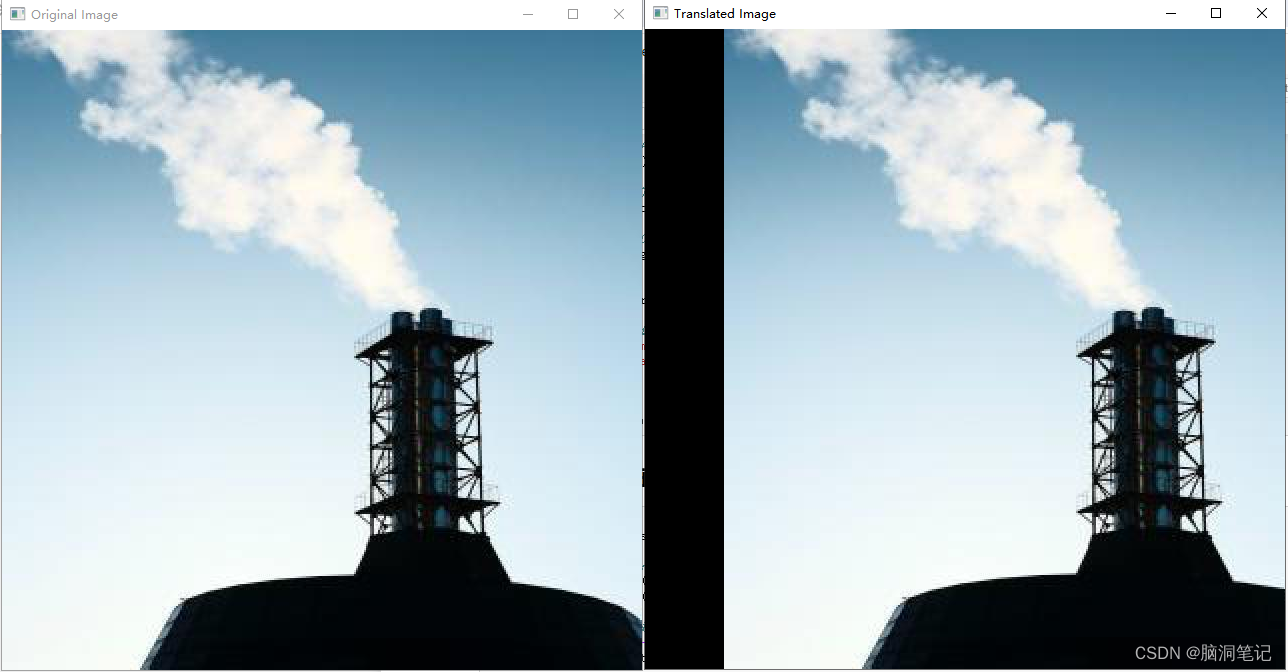
2. 平移(Translation):
- 随机平移图像在水平或垂直方向上的位置。
# 获取图像的高和宽
height, width = image.shape[:2]

# 随机生成平移量(注意:这里需要确保平移量不会使图像超出边界)
tx = np.random.randint(-100, 100)  # 水平方向上的平移量,单位:像素
ty = np.random.randint(-100, 100)  # 垂直方向上的平移量,单位:像素

# 确保平移后的图像不会超出原始图像的边界
tx = max(min(tx, width-1), 0)
ty = max(min(ty, height-1), 0)

# 创建仿射变换矩阵
translation_matrix = np.float32([[1, 0, tx], [0, 1, ty]])

# 应用仿射变换
translated_image = cv2.warpAffine(image, translation_matrix, (width, height))

# 显示或保存平移后的图像
cv2.imshow('Original Image', image)
cv2.imshow('Translated Image', translated_image)
cv2.waitKey(0)
cv2.destroyAllWindows()
- 1
- 2
- 3
- 4
- 5
- 6
- 7
- 8
- 9
- 10
- 11
- 12
- 13
- 14
- 15
- 16
- 17
- 18
- 19
- 20
- 21
- 22
- 23
- 24
平移效果如下:
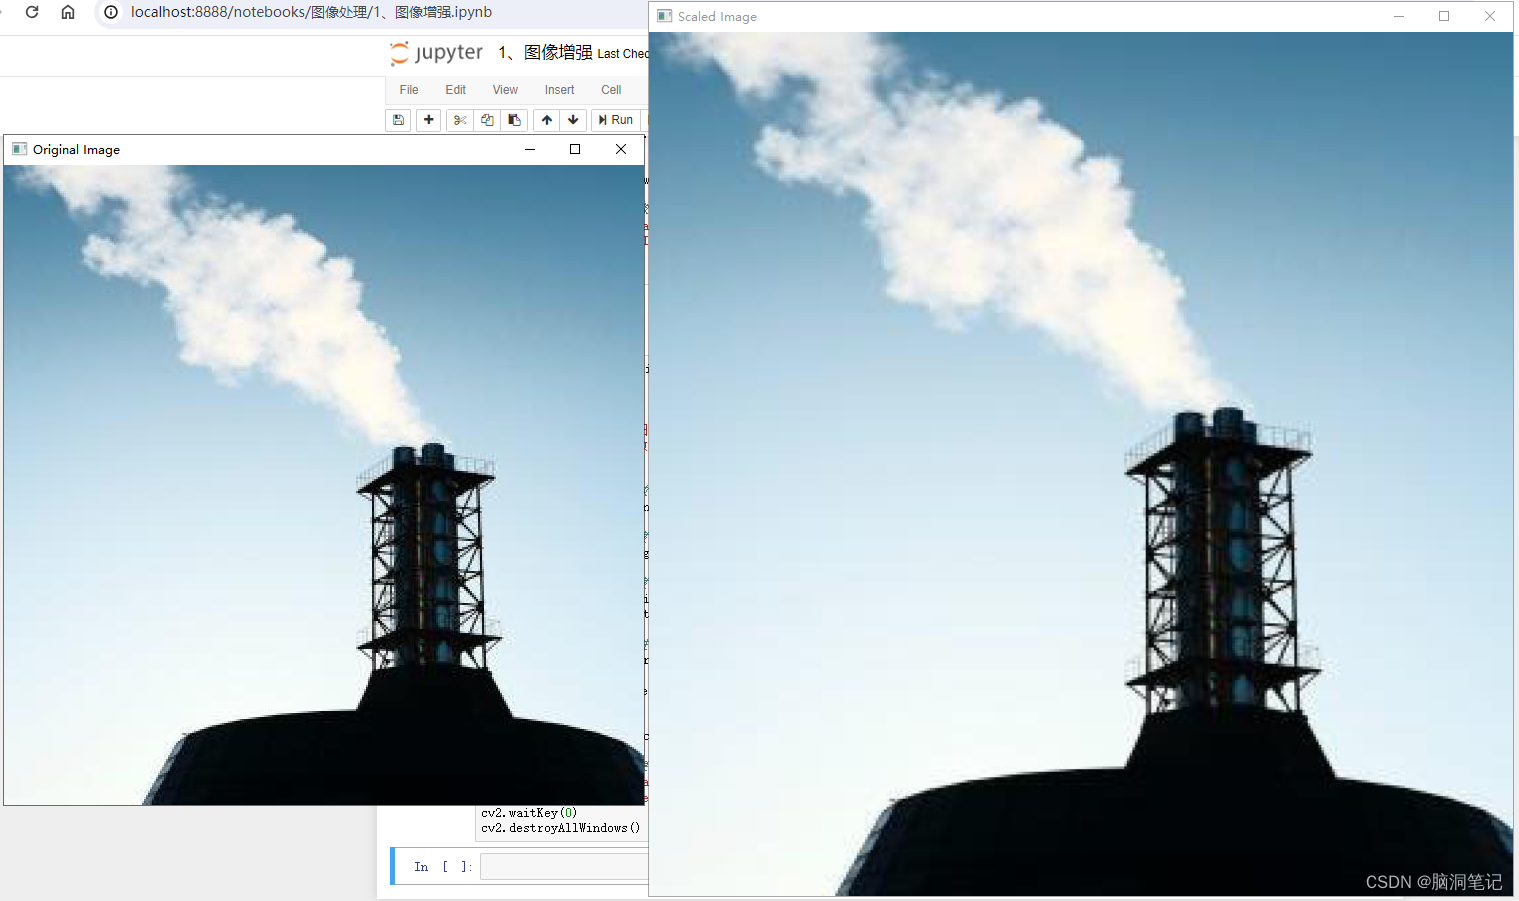
3. 缩放(Scaling):
- 随机缩放图像大小。
def random_scale_image(image, scale_range=(0.5, 1.5)):
 """
随机缩放图像的大小。

:param image: 要缩放的图像,应为numpy数组形式
:param scale_range: 缩放比例的范围,默认(0.5, 1.5),即缩放后的大小在原始大小的50%到150%之间
:return: 缩放后的图像
"""
 # 生成一个随机的缩放比例
 scale = np.random.uniform(scale_range[0], scale_range[1])

 # 获取原始图像的高度和宽度
 height, width = image.shape[:2]

 # 计算缩放后的新高度和宽度
 new_height = int(height * scale)
 new_width = int(width * scale)

 # 使用cv2.resize()进行缩放
 scaled_image = cv2.resize(image, (new_width, new_height), interpolation=cv2.INTER_LINEAR)

 return scaled_image

# 随机缩放图像
scaled_image = random_scale_image(image)

# 显示缩放后的图像(如果需要)
cv2.imshow('Original Image', image)
cv2.imshow('Scaled Image', scaled_image)
cv2.waitKey(0)
cv2.destroyAllWindows()
- 1
- 2
- 3
- 4
- 5
- 6
- 7
- 8
- 9
- 10
- 11
- 12
- 13
- 14
- 15
- 16
- 17
- 18
- 19
- 20
- 21
- 22
- 23
- 24
- 25
- 26
- 27
- 28
- 29
- 30
- 31
- 32
- 33
缩放效果:
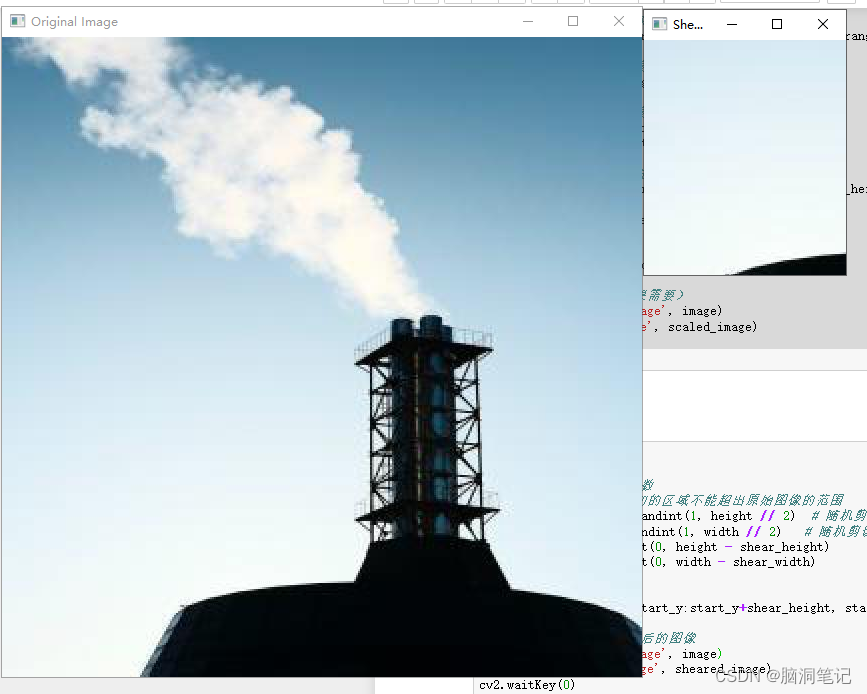
4. 剪切变换(Shear Transform):
- 随机剪切图像。
 import random

 # 步骤1:定义随机剪切参数
 # 注意:这里我们假设剪切的区域不能超出原始图像的范围
 shear_height = random.randint(1, height // 2)  # 随机剪切高度(这里设定为图像高度的一半以下)
 shear_width = random.randint(1, width // 2)   # 随机剪切宽度(这里设定为图像宽度的一半以下)
 start_y = random.randint(0, height - shear_height)
 start_x = random.randint(0, width - shear_width)

 # 步骤2:剪切图像
 sheared_image = image[start_y:start_y+shear_height, start_x:start_x+shear_width]

 # 步骤3:显示或保存剪切后的图像
 cv2.imshow('Original Image', image)
 cv2.imshow('Sheared Image', sheared_image)
 cv2.waitKey(0)
 cv2.destroyAllWindows()
- 1
- 2
- 3
- 4
- 5
- 6
- 7
- 8
- 9
- 10
- 11
- 12
- 13
- 14
- 15
- 16
- 17
- 18
- 19
- 20
效果
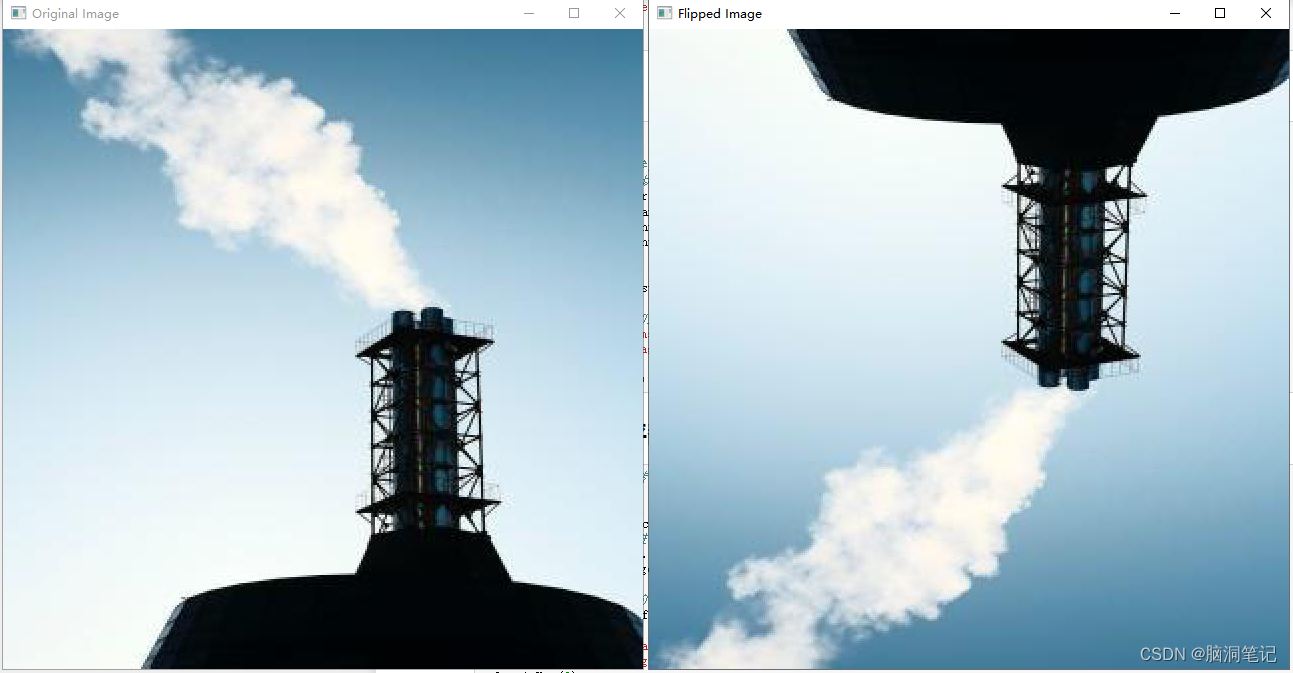
5. 翻转(Flipping):
- 随机水平或垂直翻转图像。
 # 定义一个函数来随机翻转图像
 def random_flip(image):
     # 随机选择翻转模式
     flip_code = random.choice([0, 1])  # 0为垂直翻转,1为水平翻转
     # 使用cv2.flip函数进行翻转
     flipped_image = cv2.flip(image, flip_code)
     return flipped_image

 # 调用函数并显示翻转后的图像
 flipped_image = random_flip(image)

 cv2.imshow('Original Image', image)
 cv2.imshow('Flipped Image', flipped_image)
 cv2.waitKey(0)
 cv2.destroyAllWindows()
- 1
- 2
- 3
- 4
- 5
- 6
- 7
- 8
- 9
- 10
- 11
- 12
- 13
- 14
- 15
- 16
- 17
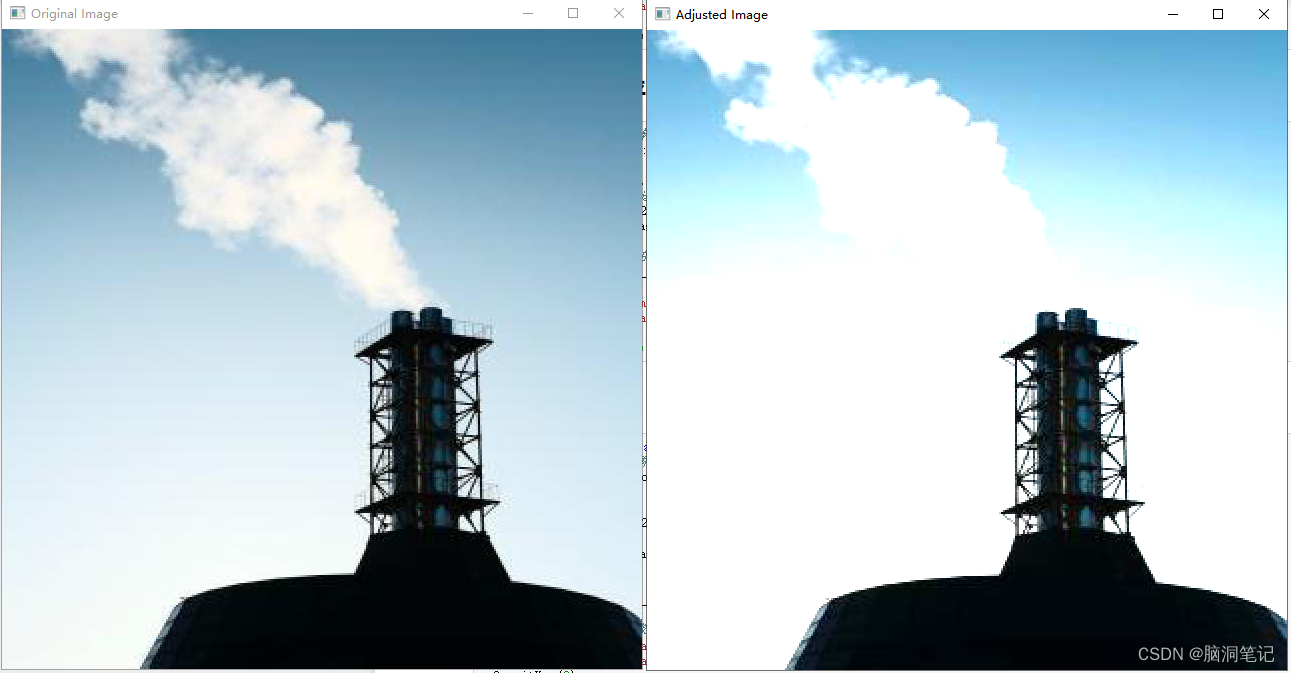
6. 亮度调整(Brightness Adjustment):
- 随机调整图像的亮度。
def adjust_brightness_randomly(image, alpha_range=(0.5, 1.5)):
 # 生成一个随机亮度调整因子
 alpha = random.uniform(alpha_range[0], alpha_range[1])

 # 亮度调整
 adjusted_image = cv2.convertScaleAbs(image, alpha=alpha, beta=0)

 return adjusted_image

# 随机调整亮度
adjusted_image = adjust_brightness_randomly(image)

# 显示或保存调整后的图像
cv2.imshow('Original Image', image)
cv2.imshow('Adjusted Image', adjusted_image)
cv2.waitKey(0)
cv2.destroyAllWindows()
- 1
- 2
- 3
- 4
- 5
- 6
- 7
- 8
- 9
- 10
- 11
- 12
- 13
- 14
- 15
- 16
- 17
- 18
- 19
- 20
- 21
效果
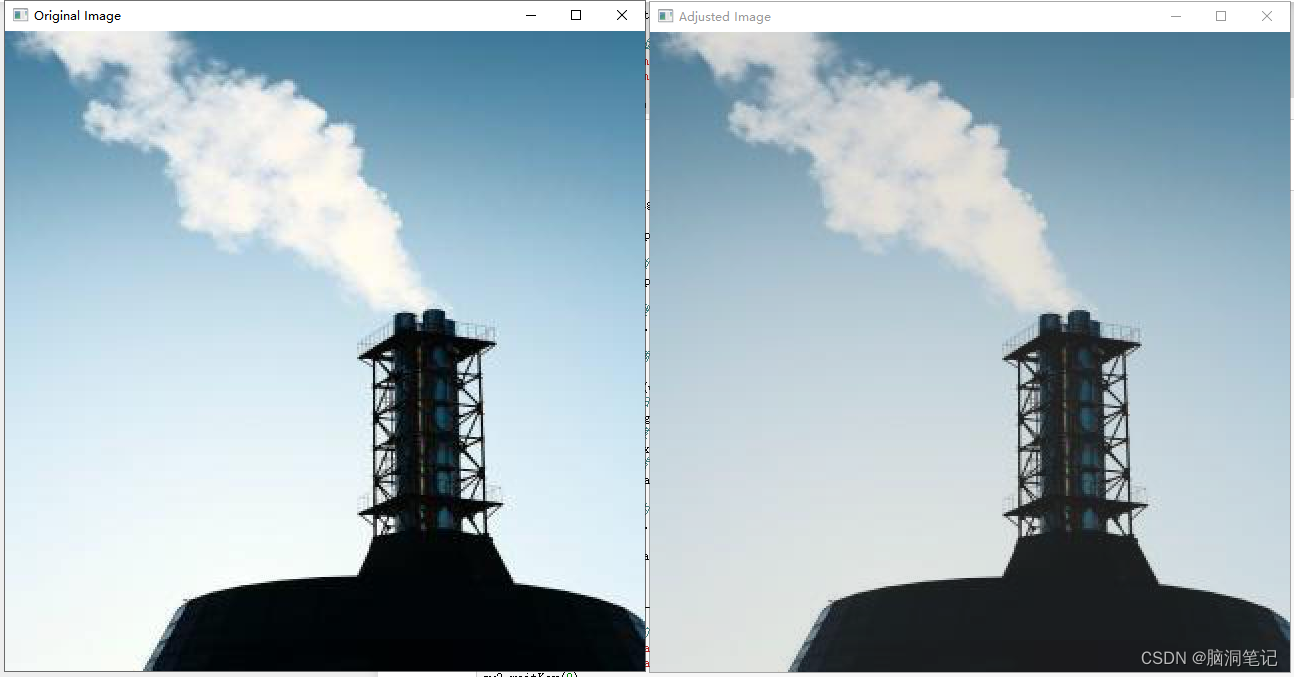
7. 对比度调整(Contrast Adjustment):
- 随机调整图像的对比度。
def random_contrast(image, contrast_range=[0.5, 1.5]):
 # 获取图像的维度
 h, w, _ = image.shape

 # 随机选择对比度系数
 contrast_factor = np.random.uniform(contrast_range[0], contrast_range[1])

 # 创建一个空的浮点型图像来存储调整后的图像
 adjusted_image = np.zeros((h, w, 3), dtype=np.float32)

 # 对图像进行对比度调整
 for i in range(h):
     for j in range(w):
         # 将像素值归一化到0-1之间
         pixel = image[i, j] / 255.0
         # 调整对比度
         adjusted_pixel = np.clip(contrast_factor * (pixel - 0.5) + 0.5, 0, 1)
         # 将像素值转换回0-255
         adjusted_image[i, j] = adjusted_pixel * 255

 # 将浮点数图像转换为无符号整数
 adjusted_image = np.uint8(adjusted_image)

 return adjusted_image

# 随机调整图像的对比度
adjusted_image = random_contrast(image)

# 显示原始图像和调整后的图像
cv2.imshow('Original Image', image)
cv2.imshow('Adjusted Image', adjusted_image)
cv2.waitKey(0)
cv2.destroyAllWindows()
- 1
- 2
- 3
- 4
- 5
- 6
- 7
- 8
- 9
- 10
- 11
- 12
- 13
- 14
- 15
- 16
- 17
- 18
- 19
- 20
- 21
- 22
- 23
- 24
- 25
- 26
- 27
- 28
- 29
- 30
- 31
- 32
- 33
- 34
- 35
- 36
- 37
效果如下
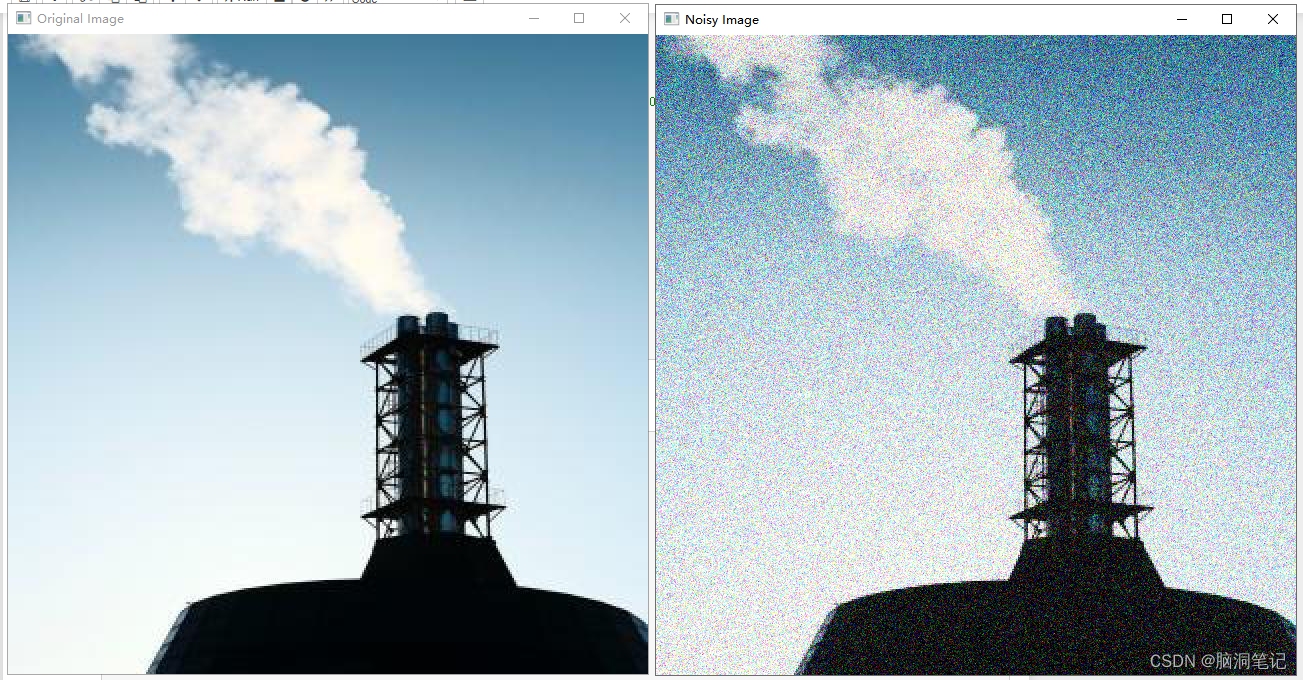
8. 添加噪声(Adding Noise):
- 随机向图像中添加噪声。
 # 将图像数据转换为浮点型以支持噪声添加
image_N = image.astype(np.float32)

# 定义高斯噪声的均值和标准差
mean = 0
stddev = 50.0  # 可以根据需要调整这个值来控制噪声的强度

# 生成高斯噪声
noise = np.random.normal(mean, stddev, image_N.shape)

# 将噪声添加到图像上
noisy_image = np.clip(image_N + noise, 0, 255).astype(np.uint8)

# 显示或保存带噪声的图像
cv2.imshow('Original Image', image)
cv2.imshow('Noisy Image', noisy_image)
cv2.waitKey(0)
cv2.destroyAllWindows()
- 1
- 2
- 3
- 4
- 5
- 6
- 7
- 8
- 9
- 10
- 11
- 12
- 13
- 14
- 15
- 16
- 17
- 18
效果
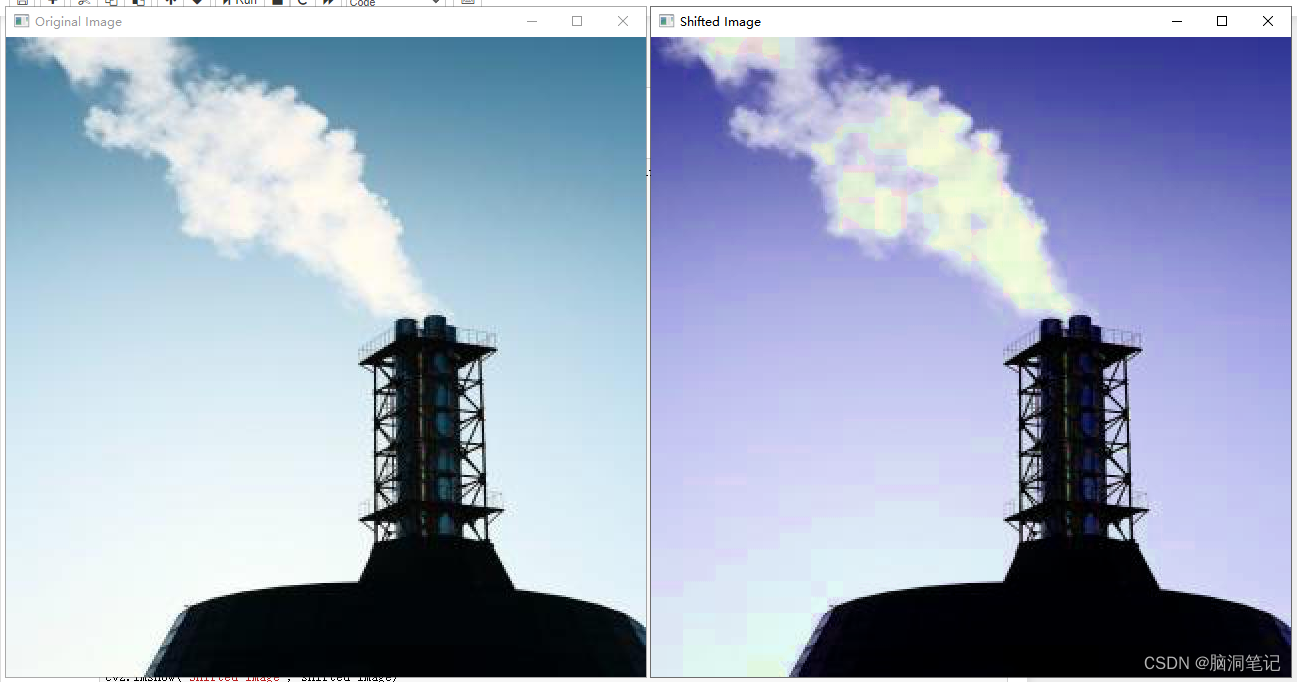
9. 颜色抖动(Color Jittering):
- 随机改变图像的颜色属性,如色调、饱和度和亮度。
 def random_color_shift(image, hue_shift_range=18, sat_shift_range=30, val_shift_range=40):
    # 将BGR图像转换为HSV图像
    hsv = cv2.cvtColor(image, cv2.COLOR_BGR2HSV)

    # 分解HSV图像的通道
    h, s, v = cv2.split(hsv)

    # 随机改变色调
    h = cv2.add(h, np.random.randint(-hue_shift_range, hue_shift_range+1))
    h = np.clip(h, 0, 179)  # 确保色调值在0-179之间

    # 随机改变饱和度
    s = cv2.add(s, np.random.randint(-sat_shift_range, sat_shift_range+1))
    s = np.clip(s, 0, 255)  # 确保饱和度值在0-255之间

    # 随机改变亮度
    v = cv2.add(v, np.random.randint(-val_shift_range, val_shift_range+1))
    v = np.clip(v, 0, 255)  # 确保亮度值在0-255之间

    # 合并HSV通道
    hsv_shifted = cv2.merge((h, s, v))

    # 将HSV图像转换回BGR图像
    image_shifted = cv2.cvtColor(hsv_shifted, cv2.COLOR_HSV2BGR)

    return image_shifted


# 随机改变颜色属性
shifted_image = random_color_shift(image)

# 显示或保存图像
cv2.imshow('Original Image', image)
cv2.imshow('Shifted Image', shifted_image)
cv2.waitKey(0)
cv2.destroyAllWindows()
- 1
- 2
- 3
- 4
- 5
- 6
- 7
- 8
- 9
- 10
- 11
- 12
- 13
- 14
- 15
- 16
- 17
- 18
- 19
- 20
- 21
- 22
- 23
- 24
- 25
- 26
- 27
- 28
- 29
- 30
- 31
- 32
- 33
- 34
- 35
- 36
效果
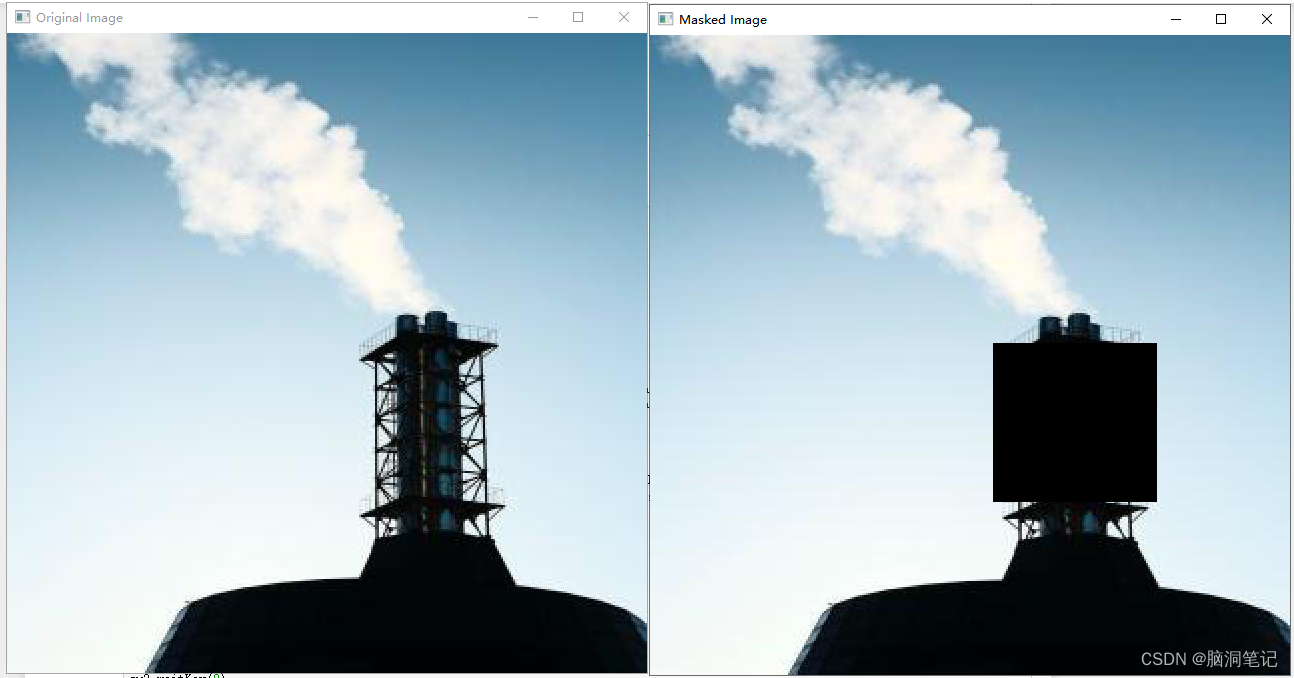
10. 随机擦除(Random Erasing)
- 随机遮挡图像的一部分,以增强模型的鲁棒性。
def random_mask_image(image, min_mask_area=0.05, max_mask_area=0.2):
    image_c = image.copy()
    height, width = image_c.shape[:2]

    # 确定要遮挡的面积(基于图像尺寸的百分比)
    min_mask_width_height = int(min(width, height) * np.sqrt(min_mask_area))
    max_mask_width_height = int(min(width, height) * np.sqrt(max_mask_area))

    # 随机选择遮挡区域的左上角坐标和大小
    start_x = random.randint(0, width - max_mask_width_height)
    start_y = random.randint(0, height - max_mask_width_height)
    mask_width = random.randint(min_mask_width_height, max_mask_width_height)
    mask_height = random.randint(min_mask_width_height, max_mask_width_height)

    # 在图像上绘制遮挡矩形
    image_c[start_y:start_y+mask_height, start_x:start_x+mask_width, :] = 0  # 使用黑色(RGB值为0,0,0)进行遮挡

    return image_c

# 使用示例
masked_image = random_mask_image(image)

cv2.imshow('Original Image', image)
cv2.imshow('Masked Image', masked_image)
cv2.waitKey(0)
cv2.destroyAllWindows()
- 1
- 2
- 3
- 4
- 5
- 6
- 7
- 8
- 9
- 10
- 11
- 12
- 13
- 14
- 15
- 16
- 17
- 18
- 19
- 20
- 21
- 22
- 23
- 24
- 25
- 26
效果
声明:本文内容由网友自发贡献,版权归原作者所有,本站不承担相应法律责任。如您发现有侵权的内容,请联系我们。转载请注明出处:【wpsshop博客】
推荐阅读

相关标签

