热门标签
热门文章
- 1IIS部署Web服务器,用公网IP访问_虚拟机公网ip代端口, 建了iis,外部怎样访问
- 2Maven(一) 依赖&继承&聚合_如何运用继承、聚合和依赖复用的方法进行程序设计?
- 3Cisco ❀ IPsec原理与加密算法_cisco实现3des加密算法
- 4超级充电测试负载的核心功能?
- 5cisco思科实现MPLS 虚拟专用网_思科mpls配置实例
- 6路侧智慧泊车解决方案_道路交通信号控制方式 ga/t 527
- 7vivado的license_vivado 2020.2 license
- 8windows 下 nat123免费版内网穿透使用教程_nat123使用教程
- 9课堂笔记02 - 2.0版
- 10telnet控制windows_windows telnet
当前位置: article > 正文
springboot利用maven打包成war,部署在tomcat教程_maven-war-plugin配置
作者:weixin_40725706 | 2024-02-26 21:00:54
赞
踩
maven-war-plugin配置
一、在pom.xml中做如下修改:
(一)、添加packaging
<packaging>war</packaging>(二)、添加相关插件依赖
- <build>
- <!--打包名字-->
- <finalName>kunyuan</finalName>
- <plugins>
- <plugin>
- <groupId>org.apache.maven.plugins</groupId>
- <artifactId>maven-compiler-plugin</artifactId>
- <configuration>
- <source>1.8</source>
- <target>1.8</target>
- </configuration>
- </plugin>
- <plugin>
- <groupId>org.apache.maven.plugins</groupId>
- <artifactId>maven-war-plugin</artifactId>
- <version>3.2.0</version>
- <!--打war包时WEB-INF/web.xml报错要在下面添加以下配置-->
- <configuration>
- <failOnMissingWebXml>false</failOnMissingWebXml>
- </configuration>
- </plugin>
- </plugins>
- </build>
(三)、添加启动依赖
- <!-- 这个依赖让你能够在程序入口类:xxxAppAplication中直接执行main方法启动tomcat -->
- <dependency>
- <groupId>org.springframework.boot</groupId>
- <artifactId>spring-boot-starter-tomcat</artifactId>
- <!-- 但是这里一定要设置为provided -->
- <scope>provided</scope>
- </dependency>
(四)、排除springboot自带的tomcat
- <dependency>
- <groupId>org.springframework.boot</groupId>
- <artifactId>spring-boot-starter-web</artifactId>
- <version>2.7.7</version>
- <scope>runtime</scope>
- <exclusions>
- <exclusion>
- <groupId>org.springframework.boot</groupId>
- <artifactId>spring-boot-starter-tomcat</artifactId>
- </exclusion>
- </exclusions>
- </dependency>
本人测试完整的pom.xml文件如下:
- <?xml version="1.0" encoding="UTF-8"?>
- <project xmlns="http://maven.apache.org/POM/4.0.0"
- xsi:schemaLocation="http://maven.apache.org/POM/4.0.0 http://maven.apache.org/xsd/maven-4.0.0.xsd"
- xmlns:xsi="http://www.w3.org/2001/XMLSchema-instance">
- <modelVersion>4.0.0</modelVersion>
- <groupId>com</groupId>
- <artifactId>kunyuan</artifactId>
- <version>1.0.0</version>
- <packaging>war</packaging>
-
- <dependencies>
- <dependency>
- <groupId>com.baomidou</groupId>
- <artifactId>mybatis-plus-boot-starter</artifactId>
- <version>3.5.3.2</version>
- <scope>runtime</scope>
- </dependency>
- <dependency>
- <groupId>com.baomidou</groupId>
- <artifactId>mybatis-plus-extension</artifactId>
- <version>3.5.3.2</version>
- <scope>compile</scope>
- </dependency>
- <dependency>
- <groupId>mysql</groupId>
- <artifactId>mysql-connector-java</artifactId>
- <scope>runtime</scope>
- <version>8.0.28</version>
- </dependency>
- <!-- Jackson -->
- <dependency>
- <groupId>com.fasterxml.jackson.core</groupId>
- <artifactId>jackson-databind</artifactId>
- </dependency>
- <dependency>
- <groupId>org.apache.httpcomponents</groupId>
- <artifactId>httpclient</artifactId>
- <version>4.5.13</version>
- <scope>runtime</scope>
- </dependency>
- <dependency>
- <groupId>joda-time</groupId>
- <artifactId>joda-time</artifactId>
- <version>2.9.1</version>
- <scope>runtime</scope>
- </dependency>
- <dependency>
- <groupId>org.springframework.boot</groupId>
- <artifactId>spring-boot-starter-aop</artifactId>
- <scope>runtime</scope>
- </dependency>
-
- <!-- 引入log4j日志依赖 -->
- <dependency>
- <groupId>org.springframework.boot</groupId>
- <artifactId>spring-boot-starter-log4j</artifactId>
- <version>1.3.8.RELEASE</version>
- <exclusions>
- <exclusion>
- <groupId>ch.qos.reload4j</groupId>
- <artifactId>reload4j</artifactId>
- </exclusion>
- <exclusion>
- <groupId>org.slf4j</groupId>
- <artifactId>slf4j-reload4j</artifactId>
- </exclusion>
- </exclusions>
- </dependency>
-
- <dependency>
- <groupId>org.springframework.boot</groupId>
- <artifactId>spring-boot-starter-web</artifactId>
- <version>2.7.7</version>
- <scope>runtime</scope>
- <exclusions>
- <exclusion>
- <groupId>org.springframework.boot</groupId>
- <artifactId>spring-boot-starter-tomcat</artifactId>
- </exclusion>
- </exclusions>
- </dependency>
- <dependency>
- <groupId>org.springframework.boot</groupId>
- <artifactId>spring-boot-autoconfigure</artifactId>
- <version>2.7.7</version>
- </dependency>
- <dependency>
- <groupId>org.springframework</groupId>
- <artifactId>spring-web</artifactId>
- <version>5.3.24</version>
- </dependency>
- <dependency>
- <groupId>com.alibaba</groupId>
- <artifactId>fastjson</artifactId>
- <version>1.2.83_noneautotype</version>
- </dependency>
- <!-- 这个依赖让你能够在程序入口类:xxxAppAplication中直接执行main方法启动tomcat -->
- <dependency>
- <groupId>org.springframework.boot</groupId>
- <artifactId>spring-boot-starter-tomcat</artifactId>
- <!-- 但是这里一定要设置为provided -->
- <scope>provided</scope>
- </dependency>
-
- <!-- Spring Web -->
- <dependency>
- <groupId>org.springframework</groupId>
- <artifactId>spring-webmvc</artifactId>
- </dependency>
- </dependencies>
- <build>
- <!--打包名字-->
- <finalName>kunyuan</finalName>
- <plugins>
- <plugin>
- <groupId>org.apache.maven.plugins</groupId>
- <artifactId>maven-compiler-plugin</artifactId>
- <configuration>
- <source>1.8</source>
- <target>1.8</target>
- </configuration>
- </plugin>
- <plugin>
- <groupId>org.apache.maven.plugins</groupId>
- <artifactId>maven-war-plugin</artifactId>
- <version>3.2.0</version>
- <!--打war包时WEB-INF/web.xml报错要在下面添加以下配置-->
- <configuration>
- <failOnMissingWebXml>false</failOnMissingWebXml>
- </configuration>
- </plugin>
- </plugins>
- </build>
- <dependencyManagement>
- <dependencies>
- <dependency>
- <groupId>org.springframework.cloud</groupId>
- <artifactId>spring-cloud-dependencies</artifactId>
- <version>Hoxton.SR3</version>
- <scope>import</scope>
- <type>pom</type>
- </dependency>
- <dependency>
- <groupId>org.springframework.boot</groupId>
- <artifactId>spring-boot-dependencies</artifactId>
- <version>2.7.7</version>
- <scope>import</scope>
- <type>pom</type>
- </dependency>
- </dependencies>
- </dependencyManagement>
- </project>
二、启动类修改如下:
- import org.springframework.boot.SpringApplication;
- import org.springframework.boot.autoconfigure.SpringBootApplication;
- import org.springframework.boot.autoconfigure.security.servlet.SecurityAutoConfiguration;
- import org.springframework.boot.builder.SpringApplicationBuilder;
- import org.springframework.boot.web.servlet.support.SpringBootServletInitializer;
-
- @SpringBootApplication(exclude= {SecurityAutoConfiguration.class})
- // tomcat部署需要继承SpringBootServletInitializer
- public class KunyuanApplication extends SpringBootServletInitializer {
-
- public static void main(String[] args) {
- SpringApplication.run(KunyuanApplication.class, args);
- System.out.println("系统启动成功!");
- }
-
- // tomcat部署重写该方法
- @Override
- protected SpringApplicationBuilder configure(SpringApplicationBuilder builder) {
- return builder.sources(KunyuanApplication.class);
- }
-
- }
做好以上步骤之后呢就可以在idea中按如下步骤打包成war包啦:

然后就会在我们的项目目录下生成一个target文件夹,里面就包含maven打出来的war包。
三、tomcat部署
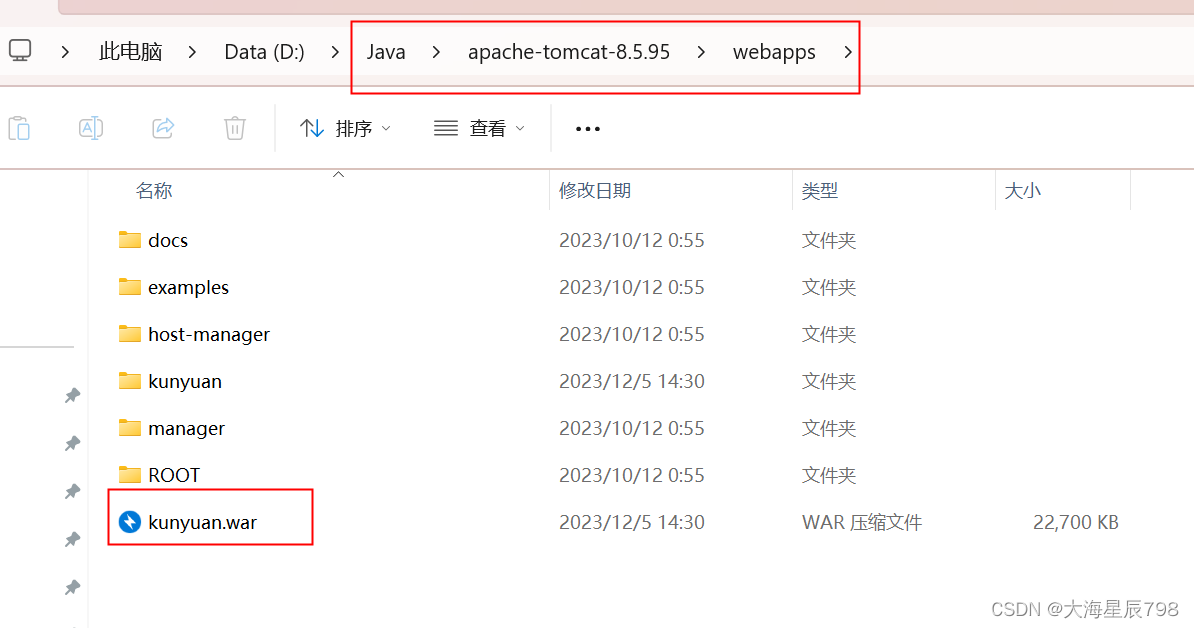
(一)、本地搭建号tomcat环境后,把我们的war包丢进webapps下:

(二)、在tomcat的bin下点击startup.bat就可以启动我们的war包啦

(三)、启动成功后,我们就可以测试我们的接口是否能访问,这时候要注意当我们没对tomcat做什么特殊配置的时候,访问接口时需要带上我们war包名才可以访问。
127.0.0.1:8080/war包名/接口名推荐阅读
相关标签


