
- 1完全背包问题-动态规划_动态规划 全背包问题。有n种重量和价值分别为wi、vi(1≤i≤n)的物品,
- 2Parallels Desktop 19 for Mac 发布, 简化 macOS 和 Windows 交互_parallels desktop 19 百度云
- 3时序数据处理模型:RNN与LSTM总结_处理时序 信息的网络模型
- 4顺序表的操作例题——已知一个顺序表L, 其中的元素递增有序排列,设计一个算法,插入一个元素x (x为int 后保持该顺序表仍然递增有序排列(假设插入操作总能成功)。_设计一个算法,判断顺序表l中所有元素是否是递增有序的。
- 5结构体链表 (创建)_结构体链表的创建
- 6【人工智能 | 知识表示方法】状态空间法 & 语义网络,良好的知识表示是解题的关键!(笔记总结系列)_状态空间法总结
- 7阿里P7架构师开源分享2023最新897道java面试题答案
- 8el-tree饿了么elementUI tree树结构插件设置全部展开折叠_饿了么ui树形组件
- 9时间频度,时间复杂度的计算
- 10ffmpeg和ImageMagick使用_failedtoexecutecommand `"gswin64c.exe
零基础实现大模型部署(window平台)_windows部署大模型
赞
踩
这是一个超详细安装教程,介绍了在 Window 电脑上如何部署 Qwen1.5 大模型。本文还涉及到 Python 及其环境的配置。
适合对象:有点后端编程基础,没有 Python 基础。
需要环境:Window10/11,支持 Cuda 的 Nvidia 显卡。
GPU升级到合适的驱动
- 先到Nvidia官网下载合适的驱动,例如我家里的电脑是GTX1060版本,选择如下:

- 点击搜索后会给出一些驱动选择,我选择了一个 537 的版本,配合我后续会提到的 cuda 12.2。

安装 Anaconda
搞机器学习的,Anaconda一般绕不开。
Anaconda 是一个用于科学计算的 Python 发行版,支持 Linux, Mac, Windows, 包含了众多流行的科学计算、数据分析的 Python 包。Conda是一个开源的包、环境管理器,可以用于在同一个机器上安装不同版本的软件包及其依赖,并能够在不同的环境之间切换。
因为我之前是学前端的,我给前端同学类比一下,每个环境就像 npm + package.json 组成的一个项目,还有可以指定该环境的 python 版本。这点在nodejs上只能通过 nvm 切换。
删除原有 Python
既然每个环境可以指定相应的 python 版本了,那我们就不用安装全局的 Python,先删除一下。
- 通过 控制面板 -> 卸载,找到 Python 卸载。
- 通过左下角搜索框搜 “环境变量” -> 编辑系统环境变量 -> 右下角 环境变量 -> 系统变量 -> Path


找到原来的 Python 安装的地址的两条记录,删掉。在退出时,记得点确定。

下载Anaconda3
首先来到Anaconda官网下载,算了,不推荐,下载起来有点麻烦。
我们来到清华的镜像站,点击安装包下载链接。这里有个注意点,记得点一下按时间倒排,才能看到最新的版本,选择符合我们的 Window 64位版本下载。

安装Anaconda3
安装过程有很多点击下一步,在这里省略。在这里针对C盘比较小的情况,选择安装盘的时候,需要选择 All Users 和改到其它盘。


配置环境变量
我们继续回到刚才删掉 Python 环境变量的 Path 上,把Anaconda3的安装地址加进去。

检查安装成功与否
配置完环境变量,重启一下电脑。这是环境变量生效最不烧脑的做法。
按 Win + R,输入 cmd 确定进入命令行提示框,输入:
conda --version
- 1
- 2

此时能看到 conda 的版本号。
接入我们输入 python 进入python交互环境:

同样的,我们也能看到 Python 的版本号。
在这里我们可以通过 Ctrl+Z 再加 Enter 或者输入 exit() 来退出环境。
更换conda源
官方的源在国外,下载缓慢且不稳定。我们这里更换成国内的镜像。
- 首先通过系统左下角搜索“Anaconda”,选择“Anaconda Powershell Prompt”点击进去。

执行以下命令生成 .condarc 文件:
conda config --set show_channel_urls yes
- 1
- 2
- 后在用户目录下找到
.condarc文件打开:

修改为以下内容:
channels:
  - defaults
show_channel_urls: true
default_channels:
  - https://mirrors.tuna.tsinghua.edu.cn/anaconda/pkgs/main
  - https://mirrors.tuna.tsinghua.edu.cn/anaconda/pkgs/r
  - https://mirrors.tuna.tsinghua.edu.cn/anaconda/pkgs/msys2
custom_channels:
  conda-forge: https://mirrors.tuna.tsinghua.edu.cn/anaconda/cloud
  msys2: https://mirrors.tuna.tsinghua.edu.cn/anaconda/cloud
  bioconda: https://mirrors.tuna.tsinghua.edu.cn/anaconda/cloud
  menpo: https://mirrors.tuna.tsinghua.edu.cn/anaconda/cloud
  pytorch: https://mirrors.tuna.tsinghua.edu.cn/anaconda/cloud
  pytorch-lts: https://mirrors.tuna.tsinghua.edu.cn/anaconda/cloud
  simpleitk: https://mirrors.tuna.tsinghua.edu.cn/anaconda/cloud
  deepmodeling: https://mirrors.tuna.tsinghua.edu.cn/anaconda/cloud/

- 1
- 2
- 3
- 4
- 5
- 6
- 7
- 8
- 9
- 10
- 11
- 12
- 13
- 14
- 15
- 16
- 17
- 运行
conda clean -i清除索引缓存,保证用的是镜像站提供的索引。
注1:清华 Anaconda 镜像使用帮助,点击过去把地址收藏一下,后续有更新以他为准。
注2:后续如果想切换回官方源,.condarc 文件里面的内容清掉即可。
创建虚拟环境
- 通过以下命令来创建虚拟环境:
> conda create --name <name> python=<version>
- 1
- 2

在这里我们创建的虚拟环境名称为 llm,选择 Python 的版本选择为 3.11.5。
- 查看环境是否创建成功
通过命令:
conda info --envs
- 1
- 2

可以看到,我们创建的 llm 已经在里面了。
- 接下来我们切换到创建的环境中
conda activate <name>
- 1
- 2

部署大模型
下载大模型
以我们要部署的 Qwen1.5-0.5B-Chat 为例,通过 Modelscope社区 ,提供的下载方式,我们选择Git方式下载。
git clone https://www.modelscope.cn/qwen/Qwen1.5-0.5B-Chat.git
- 1
- 2
我把大模型下载到 D:\大模型\Qwen1.5-0.5B-Chat 目录下。
安装依赖
在这之前,我们先查一下我们的cuda版本。前面已经装好了相应的NVIDIA驱动,我们通过桌面右键,选择“NVIDIA控制面板”->左下角“系统信息”->切换为“组件”Tab:


可以看到我的cuda版本为12.2。
安装PyTorch
通过 PyTorch官网 找到相应的安装脚本。
这里选择 PyTorch 2.1.0 版本,之所以不选择更加新的版本,是因为会遇到其它问题。而cuda则选择12.1版本的,跟我电脑的12.2比较接近。
conda install pytorch==2.1.0 torchvision==0.16.0 torchaudio==2.1.0 pytorch-cuda=12.1 -c pytorch -c nvidia
- 1
- 2
安装transformers
这里提供一下 Qwen官方文档,我们需要安装transformers库:
conda install conda-forge::transformers
- 1
- 2
配置VSCode
在写代码前,先配置一下写代码工具,那是必须的。这里以 VSCode 为例。
- 下载安装
通过 官网地址 进行下载安装。
- 安装拓展

同时推荐安装 autoDocstring - Python Docstring Generator、autopep8。这样 VSCode 在编写 Python 代码时,可以提高代码质量和编写效率:
- autoDocstring 快速生成代码的注释,提高代码可读性与可维护性。
- autopep8,代码格式化工具。
- 引入 conda 环境
首先打开引入我们的大模型目录(D:\大模型)

接着按住 Ctrl + Shift + P 打开命令面板,搜索“python 选择解析器”,选择上我们刚刚新建的 llm 环境。这样在VSCode中,我们就按照那个环境来跑我们的代码了。

尝试跑demo
- 根据官方的指导,首先在大模型同级目录下(D:\大模型),新建一个
qwen.py文件,写入:
from transformers import AutoModelForCausalLM, AutoTokenizer
device = "cuda" # the device to load the model onto

# Now you do not need to add "trust_remote_code=True"
model = AutoModelForCausalLM.from_pretrained(
    "Qwen1.5-0.5B-Chat",  # 修改大模型位置
    torch_dtype="auto",
    device_map="auto"
)
tokenizer = AutoTokenizer.from_pretrained("Qwen1.5-0.5B-Chat") # 修改大模型位置

# Instead of using model.chat(), we directly use model.generate()
# But you need to use tokenizer.apply_chat_template() to format your inputs as shown below
# 改成中文提问
prompt = "给我简单介绍一下大型语言模型。"
messages = [
    {"role": "system", "content": "You are a helpful assistant."},
    {"role": "user", "content": prompt}
]
text = tokenizer.apply_chat_template(
    messages,
    tokenize=False,
    add_generation_prompt=True
)
model_inputs = tokenizer([text], return_tensors="pt").to(device)

# Directly use generate() and tokenizer.decode() to get the output.
# Use `max_new_tokens` to control the maximum output length.
generated_ids = model.generate(
    model_inputs.input_ids,
    max_new_tokens=512
)
generated_ids = [
    output_ids[len(input_ids):] for input_ids, output_ids in zip(model_inputs.input_ids, generated_ids)
]

response = tokenizer.batch_decode(generated_ids, skip_special_tokens=True)[0]

# 打印一下助手回复的内容
print(response)
- 1
- 2
- 3
- 4
- 5
- 6
- 7
- 8
- 9
- 10
- 11
- 12
- 13
- 14
- 15
- 16
- 17
- 18
- 19
- 20
- 21
- 22
- 23
- 24
- 25
- 26
- 27
- 28
- 29
- 30
- 31
- 32
- 33
- 34
- 35
- 36
- 37
- 38
- 39
- 40
- 41
注:这里要修改对大模型的引入路径。
- 执行py文件:
python qwen.py
- 1
- 2

发现还是缺了一个依赖,安装:
conda install conda-forge::accelerate
- 1
- 2
再重新执行,这时候就可以看到模型的回复了。

如果想在VSCode中运行,则需要选择在“在专用终端中运行 Python 文件”。

运行效果如下:

如果想要流式的,可以改为以下代码:
from transformers import AutoModelForCausalLM, AutoTokenizer, TextIteratorStreamer
from threading import Thread

device = "cuda"  # the device to load the model onto

# Now you do not need to add "trust_remote_code=True"
model = AutoModelForCausalLM.from_pretrained(
    "Qwen1.5-0.5B-Chat",
    torch_dtype="auto",
    device_map="auto"
)
tokenizer = AutoTokenizer.from_pretrained("Qwen1.5-0.5B-Chat")

# Instead of using model.chat(), we directly use model.generate()
# But you need to use tokenizer.apply_chat_template() to format your inputs as shown below
# 改成中文提问
prompt = "给我简单介绍一下大型语言模型。"
messages = [
    {"role": "system", "content": "You are a helpful assistant."},
    {"role": "user", "content": prompt}
]
text = tokenizer.apply_chat_template(
    messages,
    tokenize=False,
    add_generation_prompt=True
)
model_inputs = tokenizer([text], return_tensors="pt").to(device)

# Directly use generate() and tokenizer.decode() to get the output.
# Use `max_new_tokens` to control the maximum output length.
streamer = TextIteratorStreamer(
    tokenizer, skip_prompt=True, skip_special_tokens=True)
generation_kwargs = dict(model_inputs, streamer=streamer, max_new_tokens=512)
thread = Thread(target=model.generate, kwargs=generation_kwargs)

thread.start()
generated_text = ""
for new_text in streamer:
    generated_text += new_text
    print(generated_text)
- 1
- 2
- 3
- 4
- 5
- 6
- 7
- 8
- 9
- 10
- 11
- 12
- 13
- 14
- 15
- 16
- 17
- 18
- 19
- 20
- 21
- 22
- 23
- 24
- 25
- 26
- 27
- 28
- 29
- 30
- 31
- 32
- 33
- 34
- 35
- 36
- 37
- 38
- 39
- 40
- 41
- 42
部署为API
这时候我们借助一个 FastAPI 和 Uvicorn 来实现 API 接口的支持。
- FastAPI: 是一个用于构建 API 的现代、快速(高性能)的 web 框架,使用 Python 并基于标准的 Python 类型提示。
- Uvicorn: 是一个快速的 ASGI(Asynchronous Server Gateway Interface)服务器,用于构建异步 Web 服务。
我是参考这篇文章学习的:Python框架篇(1):FastApi-快速入门
快速启动
- 首先我们安装这两个库:
conda install fastapi uvicorn
- 1
- 2
- 新建
web.py,写入代码:
import uvicorn
from fastapi import FastAPI
from fastapi.middleware.cors import CORSMiddleware
from argparse import ArgumentParser

app = FastAPI()

# 支持CORS
app.add_middleware(
    CORSMiddleware,
    allow_origins=['*'],
    allow_credentials=True,
    allow_methods=['*'],
    allow_headers=['*'],
)

@app.get("/")
async def index():

    return {"message": "Hello World"}

def _get_args():
    parser = ArgumentParser()

    parser.add_argument('--server-port',
                        type=int,
                        default=8000,
                        help='Demo server port.')
    parser.add_argument('--server-name',
                        type=str,
                        default='127.0.0.1',
                        help='Demo server name. Default: 127.0.0.1, which is only visible from the local computer.'
                        ' If you want other computers to access your server, use 0.0.0.0 instead.',
                        )

    args = parser.parse_args()
    return args

if __name__ == '__main__':
    args = _get_args()

    uvicorn.run(app, host=args.server_name, port=args.server_port, workers=1)
- 1
- 2
- 3
- 4
- 5
- 6
- 7
- 8
- 9
- 10
- 11
- 12
- 13
- 14
- 15
- 16
- 17
- 18
- 19
- 20
- 21
- 22
- 23
- 24
- 25
- 26
- 27
- 28
- 29
- 30
- 31
- 32
- 33
- 34
- 35
- 36
- 37
- 38
- 39
- 40
- 41
- 42
- 43
- 运行
web.py
python web.py
- 1
- 2

这时候请求接口,就可以看到返回 hello world :

接入大模型测试
上面已经启动API服务了,我们把前面 Qwen 的代码写进去:
from contextlib import asynccontextmanager
import torch
import uvicorn
import time
from transformers import AutoModelForCausalLM, AutoTokenizer
from fastapi import FastAPI, HTTPException
from fastapi.middleware.cors import CORSMiddleware
from argparse import ArgumentParser
from typing import List, Literal, Optional, Union
from pydantic import BaseModel, Field

@asynccontextmanager
async def lifespan(app: FastAPI):  # collects GPU memory
    yield
    if torch.cuda.is_available():
        torch.cuda.empty_cache()
        torch.cuda.ipc_collect()

app = FastAPI(lifespan=lifespan)

# 支持CORS
app.add_middleware(
    CORSMiddleware,
    allow_origins=['*'],
    allow_credentials=True,
    allow_methods=['*'],
    allow_headers=['*'],
)

class ChatMessage(BaseModel):
    role: Literal['user', 'assistant', 'system']
    content: Optional[str]

class DeltaMessage(BaseModel):
    role: Optional[Literal['user', 'assistant', 'system']] = None
    content: Optional[str] = None

class ChatCompletionRequest(BaseModel):
    model: str
    messages: List[ChatMessage]
    stream: Optional[bool] = False

class ChatCompletionResponseChoice(BaseModel):
    index: int
    message: ChatMessage
    finish_reason: Literal['stop', 'length']

class ChatCompletionResponseStreamChoice(BaseModel):
    index: int
    delta: DeltaMessage
    finish_reason: Optional[Literal['stop', 'length']]

class ChatCompletionResponse(BaseModel):
    model: str
    object: Literal['chat.completion', 'chat.completion.chunk']
    choices: List[Union[ChatCompletionResponseChoice,
                        ChatCompletionResponseStreamChoice]]
    created: Optional[int] = Field(default_factory=lambda: int(time.time()))

@app.get("/")
async def index():

    return {"message": "Hello World"}

@app.post("/v1/chat/completions", response_model=ChatCompletionResponse)
async def create_chat_completion(request: ChatCompletionRequest):
    global model, tokenizer

    # 简单的错误校验
    if request.messages[-1].role != "user":
        raise HTTPException(status_code=400, detail="Invalid request")

    text = tokenizer.apply_chat_template(
        request.messages,
        tokenize=False,
        add_generation_prompt=True
    )
    model_inputs = tokenizer([text], return_tensors="pt").to(model.device)

    # Directly use generate() and tokenizer.decode() to get the output.
    # Use `max_new_tokens` to control the maximum output length.
    generated_ids = model.generate(
        model_inputs.input_ids,
        max_new_tokens=512
    )
    generated_ids = [
        output_ids[len(input_ids):] for input_ids, output_ids in zip(model_inputs.input_ids, generated_ids)
    ]

    response = tokenizer.batch_decode(
        generated_ids, skip_special_tokens=True)[0]

    choice_data = ChatCompletionResponseChoice(
        index=0,
        message=ChatMessage(role="assistant", content=response),
        finish_reason="stop"
    )

    return ChatCompletionResponse(model=request.model, choices=[choice_data], object="chat.completion")

def _get_args():
    parser = ArgumentParser()

    parser.add_argument(
        '-c',
        '--checkpoint-path',
        type=str,
        default='Qwen1.5-0.5B-Chat',
        help='Checkpoint name or path, default to %(default)r',
    )

    parser.add_argument('--server-port',
                        type=int,
                        default=8000,
                        help='Demo server port.')
    parser.add_argument('--server-name',
                        type=str,
                        default='127.0.0.1',
                        help='Demo server name. Default: 127.0.0.1, which is only visible from the local computer.'
                        ' If you want other computers to access your server, use 0.0.0.0 instead.',
                        )

    args = parser.parse_args()
    return args

if __name__ == '__main__':
    args = _get_args()

    # Now you do not need to add "trust_remote_code=True"
    model = AutoModelForCausalLM.from_pretrained(
        args.checkpoint_path,
        torch_dtype="auto",
        device_map="auto"
    )
    tokenizer = AutoTokenizer.from_pretrained(args.checkpoint_path)

    uvicorn.run(app, host=args.server_name, port=args.server_port, workers=1)
- 1
- 2
- 3
- 4
- 5
- 6
- 7
- 8
- 9
- 10
- 11
- 12
- 13
- 14
- 15
- 16
- 17
- 18
- 19
- 20
- 21
- 22
- 23
- 24
- 25
- 26
- 27
- 28
- 29
- 30
- 31
- 32
- 33
- 34
- 35
- 36
- 37
- 38
- 39
- 40
- 41
- 42
- 43
- 44
- 45
- 46
- 47
- 48
- 49
- 50
- 51
- 52
- 53
- 54
- 55
- 56
- 57
- 58
- 59
- 60
- 61
- 62
- 63
- 64
- 65
- 66
- 67
- 68
- 69
- 70
- 71
- 72
- 73
- 74
- 75
- 76
- 77
- 78
- 79
- 80
- 81
- 82
- 83
- 84
- 85
- 86
- 87
- 88
- 89
- 90
- 91
- 92
- 93
- 94
- 95
- 96
- 97
- 98
- 99
- 100
- 101
- 102
- 103
- 104
- 105
- 106
- 107
- 108
- 109
- 110
- 111
- 112
- 113
- 114
- 115
- 116
- 117
- 118
- 119
- 120
- 121
- 122
- 123
- 124
- 125
- 126
- 127
- 128
- 129
- 130
- 131
- 132
- 133
- 134
- 135
- 136
- 137
- 138
- 139
调用下接口:

可以看到接口已经返回内容了。
增加流式支持
这里需要安装 sse_starlette 的库,来支持流式的返回:
pip install sse_starlette
- 1
- 2
安装完把代码再改一下,通过参数 stream 来判断是否流式返回:
from contextlib import asynccontextmanager
from threading import Thread
import torch
import uvicorn
import time
from transformers import AutoModelForCausalLM, AutoTokenizer, TextIteratorStreamer, BatchEncoding
from fastapi import FastAPI, HTTPException
from fastapi.middleware.cors import CORSMiddleware
from argparse import ArgumentParser
from typing import List, Literal, Optional, Union
from pydantic import BaseModel, Field
from sse_starlette.sse import EventSourceResponse

@asynccontextmanager
async def lifespan(app: FastAPI):  # collects GPU memory
    yield
    if torch.cuda.is_available():
        torch.cuda.empty_cache()
        torch.cuda.ipc_collect()

app = FastAPI(lifespan=lifespan)

# 支持CORS
app.add_middleware(
    CORSMiddleware,
    allow_origins=['*'],
    allow_credentials=True,
    allow_methods=['*'],
    allow_headers=['*'],
)

class ChatMessage(BaseModel):
    role: Literal['user', 'assistant', 'system']
    content: Optional[str]

class DeltaMessage(BaseModel):
    role: Optional[Literal['user', 'assistant', 'system']] = None
    content: Optional[str] = None

class ChatCompletionRequest(BaseModel):
    model: str
    messages: List[ChatMessage]
    stream: Optional[bool] = False

class ChatCompletionResponseChoice(BaseModel):
    index: int
    message: ChatMessage
    finish_reason: Literal['stop', 'length']

class ChatCompletionResponseStreamChoice(BaseModel):
    index: int
    delta: DeltaMessage
    finish_reason: Optional[Literal['stop', 'length']]

class ChatCompletionResponse(BaseModel):
    model: str
    object: Literal['chat.completion', 'chat.completion.chunk']
    choices: List[Union[ChatCompletionResponseChoice,
                        ChatCompletionResponseStreamChoice]]
    created: Optional[int] = Field(default_factory=lambda: int(time.time()))

@app.get("/")
async def index():

    return {"message": "Hello World"}

@app.post("/v1/chat/completions", response_model=ChatCompletionResponse)
async def create_chat_completion(request: ChatCompletionRequest):
    global model, tokenizer

    # 简单的错误校验
    if request.messages[-1].role != "user":
        raise HTTPException(status_code=400, detail="Invalid request")

    text = tokenizer.apply_chat_template(
        request.messages,
        tokenize=False,
        add_generation_prompt=True
    )
    model_inputs = tokenizer([text], return_tensors="pt").to(model.device)

    if request.stream:
        generate = predict(model_inputs, request.model)
        return EventSourceResponse(generate, media_type="text/event-stream")

    # Directly use generate() and tokenizer.decode() to get the output.
    # Use `max_new_tokens` to control the maximum output length.
    generated_ids = model.generate(
        model_inputs.input_ids,
        max_new_tokens=512
    )
    generated_ids = [
        output_ids[len(input_ids):] for input_ids, output_ids in zip(model_inputs.input_ids, generated_ids)
    ]

    response = tokenizer.batch_decode(
        generated_ids, skip_special_tokens=True)[0]

    choice_data = ChatCompletionResponseChoice(
        index=0,
        message=ChatMessage(role="assistant", content=response),
        finish_reason="stop"
    )

    return ChatCompletionResponse(model=request.model, choices=[choice_data], object="chat.completion")

async def predict(model_inputs: BatchEncoding,  model_id: str):
    global model, tokenizer

    streamer = TextIteratorStreamer(
        tokenizer, skip_prompt=True, skip_special_tokens=True)
    generation_kwargs = dict(
        model_inputs, streamer=streamer, max_new_tokens=512)
    thread = Thread(target=model.generate, kwargs=generation_kwargs)

    choice_data = ChatCompletionResponseStreamChoice(
        index=0,
        delta=DeltaMessage(role="assistant"),
        finish_reason=None
    )
    chunk = ChatCompletionResponse(model=model_id, choices=[
                                   choice_data], object="chat.completion.chunk")
    yield "{}".format(chunk.model_dump_json(exclude_unset=True))

    thread.start()
    for new_text in streamer:
        choice_data = ChatCompletionResponseStreamChoice(
            index=0,
            delta=DeltaMessage(content=new_text),
            finish_reason=None
        )

        chunk = ChatCompletionResponse(model=model_id, choices=[
                                       choice_data], object="chat.completion.chunk")
        yield "{}".format(chunk.model_dump_json(exclude_unset=True))

    choice_data = ChatCompletionResponseStreamChoice(
        index=0,
        delta=DeltaMessage(),
        finish_reason="stop"
    )
    chunk = ChatCompletionResponse(model=model_id, choices=[
                                   choice_data], object="chat.completion.chunk")
    yield "{}".format(chunk.model_dump_json(exclude_unset=True))
    yield '[DONE]'

def _get_args():
    parser = ArgumentParser()

    parser.add_argument(
        '-c',
        '--checkpoint-path',
        type=str,
        default='Qwen1.5-0.5B-Chat',
        help='Checkpoint name or path, default to %(default)r',
    )

    parser.add_argument('--server-port',
                        type=int,
                        default=8000,
                        help='Demo server port.')
    parser.add_argument('--server-name',
                        type=str,
                        default='127.0.0.1',
                        help='Demo server name. Default: 127.0.0.1, which is only visible from the local computer.'
                        ' If you want other computers to access your server, use 0.0.0.0 instead.',
                        )

    args = parser.parse_args()
    return args

if __name__ == '__main__':
    args = _get_args()

    # Now you do not need to add "trust_remote_code=True"
    model = AutoModelForCausalLM.from_pretrained(
        args.checkpoint_path,
        torch_dtype="auto",
        device_map="auto"
    )
    tokenizer = AutoTokenizer.from_pretrained(args.checkpoint_path)

    uvicorn.run(app, host=args.server_name, port=args.server_port, workers=1)
- 1
- 2
- 3
- 4
- 5
- 6
- 7
- 8
- 9
- 10
- 11
- 12
- 13
- 14
- 15
- 16
- 17
- 18
- 19
- 20
- 21
- 22
- 23
- 24
- 25
- 26
- 27
- 28
- 29
- 30
- 31
- 32
- 33
- 34
- 35
- 36
- 37
- 38
- 39
- 40
- 41
- 42
- 43
- 44
- 45
- 46
- 47
- 48
- 49
- 50
- 51
- 52
- 53
- 54
- 55
- 56
- 57
- 58
- 59
- 60
- 61
- 62
- 63
- 64
- 65
- 66
- 67
- 68
- 69
- 70
- 71
- 72
- 73
- 74
- 75
- 76
- 77
- 78
- 79
- 80
- 81
- 82
- 83
- 84
- 85
- 86
- 87
- 88
- 89
- 90
- 91
- 92
- 93
- 94
- 95
- 96
- 97
- 98
- 99
- 100
- 101
- 102
- 103
- 104
- 105
- 106
- 107
- 108
- 109
- 110
- 111
- 112
- 113
- 114
- 115
- 116
- 117
- 118
- 119
- 120
- 121
- 122
- 123
- 124
- 125
- 126
- 127
- 128
- 129
- 130
- 131
- 132
- 133
- 134
- 135
- 136
- 137
- 138
- 139
- 140
- 141
- 142
- 143
- 144
- 145
- 146
- 147
- 148
- 149
- 150
- 151
- 152
- 153
- 154
- 155
- 156
- 157
- 158
- 159
- 160
- 161
- 162
- 163
- 164
- 165
- 166
- 167
- 168
- 169
- 170
- 171
- 172
- 173
- 174
- 175
- 176
- 177
- 178
- 179
- 180
- 181
- 182
- 183
- 184
- 185
再调用接口:

流式返回也支持了。
完善接口
接口更加完善的话可以参考 Qwen Github。
谢谢能看到最后!
大模型岗位需求
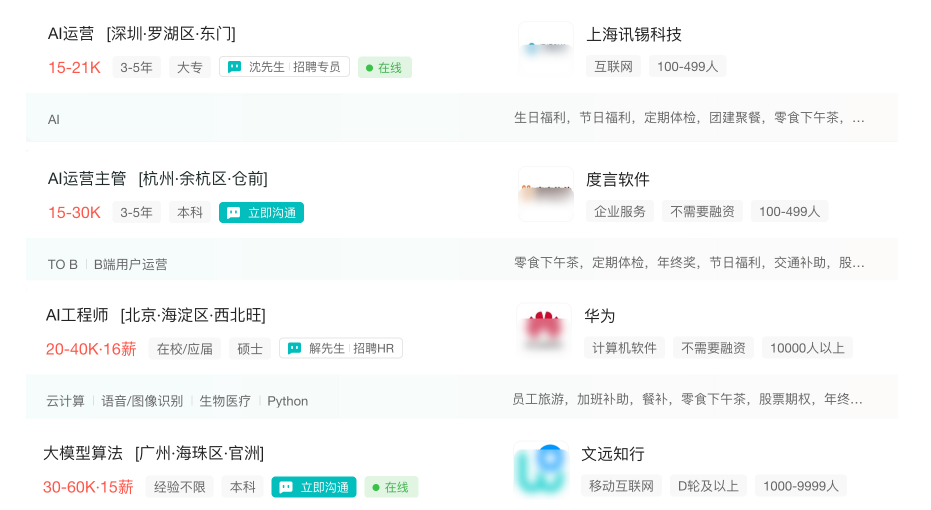
大模型时代,企业对人才的需求变了,AIGC相关岗位人才难求,薪资持续走高,AI运营薪资平均值约18457元,AI工程师薪资平均值约37336元,大模型算法薪资平均值约39607元。
掌握大模型技术你还能拥有更多可能性:
• 成为一名全栈大模型工程师,包括Prompt,LangChain,LoRA等技术开发、运营、产品等方向全栈工程;
• 能够拥有模型二次训练和微调能力,带领大家完成智能对话、文生图等热门应用;
• 薪资上浮10%-20%,覆盖更多高薪岗位,这是一个高需求、高待遇的热门方向和领域;
• 更优质的项目可以为未来创新创业提供基石。
可能大家都想学习AI大模型技术,也想通过这项技能真正达到升职加薪,就业或是副业的目的,但是不知道该如何开始学习,因为网上的资料太多太杂乱了,如果不能系统的学习就相当于是白学。为了让大家少走弯路,少碰壁,这里我直接把全套AI技术和大模型入门资料、操作变现玩法都打包整理好,希望能够真正帮助到大家。
-END-
声明:本文内容由网友自发贡献,不代表【wpsshop博客】立场,版权归原作者所有,本站不承担相应法律责任。如您发现有侵权的内容,请联系我们。转载请注明出处:https://www.wpsshop.cn/w/weixin_40725706/article/detail/862719
Copyright © 2003-2013 www.wpsshop.cn 版权所有,并保留所有权利。

