- 1Android --调启百度地图_geo:0,0:?q=
- 2Latex--TikZ和PGF--高级文本绘图,思维绘图,想到--得到!
- 3HarmonyOS云开发简介_harmonyos云开发工程创建后,会自动开通哪些服务?
- 4Mysql TIMESTAMP 和 DATETIME的区别_mysql timestamp 和datetime区别
- 5荣耀es升级鸿蒙,华为手机明年全部升级鸿蒙系统 所有自研设备换OS
- 6Sass(Scss)的学习和安装_安装sacc的命令是什么
- 7高并发架构设计经验_适合大单元设计建立多级互联模式
- 8RHCS集群使用GFS2实现文件实时共享(多点挂载)_gfs2使用
- 9vue3-admin-element安装_vue3-admin-element-template
- 10获取Android设备DeviceId与反Xposed Hook_系统隐藏接口获取安卓id
DataEase二开记录--踩坑和详细步骤(一)_dataease 二次开发
赞
踩
最近在看DataEase,发现挺好用的,推荐使用。
用的过程中萌生了二开的想法,于是自己玩了玩,并做了一些记录。
开发环境问题
下载源码,选稳定版本的,本案例是1.17.0版本。
下载地址
数据库配置
数据库初始化:
DataEase 使用 MySQL 数据库,推荐使用 MySQL 5.7 版本。同时 DataEase 对数据库部分配置项有要求,请参考下附的数据库配置,修改开发环境中的数据库配置文件(以下配置有部分参数可能并不适用 MySQL 8.x 版本)
[mysqld]
datadir=/var/lib/mysql
default-storage-engine=INNODB
character_set_server=utf8
lower_case_table_names=1
table_open_cache=128
max_connections=2000
max_connect_errors=6000
innodb_file_per_table=1
innodb_buffer_pool_size=1G
max_allowed_packet=64M
transaction_isolation=READ-COMMITTED
innodb_flush_method=O_DIRECT
innodb_lock_wait_timeout=1800
innodb_flush_log_at_trx_commit=0
sync_binlog=0
group_concat_max_len=1024000
sql_mode=STRICT_TRANS_TABLES,NO_ZERO_IN_DATE,NO_ZERO_DATE,ERROR_FOR_DIVISION_BY_ZERO,NO_AUTO_CREATE_USER,NO_ENGINE_SUBSTITUTION
skip-name-resolve
- 1
- 2
- 3
- 4
- 5
- 6
- 7
- 8
- 9
- 10
- 11
- 12
- 13
- 14
- 15
- 16
- 17
- 18
- 19
建数据库
CREATE DATABASE `dataease` DEFAULT CHARACTER SET utf8mb4 COLLATE utf8mb4_general_ci;
- 1
配置文件
DataEase 会默认加载该路径下的配置文件 /opt/dataease/conf/dataease.properties,请参考下面配置创建对应目录及配置文件。
提示: 请自行将 MYSQL_HOST 配置为自己的 MySQL 地址。
# 数据库配置
spring.datasource.url=jdbc:mysql://MYSQL_HOST:3306/dataease?autoReconnect=false&useUnicode=true&characterEncoding=UTF-8&characterSetResults=UTF-8&zeroDateTimeBehavior=convertToNull&useSSL=false
spring.datasource.username=root
spring.datasource.password=Password123@mysql

carte.host=kettle
carte.port=18080
carte.user=cluster
carte.passwd=cluster

doris.db=dataease
doris.user=root
doris.password=Password123@doris
doris.host=doris-fe
doris.port=9030
doris.httpPort=8030

#新建用户初始密码
dataease.init_password=DataEase123456
#登录超时时间单位min  如果不设置 默认8小时也就是480
dataease.login_timeout=480

logger.level=INFO

#DE运行模式,可选值有 local、simple、cluster,分别对应本地模式、精简模式、集群模式
engine_mode=simple
- 1
- 2
- 3
- 4
- 5
- 6
- 7
- 8
- 9
- 10
- 11
- 12
- 13
- 14
- 15
- 16
- 17
- 18
- 19
- 20
- 21
- 22
- 23
- 24
- 25
- 26
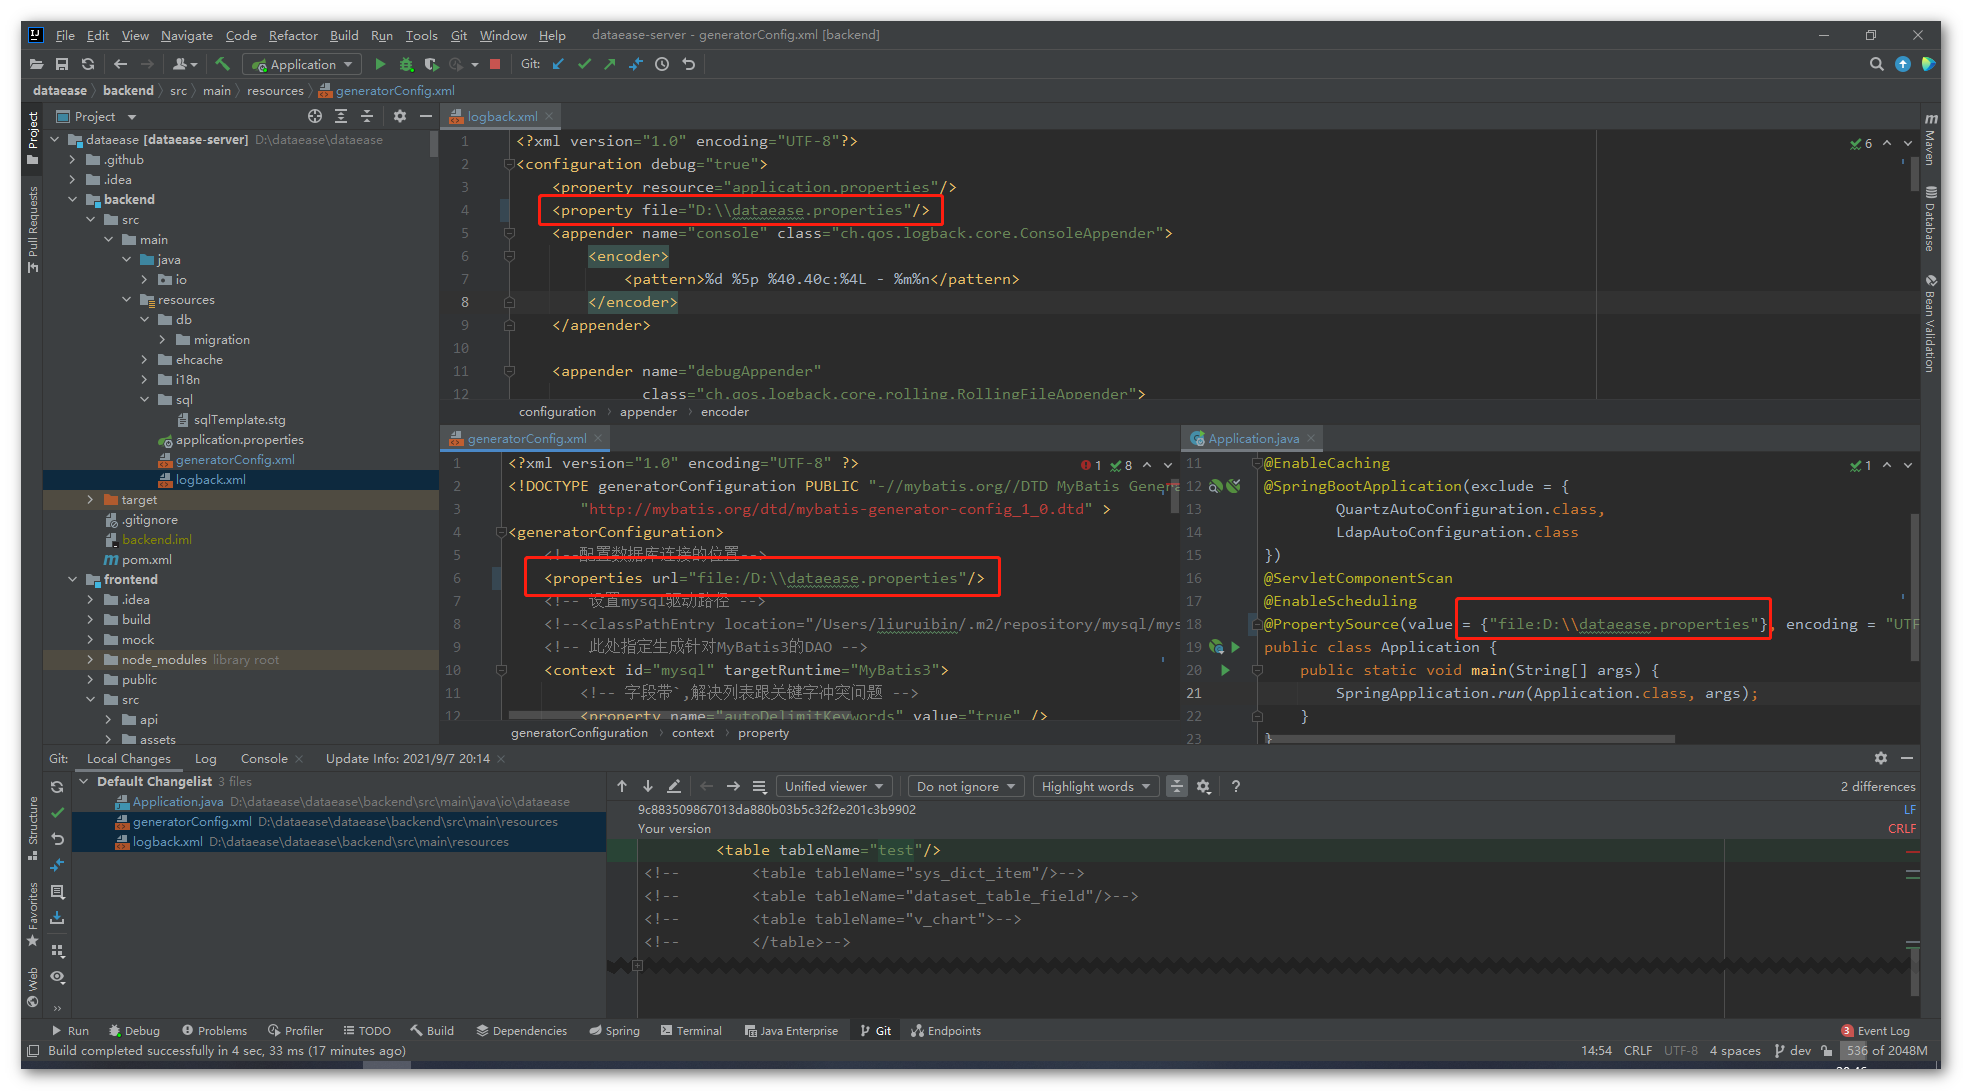
文件地址需要对应修改一下地方

依赖相关问题
如遇到缺少 kettle 相关依赖的话,可以检查是否使用了 maven 的 mirror,建议去掉 mirror 后重试。如还不行的话,可以在百度网盘上下载一下最小化的 dataease 依赖包。链接: https://pan.baidu.com/s/1hoT6zGNFaToqTbLhnpm6lg 提取码: 45pg 将删除依赖包解压后放置到 ~/.m2/repository 下即可。
为了方便开到springboot的报错,可以加一个依赖
      <dependency>
            <groupId>org.springframework.boot</groupId>
            <artifactId>spring-boot-starter</artifactId>
            <exclusions>
                <exclusion>
                    <groupId>org.springframework.boot</groupId>
                    <artifactId>spring-boot-starter-logging</artifactId>
                </exclusion>
            </exclusions>
        </dependency>
- 1
- 2
- 3
- 4
- 5
- 6
- 7
- 8
- 9
- 10
增加依赖后,可以清晰看到日志,缺少日志的目录,需要在工程所在的盘下建相应的目录
E:\opt\dataease\logs\dataease
- 1
本地运行
先确定idea已经引用pom的依赖
后端启动方式
- 可以使用 io.dataease.Application 入口方法直接启动
- 可以使用 maven 插件中的 backend>spring-boot>spring-boot:start 启动
前端启动方式
进入工程目录下的子目录 frontend, 用 npm i 安装前端依赖包
安装完成后,使用 npm run serve 命名启动前端,前端启动后即可通过 http://localhost:9528/ 地址访问
这时候就可以做修改代码的事情了
修改后可以像上面的步骤一样执行了。
下一篇讲 如何吧修改好的代码放到服务器上 以及整体替换,可以移植到任何地方正常安装。


