热门标签
热门文章
- 1python批量检索文献_我要用python 建一个快速的检索类网站 很小规模 如果有对此非常熟悉的 推荐一个框架...
- 2秒杀项目07-安全优化
- 3LeetCode 算法:找到字符串中所有字母异位词c++
- 4基于AppBuilder自定义组件开发大模型应用
- 5LangChain的函数,工具和代理(六):Conversational agent_langchain agent调用函数
- 6Redis Desktop Manager2022中文 附安装教程(附使用)_redis desktop manager 2022
- 7工业大数据的应用有哪些_工业大数据应用
- 8Java:SpringBoot整合Druid实现双数据源_springboo配置双数据源并集成durid加密数据库
- 9网络空间安全论文笔记4_mvp: detecting vulnerabilities using patch-enhance
- 10c语言整人程序(1)_c语言整人代码
当前位置: article > 正文
neo4j 图数据库 py2neo 操作 示例代码_py2neo的relationshipmatcher
作者:喵喵爱编程 | 2024-07-11 13:27:58
赞
踩
py2neo的relationshipmatcher
摘要
利用py2neo包,实现把excel表里面的数据,插入到neo4j 图数据库中;
- 创建新(节点或关系)到neo4j图数据库中;
- 能够获取neo4j 中已有的(节点或关系),不再创建新(节点或关系);
前置
安装py2neo: pip install py2neo
安装neo4j软件,请自行安装
NodeMatcher & RelationshipMatcher
代码由 Jupyter 编写,建议使用vscode
from py2neo import Graph, Node, NodeMatcher, RelationshipMatcher
import pandas as pd

# 连接到Neo4j数据库
graph = Graph("bolt://localhost:7687", auth=("neo4j", "你设置的密码"))

node_matcher = NodeMatcher(graph)
relationship_matcher = RelationshipMatcher(graph)
- 1
- 2
- 3
- 4
- 5
- 6
- 7
- 8

TODO: 设置neo4j 远程连接
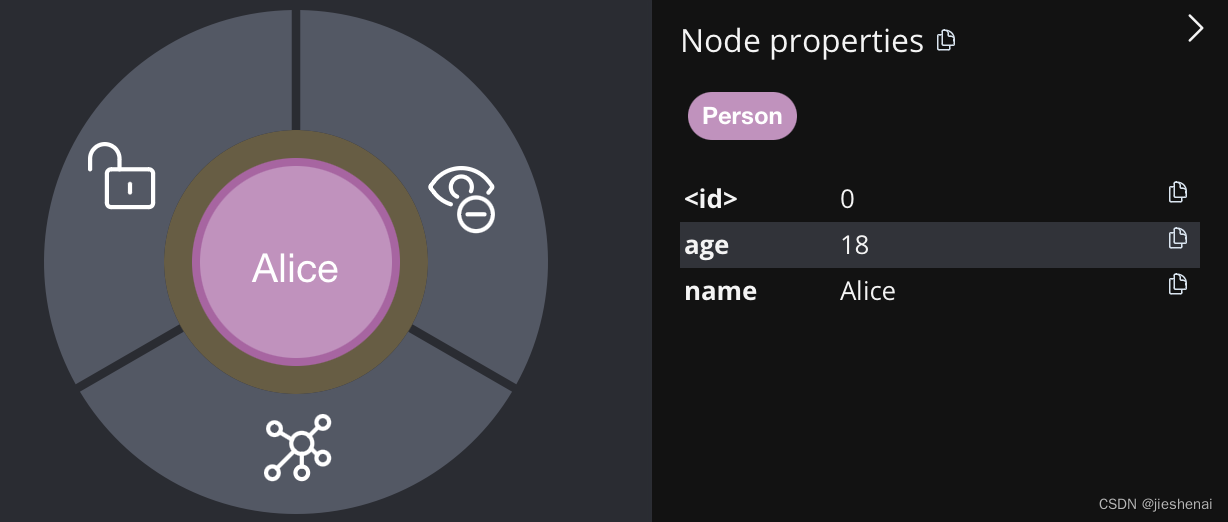
创建节点
node = Node("Person", name="Alice", age=18)
graph.create(node)
- 1
- 2

查询获取节点
# 拿到匹配到的第一个节点
node_matcher.match('Person', name='Alice').first()

# 拿到可匹配到的所有
node_matcher.match('Person', name='Alice').all()
- 1
- 2
- 3
- 4
- 5
节点有则查询,无则创建
def get_node(class_, **kwargs):
    if node := node_matcher.match(class_, **kwargs):
        # 节点存在,则获取
        return node.first()
    else:
        # 节点不存在,则创建
        node = Node(class_, **kwargs)
        graph.create(node)
        return node
- 1
- 2
- 3
- 4
- 5
- 6
- 7
- 8
- 9
运行

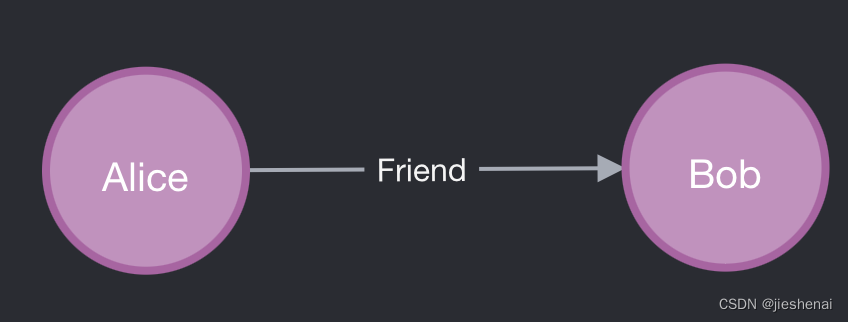
创建关系
Alice - Friend -> Bob
node1 = get_node('Person', name='Alice', age=21)
node2 = get_node('Person', name='Bob', age=20)

graph.create(
                Relationship(node1, 'Friend', node2)
            )
- 1
- 2
- 3
- 4
- 5
- 6

查询关系
查询 node1 和 node2 之间是否有 Friend 关系
node1 = get_node('Person', name='Alice', age=21)
node2 = get_node('Person', name='Bob', age=20)

relationship_matcher.match(
        [node1, node2],
        r_type='Friend'
    ).first()
- 1
- 2
- 3
- 4
- 5
- 6
- 7
关系有则查询,无则创建
def get_relation(node1, node2, r_type):
    if r :=  relationship_matcher.match(
                [node1, node2],
                r_type=r_type
            ):
        return r.first()
    else:
        r = Relationship(node1, r_type, node2)
        graph.create(r)
        return r
- 1
- 2
- 3
- 4
- 5
- 6
- 7
- 8
- 9
- 10
运行
# 查询已有关系
get_relation(node1, node2, 'Friend')
# 创建新关系
get_relation(node1, node2, 'Classmate')
- 1
- 2
- 3
- 4

Cypher语句
虽然 在 NodeMatcher & RelationshipMatcher 介绍的接口已经能够满足大部分情况的使用,本文仍想提供一种使用cypher语句的插入数据到neo4j图数据库的思路。
创建节点
graph.run(
    "create (n:Person {name:'js'}) return n"
)
- 1
- 2
- 3
graph.run(
    "MERGE (n:Person {name: $name}) \
            ON CREATE SET n.created_at = timestamp() \
            return n",
    name='Cyder'
)
- 1
- 2
- 3
- 4
- 5
- 6
封装类
上述内容的使用还是有所不便,故提供Neo4jDriver分装类,简化用户操作。
from py2neo import Graph, Node, NodeMatcher, RelationshipMatcher, Relationship


# 连接到Neo4j数据库
class Neo4jDriver:
    def __init__(self, url, username, password):
        self.graph = Graph(url, auth=(username, password))
        self.node_matcher = NodeMatcher(self.graph)
        self.relationship_matcher = RelationshipMatcher(self.graph)

    def query_node(self, class_, **kwargs):
        if node := self.node_matcher.match(class_, **kwargs):
            # 节点存在,则获取
            return node.first()

    def create_node(self, class_, **kwargs):
        """
            不创建重复节点
        """
        # 节点存在,则获取
        if node := self.query_node(class_, **kwargs):
            return node
        # 节点不存在,则创建
        node = Node(class_, **kwargs)
        self.graph.create(node)
        return node

    def query_relationship(self, start_node, rel, end_node):
        r = self.relationship_matcher.match(
            [start_node, end_node],
            r_type=rel
        )
        return r.first()

    def create_relationship(self, start_node, rel, end_node):
        if r := self.query_relationship(start_node, rel, end_node):
            return r
        self.graph.create(
            Relationship(start_node, rel, end_node)
        )
- 1
- 2
- 3
- 4
- 5
- 6
- 7
- 8
- 9
- 10
- 11
- 12
- 13
- 14
- 15
- 16
- 17
- 18
- 19
- 20
- 21
- 22
- 23
- 24
- 25
- 26
- 27
- 28
- 29
- 30
- 31
- 32
- 33
- 34
- 35
- 36
- 37
- 38
- 39
- 40
封装类的使用如下:
# 使用自己的url, username, password,我使用自定义的private起到保密作用
from private import url, username, password

driver = Neo4jDriver(url, username, password)

# 创建节点
data = {
    "name": "Jie",
    "age": 18
}
node1 = driver.create_node('Person', **data)
print(node1)

# 查询节点
node2 = driver.query_node('Person', name='Jie')
print(node2)

# 查询到节点后,修改节点,再保存到neo4j
node2.update({'age':18})
driver.graph.push(node2)
- 1
- 2
- 3
- 4
- 5
- 6
- 7
- 8
- 9
- 10
- 11
- 12
- 13
- 14
- 15
- 16
- 17
- 18
- 19
- 20
本文内容由网友自发贡献,转载请注明出处:https://www.wpsshop.cn/w/喵喵爱编程/article/detail/810454
推荐阅读
相关标签


