
windows 设置代理
http || https协议
- //设置全局代理
- //http
- git config --global https.proxy http://127.0.0.1:7891
- //https
- git config --global https.proxy https://127.0.0.1:7891
-
- // socks
- git config --global http.proxy socks5://127.0.0.1:7891
- git config --global https.proxy socks5://127.0.0.1:7891
-
- //只对github.com使用代理,其他仓库不走代理
- git config --global http.https://github.com.proxy socks5://127.0.0.1:7891
- git config --global https.https://github.com.proxy socks5://127.0.0.1:7891
- //取消github代理
- git config --global --unset http.https://github.com.proxy
- git config --global --unset https.https://github.com.proxy
-
- //取消全局代理
- git config --global --unset http.proxy
- git config --global --unset https.proxy

SSH协议
- //对于使用git@协议的,可以配置socks5代理
- //在~/.ssh/config 文件后面添加几行,没有可以新建一个
- //socks5
- Host github.com
- User git
- ProxyCommand connect -S 127.0.0.1:7891 %h %p
-
- //http || https
- Host github.com
- User git
- ProxyCommand connect -H 127.0.0.1:7891 %h %p
WSL2设置代理
在 Ubuntu 子系统中,通过 cat /etc/resolv.conf 查看 DNS 服务器 IP
其实上面地址就是windows下面这个ip地址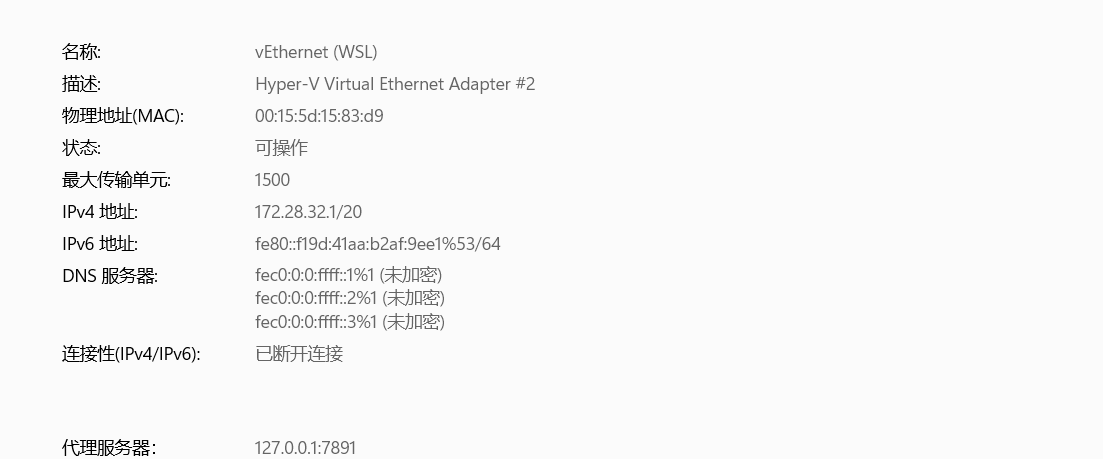
我们要为WSL配置ssh代理和http代理
- touch ~/.ssh/config
- vim ~/.ssh/config
-
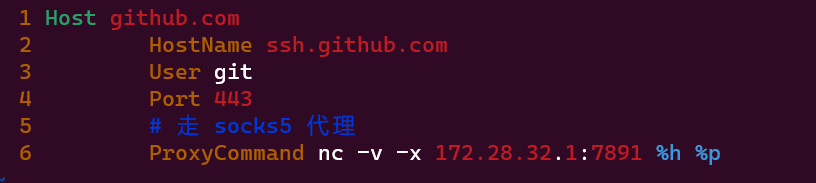
- Host github.com
- HostName github.com
- User git
- # 走 socks5 代理
- ProxyCommand nc -v -x 172.28.32.1:7891 %h %p
使用下面命令检查ssh代理配置是否成功
可以将上面ip地址配置代理写入到.bashrc文件中,这样就可以自己用户开机永久生效
- host_ip=`cat /etc/resolv.conf|grep nameserver|awk '{print $2}'`
- sed -i "/.*ProxyCommand*/c\ ProxyCommand nc -v -x $host_ip:7891 %h %p" ~/.ssh/config
- export ALL_PROXY=http://$host_ip:7891
- export {http,https,ftp}_proxy=$ALL_PROXY
- export {HTTP,HTTPS,FTP}_PROXY=$ALL_PROXY
7891端口是clash for windows端口,另外将Allow LAN打开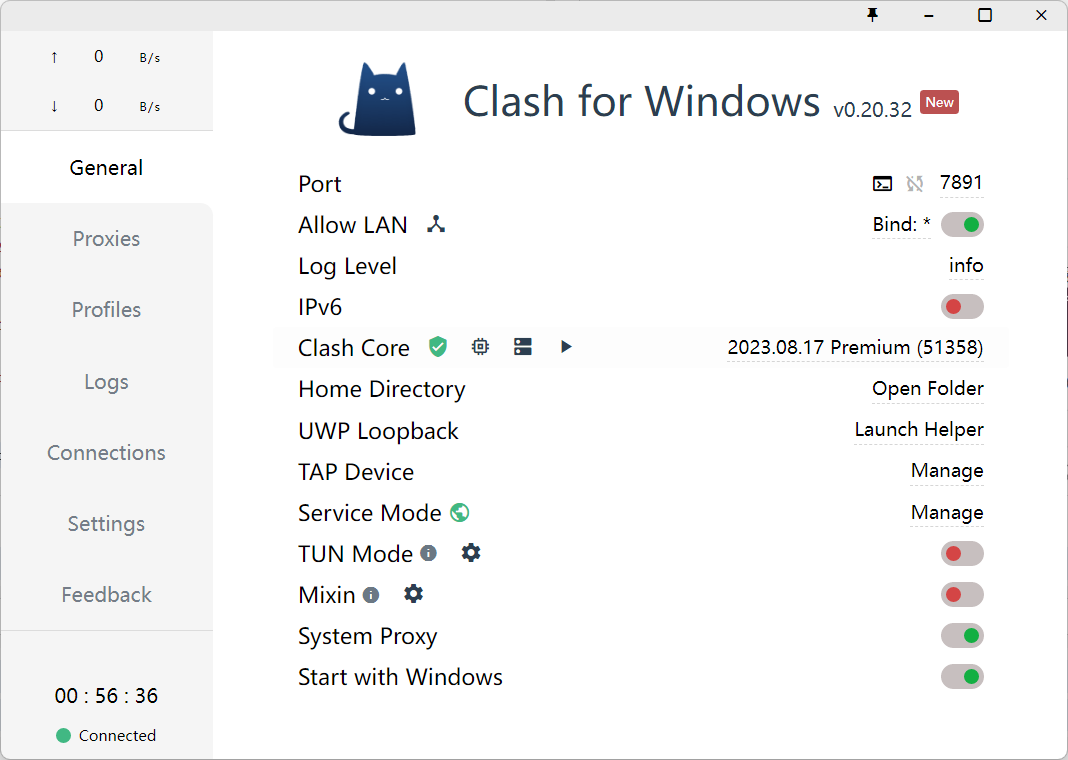
还需要将防火墙打开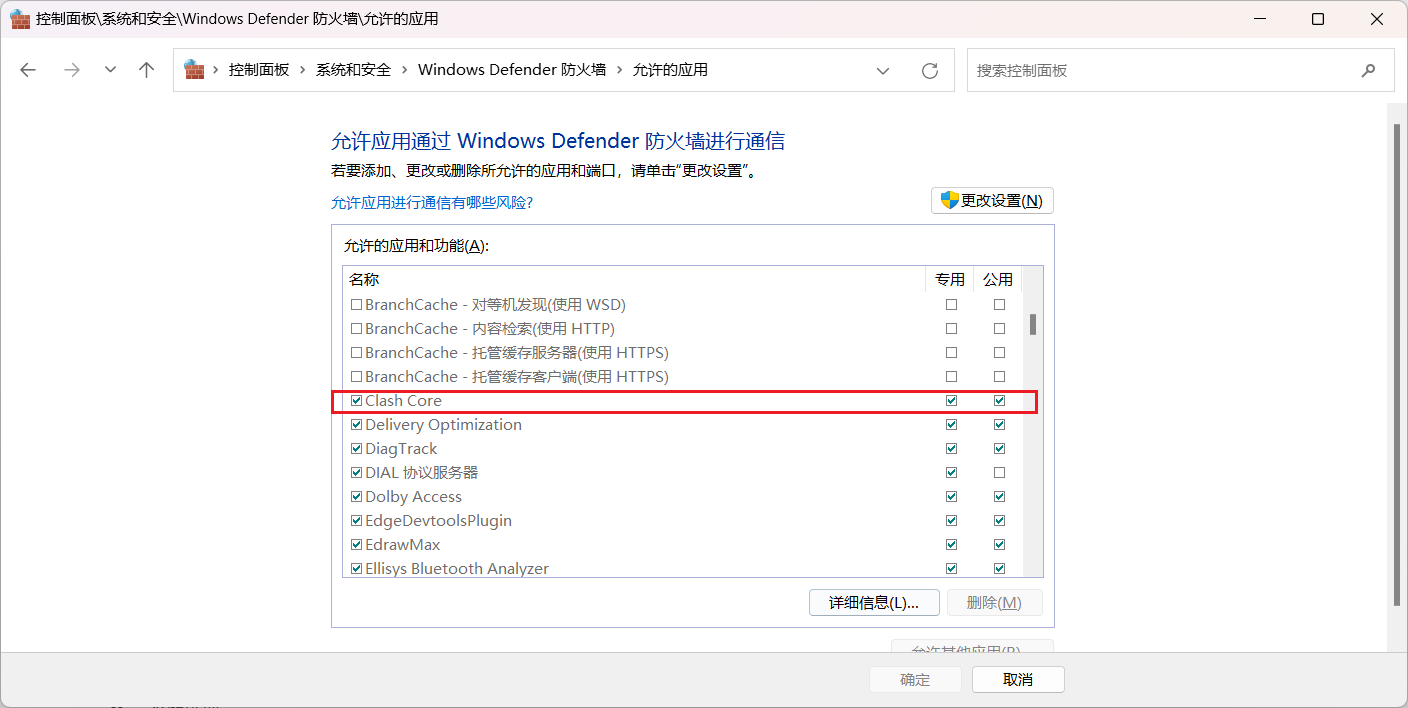
git push失败或者卡住不动问题
原因是有点节点22端口被服务端封锁了,需要更换443端口(~/.ssh/config))
- # 可以先使用如下测试下
- ssh -T -p 443 git@ssh.github.com
- # Hi USERNAME! You've successfully authenticated, but GitHub does not
- # provide shell access.
-
- # 更换端口后再测试下
- $ ssh -T git@github.com
- # Hi USERNAME! You've successfully authenticated, but GitHub does not
- # provide shell access.
参考链接
Git设置代理为 WSL2 一键设置代理WSL2配置代理wsl2 proxyHTTPS_PROXY vs https_proxygit-configSSH 防爆破与 Fail2Ban 加固解决 push 到 GitHub 异常 - 无法连接22端口Using SSH over the HTTPS port

