- 1【深度学习】01-04-深度学习(选修)-李宏毅老师21&22深度学习课程笔记_can the structure be automatically determined
- 2一套键鼠控制多台不同平台电脑——synergy使用详解_synergy支持几台电脑
- 3【Make YOLO Great Again】YOLOv1-v7全系列大解析(Head篇)(完整版)_yolo的headhand
- 4校园跑腿代购安卓APP 微信小程序的设计与实现(附源码)
- 5深度学习笔记(4)——TextCNN、BiLSTM实现情感分类(weibo100k数据集)_微博数据集
- 6【SAP-HCM】--HR模块员工照片录入ARCHIV_CREATE_FILE_sap-hr-员工照片配置
- 7【GPT】让你事半功倍特别好用的5个GPT工具
- 8私家云二代\比特米盒CumeBox2 配置CasaOs作为家庭轻nas\轻影院\网盘挂载\下载器使用(对应Armbian_21.08.1_Ubuntu_CumeBox2_5.10.602.img固件)_比特米盒安装casaos
- 9跟着GPT学习shell脚本,理论与实践相结合的学习计划。(一)_gpt linux脚本
- 10STM32F411CE VCAP 电容不稳定导致死机
快速搭建一个简约学术风的个人主页(基于Jekyll和GithubPage)_academicpage本地怎么查看
赞
踩
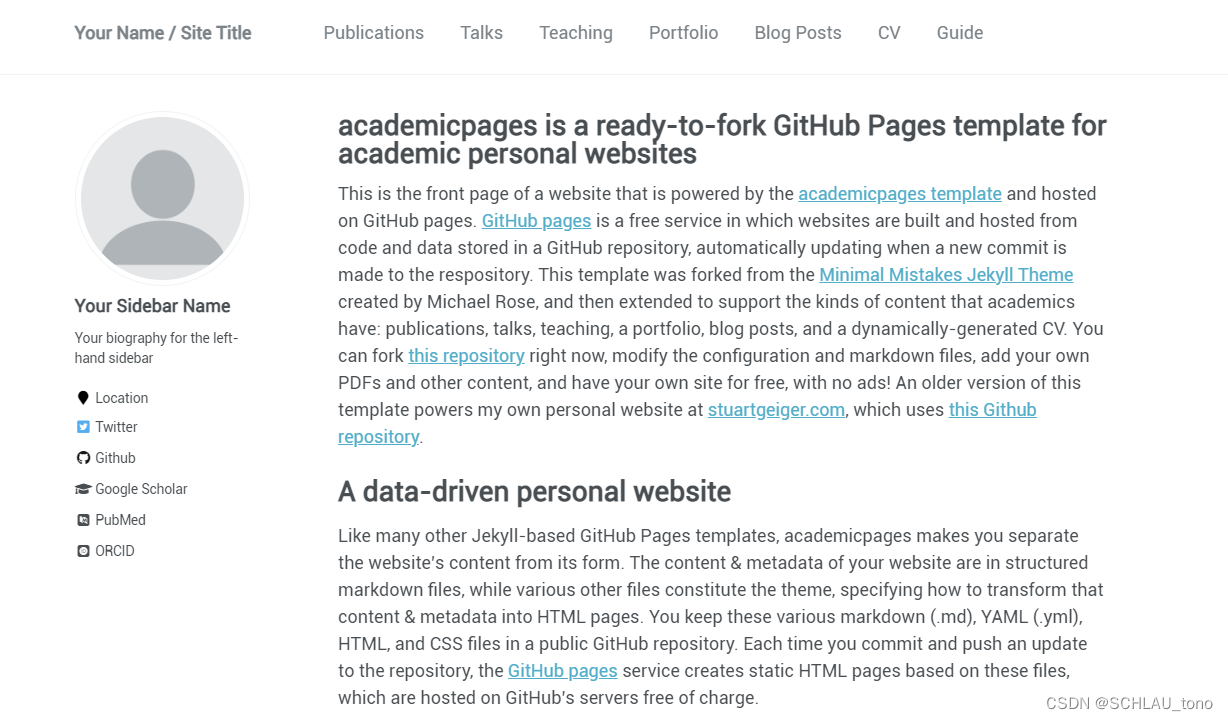
网页的样例可以参照

1 环境准备
1.1 安装bundle和ruby
- Windows 下可以通过Rubyinstaller完成一键式傻瓜安装
- Mac下可以参考Jayrobwilliams的这篇博客
1.2 Clone Academic page repos
Academic page的仓库地址, 将该仓库clone到本地
1.3 本地运行Jekyll 服务
在上步骤下载的仓库中打开shell或者prompt,按以下顺序1执行命令:
- 执行
bundle clean清理下载的库,不需要执行--force - 执行
bundle install安装ruby 依赖项, 如果该步骤出错,删除Gemfiles.lock后,重新执行该命令 - 执行
bundle exec jekyll serve生成HTML文件,并启动本地服务器在localhost:4000,对源文件的更改在刷新之后即可更新。
遇到的错误
-
Error: No source of timezone data could be found或(TZInfo::DataSourceNotFound)该问题的方法主要原因可能是跨平台导致的tzinfo-data包安装异常。- 解决方法12:在Gemfiles中添加以下语句看,然后
bundle update应用更新,然后重新启动服务器bundle exec jekyll seve
	source "https://rubygems.org"
	# Hello! This is where you manage which Jekyll version is used to run.
	# When you want to use a different version, change it below, save the
	# file and run `bundle install`. Run Jekyll with `bundle exec`, like 		so:
	#
	#     bundle exec jekyll serve
	#
	# This will help ensure the proper Jekyll version is running.
	# Happy Jekylling!

	gem "github-pages", group: :jekyll_plugins

	# If you want to use Jekyll native, uncomment the line below.
	# To upgrade, run `bundle update`.

	gem "jekyll"

	gem 'tzinfo-data', platforms: [:mingw, :mswin, :x64_mingw]

	gem "wdm", "~> 0.1.0" if Gem.win_platform?

	# If you have any plugins, put them here!
	group :jekyll_plugins do
	  # gem "jekyll-archives"
	  gem "jekyll-feed"
	  gem 'jekyll-sitemap'
	  gem 'hawkins'
	end

	gem "webrick", "~> 1.7"
- 1
- 2
- 3
- 4
- 5
- 6
- 7
- 8
- 9
- 10
- 11
- 12
- 13
- 14
- 15
- 16
- 17
- 18
- 19
- 20
- 21
- 22
- 23
- 24
- 25
- 26
- 27
- 28
- 29
- 30
- 解决方法23:手动安装TZinfo包,执行以下命令:
gem install tzinfo-data- 1
- Load错误
servlet.rb:1:in 'require': cannot load such file -- webrick (LoadError)- 解决方法4: 在shell中执行:
bundle add webrick- 1
- 解决方法4: 在shell中执行:
成功运行后的窗口截图:

在浏览器输入localhost:4000就能查看网页运行在本地服务器。 - 解决方法12:在Gemfiles中添加以下语句看,然后
2 将网页发布在网路上
Github 可以自动托管<Username>.github.io的网页。因此只需要首先在github创建一个名为[username].github.io的仓库,例如

创建完成后,将本地仓库push到该远程仓库。
Github会自动将仓库名为<Username>.github.io的仓库设置为Github page。
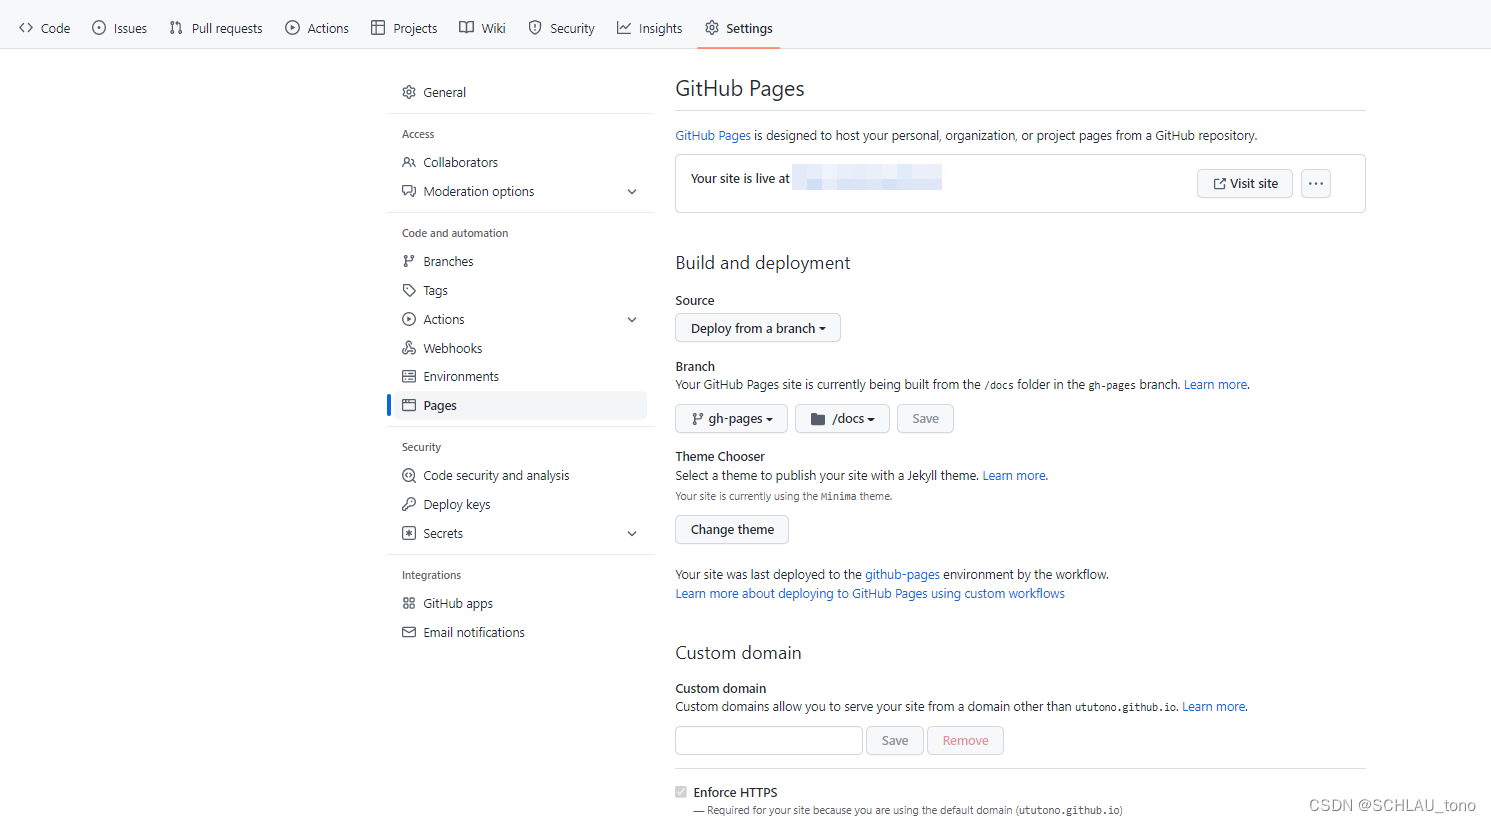
如果创建完该仓库,在浏览器中输入<Username>.github.io出现错误,则需要手动设置,步骤如下:
1. 打开仓库的Setting
2. 在右边侧栏中选择Pages
3. 设置GitHub pages的名字,也是<Username>.github.io的命名格式
4. 其他根据偏好定制化,比如域名(optional)
1-2分钟后就可以在浏览器输入<Username>.github.io来访问你的主页了
Academic page 官方安装指南 https://github.com/academicpages/academicpages.github.io ↩︎
Stackoverflow: error-no-source-of-timezone-data-could-be-found ↩︎


