
热门标签
热门文章
- 1聊聊 Kafka: 在 Linux 环境上搭建 Kafka_kafka的持久化存储在linux上是哪一个路径
- 2Python 第三方库大全_python第三方库列表
- 3让机器学习助力医疗领域
- 4计算机组成原理:输入、输出系统(一)_crt的分辨率为1024*512像素,像素的颜色数为256,则刷新存储器的容量为
- 5《网络是怎样连接的》——第二章笔记_协议栈到网卡都是单线程在处理吗
- 6XSS注入——反射性XSS_反射型xss攻击方式的攻击过程
- 7基于matlab的图像去噪算法设计与实现_图像降噪研究现状
- 8java后端部署一般需要选择什么服务器?_后端常用服务器
- 92022/6/15 docker安装与项目部署(入门教程)_docker部署项目
- 10基于Java+Vue+uniapp微信小程序宿舍报修系统设计和实现
当前位置: article > 正文
MacOS:用LaTeX写论文_用的mac版latex 写大论文,中文字体编译出来
作者:小蓝xlanll | 2024-06-12 21:05:25
赞
踩
用的mac版latex 写大论文,中文字体编译出来
实现方法
(1)TeXmacs
(2)MacTeX + texstudio
(3)MacTeX + Sublime Text + Skim
作为Sublime的拥趸,本文重点讲方法3.
下载地址
测试版本
- TeXmacs-1.99.8-yosemite.dmg
- Skim-1.4.36.dmg
- Sublime Text 3.1.1
配置步骤
1. Sublime Text安装插件
- Tools -> Command pallet (快捷键是Command+Shift+P)
- 输入命令"Install Package",回车。
- 再输入"LaTeX Tools",安装插件;
- 安装完成后,退出并重启Sublime Text。
TeX示例代码:
%导言区
\documentclass[10pt]{article} %确定normalsize大小,为可选参数,在中括号内,此为10磅,只有10,11,12磅三个选项。

\usepackage{ctex}

%自定义字体
\newcommand{\myfont}{\textit{\textbf{\textsf{Fancy Text}}}}

%文稿区
\begin{document}
    %字体族设置(罗马字体、无衬线字体、打印机字体)
    \textrm{Roman Family} \textsf{Sans Serif Family} \texttt{Typewriter Family}

    {\rmfamily Roman Family} {\sffamily Sans Serif Family} {\ttfamily Typewriter Family}

    {\sffamily who you are? you find self on everyone around. take you as the same as others!}

    {\ttfamily Are you wiser than others? definitely on. in some days, my it is true. What can you achieve? a luxurious house? a brillilant car? an admirable career? who knows?}

    %字体系列设置(粗细、宽度)
    \textmd{Medium Series} \textbf{Boldface Series}

    {\mdseries Medium Series} {\bfseries Boldface Series}

    %字体形状(直立、斜体、伪斜体、小型大写)
    \textup{Upright Shape} \textit{Italic Shape} \textsl{Slanted Shape} \textsc{Small Caps Shape}

    {\upshape Upright Shape} {\itshape Italic Shape} {\slshape Slanted Shape} {\scshape Small Caps Shape}

    %中文字体
    {\songti 宋体} \quad {\heiti 黑体} \quad {\fangsong 仿宋} \quad {\kaishu 楷书}

    中文字体的 \textbf{粗体} 和 \textit{斜体} 。

    %字体大小,根据normalsize的大小确定,normalsize 在文档类的参数决定
    {\tiny           Hello}\\
    {\scriptsize     Hello}\\
    {\footnotesize   Hello}\\
    {\small          Hello}\\
    {\normalsize      Hello}\\
    {\large          Hello}\\
    {\Large          Hello}\\
    {\LARGE          Hello}\\
    {\huge           Hello}\\
    {\Huge           Hello}\\

    %中文字号设置命令、
    \zihao{-0} 你好!
    \zihao{5} 你好!

    \myfont

\end{document}

- 1
- 2
- 3
- 4
- 5
- 6
- 7
- 8
- 9
- 10
- 11
- 12
- 13
- 14
- 15
- 16
- 17
- 18
- 19
- 20
- 21
- 22
- 23
- 24
- 25
- 26
- 27
- 28
- 29
- 30
- 31
- 32
- 33
- 34
- 35
- 36
- 37
- 38
- 39
- 40
- 41
- 42
- 43
- 44
- 45
- 46
- 47
- 48
- 49
- 50
- 51
- 52
- 53
保存为"font_test.tex"
2. 配置Skim
- Skim -> 选项 (快捷键是Command + ,)
- 点击同步(Sync),预设:选择Sublime Text
3. 编译
在Sublime里按command + B即可编译。
另外,默认按LaTeX编译。
编译中文时,按住 command + shift + B 然后选 XeLaTeX,再command + B就是按XeLaTeX编译。
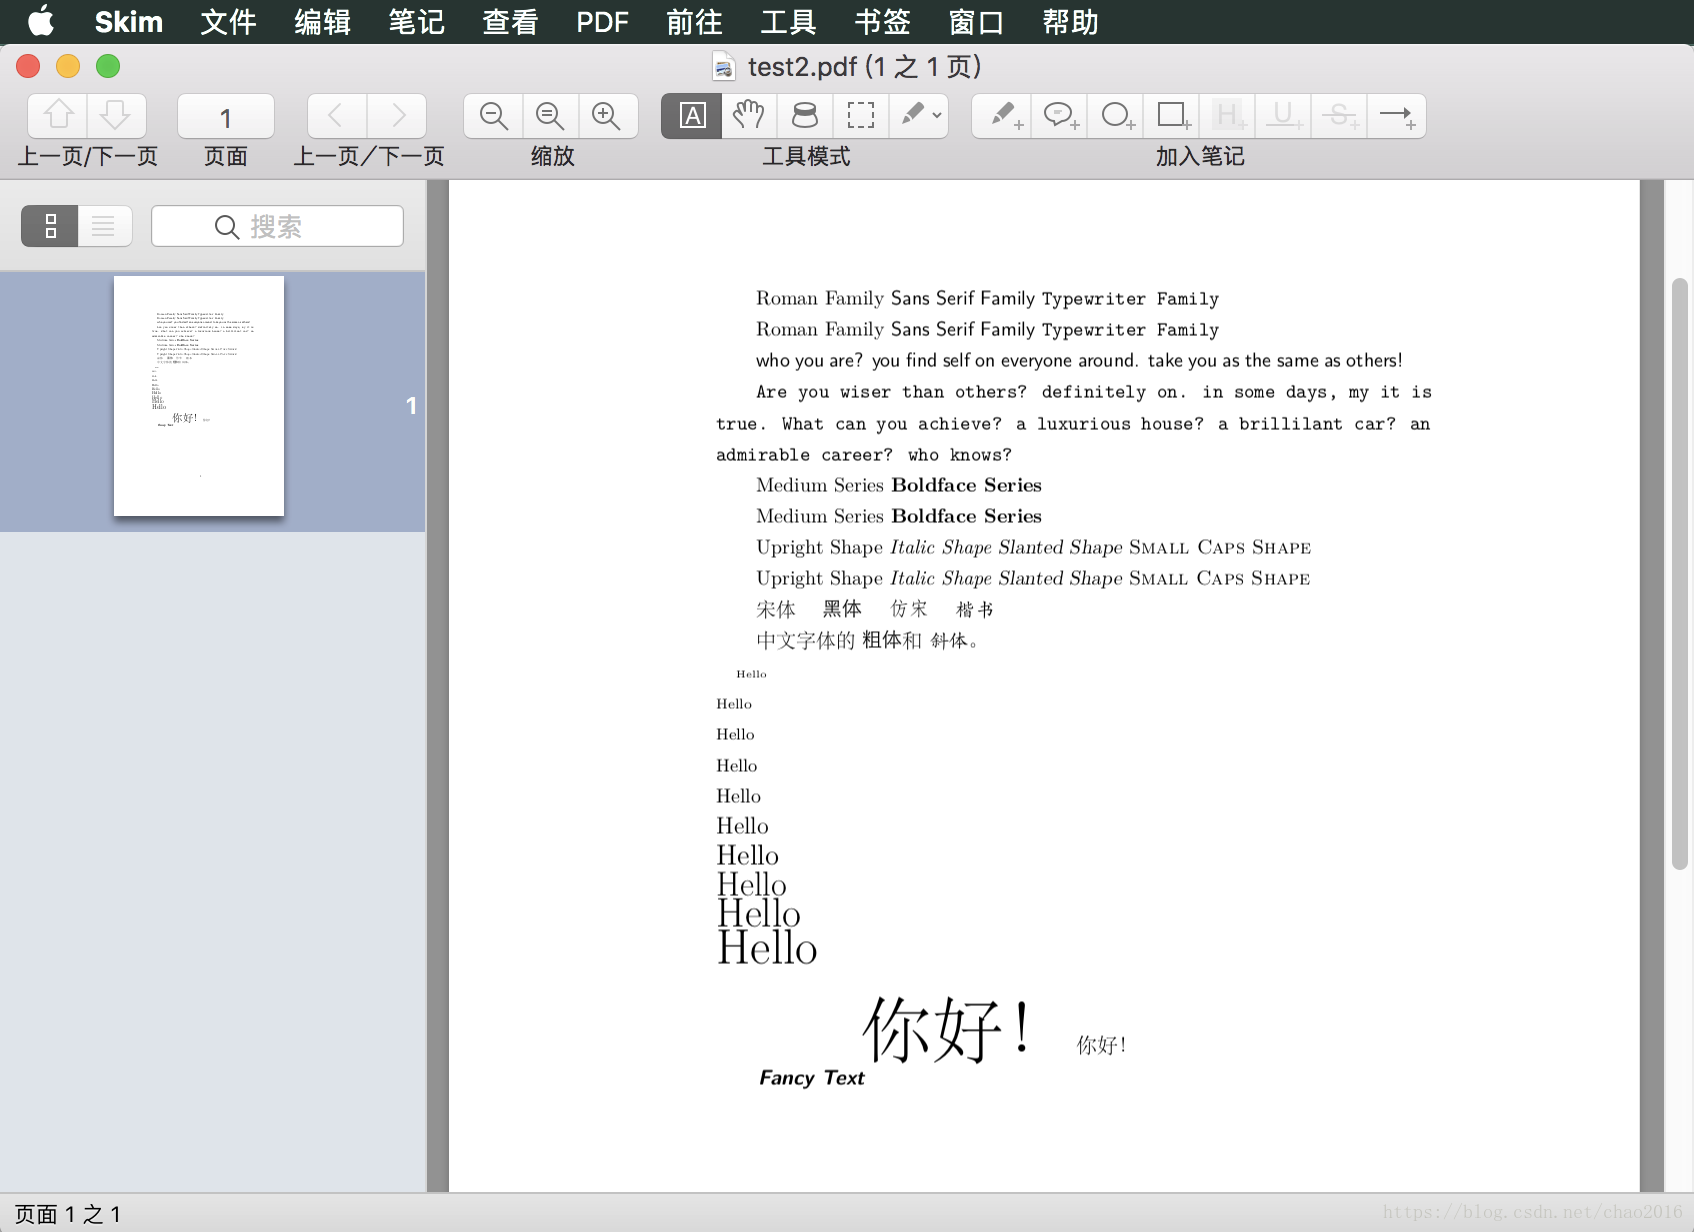
编译通过后,Skim 会弹出预览窗口。示例代码的效果如下:
声明:本文内容由网友自发贡献,版权归原作者所有,本站不承担相应法律责任。如您发现有侵权的内容,请联系我们。转载请注明出处:【wpsshop博客】
推荐阅读
相关标签

