- 1python中pip安装、升级包用法详解_pip upgrade
- 2vue项目中安装sass方法_vue安装sass
- 3秒杀系统如何设计?
- 4市场份额被微软步步蚕食,Zoom已到生死存亡关头
- 5docker run 命令转为docker-compose.yml配置文件_docker run 转换yaml
- 6SQL 教程-入门基础篇_sql学习
- 7There is no getter for property named ‘xxxxx’ in ‘class com.xxx.xx.xx.xxxx‘”,_there is no getter for property named 'student_id'
- 8如何查看linux系统CPU利用率
- 9PyTorch 2.2 中文官方教程(十五)
- 10【新知实验室】腾讯云TRTC服务体验_trtc和webrtc
软件测试(五)自动化 selenium
赞
踩
自动化测试
自动化测试指软件测试的自动化,在预设状态下运行应用程序或者系统,预设条件包括正常和异常,最后评估运行结果。将人为驱动的测试行为转化为机器(代码)执行的过程。(简单而言其实就是降低重复性的工作(大部分是Python))
自动化测试的具体实现,应该是包含下面七个过程的。
- 分析:总体把握系统逻辑,分析出系统的核心体系架构。
- 设计:设计测试用例,测试用例要足够明确和清晰,覆盖面广而精
- 实现:实现脚本,有两个要求一是断言,二是合理的运用参数化。
- 执行:执行脚本远远没有我们想象中那么简单。脚本执行过程中的异常需要我们仔细的去分析原因。
- 总结:测试结果的分析,和测试过程的总结是自动化测试的关键。
- 维护:自动化测试脚本的维护是一个难以解决但又必须要解决的问题。
- 分析:在自动化测试过程中深刻的分析自动化用例的覆盖风险和脚本维护的成本。
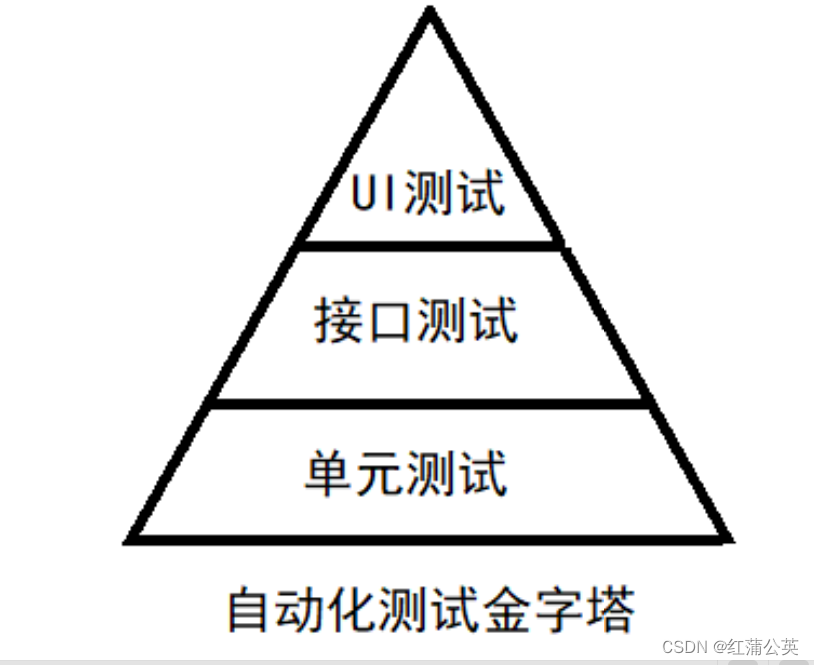
自动化的分类:单元测试,接口测试,UI自动化测试
单元测试:
最大的投入应该在单元测试上,单元测试运行的频率也更加高。
单元测试:
接口测试就是API测试,相对于UI自动化API自动化更加容易实现,执行起来也更稳定。
接口自动化的有以下特点:
- 可在产品前期,接口完成后介入
- 用例维护量小
- 适合接口变动较小,界面变动频繁的项目
常见的接口自动化测试工具有,RobotFramework,JMeter,SoapUI,TestNG+HttpClient,Postman等。
UI自动化
虽然测试金字塔告诉我们尽量多做API层的自动化测试,但是UI层的自动化测试更加贴近用户的需求和软件系统的实际业务。并且有时候我们不得不进行UI层的测试。
UI自动化的特点:
- 用例维护量大
- 页面相关性强,必须后期项目页面开发完成后介入
- UI测试适合与界面变动较小的项目
UI层的测试框架比较多,比如Windows客户端测试的AutoIT,web测试的selenium以及TestPlanteggPlant,Robot framework,QTP等
selenium工具
定义
selenium是用来做web自动化测试框架。
特点:
- 兼容各种浏览器,支持各种平台,支持各种语言
- 小巧,对于不同的语言它只是一个包而已,而QTP 需要下载安装1个多G 的程序
- 有丰富的API
- 支持分布式测试用例的执行,可以把测试用例分布到不同的测试机器执行,相当于分 发机的功能。
原理:
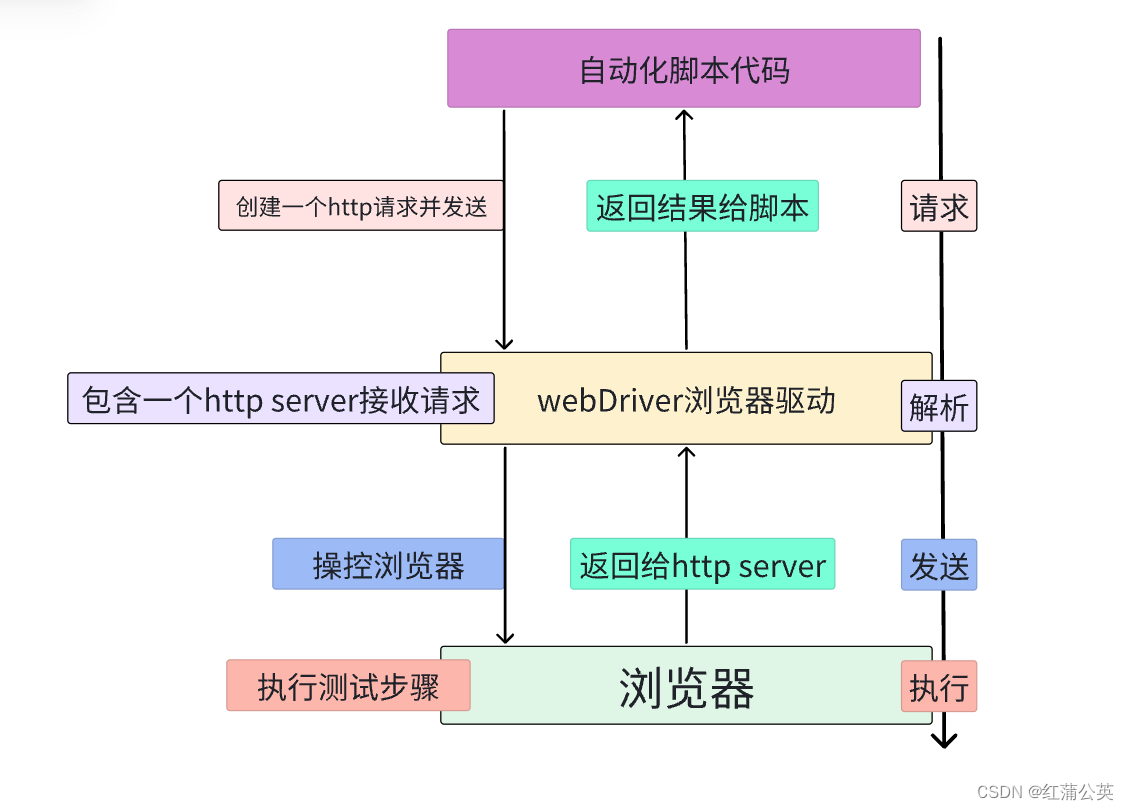
自动化脚本:通过编写代码
webDriver:需要我们去下载
浏览器:edge浏览器,Chrome浏览器
selenium+java环境搭建
- 浏览器这里用Chrome浏览器:官网下载(注意自己浏览器的版本:在浏览器关于里查看)
- 下载与之对应的浏览器驱动:webDirver:官网下载
- 将压缩包解压后驱动放入java安装的jdk中;
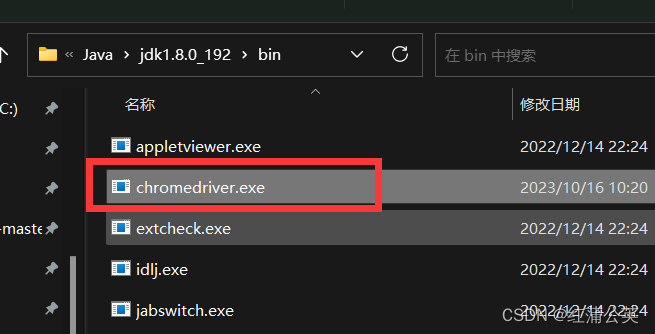
- 打开idea创建项目,导入依赖pom
		<dependency>
            <groupId>org.seleniumhq.selenium</groupId>
            <artifactId>selenium-java</artifactId>
            <version>3.141.59</version>
        </dependency>
- 1
- 2
- 3
- 4
- 5
- 创建测试化代码
public class Main {
    public static void main(String[] args) {
        ChromeOptions options=new ChromeOptions();
        //允许所有的请求
        options.addArguments("--remote--allow-origin=*");
        WebDriver webDriver=new ChromeDriver(options);
        //打开一个网页
        webDriver.get("https://www.baidu.com");
    }
}
- 1
- 2
- 3
- 4
- 5
- 6
- 7
- 8
- 9
- 10
- 运行代码

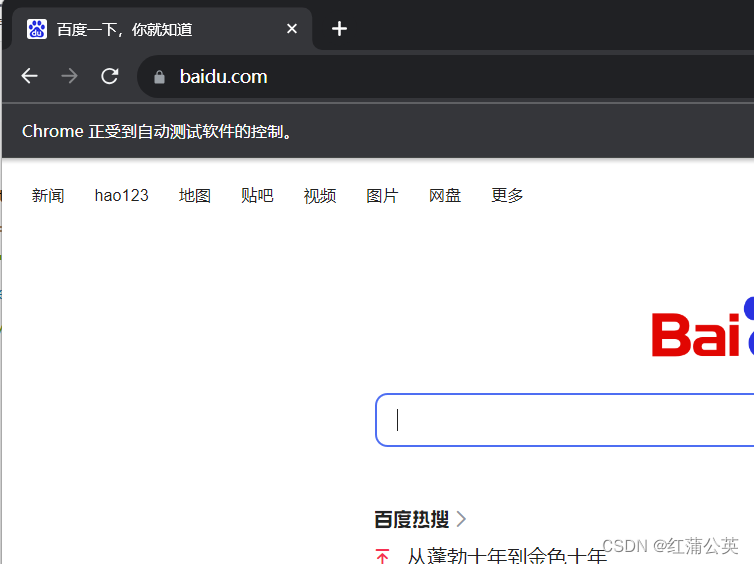
- 此时环境就配好了
Selenium+API
webdriver 提供了一系列的对象定位方法,常用的有以下几种:
id,name,class name,link textpartial,link text,tag name,xpath,css selector
这里的重点是css,xpath
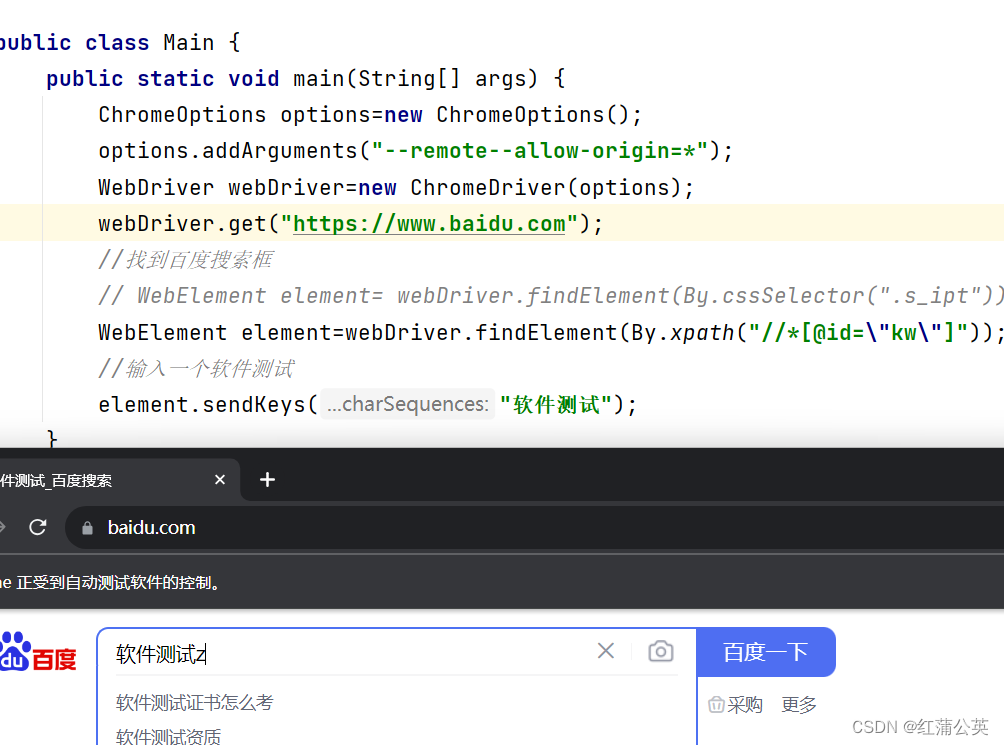
public class Main {
    public static void main(String[] args) {
        ChromeOptions options=new ChromeOptions();
        options.addArguments("--remote--allow-origin=*");
        WebDriver webDriver=new ChromeDriver(options);
        webDriver.get("https://www.baidu.com");
        //找到百度搜索框
        // WebElement element= webDriver.findElement(By.cssSelector(".s_ipt"));
        WebElement element=webDriver.findElement(By.xpath("//*[@id=\"kw\"]"));
        //输入一个软件测试
        element.sendKeys("软件测试");
    }
}
- 1
- 2
- 3
- 4
- 5
- 6
- 7
- 8
- 9
- 10
- 11
- 12
- 13
定位元素findElement:css
css选择语法:
id选择器:#id
类选择:.class
标签选择器:标签名
后代选择器:父级选择器,子级选择器
xPath :
绝对路径:从根目录出发寻找
相对路径:(常用)
1. 相对路径+索引://from/span[2]/input
2. 相对路径+属性://input[@class="s_ipt"]
3. 相对路径+通配符://*[@*="s_ipt"]
4. 相对路径+文本匹配://a[text()="新闻"]
- 1
- 2
- 3
- 4
获取测试结果:
public class Main {
    public static void main(String[] args) throws InterruptedException {
        int flag=0;
        ChromeOptions options=new ChromeOptions();
        options.addArguments("--remote--allow-origin=*");
        WebDriver webDriver=new ChromeDriver(options);
        webDriver.get("https://www.baidu.com");
        //找到百度搜索框
        // WebElement element= webDriver.findElement(By.cssSelector(".s_ipt"));
        WebElement element=webDriver.findElement(By.xpath("//*[@id=\"kw\"]"));
        //输入一个软件测试
        element.sendKeys("软件测试");
        //点击一下百度按钮
        webDriver.findElement(By.cssSelector("#su")).click();
        sleep(3000);
        //校验
        //找到搜索结果
        List<WebElement> elements= webDriver.findElements(By.cssSelector("a em"));
        for (int i=0;i<elements.size();i++){
            if (!elements.get(i).getText().equals("测试")){
                flag=1;
                System.out.println("测试通过");
                break;
            }
        }
        if (flag==0){
            System.out.println("测试不通过");

        }
    }
}
- 1
- 2
- 3
- 4
- 5
- 6
- 7
- 8
- 9
- 10
- 11
- 12
- 13
- 14
- 15
- 16
- 17
- 18
- 19
- 20
- 21
- 22
- 23
- 24
- 25
- 26
- 27
- 28
- 29
- 30
- 31
webdriver 中比较常用的操作对象的方法有下面几个:
- click: 点击对象
- sendKeys: 在对象上模拟按键输入
- clear: 清除对象输入的文本内容
- submit: 提交(必须from标签中,不然会报错)
- text: 用于获取元素的文本信息
- getAttribute 获取控件中的属性值
    private static void test02() {
        ChromeOptions options=new ChromeOptions();
        options.addArguments("--remote--allow-origin=*");
        WebDriver webDriver=new ChromeDriver(options);
        webDriver.get("https://www.baidu.com");
        String button_value=webDriver.findElement(By.cssSelector("#su")).getAttribute("value");
        if (button_value.equals("百度一下")){
            System.out.println("测试通过");
        }else {
            System.out.println(button_value);
            System.out.println("测试不通过");
        }
    }
- 1
- 2
- 3
- 4
- 5
- 6
- 7
- 8
- 9
- 10
- 11
- 12
- 13
添加等待
sleep休眠:添加休眠非常简单,我们需要引入time 包,就可以在脚本中自由的添加休眠时间了,这里的休眠指固定休眠
隐式等待:通过添加implicitlyWait() 方法就可以方便的实现智能等待;implicitlyWait(30)的用法比time.sleep()更智能,后者只能选择一个固定的时间的等待,前者可以在一个时间范围内智能的等待
private static void test02() {
        ChromeOptions options=new ChromeOptions();
        options.addArguments("--remote--allow-origin=*");
        WebDriver webDriver=new ChromeDriver(options);
        webDriver.get("https://www.baidu.com");
        String button_value=webDriver.findElement(By.cssSelector("#su")).getAttribute("value");
       	//隐式等待
        webDriver.manage().timeouts().implicitlyWait(3, TimeUnit.DAYS);
        if (button_value.equals("百度一下")){
            System.out.println("测试通过");
        }else {
            System.out.println(button_value);
            System.out.println("测试不通过");
        }
    }
- 1
- 2
- 3
- 4
- 5
- 6
- 7
- 8
- 9
- 10
- 11
- 12
- 13
- 14
- 15
隐式地等待并非一个固定的等待时间,当脚本执行到某个元素定位时,如果元素可以定位,则继续执行;如果元素定位不到,则它以轮询的方式不断的判断元素是否被定位到。直到超出设置的时长。
显示等待:
    private static void test02() {
        ChromeOptions options=new ChromeOptions();
        options.addArguments("--remote--allow-origin=*");
        WebDriver webDriver=new ChromeDriver(options);
        webDriver.get("https://www.baidu.com");
        String button_value=webDriver.findElement(By.cssSelector("#su")).getAttribute("value");
//        webDriver.manage().timeouts().implicitlyWait(3, TimeUnit.DAYS);
        WebDriverWait wait= new WebDriverWait(webDriver,3000);
        wait.until(ExpectedConditions.elementToBeClickable(By.cssSelector("#help > a:nth-child(1)")));


    }
- 1
- 2
- 3
- 4
- 5
- 6
- 7
- 8
- 9
- 10
- 11
- 12
隐式等待和显示等待区别:
显示等待:可以针对某一个地方进行等待
隐式等待:对全局进行等待
浏览器操作
- 浏览器前进,浏览器退后
  private static void test03() {
        ChromeOptions options=new ChromeOptions();
        options.addArguments("--remote--allow-origin=*");
        WebDriver webDriver=new ChromeDriver(options);
        webDriver.get("https://www.baidu.com");
        webDriver.findElement(By.cssSelector("#kw")).sendKeys("521");
        webDriver.findElement(By.cssSelector("#su")).click();
        //浏览器后退
        webDriver.navigate().back();
        //浏览器前进
        webDriver.navigate().forward();
        //浏览器刷新
        webDriver.navigate().refresh();
    }
- 1
- 2
- 3
- 4
- 5
- 6
- 7
- 8
- 9
- 10
- 11
- 12
- 13
- 14
- 浏览器滚动条
#将浏览器滚动条滑到最顶端
document.documentElement.scrollTop=0
#将浏览器滚动条滑到最底端
document.documentElement.scrollTop=10000
#将浏览器滚动条滑到最底端, 示例
((JavascriptExecutor)webDriver).executeScript(“document.documentElement.scrollTop=10000”);
其中,executeScript(script, *args),在当前窗口/框架同步执行javaScript
private static void test03() {
        ChromeOptions options=new ChromeOptions();
        options.addArguments("--remote--allow-origin=*");
        WebDriver webDriver=new ChromeDriver(options);
        webDriver.get("https://www.baidu.com");
        webDriver.findElement(By.cssSelector("#kw")).sendKeys("521");
        webDriver.findElement(By.cssSelector("#su")).click();
        //浏览器后退
        webDriver.navigate().back();
        //浏览器前进
        webDriver.navigate().forward();
        //浏览器刷新
        webDriver.navigate().refresh();
        //滑动
        ((JavascriptExecutor)webDriver).executeScript("document.documentElement.scrollTop=10000");

    }
- 1
- 2
- 3
- 4
- 5
- 6
- 7
- 8
- 9
- 10
- 11
- 12
- 13
- 14
- 15
- 16
- 17
- 设置浏览器宽、高
webDriver.manage().window().setSize(new Dimension(1000,1000));
- 1
- 浏览器最大化
webDriver.manage().window().maximize();
- 1
- 浏览器全屏
webDriver.manage().window().fullscreen();
- 1
键盘事件
要使用键盘按键,必须引入keys 包:
通过send_keys()调用按键:
sendkeys(Keys.TAB) # TAB
sendkeys(Keys.ENTER) # 回车
sendkeys(Keys.SPACE) #空格键
sendkeys(Keys.ESCAPE) #回退键(Esc)
键盘组合键用法
sendkeys(Keys.CONTROL,‘a’) #全选(Ctrl+A)
sendkeys(Keys.CONTROL,‘c’) #复制(Ctrl+C)
sendkeys(Keys.CONTROL,‘x’) #剪贴(Ctrl+X)
sendkeys(Keys.CONTROL,‘v’) #粘贴(Ctrl+V)
webDriver.findElement(By.cssSelector("#kw")).sendKeys(Keys.CONTROL,"A");
- 1
鼠标事件
Actions(driver)
生成用户的行为。所有的行动都存储在actionchains 对象。通过perform()存储的行为。
move_to_element(element)
移动鼠标到一个元素中,menu 上面已经定义了他所指向的哪一个元素
perform()
执行所有存储的行为:
Actions类
- contextClick() 右击
- doubleClick() 双击
- dragAndDrop() 拖动
- moveToElement() 移动
   private static void test05() throws InterruptedException {
        ChromeOptions options=new ChromeOptions();
        options.addArguments("--remote--allow-origin=*");
        WebDriver webDriver=new ChromeDriver(options);
        webDriver.get("https://www.baidu.com");
        WebElement webElement=webDriver.findElement(By.cssSelector("#kw"));
        Actions actions=new Actions(webDriver);
        sleep(3000);
        actions.moveToElement(webElement).contextClick().perform();
    }
- 1
- 2
- 3
- 4
- 5
- 6
- 7
- 8
- 9
- 10
多层框架/窗口定位
获取框架
对于一个web 应用,经常会出现框架(frame) 或窗口(window)的应用,这也就给我们的定位带来了一定的困难。
通过frame的id或者name或者frame自带的其它属性来定位框架,这里switchTo.frame()把当前定位的主体切换了frame里。
窗口定位:
有可能嵌套的不是框架,而是窗口,还有真对窗口的方法:switchTo.window用法与switchTo.frame 相同。
下拉框处理
下拉框是我们最常见的一种页面元素,对于一般的元素,我们只需要一次就定位,但下拉框里的内容需要进行两次定位,先定位到下拉框对下拉框进行操作后,再定位到下拉框内里的选项。
    private static void test06() {
        WebDriver webDriver=new ChromeDriver();
        webDriver.get("https://www.baidu.com");
        WebElement webElement=webDriver.findElement(By.cssSelector("#ShippingMethod"));
        Select select=new Select(webElement);
        //通过下标选择
        select.selectByIndex(3);
        select.selectByValue("12.5");
    }
- 1
- 2
- 3
- 4
- 5
- 6
- 7
- 8
- 9
弹窗处理
alert、confirm、prompt 的处理
- text 返回alert/confirm/prompt 中的文字信息
- accept 点击确认按钮
- dismiss 点击取消按钮,如果有的话
- send_keys 输入值,如果alert 没有对话框就不能用了,不然会报错
    private static void test07() throws InterruptedException {
        WebDriver webDriver=new ChromeDriver();
        webDriver.get("https://www.baidu.com");
        webDriver.findElement(By.cssSelector("button")).click();
        sleep(3000);
        //alert弹窗取消
        webDriver.switchTo().alert().dismiss();
        //点击按钮
        webDriver.findElement(By.cssSelector("button")).click();
        //在alert弹窗内输入值
        webDriver.switchTo().alert().sendKeys("123456");
        //alert弹窗确认
        webDriver.switchTo().alert().accept();
    }
- 1
- 2
- 3
- 4
- 5
- 6
- 7
- 8
- 9
- 10
- 11
- 12
- 13
- 14
上传文件操作
上传过程一般要打开一个本地窗口,从窗口选择本地文件添加。所以,一般会卡在如何操作本地窗口添加上传文件。
在selenium webdriver 没我们想的那么复杂;只要定位上传按钮,通过sendKeys 添加本地文件路径就可以了。绝对路径和相对路径都可以,关键是上传的文件存在。
private static void test08() {
        WebDriver webDriver=new ChromeDriver();
        webDriver.get("https://www.baidu.com");
        webDriver.findElement(By.cssSelector("input")).sendKeys("本地文件目录");
    }
- 1
- 2
- 3
- 4
- 5
关闭浏览器
浏览器的quit和close之间的区别:
- quit关闭了整个浏览器,close关闭当前的页面。
- quit清空了浏览器的缓存,close不会清空缓存。
    private static void test09() {
        WebDriver webDriver=new ChromeDriver();
        webDriver.get("https://www.baidu.com");
        webDriver.findElement(By.cssSelector("#help > a:nth-child(1)"));
        //关闭
        webDriver.quit();
        webDriver.close();
    }
- 1
- 2
- 3
- 4
- 5
- 6
- 7
- 8
窗口的切换
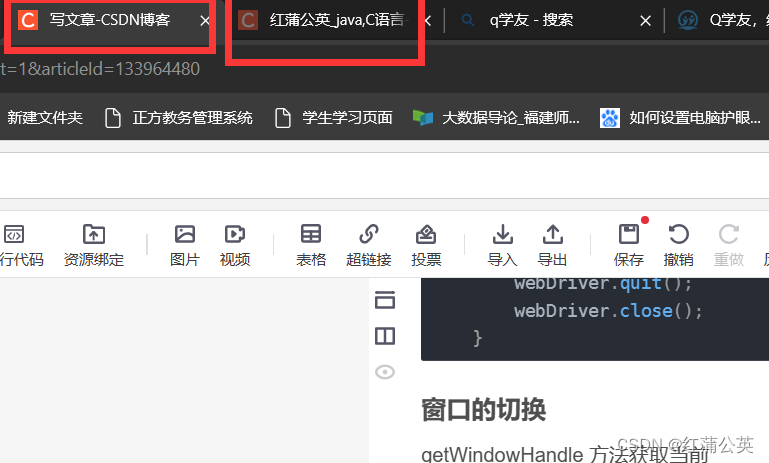
getWindowHandle 方法获取当前
   private static void test11() throws InterruptedException {
        WebDriver webDriver=new ChromeDriver();
        webDriver.get("https://www.baidu.com");
        webDriver.findElement(By.cssSelector("#help > a:nth-child(1)")).click();
        sleep(3000);
        //通过这个方法getWindowHandle,获取当前的窗口句柄
        //通过这个方法getWindowHandles,获取所有的窗口句柄
        Set<String> handles= webDriver.getWindowHandles();
        String target_handle="";
        for ( String handle:handles){
            target_handle=handle;
        }
        webDriver.switchTo().window(target_handle);
        sleep(3000);
        webDriver.findElement(By.cssSelector("#ww")).sendKeys("新闻联播");
        webDriver.findElement(By.cssSelector("#s_btn_wr")).click();
    }
- 1
- 2
- 3
- 4
- 5
- 6
- 7
- 8
- 9
- 10
- 11
- 12
- 13
- 14
- 15
- 16
- 17
截图
导入依赖:进入Maven仓库
<!-- https://mvnrepository.com/artifact/commons-io/commons-io -->
<dependency>
    <groupId>commons-io</groupId>
    <artifactId>commons-io</artifactId>
    <version>2.11.0</version>
</dependency>
- 1
- 2
- 3
- 4
- 5
- 6
- 7
 private static void test12() throws InterruptedException, IOException {
        WebDriver webDriver=new ChromeDriver();
        webDriver.get("https://www.baidu.com");
        webDriver.findElement(By.cssSelector("#kw")).sendKeys("测试");
        webDriver.findElement(By.cssSelector("#su")).click();
        sleep(3000);
        File file=((TakesScreenshot)(webDriver)).getScreenshotAs(OutputType.FILE);
        FileUtils.copyFile(file,new File("D://20231022.png"));
    }
- 1
- 2
- 3
- 4
- 5
- 6
- 7
- 8
- 9
需要向上转型,TakesScreenshot,然后调用getScreenshotAs方法


