
- 1如何看懂设计师给到的设计图?_前端看ui设计的东西,怎么看
- 2【ITOO技术篇】Easyui datagrid中添加 Combobox_easyui grid combobox
- 3这7本书都没有,还学什么Web安全?(附全套PDF)_白帽子讲web安全pdf下载
- 4算法沉淀——穷举、暴搜、深搜、回溯、剪枝综合练习三(leetcode真题剖析)
- 5彻底搞懂NeRF论文公式代码_nerf代码
- 6【阶段二】Python数据分析Pandas工具使用05篇:数据预处理:数据的规范化_pandas 归一化标准化
- 7Kafka相关知识_zookeeper-server-start.sh zookeeper-shell.sh 区别
- 8BUUCTF-Misc-No.2_[mrctf2020]小o的考研复试
- 9新版 Alist + RaiDrive 挂载阿里云盘 Open 到本地,实现网盘本地化_alist挂载阿里云盘open
- 10【机器学习学习脉络】
在k8s上部署dolphinscheduler
赞
踩
(作者:陈玓玏)
一、 前提条件
- 已部署k8s,版本信息如下:

- k8s为单机部署;
- 已部署nfs,版本如下;

二、 部署helm
以下步骤安装的是二进制版本,如果通过脚本安装,可以直接参考链接:https://helm.sh/docs/intro/install/。
1.下载helm,地址:https://github.com/helm/helm/releases,通过wget下载。这里碰到一个错误,下载到最后四秒时报错,helm文件带*号,不可用,网络问题,重新下载;
2.解压,tar -zxvf helm-v3.14.2-linux-amd64.tar.gz;
3.把文件移至指定位置,mv linux-amd64/helm /usr/local/bin/helm;
4.验证是否安装成功,输入helm version,能查看到版本即可。

三、安装dolphinscheduler
1.下载安装包,下载地址:https://dolphinscheduler.apache.org/zh-cn/download/3.1.8,通过命令wget -c https://archive.apache.org/dist/dolphinscheduler/3.1.8/apache-dolphinscheduler-3.1.8-src.tar.gz下载;
2.按序执行以下代码:
tar -zxvf apache-dolphinscheduler-<version>-src.tar.gz
cd apache-dolphinscheduler-<version>-src/deploy/kubernetes/dolphinscheduler
helm repo add bitnami https://charts.bitnami.com/bitnami
- 1
- 2
- 3
- 更新依赖:
helm dependency update .
注意,执行helm dependency update .前,最好把Chart.yaml中的三个repository: https://raw.githubusercontent.com/bitnami/charts/archive-full-index/bitnami改成repository: https://raw.gitmirror.com/bitnami/charts/archive-full-index/bitnami,避免连不上外网导致下载不到依赖。
碰到的bug:
3.1. helm dependency update .碰到bug:Chart.yaml file is missing,因为没进入正确的路径,少cd了两层;
3.2. helm dependency update .碰到bug:Save error occurred: could not find : chart postgresql not found in https://raw.githubusercontent.com/bitnami/charts/archive-full-index/bitnami: looks like “https://raw.githubusercontent.com/bitnami/charts/archive-full-index/bitnami” is not a valid chart repository or cannot be reached: context deadline exceeded (Client.Timeout or context cancellation while reading body),应该是服务器不通github或者链接github的网速太慢。尝试解决,先在https://www.ip138.com/查找github.com的ip地址,然后在服务器的/etc/hosts中加入一行,ip github.com,再尝试helm dependency update .最后解决方法是更改Chart.yaml的地址,把repository: https://raw.githubusercontent.com/bitnami/charts/archive-full-index/bitnami改成repository: https://raw.gitmirror.com/bitnami/charts/archive-full-index/bitnami。
-
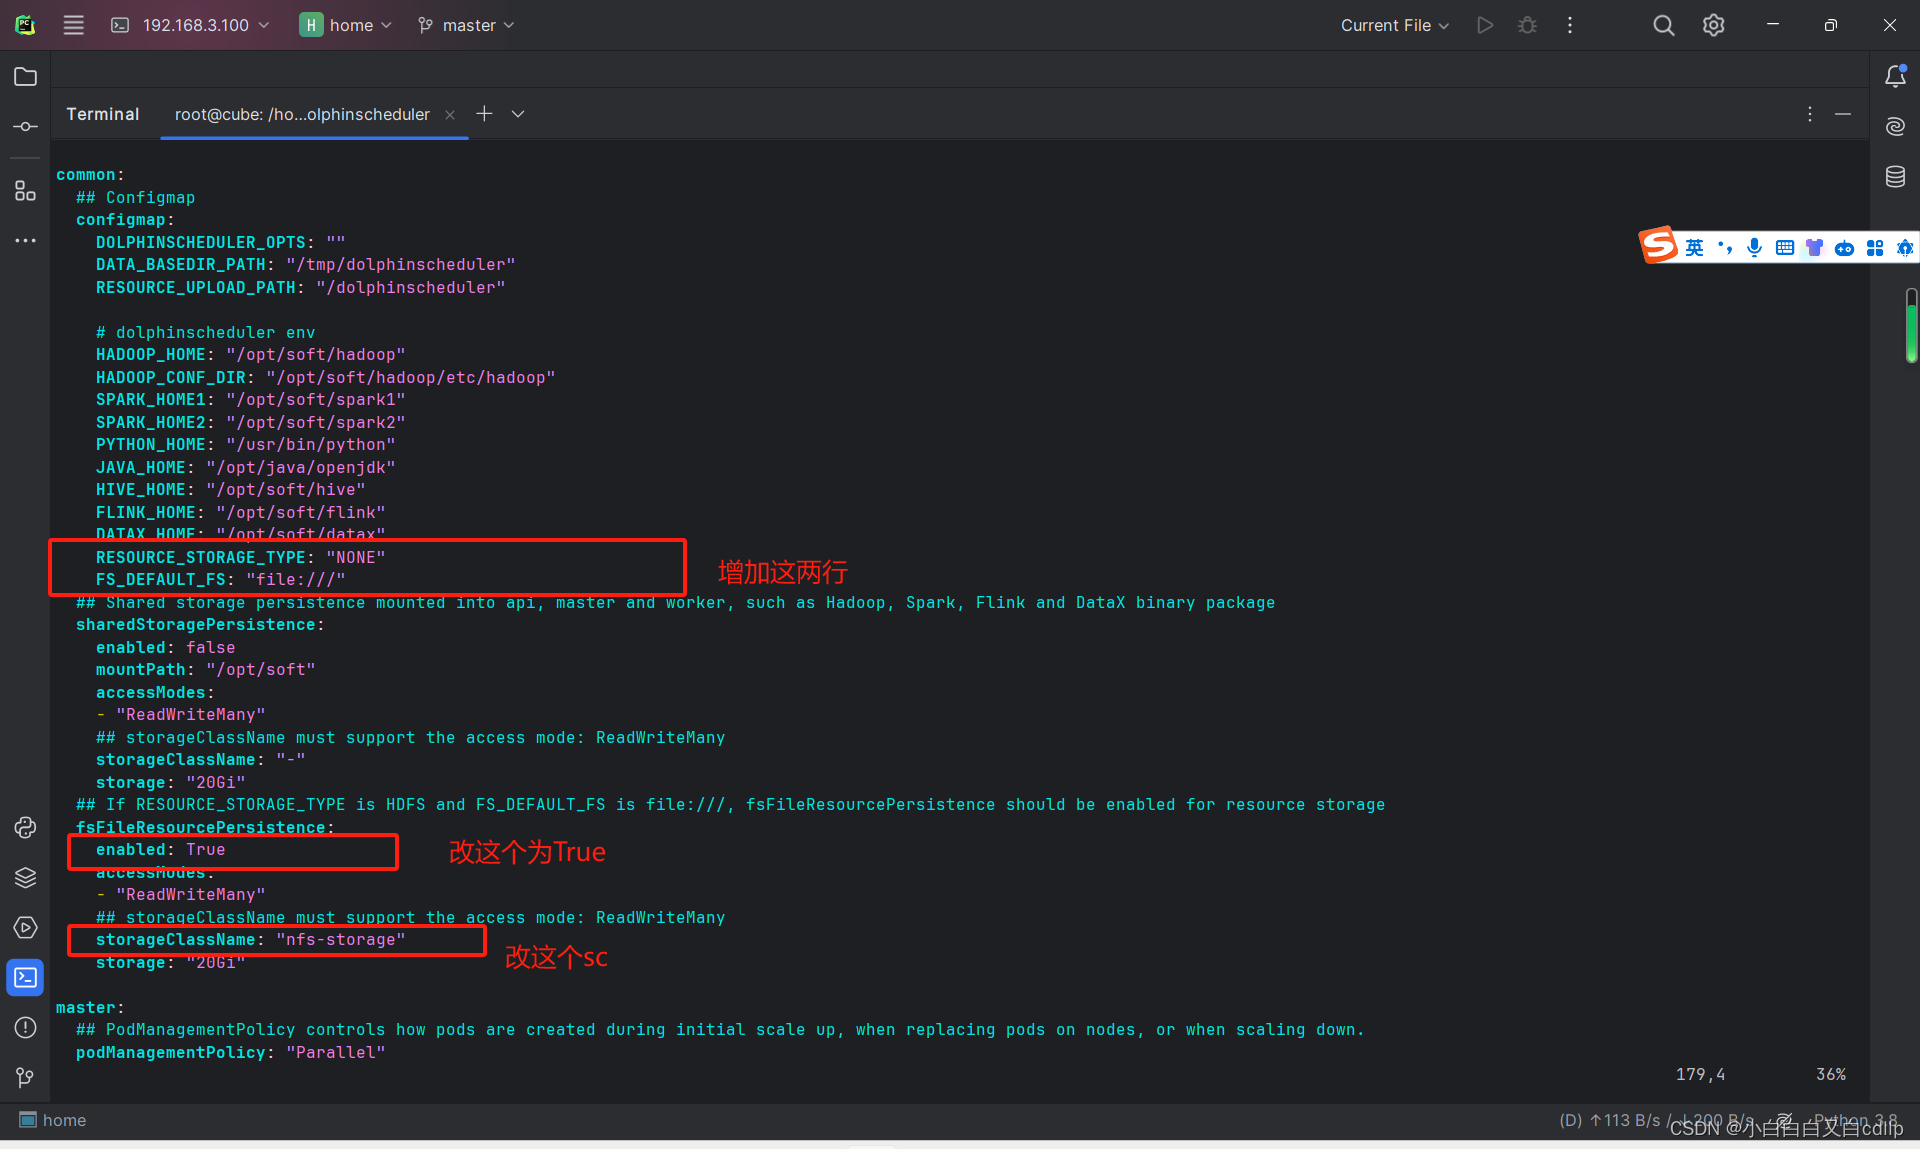
修改存储类型
修改 values.yaml 文件中下面的配置项,将resource.storage.type改为NONE,common中的configmap中新增RESOURCE_STORAGE_TYPE: "NONE"和FS_DEFAULT_FS: “file:///”,common的fsFileResourcePersistence改enabled: true,storageClassName: “nfs-storage”.
主要修改的内容如下图:
-
部署dolphinscheduler:
helm install dolphinscheduler . --set image.tag=<version>
碰到的Bug:
5.1 一开始没进行第四步,默认用的是hdfs存储,一直报错postgresql的secret不存在,重新执行了第4步就好了;
5.2 报错连接postgresql失败,账号密码有误,排查应该是我之前用k8s部署过了postgresql和mysql等,账号密码已经在configmap中设置过了,所以dolphinscheduler用新的账号密码连不上,删除原来的postgresql、mysql、zookeeper的部署,重新执行helm部署dolphinscheduler就解决了;
5.3 报错0/1 nodes are available: 1 pod has unbound immediate PersistentVolumeClaims.这里应该是我设置了存储类型中的storageClassName: “nfs-storage”,但实际我的集群中没有这个storageClassName,所以pod和pvc、pv绑定失败。
为了解决Bug5.3,新建一个pv:
kind: PersistentVolume
apiVersion: v1
metadata:
  name: nfs-storage
  labels:
    app: nfs
    type: local

spec:
  capacity:
    storage: 20Gi
  hostPath:
    path: /home/data
    type: ''
  accessModes:
    - ReadWriteMany
  persistentVolumeReclaimPolicy: Retain
  storageClassName: nfs-storage
  volumeMode: Filesystem

- 1
- 2
- 3
- 4
- 5
- 6
- 7
- 8
- 9
- 10
- 11
- 12
- 13
- 14
- 15
- 16
- 17
- 18
- 19
pod全部正常运行了。
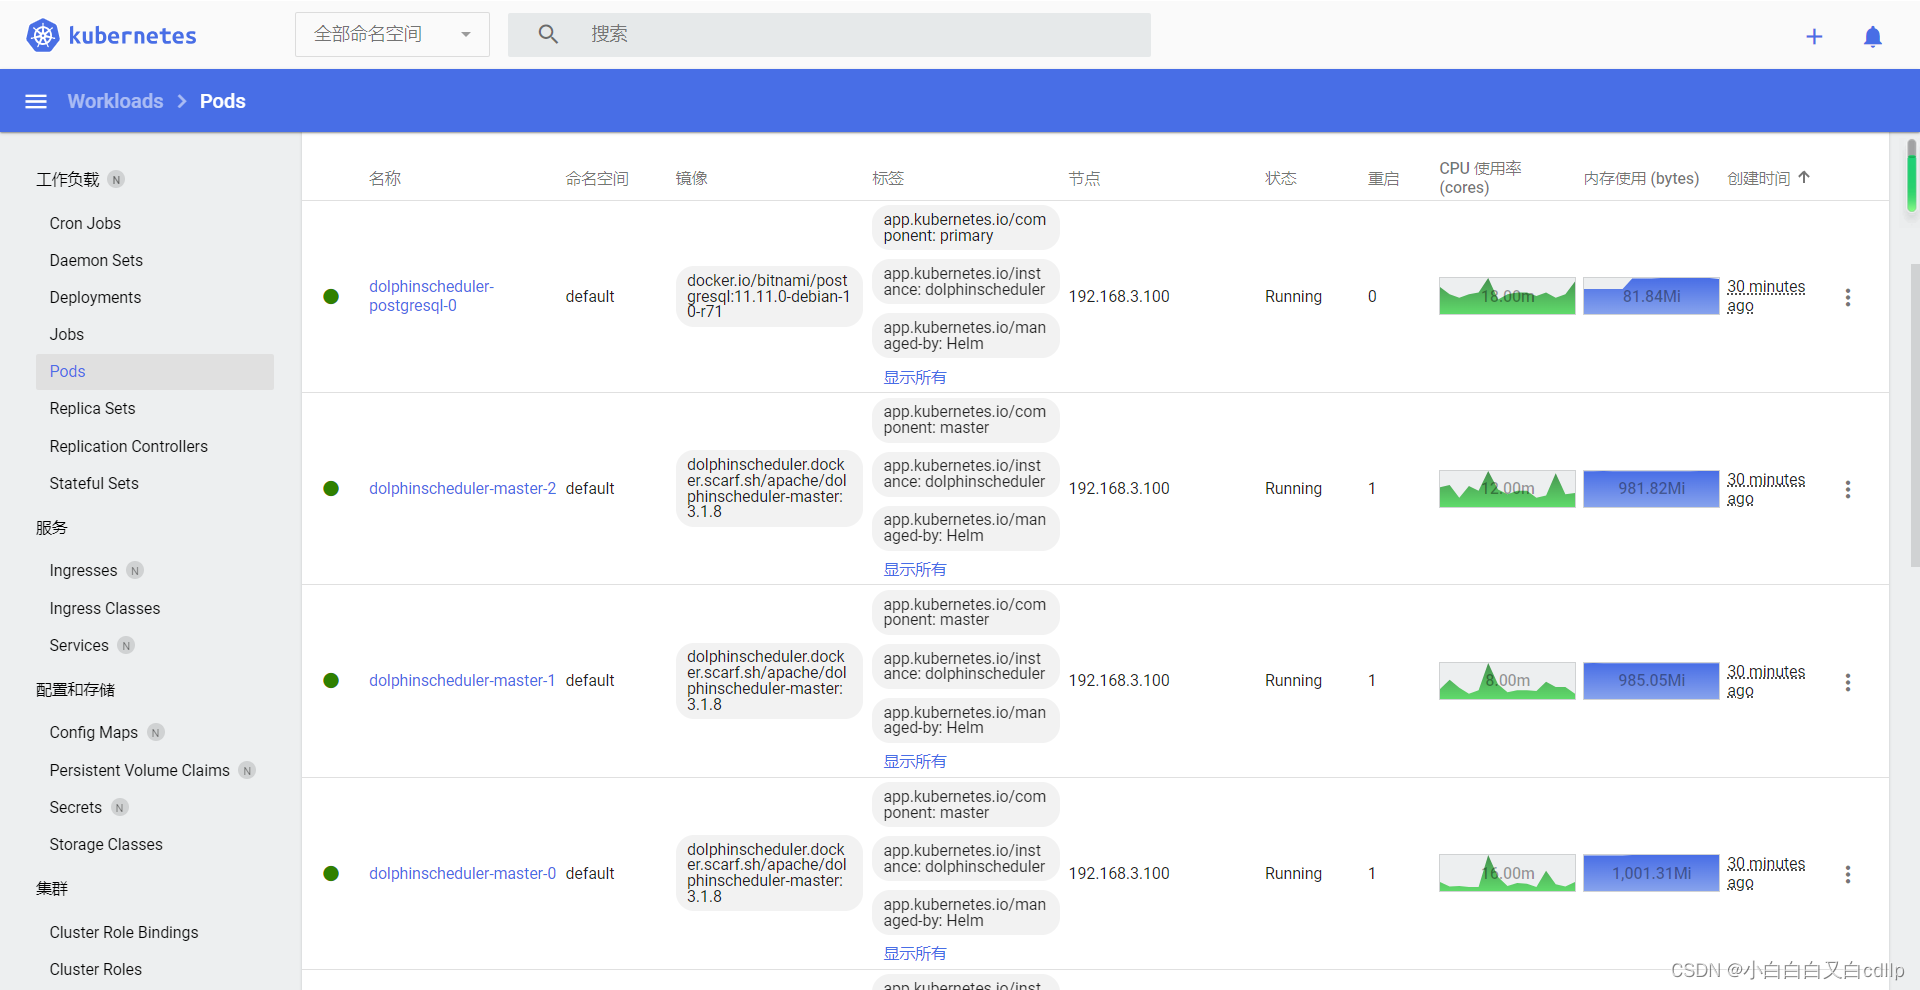
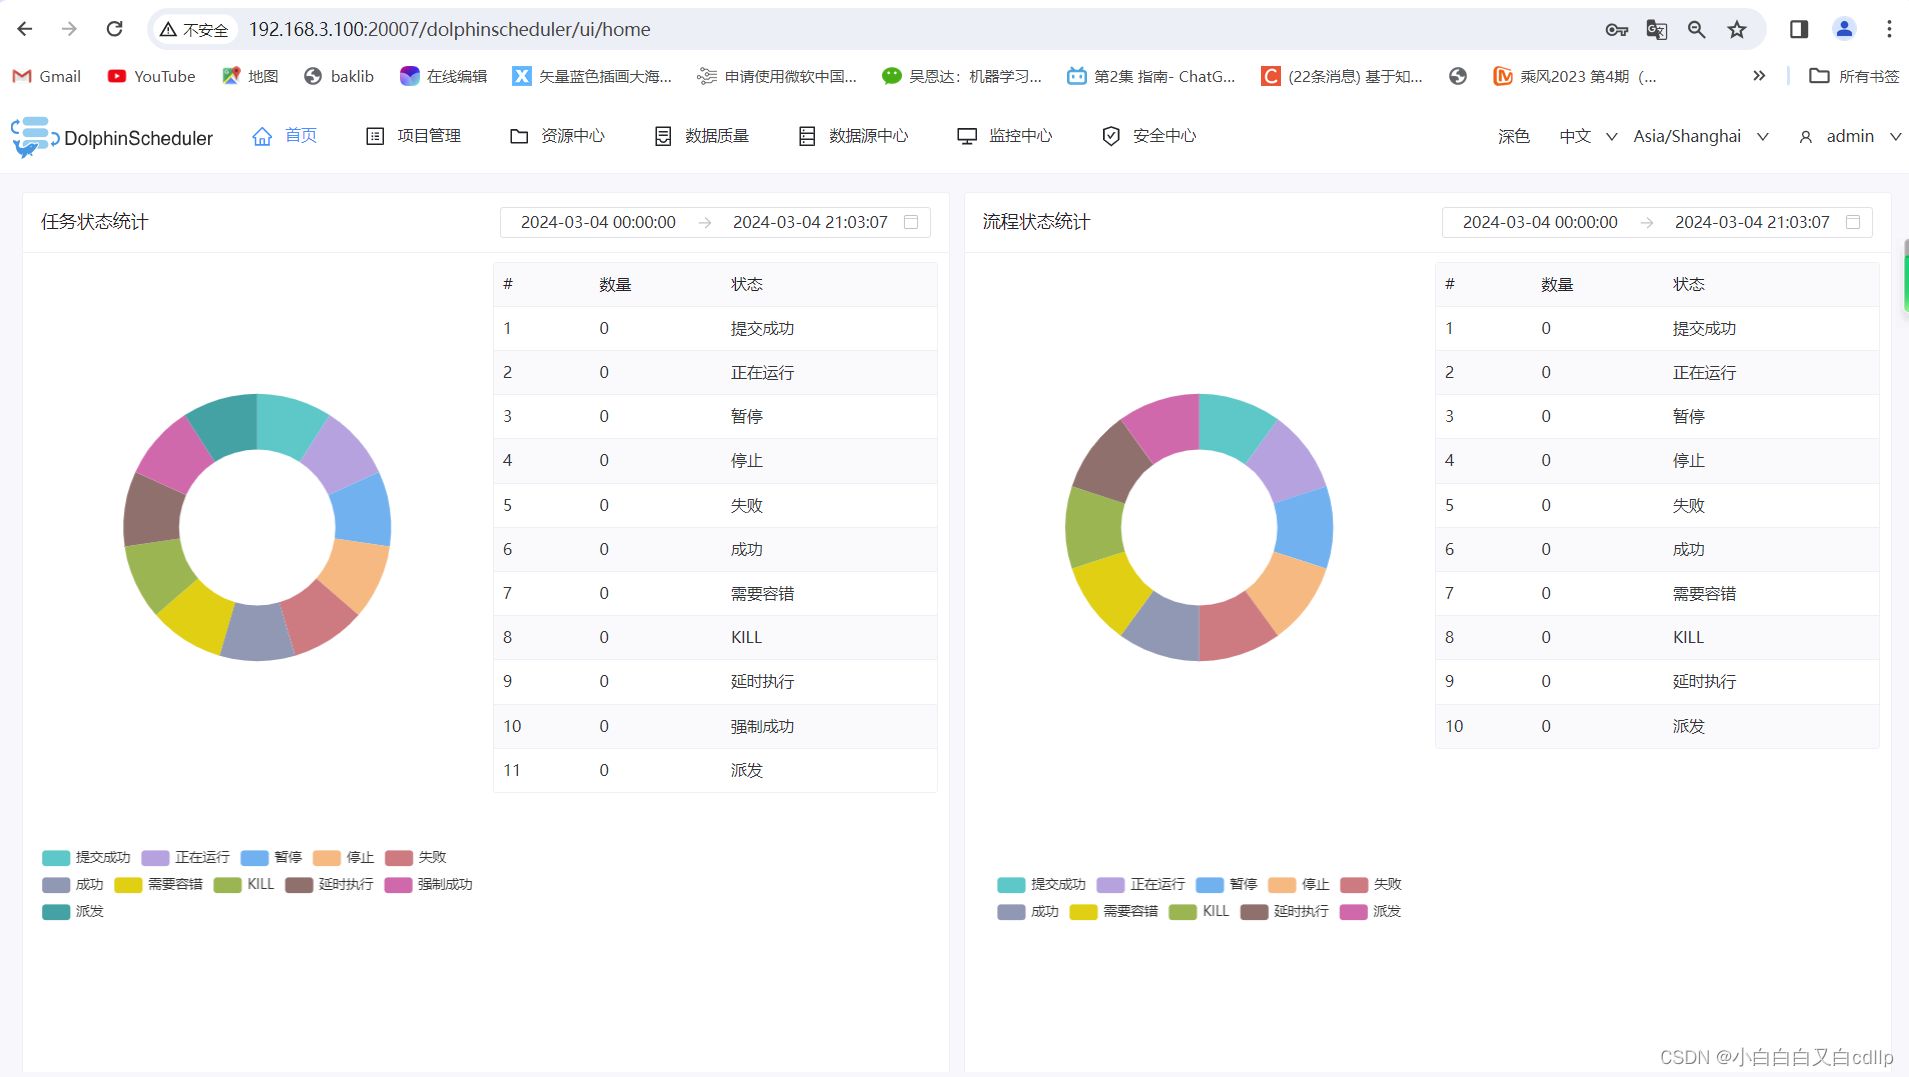
6. 访问,在k8sdashboard上找到名为dolphinscheduler-api的service,编辑yaml文件,把类型从ClusterIP改为NodePort,访问ip+端口+/dolphinscheduler/ui,默认的用户是admin,默认的密码是dolphinscheduler123,可进入dolphinscheduler,表示部署成功。
参考文章:
https://blog.csdn.net/weixin_64348970/article/details/134368824
https://blog.csdn.net/qq_41538097/article/details/125380287

