
- 1pythonruner和class的区别_Python排序傻傻分不清?一文看透sorted与sort用法
- 2使用FFMPEG提取音频数据_ffmpeg 提取音频
- 3opencv中的rgb转gray的计算方法
- 4>/etc/ld.so.conf" href="/w/Monodyee/article/detail/177164" target="_blank">【Linux】配置动态链接库的几种方法_echo "/usr/local/ssl/lib">>/etc/ld.so.conf
- 5Python | 轻量ORM框架Peewee的基础使用(增删改查、自动创建模型类、事务装饰器)_peewee 关闭已经开启的事务
- 6local storage在不同标签页,不同浏览器之间通用吗,可以跨域吗_localstorage可以跨页面吗
- 7POI 3.17 导出Excel,基础代码_poi3.17使用commons-lang3
- 8使用LSTM进行时间序列预测_lstm时间序列预测
- 9一文带你了解VPN
- 10pip._vendor.urllib3.exceptions.ReadTimeoutError: HTTPSConnectionPool(host='f 的解决办法
fastdfs+nginx+keepalived+openoffice+lua 实现文件上传、下载、水印、预览(word、excel、ppt、txt),feign文件上传_docker excel加水印下载宕机
赞
踩
前言
最近刚刚实现的文件服务中心,记录一下,为没做过的人提供一下思路,由于本人技术有限,不足之处欢迎批评指正,共同学习,共同进步。
目录
Fastdfs集群搭建
搭建keepalived 实现ngxin热备高可用
远程访问 实现上传下载
图片添加水印
feign远程调用解决MultipartFile为null的问题
搭建openoffice-实现文件预览
自定义openoffice连接池
nginx整合lua实现文件安全url
1.文件服务器 搭建
我是基于docker镜像安装的fastdfs,较以前的安装实现是太便捷了,特别推荐。
1.1 拉取镜像
docker pull morunchang/fastdfs
1.2 在node01和node02上安装tracker
在node01和node02上分别执行以下操作
注意:以下操作指令在node01中执行,在node02操作时,将tracker1改为tracker2
1)创建文件夹
mkdir -p /apps/fastdfs/tracker1/data /apps/fastdfs/tracker1/conf
- 1
2)写入/apps/fastdfs/tracker1/conf/tracker.conf
disabled=false
bind_addr=
port=22122
connect_timeout=30
network_timeout=30
base_path=/data/fast_data
max_connections=256
accept_threads=1
work_threads=4
store_lookup=2
store_group=group1
store_server=0
store_path=0
download_server=0
reserved_storage_space = 10%
log_level=info
run_by_group=
run_by_user=
allow_hosts=*
sync_log_buff_interval = 10
check_active_interval = 120
thread_stack_size = 64KB
storage_ip_changed_auto_adjust = true
storage_sync_file_max_delay = 86400
storage_sync_file_max_time = 300
use_trunk_file = false
slot_min_size = 256
slot_max_size = 16MB
trunk_file_size = 64MB
trunk_create_file_advance = false
trunk_create_file_time_base = 02:00
trunk_create_file_interval = 86400
trunk_create_file_space_threshold = 20G
trunk_init_check_occupying = false
trunk_init_reload_from_binlog = false
trunk_compress_binlog_min_interval = 0
use_storage_id = false
storage_ids_filename = storage_ids.conf
id_type_in_filename = ip
store_slave_file_use_link = false
rotate_error_log = false
error_log_rotate_time=00:00
rotate_error_log_size = 0
log_file_keep_days = 0
use_connection_pool = false
connection_pool_max_idle_time = 3600
http.server_port=8080
http.check_alive_interval=30
http.check_alive_type=tcp
http.check_alive_uri=/status.html

- 1
- 2
- 3
- 4
- 5
- 6
- 7
- 8
- 9
- 10
- 11
- 12
- 13
- 14
- 15
- 16
- 17
- 18
- 19
- 20
- 21
- 22
- 23
- 24
- 25
- 26
- 27
- 28
- 29
- 30
- 31
- 32
- 33
- 34
- 35
- 36
- 37
- 38
- 39
- 40
- 41
- 42
- 43
- 44
- 45
- 46
- 47
- 48
- 49
- 50
3)运行tracker1的docker容器
docker run -d --name tracker1 --net=host --restart always \
-v /etc/localtime:/etc/localtime \
-v /apps/fastdfs/tracker1/data:/data/fast_data/ \
-v /apps/fastdfs/tracker1/conf/tracker.conf:/etc/fdfs/tracker.conf \
morunchang/fastdfs sh tracker.sh
- 1
- 2
- 3
- 4
- 5
4)查看docker日志是否启动正常
docker logs tracker1
- 1
5)开启防火墙端口:22122
firewall-cmd --zone=public --add-port=22122/tcp --permanent
firewall-cmd --reload
- 1
- 2
1.3 在node01和node02上安装storage
在node01和node02上分别执行以下操作
注意:以下操作指令在node01中执行,在node02操作时,将storage1改为storage2
1)创建文件夹
mkdir -p /apps/fastdfs/storage1/data /apps/fastdfs/storage1/conf
- 1
2)写入/apps/fastdfs/storage1/conf/storage.conf
   disabled=false
    group_name=group1
    bind_addr=
    client_bind=true
    port=23002
    connect_timeout=30
    network_timeout=30
    heart_beat_interval=30
    stat_report_interval=60
    base_path=/data/fast_data
    max_connections=256
    buff_size = 256KB
    accept_threads=1
    work_threads=4
    disk_rw_separated = true
    disk_reader_threads = 1
    disk_writer_threads = 1
    sync_wait_msec=50
    sync_interval=0
    sync_start_time=00:00
    sync_end_time=23:59
    write_mark_file_freq=500
    store_path_count=1
    store_path0=/data/fast_data
    subdir_count_per_path=256
    tracker_server=198.168.1.121:22122
    tracker_server=198.168.1.122:22122
    log_level=debug
    run_by_group=
    run_by_user=
    allow_hosts=*
    file_distribute_path_mode=0
    file_distribute_rotate_count=100
    fsync_after_written_bytes=0
    sync_log_buff_interval=10
    sync_binlog_buff_interval=10
    sync_stat_file_interval=300
    thread_stack_size=512KB
    upload_priority=10
    if_alias_prefix=
    check_file_duplicate=0
    file_signature_method=hash
    key_namespace=FastDFS
    keep_alive=0
    use_access_log = true
    rotate_access_log = false
    access_log_rotate_time=00:00
    rotate_error_log = false
    error_log_rotate_time=00:00
    rotate_access_log_size = 0
    rotate_error_log_size = 0
    log_file_keep_days = 0
    file_sync_skip_invalid_record=false
    use_connection_pool = false
    connection_pool_max_idle_time = 3600
    http.domain_name=
    http.server_port=9101
- 1
- 2
- 3
- 4
- 5
- 6
- 7
- 8
- 9
- 10
- 11
- 12
- 13
- 14
- 15
- 16
- 17
- 18
- 19
- 20
- 21
- 22
- 23
- 24
- 25
- 26
- 27
- 28
- 29
- 30
- 31
- 32
- 33
- 34
- 35
- 36
- 37
- 38
- 39
- 40
- 41
- 42
- 43
- 44
- 45
- 46
- 47
- 48
- 49
- 50
- 51
- 52
- 53
- 54
- 55
- 56
- 57
3)写入/apps/fastdfs/storage1/conf/nginx.conf
worker_processes  1;
error_log  /data/fast_data/logs/nginx-error.log;

events {
    worker_connections  1024;
}

http {
    include       mime.types;
    default_type  application/octet-stream;

    log_format  main  '$remote_addr - $remote_user [$time_local] "$request" '
                      '$status $body_bytes_sent "$http_referer" '
                      '"$http_user_agent" "$http_x_forwarded_for"';

    access_log  /data/fast_data/logs/nginx-access.log  main;
    sendfile        on;
    keepalive_timeout  65;

    server {
        listen       9101;
        server_name  localhost;

        location / {
            root   html;
            index  index.html index.htm;
        }

        location ~ /group1/M00 {
                    root /data/fast_data/data;
                    ngx_fastdfs_module;
        }

        error_page   500 502 503 504  /50x.html;
        location = /50x.html {
            root   html;
        }
    }
}
- 1
- 2
- 3
- 4
- 5
- 6
- 7
- 8
- 9
- 10
- 11
- 12
- 13
- 14
- 15
- 16
- 17
- 18
- 19
- 20
- 21
- 22
- 23
- 24
- 25
- 26
- 27
- 28
- 29
- 30
- 31
- 32
- 33
- 34
- 35
- 36
- 37
- 38
- 39
4)写入/apps/fastdfs/storage1/conf/mod_fastdfs.conf
connect_timeout=30
network_timeout=30
base_path=/data/fast_data
load_fdfs_parameters_from_tracker=true
storage_sync_file_max_delay = 86400
use_storage_id = false
storage_ids_filename = storage_ids.conf
tracker_server=198.168.1.121:22122
tracker_server=198.168.1.122:22122
storage_server_port=23002
group_name=group1
url_have_group_name = true
store_path_count=1
log_level=info
log_filename=
response_mode=proxy
if_alias_prefix=
flv_support = true
flv_extension = flv
group_count = 0
- 1
- 2
- 3
- 4
- 5
- 6
- 7
- 8
- 9
- 10
- 11
- 12
- 13
- 14
- 15
- 16
- 17
- 18
- 19
- 20
5)写入/apps/fastdfs/storage1/conf/storage.sh
#!/bin/sh
/data/fastdfs/storage/fdfs_storaged /etc/fdfs/storage.conf
/etc/nginx/sbin/nginx
tail -f /data/fast_data/logs/storaged.log
- 1
- 2
- 3
- 4
6)写入/apps/fastdfs/storage1/conf/client.conf
# connect timeout in seconds
# default value is 30s
connect_timeout=30

# network timeout in seconds
# default value is 30s
network_timeout=30

# the base path to store log files
base_path=/data/fastdfs/test

# tracker_server can ocur more than once, and tracker_server format is
#  "host:port", host can be hostname or ip address

tracker_server=198.168.1.122:22122

#standard log level as syslog, case insensitive, value list:
### emerg for emergency
### alert
### crit for critical
### error
### warn for warning
### notice
### info
log_level=info

# if use connection pool
# default value is false
# since V4.05
use_connection_pool = false

# connections whose the idle time exceeds this time will be closed
# unit: second
# default value is 3600
# since V4.05
connection_pool_max_idle_time = 3600

# if load FastDFS parameters from tracker server
# since V4.05
# default value is false
load_fdfs_parameters_from_tracker=false

# if use storage ID instead of IP address
# same as tracker.conf
# valid only when load_fdfs_parameters_from_tracker is false
# default value is false
# since V4.05
use_storage_id = false

# specify storage ids filename, can use relative or absolute path
# same as tracker.conf
# valid only when load_fdfs_parameters_from_tracker is false
# since V4.05
storage_ids_filename = storage_ids.conf

#HTTP settings
http.tracker_server_port=80

#use "#include" directive to include HTTP other settiongs
##include http.conf
- 1
- 2
- 3
- 4
- 5
- 6
- 7
- 8
- 9
- 10
- 11
- 12
- 13
- 14
- 15
- 16
- 17
- 18
- 19
- 20
- 21
- 22
- 23
- 24
- 25
- 26
- 27
- 28
- 29
- 30
- 31
- 32
- 33
- 34
- 35
- 36
- 37
- 38
- 39
- 40
- 41
- 42
- 43
- 44
- 45
- 46
- 47
- 48
- 49
- 50
- 51
- 52
- 53
- 54
- 55
- 56
- 57
- 58
- 59
- 60
7)运行docker容器
docker run -d --name storage1 --net=host --restart always \
-v /etc/localtime:/etc/localtime \
-v /apps/fastdfs/storage1/data:/data/fast_data/ \
-v /apps/fastdfs/storage1/conf/storage.sh:/storage.sh \
-v /apps/fastdfs/storage1/conf/storage.conf:/etc/fdfs/storage.conf \
-v /apps/fastdfs/storage1/conf/nginx.conf:/etc/nginx/conf/nginx.conf  \
-v /apps/fastdfs/storage1/conf/mod_fastdfs.conf:/etc/fdfs/mod_fastdfs.conf \
-v /apps/fastdfs/storage1/conf/client.conf:/data/fastdfs/conf/client.conf \
morunchang/fastdfs sh storage.sh
- 1
- 2
- 3
- 4
- 5
- 6
- 7
- 8
- 9
8)查看docker日志是否正常
docker logs storage1
- 1
9)开启防火墙端口:23002、9101
firewall-cmd --zone=public --add-port=23002/tcp --add-port=9101/tcp --permanent
firewall-cmd --reload
- 1
- 2
1.4 验证fastdfs是否安装成功
说明:以下操作在node01中进行。
1.4.1查看FastDFS监控状态
docker exec -it storage1 fdfs_monitor /data/fastdfs/conf/client.conf
- 1
参数说明:
tracker_server_count:2 --表示2个Tracker Server
tracker server is 198.168.1.121:22122 --表示Leader Tracker
group count: 1	--表示有1个group
group name = group1	--组名称是group1
storage server count = 2	--组内有2个storage
active server count = 2	--活动的storage有2个
storage server port = 23002	--storage的端口
storage HTTP port = 9101	--storage的文件访问端口
store path count = 1	--storage只挂了一个存储目录
total_upload_count = 11	--总共上传了多少个文件
total_upload_bytes = 691405	--总共上传了多少字节
success_upload_bytes = 691405 --成功上传了多少字节
total_download_count = 2	--总共下载了多少文件(使用java客户端)
- 1
- 2
- 3
- 4
- 5
- 6
- 7
- 8
- 9
- 10
- 11
- 12
- 13
1.4.2 上传文件到FastDFS
docker exec -it storage1 bash
cd /data/fastdfs/conf
fdfs_test client.conf upload anti-steal.jpg
- 1
- 2
- 3
文件上传成功后,会提示文件访问地址,同时会自动同步到storage2,因此也可以通过storage2的IP,访问文件。
由于storage1的http端口配置为9101,所以真正的访问地址是:
(示例地址)http://198.168.1.001:9101/group1/M00/00/00/rBQIe11swBOAPaazAABdrZgsqUU480_big.jpg
storage2的访问地址是:
(示例地址)http://198.168.1.002:9101/group1/M00/00/00/rBQIe11swBOAPaazAABdrZgsqUU480_big.jpg
到此 ,双机fastdfs集群搭建完成,不过每台镜像上的nginx都是访问本地的fastdfs,接下来搭建keepavlived实现nginx高可用,和fastdfs服务器负载。
2 搭建keepalived 实现ngxin热备高可用
首先说明一下keepalived提供了什么:首先,keepalived提供了虚拟ip,客户真正访问的也是虚拟ip。本例中有两台节点,但同一时间有且仅有一台服务器提供虚拟ip,另一台处于备用状态,当提供虚拟ip服务的keepalived宕机时,备用机器会马上提供虚拟ip。第二,用户对虚拟ip的访问请求会被转发到keepalived所在服务器的nginx上,第三,当nginx挂掉时,本机keepalived会重启nginx或立刻停止服务(脚本配置)。
2.1 安装
yum install wget make gcc gcc-c++ openssl-devel
wget http://www.keepalived.org/software/keepalived-2.0.7.tar.gz
tar zxvf keepalived-2.0.7.tar.gz
cd keepalived-2.0.7
./configure --prefix=/data/keepalived
make
make install
- 1
- 2
- 3
- 4
- 5
- 6
- 7
如果报以下警告:
WARNING - this build will not support IPVS with IPv6. Please install libnl/libnl-3 dev libraries to support IPv6 with IPVS.
不用担心,我们只需要用到VRRP功能,不需要用IPVS功能,所以请确保以下三项是yes就行了。

2.2 将keepalived 以服务方式启动
mkdir /etc/keepalived
cp /data/keepalived/etc/keepalived/keepalived.conf /etc/keepalived/
systemctl enable keepalived
- 1
- 2
- 3
2.3 master配置
Keepalived分为主从(主机与备用机),下面是主master机器(172.20.8.90)的配置
global_defs {
    notification_email {
        824772106@qq.com
    }
    notification_email_from sns-lvs@gmail.com
    smtp_server smtp.hysec.com
    smtp_connection_timeout 30
    router_id nginx_master        # 设置nginx master的id,在一个网络应该是唯一的
}
vrrp_script chk_http_port {
    script "/etc/keepalived/check_nginx.sh"    #最后手动执行下此脚本,以确保此脚本能够正常执行
    interval 2                          #(检测脚本执行的间隔,单位是秒)
    weight 2
}
vrrp_instance VI_1 {
    state BACKUP            # 指定keepalived的角色,MASTER为主,BACKUP为备
    interface eno16780032            # 当前进行vrrp通讯的网络接口卡(当前centos的网卡
    virtual_router_id 66        # 虚拟路由编号,主从要一直
    priority 100            # 优先级,数值越大,获取处理请求的优先级越高
    nopreempt
    advert_int 1            # 检查间隔,默认为1s(vrrp组播周期秒数)
    authentication {
        auth_type PASS
        auth_pass 1111
}
    track_script {
        chk_http_port            #(调用检测脚本)
    }
    virtual_ipaddress {
        172.20.8.94            # 定义虚拟ip(VIP),可多设,每行一个
    }
}
- 1
- 2
- 3
- 4
- 5
- 6
- 7
- 8
- 9
- 10
- 11
- 12
- 13
- 14
- 15
- 16
- 17
- 18
- 19
- 20
- 21
- 22
- 23
- 24
- 25
- 26
- 27
- 28
- 29
- 30
- 31
- 32
- 33
2.4 backup配置
global_defs {
    notification_email {
       XXXXXXXX@qq.com
    }
    notification_email_from sns-lvs@gmail.com
    smtp_server smtp.hysec.com
    smtp_connection_timeout 30
    router_id nginx_backup              # 设置nginx backup的id,在一个网络应该是唯一的
}
vrrp_script chk_http_port {
    script "/etc/keepalived/check_nginx.sh"
    interval 2                          #(检测脚本执行的间隔)
    weight 2
}
vrrp_instance VI_1 {
    state BACKUP                        # 指定keepalived的角色,MASTER为主,BACKUP为备
    interface eno16780032                      # 当前进行vrrp通讯的网络接口卡(当前centos的网卡)
    virtual_router_id 66                # 虚拟路由编号,主从要一直
    priority 50                         # 优先级,数值越大,获取处理请求的优先级越高
    advert_int 1                        # 检查间隔,默认为1s(vrrp组播周期秒数)
    authentication {
        auth_type PASS
        auth_pass 1111
}
track_script {
        chk_http_port                   #(调用检测脚本)
    }
    virtual_ipaddress {
        172.20.8.94                   # 定义虚拟ip(VIP),可多设,每行一个
    }
}```
### 2.5 添加检查nginx状态的脚本

    #!/bin/bash
    #version 0.0.1
    A=`ps -C nginx --no-header | wc -l`

    if [ $A -eq 0 ];then
    systemctl restart docker
    sleep 3
    if [ ps -C nginx --no-header |wc -l -eq 0 ];then
    systemctl stop keepalived
    fi
    fi

脚本说明:检查nginx进程数 如果为0 重启docker(容器会同步重启),睡3秒 nginx进程还是0 则停止keepalived
- 1
- 2
- 3
- 4
- 5
- 6
- 7
- 8
- 9
- 10
- 11
- 12
- 13
- 14
- 15
- 16
- 17
- 18
- 19
- 20
- 21
- 22
- 23
- 24
- 25
- 26
- 27
- 28
- 29
- 30
- 31
- 32
- 33
- 34
- 35
- 36
- 37
- 38
- 39
- 40
- 41
- 42
- 43
- 44
- 45
- 46
- 47
赋权:chmod +x /etc/keepalived/nginx_pid.sh
2.6 配置master和backup时间同步
在NGINX_MASTER和NGINX_BACKUP上安装ntp
yum -y install ntp
- 1
在NGINX_MASTER上修改ntp配置文件
添加以下两行
vim /etc/ntp.conf
server 127.127.1.0 iburst local clock #添加使用本地时间 restrict 192.168.8.0 mask 255.255.255.0 nomodify #允许更新的IP地址段
- 1
- 2

在NGINX_MASTER上启动ntp服务,并加入开机启动
systemctl start ntpd systemctl enable ntpd
- 1
在NGINX_BACKUP上同步NGINX_MASTER的时间
ntpdate 172.20.8.123
- 1
在NGINX_BACKUP上设置计划任务
每天凌晨5点01分同步时间。
crontab -e 1 5 * /usr/sbin/ntpdate 172.20.8.123 >> /var/log/upClock.log
- 1
测试:
关闭一台服务,vip能自动切换 可以通过vip正常访问服务 则成功。
3. 远程访问 实现上传下载
3.1 引入开源工具包
<dependency>
 		 <groupId>com.github.tobato</groupId>
 		   <artifactId>fastdfs-client</artifactId>
 		   <version>1.26.3</version>
 </dependency>
- 1
- 2
- 3
- 4
- 5
该包已经封装好了各种方法,可以直接调用。这里着重说一下水印、feign远程调用图片上传下载和预览的问题
3.2 图片添加水印
	/**
	* 加图片水印
	*
	* @param bufImg  --BufferedImage  用来画图的宽高跟需要加水印的图片一样的空白图
	* @param srcImg --需要加水印的图片
	* @param degree --旋转角度
	* @param logoText	--水印内容
	*
	 */
	public static void markPic(BufferedImage buffImg, Image srcImg, Integer degree,String logoText) {

		 // 2、得到画笔对象
        Graphics2D g = buffImg.createGraphics();

        // 3、设置对线段的锯齿状边缘处理
        g.setRenderingHint(RenderingHints.KEY_INTERPOLATION,
                RenderingHints.VALUE_INTERPOLATION_BILINEAR);
        g.drawImage(
                srcImg.getScaledInstance(srcImg.getWidth(null),
                        srcImg.getHeight(null), Image.SCALE_SMOOTH), 0, 0,
                null);

        // 4、设置水印旋转
        if (null != degree) {
            g.rotate(Math.toRadians(degree),
                    (double) buffImg.getWidth() / 2,
                    (double) buffImg.getHeight() / 2);
        }

        // 5、设置水印文字颜色
        g.setColor(fileWatermark.getColor());

        // 6、设置水印文字Font
     //   g.setFont(fileWatermark.getFont());

        // 7、设置水印文字透明度
        g.setComposite(AlphaComposite.getInstance(AlphaComposite.SRC_ATOP,
        		fileWatermark.getAlpha()));

        // 8、第一参数->设置的内容,后面两个参数->文字在图片上的坐标位置(x,y)
     //   g.drawString(logoText, fileWatermark.getPositionWidth(), fileWatermark.getPositionHeight());

        // 9、释放资源
        g.dispose();

	}

	/**
     * 给图片添加水印文字
     *
     * @param logoText
     *            水印文字
     * @param srcImgPath
     *            源图片路径
     * @param targerPath
     *            目标图片路径
	 * @throws IOException
     */
    public static void markImageByText(MultipartFile multipartFile,String logoText) throws Exception {
       markImageByText(multipartFile,logoText, null);
    }

    /**
     * 给图片添加水印文字、可设置水印文字的旋转角度
     *
     * @param logoText
     * @param srcImgPath
     * @param targerPath
     * @param degree 水印旋转角度
     */
    public  static MultipartFile markImageByText(MultipartFile multipartFile,String logoText,Integer degree) throws Exception {

    	OutputStream os = null;
    	InputStream input =null;

    	try {
		    	// 1、源图片
		        Image srcImg = ImageIO.read(multipartFile.getInputStream());
		        BufferedImage buffImg = new BufferedImage(srcImg.getWidth(null),
		                srcImg.getHeight(null), BufferedImage.TYPE_INT_RGB);

		        markPic(buffImg,srcImg,degree,logoText);


		        String suffix = CommonUtil.getFileExtension(multipartFile);

		        ByteArrayOutputStream bs = new ByteArrayOutputStream();
				ImageOutputStream imOut = ImageIO.createImageOutputStream(bs);
				ImageIO.write(buffImg, suffix, imOut);
				//InputStream is = new ByteArrayInputStream(bs.toByteArray());

				// 加水印后的文件上传
				//multipartFile = new MockMultipartFile(multipartFile.getOriginalFilename(),is);
				String originalFilename = multipartFile.getOriginalFilename();

				File file = new File("/tmp/"+ new Date().getTime() + "/" + originalFilename);

				// 判断目标文件所在的目录是否存在
				if (!file.getParentFile().exists()) {
					// 如果目标文件所在的文件夹不存在,则创建父文件夹
					log.info("目标文件所在目录不存在,准备创建它!");
					if (!file.getParentFile().mkdirs()) {
						log.error("创建目标文件所在的目录失败!");
						throw new NotFoundException("目录不存在");
					}
				}

				// 创建目标文件
				if (file.createNewFile()) {

					log.info("创建单个文件" + originalFilename + "成功!");

				} else {

					log.error("创建单个文件" + originalFilename + "失败!");
					throw new IOException("创建单个文件" + originalFilename + "失败!");

				}

				FileItem fileItem = new DiskFileItem(originalFilename, Files.probeContentType(file.toPath()), false, file.getName(), (int) file.length(), file.getParentFile());

				try {
				    input = new FileInputStream(file);
				    os = fileItem.getOutputStream();
				    IOUtils.copy(input, os);

				} catch (IOException ex) {
				   ex.printStackTrace();
				}

				multipartFile = new CommonsMultipartFile(fileItem);

				//返回加了水印的上传对象
				log.error("图片:[]成添加水印文字,filename=[{}]",originalFilename);


	    } finally {
	        try {
	            if (null != input)
	            	input.close();
	        } catch (Exception e) {
	            e.printStackTrace();
	        }
	        try {
	            if (null != os)
	                os.close();
	        } catch (Exception e) {
	            e.printStackTrace();
	        }
	    }

    	return multipartFile;
	 }
- 1
- 2
- 3
- 4
- 5
- 6
- 7
- 8
- 9
- 10
- 11
- 12
- 13
- 14
- 15
- 16
- 17
- 18
- 19
- 20
- 21
- 22
- 23
- 24
- 25
- 26
- 27
- 28
- 29
- 30
- 31
- 32
- 33
- 34
- 35
- 36
- 37
- 38
- 39
- 40
- 41
- 42
- 43
- 44
- 45
- 46
- 47
- 48
- 49
- 50
- 51
- 52
- 53
- 54
- 55
- 56
- 57
- 58
- 59
- 60
- 61
- 62
- 63
- 64
- 65
- 66
- 67
- 68
- 69
- 70
- 71
- 72
- 73
- 74
- 75
- 76
- 77
- 78
- 79
- 80
- 81
- 82
- 83
- 84
- 85
- 86
- 87
- 88
- 89
- 90
- 91
- 92
- 93
- 94
- 95
- 96
- 97
- 98
- 99
- 100
- 101
- 102
- 103
- 104
- 105
- 106
- 107
- 108
- 109
- 110
- 111
- 112
- 113
- 114
- 115
- 116
- 117
- 118
- 119
- 120
- 121
- 122
- 123
- 124
- 125
- 126
- 127
- 128
- 129
- 130
- 131
- 132
- 133
- 134
- 135
- 136
- 137
- 138
- 139
- 140
- 141
- 142
- 143
- 144
- 145
- 146
- 147
- 148
- 149
- 150
- 151
- 152
- 153
- 154
- 155
3.3 feign远程调用解决MultipartFile为null的问题
服务消费方增加两个配置类:
FeignMultipartSupportConfig
@Configuration
public class FeignMultipartSupportConfig {

	@Autowired
	private ObjectFactory<HttpMessageConverters> messageConverters;

    @Bean
    public Encoder multipartFormEncoder() {
    	return new FeignSpringFormEncoder(new SpringEncoder(messageConverters));
    }
}
- 1
- 2
- 3
- 4
- 5
- 6
- 7
- 8
- 9
- 10
- 11
FeignSpringFormEncoder
public class FeignSpringFormEncoder extends FormEncoder {
	  /**
	   * Constructor with the default Feign's encoder as a delegate.
	   */
	  public FeignSpringFormEncoder() {
	    this(new Default());
	  }
	  /**
	   * Constructor with specified delegate encoder.
	   *
	   * @param delegate delegate encoder, if this encoder couldn't encode object.
	   */
	  public FeignSpringFormEncoder(Encoder delegate) {
	    super(delegate);

	    MultipartFormContentProcessor processor = (MultipartFormContentProcessor) getContentProcessor(ContentType.MULTIPART);
	    processor.addWriter(new SpringSingleMultipartFileWriter());
	    processor.addWriter(new SpringManyMultipartFilesWriter());
	  }


	  @Override
	  public void encode(Object object, Type bodyType, RequestTemplate template) throws EncodeException {
	    if (bodyType.equals(MultipartFile.class)) {
	    	MultipartFile file = (MultipartFile) object;
	      Map data = Collections.singletonMap(file.getName(), object);
	      super.encode(data, MAP_STRING_WILDCARD, template);
	      return;
	    } else if (bodyType.equals(MultipartFile[].class)) {
	    	MultipartFile[] file = (MultipartFile[]) object;
	      if(file != null) {
	        Map data = Collections.singletonMap(file.length == 0 ? "" : file[0].getName(), object);
	        super.encode(data, MAP_STRING_WILDCARD, template);
	        return;
	      }
	    } else if(bodyType.equals(CommonsMultipartFile[].class) ) {
	    	CommonsMultipartFile[] file = (CommonsMultipartFile[]) object;
	        Map data = Collections.singletonMap(file.length == 0 ? "" : file[0].getName(), object);
	        super.encode(data, MAP_STRING_WILDCARD, template);
	        return;
	    }else if(bodyType.equals(CommonsMultipartFile.class)) {
	    	  CommonsMultipartFile file = (CommonsMultipartFile) object;
		      Map data = Collections.singletonMap(file.getName(), object);
		      super.encode(data, MAP_STRING_WILDCARD, template);
		      return;
	    }
	    super.encode(object, bodyType, template);
	  }
	}
- 1
- 2
- 3
- 4
- 5
- 6
- 7
- 8
- 9
- 10
- 11
- 12
- 13
- 14
- 15
- 16
- 17
- 18
- 19
- 20
- 21
- 22
- 23
- 24
- 25
- 26
- 27
- 28
- 29
- 30
- 31
- 32
- 33
- 34
- 35
- 36
- 37
- 38
- 39
- 40
- 41
- 42
- 43
- 44
- 45
- 46
- 47
- 48
- 49
4. 文件预览
思路:搭建openoffice服务器,word、ppt转pdf,txt文本转码后转pdf,excel转html再转pdf
4.1 搭建openoffice
需要先安装jdk
https://www.oracle.com/technetwork/java/javase/downloads/jdk8-downloads-2133151.html
下载openoffice
wget https://jaist.dl.sourceforge.net/project/openofficeorg.mirror/4.1.5/binaries/zh-CN/Apache_OpenOffice_4.1.5_Linux_x86-64_install-rpm_zh-CN.tar.gz
- 1
解压后会在当前目录里生成一个zh-CN目录
cd /usr/local/src/ openoffice /zh-CN/RPMS/
yum localinstall *.rpm
- 1
- 2
装完后会在当前目录下生成一个desktop-integration目录
cd /usr/local/src/zh-CN/RPMS/desktop-integration/
yum localinstall openoffice4.1.5-redhat-menus-4.1.5-9789.noarch.rpm
- 1
- 2
启动
临时启动
/opt/openoffice4/program/soffice -headless -accept="socket,host=127.0.0.1,port=8100;urp;" -nofirststartwizard
- 1
放入后台永久运行
nohup /opt/openoffice4/program/soffice -headless -accept="socket,host=127.0.0.1,port=8100;urp;" -nofirststartwizard &
- 1
加入到开机自启动
//远程连接设置host为0.0.0.0
vim /etc/rc.local
nohup /opt/openoffice4/program/soffice -headless -accept="socket,host=0.0.0.0,port=8100;urp;" -nofirststartwizard &
- 1
- 2
启动如果报错
error while loading shared libraries: libXext.so.6: cannot open shared object file: No such file or directory
原因是缺少相关包,执行命令:
yum install libXext libSM libXrender
- 1
在启动OpenOffice时,将host=的ip地址写为0.0.0.0就可以通过java远程连接了
字体库安装
涉及到文件中的字体装换,如果没有字体库,中文会乱码。
yum -y install fontconfig --安装字体库
- 1
这时在/usr/shared目录就可以看到fonts和fontconfig目录了
打开c盘下的Windows/Fonts目录: 找到我们想要的字体,
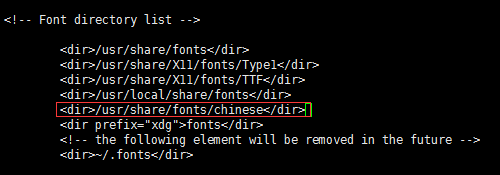
首先在/usr/shared/fonts目录下新建一个目录chinese: 然后上传字体
chmod -R 755 /usr/share/fonts/chinese --修改新增字体库文件夹权限
- 1
接下来需要安装ttmkfdir来搜索目录中所有的字体信息,并汇总生成fonts.scale文件,输入命令:
yum -y install ttmkfdir
- 1
然后执行ttmkfdir命令即可:
ttmkfdir -e /usr/share/X11/fonts/encodings/encodings.dir
- 1
最后一步就是修改字体配置文件了,首先通过编辑器打开配置文件:
vi /etc/fonts/fonts.conf
- 1
可以看到一个Font list,即字体列表,在这里需要把我们添加的中文字体位置加进去:
然后输入:wq保存退出,最后别忘了刷新内存中的字体缓存,这样就不用reboot重启了
fc-cache
- 1
这样所有的步骤就算完成了,最后再次通过fc-list,进行检查。
示例代码
  File word = new File("G:\\XXXXXX.doc");
  File pdf = new File("G:\\XXXXXX.pdf");
  OpenOfficeConnection connection=new SocketOpenOfficeConnection("172.20.8.123",8100);
        try {
            System.err.println("开启连接");
            connection.connect();
            System.err.println("连接成功");
           DocumentConverter converter = new StreamOpenOfficeDocumentConverter(connection);
           converter.convert(word, pdf);
           connection.disconnect();
        } catch (Exception e) {
            String string=e.getMessage();
            System.err.println(string);
        }
- 1
- 2
- 3
- 4
- 5
- 6
- 7
- 8
- 9
- 10
- 11
- 12
- 13
- 14
- 15
4.2 自定义openoffice连接池
maven 引入依赖
<dependency>
  <groupId>com.artofsolving</groupId>
  <artifactId>jodconverter</artifactId>
  <version>2.2.1</version>
</dependency>
<dependency>
   <groupId>org.apache.commons</groupId>
   <artifactId>commons-pool2</artifactId>
   <version>1.3.2</version>
</dependency>
- 1
- 2
- 3
- 4
- 5
- 6
- 7
- 8
- 9
- 10
OpenOfficeFactory
@Data
@Slf4j
public class OpenOfficeFactory extends BasePooledObjectFactory<OpenOfficeConnection>{

	private FilePreviewProperties properties;

	 public OpenOfficeFactory(FilePreviewProperties properties) {
	        this.properties = properties;
	}

	//创建连接
	@Override
    public OpenOfficeConnection create() throws Exception {
        try {
            OpenOfficeConnection connection=new SocketOpenOfficeConnection(properties.getHost(),properties.getPort());
            connection.connect();
            return connection;
        } catch (Exception e) {
        	 throw new  Exception("连接OpenOffice失败", e);
        }
    }

    @Override
    public PooledObject<OpenOfficeConnection> wrap(OpenOfficeConnection openOfficeConnection) {
        return new DefaultPooledObject<>(openOfficeConnection);
    }

    //初始化连接  在此做一些链接初始化工作
 /*   @Override
    public void activateObject(PooledObject<OpenOfficeConnection> pooledObject) throws Exception {
    	OpenOfficeConnection ftpClient = pooledObject.getObject();

    }*/

    // 销毁对象
    @Override
    public void destroyObject(PooledObject<OpenOfficeConnection> p) {
    	OpenOfficeConnection connetion = p.getObject();
    	connetion.disconnect();
    }

    //链接状态检查
    @Override
    public boolean validateObject(PooledObject<OpenOfficeConnection> pooledObject) {
    	OpenOfficeConnection connetion = pooledObject.getObject();
        try {
            return connetion.isConnected();
        } catch (Exception e) {
            return false;
        }
    }
}
- 1
- 2
- 3
- 4
- 5
- 6
- 7
- 8
- 9
- 10
- 11
- 12
- 13
- 14
- 15
- 16
- 17
- 18
- 19
- 20
- 21
- 22
- 23
- 24
- 25
- 26
- 27
- 28
- 29
- 30
- 31
- 32
- 33
- 34
- 35
- 36
- 37
- 38
- 39
- 40
- 41
- 42
- 43
- 44
- 45
- 46
- 47
- 48
- 49
- 50
- 51
- 52
OpenOfficePool
@Data
public class OpenOfficePool {

	  private GenericObjectPool<OpenOfficeConnection> pool;

	  public OpenOfficePool(OpenOfficeFactory factory) {
	        this.pool = new GenericObjectPool<>(factory, factory.getProperties().getPool());
	       /* GenericObjectPoolConfig poolConfig = new GenericObjectPoolConfig();
	        poolConfig.setMaxTotal(10);
	        poolConfig.setMinIdle(10);
	        poolConfig.setMaxIdle(10);
	        poolConfig.setMaxWaitMillis(10);
	        this.pool = new GenericObjectPool<OpenOfficeConnection>(factory,poolConfig);*/
	  }

	  /**
	   * 获取一个OpenOfficeConnection连接对象
	   * @return OpenOfficeConnection连接对象
	 * @throws Exception
	   */
	  public OpenOfficeConnection borrowObject() throws Exception {
	      try {
	            return pool.borrowObject();
	      } catch (Exception e) {
	            throw new Exception("获取OpenOffice连接失败", e);
	      }
	  }

    /**
     * 归还一个OpenOffice连接对象
     * @param OpenOffice连接对象
     */
    public void returnObject(OpenOfficeConnection channelSftp) {
        if (channelSftp!=null) {
            pool.returnObject(channelSftp);
        }
    }

    /**
     * 销毁池子
     */
    public  void destroy() {
        try {
        	pool.close();
        } catch (Exception e) {
          e.printStackTrace();
        }
    }
}
- 1
- 2
- 3
- 4
- 5
- 6
- 7
- 8
- 9
- 10
- 11
- 12
- 13
- 14
- 15
- 16
- 17
- 18
- 19
- 20
- 21
- 22
- 23
- 24
- 25
- 26
- 27
- 28
- 29
- 30
- 31
- 32
- 33
- 34
- 35
- 36
- 37
- 38
- 39
- 40
- 41
- 42
- 43
- 44
- 45
- 46
- 47
- 48
- 49
4.3 nginx整合lua
4.3.1 下载 安装
LuaJIT-2.0.5.tar.gz (下载地址:http://luajit.org/download.html)
lua-nginx-module-0.10.13.tar.gz (下载地址:https://github.com/openresty/lua-nginx-module/releases)
由于虚拟机上nginx是yum安装的,只有二进制文件,所以下载统一版本nginx
tar-zxvf LuaJIT
tar-zxvf  lua-nginx-module
cd LuaJIT-2.0.4
make PREFIX=/usr/local/luajit
make install PREFIX=/usr/local/luajit
- 1
- 2
- 3
- 4
- 5
#设置环境变量
 export LUAJIT_LIB=/usr/local/luajit/lib
 export LUAJIT_INC=/usr/local/luajit/include/luajit-2.0
 export LD_LIBRARY_PATH=/usr/local/luajit/lib:$LD_LIBRARY_PATH
- 1
- 2
- 3
解压nginx
make
make install
#查看之前的编译参数
nginx -V
- 1
==示例
./configure --prefix=/etc/nginx
–add-module=/data/fastdfs-nginx-module/src
–add-module=/usr/local/src/lua/lua-nginx-module-0.10.15/
==示例
4.3.2 如果之前安装过nginx,只需要在最后加上lua-nginx-module-0.10.15重新make即可
nginx -t 如果报错
nginx: error while loading shared libraries: libluajit-5.1.so.2: cannot open shared object file: No such file or directory
解决:
ln -s /usr/local/lib/libluajit-5.1.so.2 /lib64/
4.3.3 如果docker重启 环境变量失效的话:
vim /etc/ld.so.conf.d/libc.conf
- 1

再次运行ldconfig即可
4.3.4 配置nginx 实现 访问控制:
nginx配置
worker_processes  4;

error_log  /data/fast_data/logs/nginx-error.log debug;

events {
    worker_connections  1024;
}

http {
    include       mime.types;
    default_type  application/octet-stream;

    log_format  main  '$remote_addr - $remote_user [$time_local] "$request" '
                      '$status $body_bytes_sent "$http_referer" '
                      '"$http_user_agent" "$http_x_forwarded_for"';

    access_log  /data/fast_data/logs/nginx-access.log  main;
    sendfile        on;
    keepalive_timeout  65;

    upstream imageserver {
	ip_hash;
	server 172.20.8.123:9101 weight=5;
	server 172.20.8.124:9101 weight=5;
    }

    server{
        listen    80;
		server_name 172.20.8.123;


	location @fastDFS {
	    charset utf-8;
	    proxy_pass http://imageserver;
	}

	location @error {
				default_type 'text/plain';
				content_by_lua '
					ngx.say("lua error");
				';
        }

	location /getTime {
       		default_type text/html;
	       	content_by_lua '
				ngx.say(ngx.time() * 1000);
    		';
	}

	location ~ /group1/M00 {
      	access_by_lua '
			local uri = ngx.var.uri;

			array = {"jpg","png","jpeg","gif"};

			for i,v in ipairs(array)do
				local e = string.find(uri,v);
				if(type(e) ~= "nil" and tonumber(e) > 0) then
				  ngx.exec("@fastDFS");
				  break;
				end
			end
			ngx.update_time();

			local args = ngx.req.get_uri_args();
			local ts  = args["ts"];
			local token1 = args["token"];

    		local getTime = ngx.time() * 1000;

			local diffTime = tonumber(ts) - getTime;

			local token2 = ngx.md5(tostring(uri) .. "salt" .. tostring(ts));

			if (tonumber(diffTime) > 0) then

				if token1 == token2 then

					ngx.exec("@fastDFS");
				end
			 end

 		';
	}
   }

    server {
        listen       9101;
        server_name  172.20.8.123;

        location ~/group1/M00 {
                    root /data/fast_data/data;
                    ngx_fastdfs_module;
        }

        error_page   500 502 503 504  /50x.html;
        location = /50x.html {
            root   html;
        }
    }
}
- 1
- 2
- 3
- 4
- 5
- 6
- 7
- 8
- 9
- 10
- 11
- 12
- 13
- 14
- 15
- 16
- 17
- 18
- 19
- 20
- 21
- 22
- 23
- 24
- 25
- 26
- 27
- 28
- 29
- 30
- 31
- 32
- 33
- 34
- 35
- 36
- 37
- 38
- 39
- 40
- 41
- 42
- 43
- 44
- 45
- 46
- 47
- 48
- 49
- 50
- 51
- 52
- 53
- 54
- 55
- 56
- 57
- 58
- 59
- 60
- 61
- 62
- 63
- 64
- 65
- 66
- 67
- 68
- 69
- 70
- 71
- 72
- 73
- 74
- 75
- 76
- 77
- 78
- 79
- 80
- 81
- 82
- 83
- 84
- 85
- 86
- 87
- 88
- 89
- 90
- 91
- 92
- 93
- 94
- 95
- 96
- 97
- 98
- 99
- 100
- 101
- 102
- 103
java配置
java代码
public class NginxTest {
    @Test
    public void test() {
        // 获取 Nginx 服务器上的系统时间
        String requestUrl = "http://192.168.229.165/getTime";
        long systemTime = Long.parseLong(getURLContent(requestUrl));
        System.out.println("Nginx 服务器上系统时间:" + systemTime);

        // 请求的资源路径
        String requestResources = "/group1/M00/00/00/wKjlpltF-K-AZQQsAABhhboA1Kk469.png";
        String url = getUrl(requestResources, systemTime);
        System.out.println("请求的 url 为:");
        System.out.println("192.168.229.165" + url);
    }

    /**
     * 获取带时间戳与 token 的 url
     * @param requestResources 请求的资源路径,不包括 IP 地址与端口,开头有 /,例如 /group1/M00/00/00/wKjlpltF-K-AZQQsAABhhboA1Kk469.png
     * @param systemTime 系统时间
     * @return 返回请求的 url 地址,包括有效期与 token
     */
    public static String getUrl(String requestResources, long systemTime) {
        // 添加有效期时间,假设该链接有效期为 1 天,即 86400000
        // 计算毫秒时,切记转换为 Long 类型进行运算,避免超出 int 类型的范围
        // 有效期,单位:毫秒
        // 自己测试时,为了方便,可以设置为 1 分钟之类的
        long milliseconds = systemTime + 1L * 24 * 60 * 60 * 1000;
        // long milliseconds = systemTime + 60L * 1000;

        // 计算 token 信息
        // “盐” 值,和 Nginx 服务器上的保持一致即可
        String salt = "salt";
        // 加密前的字符串:请求的资源路径 + “盐” 值 + 时间戳
        String beforeEncryptionString = requestResources + salt + milliseconds;
        // 这里使用 Spring 提供的 md5 加密工具进行 md5 加密
        String token = DigestUtils.md5DigestAsHex(beforeEncryptionString.getBytes());
        String url = requestResources + "?ts=" + milliseconds + "&token=" + token;

        return url;
    }

    /**
     * 获取请求 url 返回的文本
     * @param requestUrl 请求的 url
     * @return
     */
    public static String getURLContent(String requestUrl) {
        URL url = null;
        BufferedReader in = null;
        StringBuffer sb = new StringBuffer();

        try {
            url = new URL(requestUrl);
            in = new BufferedReader(new InputStreamReader(url.openStream()));
            String str = null;
            while ((str = in.readLine()) != null) {
                sb.append(str);
            }
        } catch (Exception e) {
            e.printStackTrace();
        } finally{
            // 关闭资源
            try {
                if (in != null) {
                    in.close();
                }
            } catch (IOException e) {
                e.printStackTrace();
            }
        }
        return sb.toString();
    }
}
- 1
- 2
- 3
- 4
- 5
- 6
- 7
- 8
- 9
- 10
- 11
- 12
- 13
- 14
- 15
- 16
- 17
- 18
- 19
- 20
- 21
- 22
- 23
- 24
- 25
- 26
- 27
- 28
- 29
- 30
- 31
- 32
- 33
- 34
- 35
- 36
- 37
- 38
- 39
- 40
- 41
- 42
- 43
- 44
- 45
- 46
- 47
- 48
- 49
- 50
- 51
- 52
- 53
- 54
- 55
- 56
- 57
- 58
- 59
- 60
- 61
- 62
- 63
- 64
- 65
- 66
- 67
- 68
- 69
- 70
- 71
- 72
- 73
- 74
- 75

