热门标签
热门文章
- 1还不懂 ConcurrentHashMap ?这份源码分析了解一下_concurrenthashmap源码分析
- 2非常实用的log调试工具:logcat
- 3Springboot网上租车系统的设计与实现 计算机毕设源码64297_基于spring boot的车辆租赁管理系统设计与实现流程图
- 4分布式锁初探--redis锁_sessioncallback
sessioncallback = new ses - 5前端学习(20):无序列表_前段无序
- 6FPGA/IC秋招经典100题(含详解)_对11.916无损定点化
- 7使用hping3网络工具构造TCP/IP数据包和进行DDos攻击
- 8若将瑞星比Borland 刘旭略胜Anders_anders delphi4.0
- 9CSS知识点汇总(第三篇:为网页添加列表)_请简要描述,使用背景图像定义列表项目符号的好处。
- 10xxx cannot be cast to xxx_cannot cast xx to xx
当前位置: article > 正文
【Android】Android开发启动app弹出一张广告图片,Dialog可以查看大图,查看某个图片功能...
作者:我家小花儿 | 2024-03-29 09:17:33
赞
踩
android弹出图片
作者:程序员小冰,GitHub主页:https://github.com/QQ986945193
新浪微博:http://weibo.com/mcxiaobing
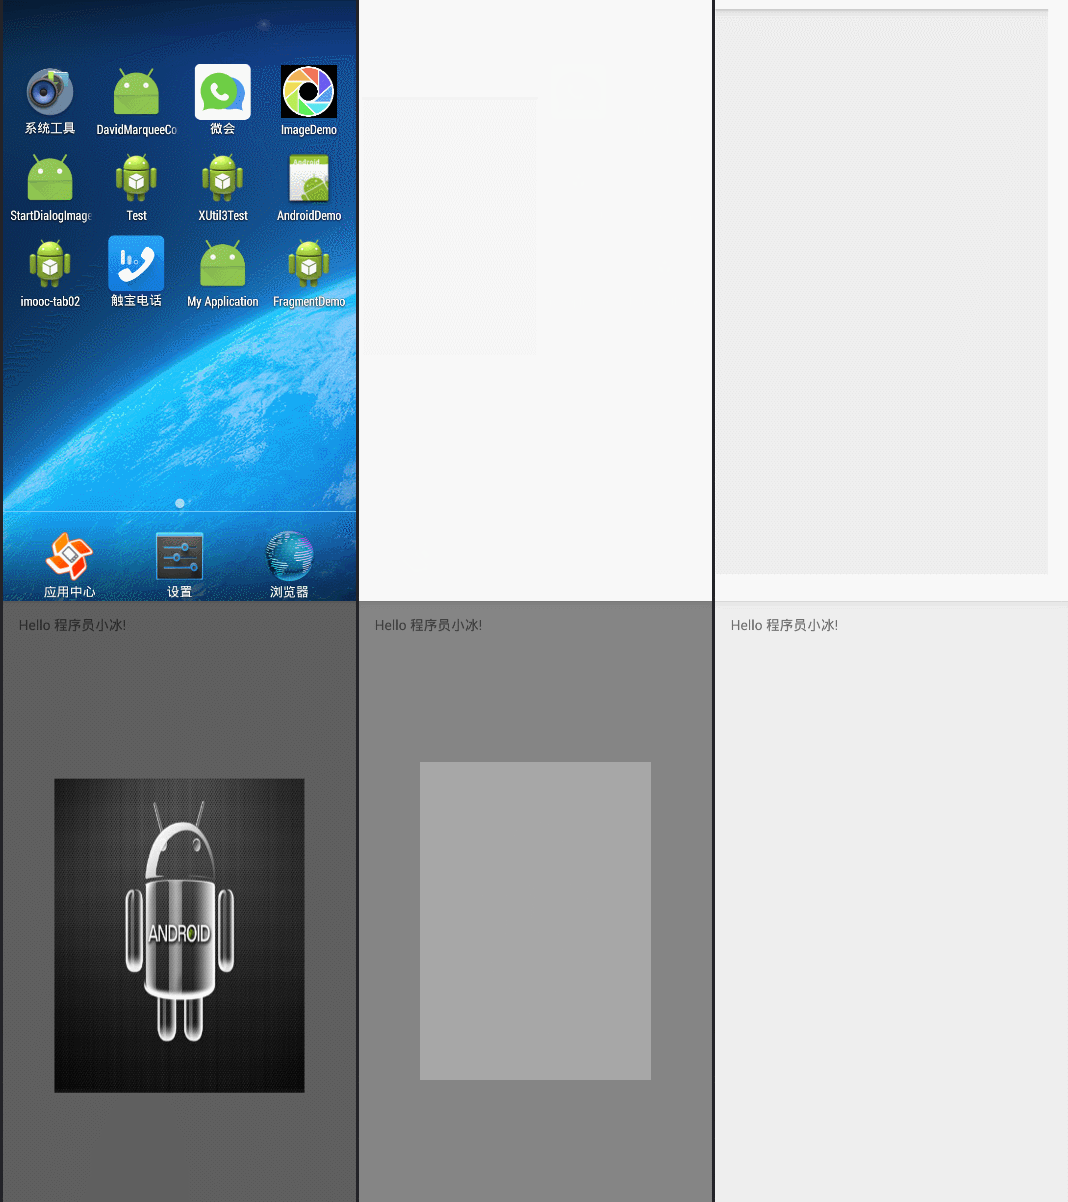
首先给大家看一下我们今天这个最终实现的效果图:
首先说一下,这里利用的是一个dialog,然后设置我们需要的背景图,然后
在java主类中引用即可,当然这个功能,也可以放在查看某个图片的效果上面。大家
看情况集中到自己的项目中即可。下面给大家看一下java实现方法:
- package startdialogimageview.qq986945193.startdialogimageview;
-
- import android.app.Activity;
- import android.app.Dialog;
- import android.content.Context;
- import android.graphics.Bitmap;
- import android.graphics.BitmapFactory;
- import android.os.Bundle;
- import android.view.Display;
- import android.view.Menu;
- import android.view.View;
- import android.view.View.OnClickListener;
- import android.view.Window;
- import android.view.WindowManager;
- import android.widget.Button;
- import android.widget.FrameLayout;
- import android.widget.ImageView;
- import android.widget.ImageView.ScaleType;
- /**
- * @author :程序员小冰
- * @新浪微博 :http://weibo.com/mcxiaobing
- * @GitHub: https://github.com/QQ986945193
- * @CSDN博客: http://blog.csdn.net/qq_21376985
- * @码云OsChina :http://git.oschina.net/MCXIAOBING
- */
- public class MainActivity extends Activity {
-
- Dialog dia;
-
- @Override
- protected void onCreate(Bundle savedInstanceState) {
- super.onCreate(savedInstanceState);
- setContentView(R.layout.activity_main);
-
-
- Context context = MainActivity.this;
- dia = new Dialog(context, R.style.edit_AlertDialog_style);
- dia.setContentView(R.layout.activity_start_dialog);
-
-
- ImageView imageView = (ImageView) dia.findViewById(R.id.start_img);
- imageView.setBackgroundResource(R.mipmap.iv_android);
- dia.show();
-
- dia.setCanceledOnTouchOutside(true); // Sets whether this dialog is
- Window w = dia.getWindow();
- WindowManager.LayoutParams lp = w.getAttributes();
- lp.x = 0;
- lp.y = 40;
- dia.onWindowAttributesChanged(lp);
- }
-
- }

- 1
- 2
- 3
- 4
- 5
- 6
- 7
- 8
- 9
- 10
- 11
- 12
- 13
- 14
- 15
- 16
- 17
- 18
- 19
- 20
- 21
- 22
- 23
- 24
- 25
- 26
- 27
- 28
- 29
- 30
- 31
- 32
- 33
- 34
- 35
- 36
- 37
- 38
- 39
- 40
- 41
- 42
- 43
- 44
- 45
- 46
- 47
- 48
- 49
- 50
- 51
- 52
- 53
所需要的style样式如下:
- <style name="edit_AlertDialog_style" parent="@android:style/Theme.Dialog">
- <item name="android:windowIsFloating">true</item>
- <item name="android:windowIsTranslucent">true</item>
- <item name="android:windowNoTitle">true</item>
- <!-- 是否启用标题栏 -->
- <item name="android:windowBackground">@android:color/transparent</item>
- <item name="android:background">@android:color/transparent</item>
- <item name="android:backgroundDimEnabled">true</item>
- <!-- 是否使用背景半透明 -->
- </style>
- 1
- 2
- 3
- 4
- 5
- 6
- 7
- 8
- 9
- 10
然后就没什么难度了,就是一个imageview . 好了。好了。到此结束吧,不懂得请留言或者私信。源代码需要的可以去
(AndroidStudio版)github下载地址:
https://github.com/QQ986945193/StartDialogImageView
声明:本文内容由网友自发贡献,不代表【wpsshop博客】立场,版权归原作者所有,本站不承担相应法律责任。如您发现有侵权的内容,请联系我们。转载请注明出处:https://www.wpsshop.cn/w/我家小花儿/article/detail/335032
推荐阅读
相关标签


