热门标签
热门文章
- 1[头哥实践平台]MapReduce基础实战_第3关:信息挖掘 - 挖掘父子关系
- 2使用Python读取串口数据的示例_python 串口库
- 3python生成的html动态页面能添加视频或者图片显示吗
- 4【Linux】虚拟机安装openEuler 24.03 X86_64 教程
- 5Dify vs Langchain:AI应用开发的全面分析_dify langchain
- 6Mysql数据库操作-数据库表的基本操作之修改表_mysql修改表信息
- 75大经典排序算法在淘宝“有好货”场景的实践
- 8「亲测有效」ChatGPT Plus会员/GPT4开通方法 — 仅需支付宝或微信_chatgpt4会员
- 9多表查询作业
- 10代码随想录算法训练营刷题复习10:二叉树、二叉搜索树复习2
当前位置: article > 正文
Spring Security httpbasic的三种密码认证方式_spring security basic认证
作者:我家小花儿 | 2024-06-21 03:51:47
赞
踩
spring security basic认证
Spring Security httpbasic的三种密码认证方式
在 Spring Security 中,可以通过多种方式指定密码。以下是几种常见的方式:
认证一—— 在内存中指定密码
@EnableWebSecurity
@Configuration
public class SecurityConfiguration extends WebSecurityConfigurerAdapter {
    @Override
    protected void configure(HttpSecurity http) throws Exception {
        http.authorizeRequests()
                .anyRequest().authenticated()
                .and()
                .httpBasic();
    }

    @Override
    protected void configure(AuthenticationManagerBuilder auth) throws Exception {
        auth.inMemoryAuthentication()
                .withUser("tom")
                .password("{noop}123456") // 指定密码,{noop} 表示密码以明文形式存储
                .roles("admin");
    }

    @Override
    public void configure(WebSecurity web) throws Exception {
        super.configure(web);
    }
- 1
- 2
- 3
- 4
- 5
- 6
- 7
- 8
- 9
- 10
- 11
- 12
- 13
- 14
- 15
- 16
- 17
- 18
- 19
- 20
- 21
- 22
- 23
- 24
使用 withUser() 方法指定用户名,使用 password() 方法指定密码。{noop} 前缀表示密码以明文形式存储,仅适用于演示和测试目的。在生产环境中,应该使用适当的密码编码方式。
认证二—— 使用密码编码器(PasswordEncoder)
@EnableWebSecurity
@Configuration
public class SecurityConfiguration extends WebSecurityConfigurerAdapter {
    private PasswordEncoder passwordEncoder;
    @Autowired
    public void setPasswordEncoder() {
        this.passwordEncoder = new BCryptPasswordEncoder();
    }

    @Override
    protected void configure(HttpSecurity http) throws Exception {
        http.authorizeRequests()
                .anyRequest().authenticated()
                .and()
                .httpBasic();
    }

    @Override
    protected void configure(AuthenticationManagerBuilder auth) throws Exception {
        auth.inMemoryAuthentication()
                .withUser("tom")
                .password(passwordEncoder.encode("123456"))
                .roles("admin");
    }

    @Override
    public void configure(WebSecurity web) throws Exception {
        super.configure(web);
    }
- 1
- 2
- 3
- 4
- 5
- 6
- 7
- 8
- 9
- 10
- 11
- 12
- 13
- 14
- 15
- 16
- 17
- 18
- 19
- 20
- 21
- 22
- 23
- 24
- 25
- 26
- 27
- 28
- 29
通过使用密码编码器(PasswordEncoder),可以对密码进行安全的编码。你可以选择合适的密码编码器实现,例如 BCryptPasswordEncoder、StandardPasswordEncoder、MessageDigestPasswordEncoder 等。需要确保密码编码器的实例已经配置好,并通过 @Autowired 注入到配置类中。
认证三——使用数据库存储密码
spring security 配置类
@EnableWebSecurity
@Configuration
public class SecurityConfiguration extends WebSecurityConfigurerAdapter {

    /**
     * 通过使用 UserDetailsService 来加载用户信息,可以从数据库或其他存储中获取用户的密码。
     * 你需要实现 UserDetailsService 接口,并根据实际情况从数据库中加载用户信息和密码。
     */
    @Autowired
    private CustomDetailsService customDetailsService;

    @Bean
    public PasswordEncoder passwordEncoder() {
        return new BCryptPasswordEncoder();
    }

    @Override
    protected void configure(HttpSecurity http) throws Exception {
        http.authorizeRequests()
                .anyRequest().authenticated()
                .and()
                .httpBasic();
    }

    @Override
    protected void configure(AuthenticationManagerBuilder auth) throws Exception {
        auth.userDetailsService(customDetailsService).passwordEncoder(passwordEncoder());
    }

    @Override
    public void configure(WebSecurity web) throws Exception {
        super.configure(web);
    }
- 1
- 2
- 3
- 4
- 5
- 6
- 7
- 8
- 9
- 10
- 11
- 12
- 13
- 14
- 15
- 16
- 17
- 18
- 19
- 20
- 21
- 22
- 23
- 24
- 25
- 26
- 27
- 28
- 29
- 30
- 31
- 32
- 33
- 34
- 35
自定义 UserDetailsService类
@Service
public class CustomDetailsService implements UserDetailsService {
    @Autowired
    private UserRepository userRepository;
    @Override
    public UserDetails loadUserByUsername(String username) throws UsernameNotFoundException {
        // 从数据库中根据用户名加载用户信息
        User user = userRepository.findByUsername(username)
                .orElseThrow(() -> new UsernameNotFoundException("User not found"));
        System.out.println("user=" + user);
        return org.springframework.security.core.userdetails.User.builder()
                .username(user.getUsername())
                .password(user.getPassword())
                .roles(user.getRoles())
                .build();
    }
- 1
- 2
- 3
- 4
- 5
- 6
- 7
- 8
- 9
- 10
- 11
- 12
- 13
- 14
- 15
- 16
查询用户密码类
@Repository
public class UserRepository {
    public Optional<User> findByUsername(String userName) throws UsernameNotFoundException{
        //TODO
        //查询数据库用户信息 ....
        //tom  123456 admin
        return Optional.of(new User("tom","$2a$10$WHv0jAVrVAwde6PaSgD6AeY6MkjweHav1mPm0urIvw4fBnBjfTWau","admin"));
    }
}
- 1
- 2
- 3
- 4
- 5
- 6
- 7
- 8
- 9
自定义user类
@Data
@ToString
@AllArgsConstructor
public class User {
    private String username;
    private String password;
    private String roles;

}
- 1
- 2
- 3
- 4
- 5
- 6
- 7
- 8
- 9
使用 UserDetailsService 来加载用户信息,可以从数据库或其他存储中获取用户的密码。你需要实现 UserDetailsService 接口,并根据实际情况从数据库中加载用户信息和密码。
controller类
@RestController
@RequestMapping("/demo")
public class DemoController {
    @RequestMapping("/hello")
    @ResponseBody
    public String hello(){
        return "hello word";
    }
}
- 1
- 2
- 3
- 4
- 5
- 6
- 7
- 8
- 9
依赖
<parent> <groupId>org.springframework.boot</groupId> <artifactId>spring-boot-starter-parent</artifactId> <version>2.7.11</version> <relativePath/> <!-- lookup parent from repository --> </parent> <properties> <maven.compiler.source>11</maven.compiler.source> <maven.compiler.target>11</maven.compiler.target> <project.build.sourceEncoding>UTF-8</project.build.sourceEncoding> </properties> <dependencies> <!--添加web依赖 --> <dependency> <groupId>org.springframework.boot</groupId> <artifactId>spring-boot-starter-web</artifactId> </dependency> <!--添加热部署依赖 --> <dependency> <groupId>org.springframework.boot</groupId> <artifactId>spring-boot-devtools</artifactId> <scope>runtime</scope> <optional>true</optional> </dependency> <!--添加lombok 依赖 --> <dependency> <groupId>org.projectlombok</groupId> <artifactId>lombok</artifactId> <optional>true</optional> </dependency> <!-- <!–添加mp 依赖 –> <dependency> <groupId>com.baomidou</groupId> <artifactId>mybatis-plus-boot-starter</artifactId> <version>3.3.2</version> </dependency>--> <!--添加Spring Security 依赖 --> <dependency> <groupId>org.springframework.boot</groupId> <artifactId>spring-boot-starter-security</artifactId> </dependency> </dependencies>
- 1
- 2
- 3
- 4
- 5
- 6
- 7
- 8
- 9
- 10
- 11
- 12
- 13
- 14
- 15
- 16
- 17
- 18
- 19
- 20
- 21
- 22
- 23
- 24
- 25
- 26
- 27
- 28
- 29
- 30
- 31
- 32
- 33
- 34
- 35
- 36
- 37
- 38
- 39
- 40
- 41
- 42
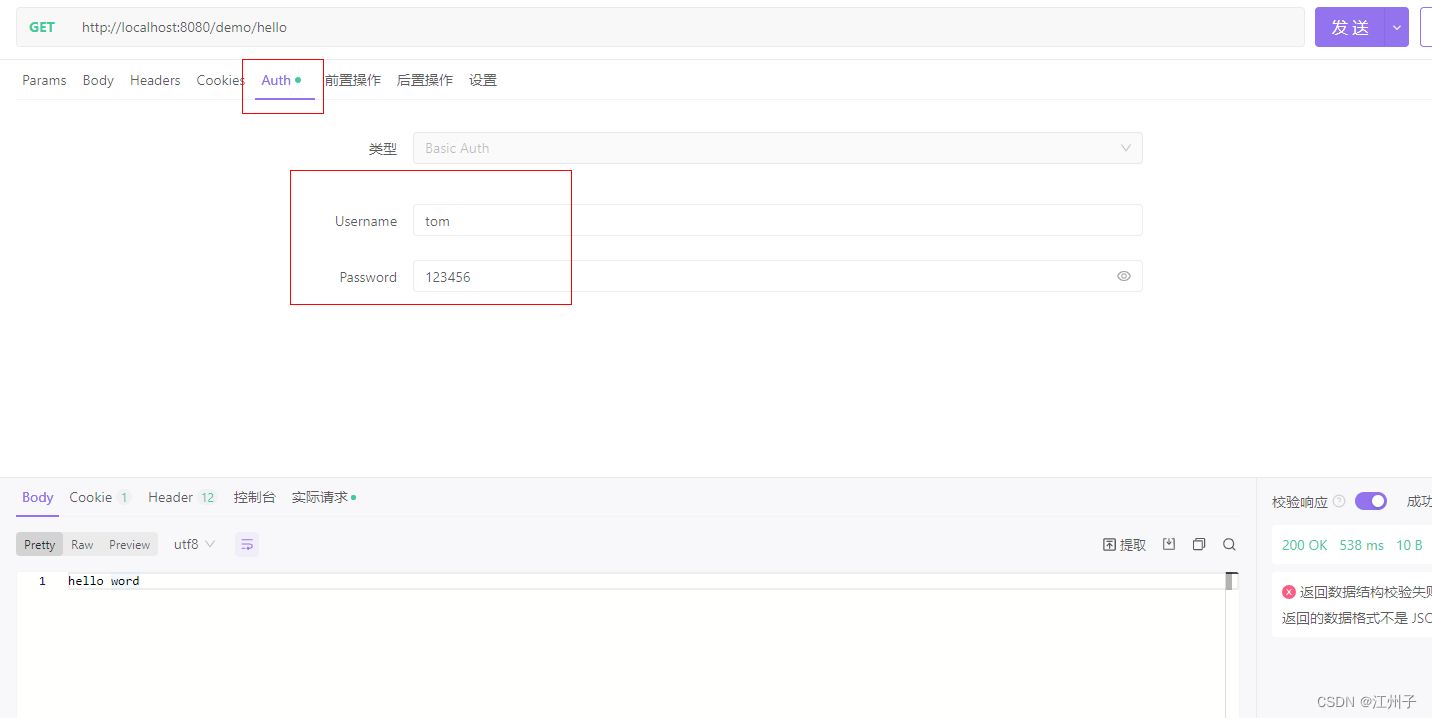
验证
声明:本文内容由网友自发贡献,版权归原作者所有,本站不承担相应法律责任。如您发现有侵权的内容,请联系我们。转载请注明出处:【wpsshop博客】
推荐阅读
相关标签


