热门标签
热门文章
- 1新鲜传媒CEO纪中展:经济危机对年轻人是机会
- 2QQ全量上云,你想了解的技术细节都在这
- 3拦截机制中Aspect、ControllerAdvice、Interceptor、Fliter之间的区别详解_controller aspect interceptor
- 4如何查看python安装位置图_如何查看pymysql 安装成功
- 5【计算机网络实验】使用Packet Tracer搭建网络拓扑_拓扑连通性测试
- 6Linux第2步_创建虚拟机_intel(r) core(tm) i7-8700 cpu @ 3.20ghz 3.19 ghz
- 7KafkaConsumer对于事务消息的处理
- 8百度文心一言4.0抢先体验教程!_文星一言4.0
- 9inputstream转string_ioutils.tostring(
- 10微信小程序的校园二手物品交易平台系统 uniapp 小程序_微信小程序二手交易平台
当前位置: article > 正文
vite+ts构建搭建谷歌插件开发环境_vue+vite开发谷歌插件
作者:我家自动化 | 2024-04-09 04:23:27
赞
踩
vue+vite开发谷歌插件
最近,根据需求开发了一款谷歌插件。所用前端脚手架就是目前最火的vite,以及typescript.本文将着重介绍利用vite+ts的搭建谷歌插件开发的具体过程。很多教程都说的是谷歌扩展v2的配置,本文是 根据最新的谷歌扩展文档开发的v3的开发。
一、创建一个vite项目:
pnpm create vite二、在 src资源目录里面文件配置
1、在src资源目录里面创建一个manifest.ts ,具体配置:
- const manifest = {
- manifest_version: 3,
- homepage_url: 'https://demo.xxx.com',
- name: 'chome extension demo ',
- description: 'This is a demo',
- version: '1.0',
- icons: {
- '16': 'icon/icon-16.png',
- '32': 'icon/icon-32.png',
- '48': 'icon/icon-48.png',
- '64': 'icon/icon-64.png',
- '128': 'icon/icon-128.png'
- },
- action: {
- default_title: 'chrome demo',
- default_popup: './index.html',
- default_icon: {
- '16': 'icon/icon-16.png',
- '32': 'icon/icon-32.png',
- '48': 'icon/icon-48.png',
- '64': 'icon/icon-64.png',
- '128': 'icon/icon-128.png'
- }
- },
- /* externally_connectable: {
- matches: ['*://*.example.com/*', '*://localhost/*'],
- ids: ['*']
- }, */
- content_security_policy: {
- extension_pages:
- "script-src 'self'; object-src 'self'; frame-ancestors 'none';"
- },
- externally_connectable: {
- ids: ['*']
- },
- permissions: ['storage', 'activeTab', 'scripting', 'tabs'],
- background: {
- service_worker: './background.ts',
- type: 'module'
- },
- // content_scripts: [
- // {
- // matches: ['http://*/*', 'https://*/*', '<all_urls>'],
- // js: ['background.ts']
- // css: ['content.styles.css']
- // }
- // ],
- commands: {
- _execute_action: {
- suggested_key: {
- windows: 'Alt+Shift+N',
- mac: 'Alt+Shift+N',
- chromeos: 'Alt+Shift+N',
- linux: 'Alt+Shift+N'
- }
- }
- },
- options_page: './options.html'
- };
-
- export default manifest;

如果还需要其他配置可以查看谷歌扩展的官方文档
谷歌插件自定义的图标可以放在public目录下
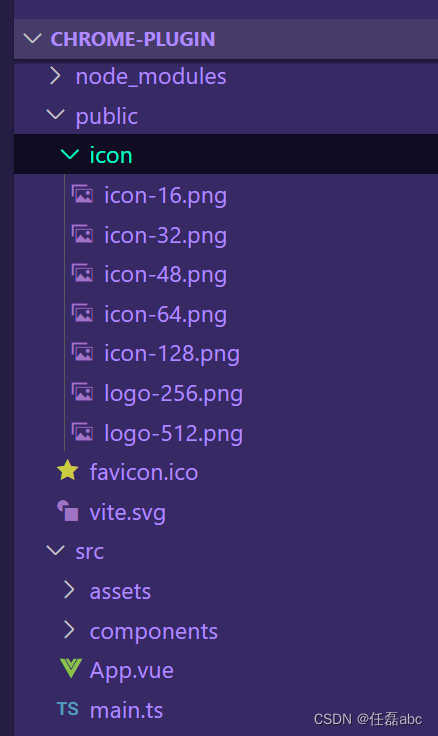
2、安装@samrum/vite-plugin-web-extension插件:
pnpm add @samrum/vite-plugin-web-extension -D3、配置vite.config.ts文件
- import { defineConfig } from 'vite';
- import vue from '@vitejs/plugin-vue';
- import webExtension from '@samrum/vite-plugin-web-extension';
- import nodePolyfills from 'rollup-plugin-polyfill-node';
- import { resolve } from 'path';
- import manifest from './src/manifest';
- // https://vitejs.dev/config/
- export default ({ mode, command }) => {
- console.log(mode, command);
- return defineConfig({
- root: './src/',
- base: '/',
- envDir: '../',
- publicDir: '../public',
- plugins: [
- vue(),
- webExtension({
- manifest: {
- ...manifest
- }
- })
- ],
- define: {
- 'process.env': {}
- },
- server: {
- host: '0.0.0.0',
- port: 30,
- strictPort: true,
- open: true
- },
- css: {
- devSourcemap: true
- },
- rollupOptions: {
- plugins: [nodePolyfills()]
- },
- resolve: {
- alias: {
- '@': resolve(__dirname, 'src')
- }
- },
- build: {
- outDir: '../dist',
- emptyOutDir: true,
- cssCodeSplit: true,
- sourcemap: true,
- rollupOptions: {
- input: {
- main: resolve(__dirname, './src/index.html'),
- options: resolve(__dirname, './src/options.html')
- },
- output: {
- chunkFileNames: 'static/js/[name]-[hash].js',
- entryFileNames: 'static/js/[name]-[hash].js',
- assetFileNames: 'static/[ext]/name-[hash].[ext]'
- }
- }
- }
- });
- };

完成以上配置后,使用pnpm dev启动本地开发,本地开发完成后,使用打包命令:pnpm build,打包出dist文件夹。打开谷歌扩展列表chrome://extensions/,或者在设置下面点击扩展程序进入。
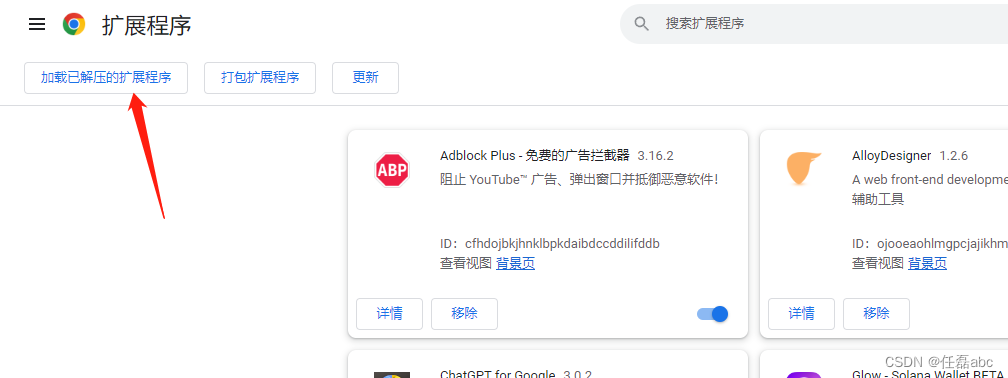
点击已解压的扩展程序
选中刚才打包好的dist文件夹,进行上传。
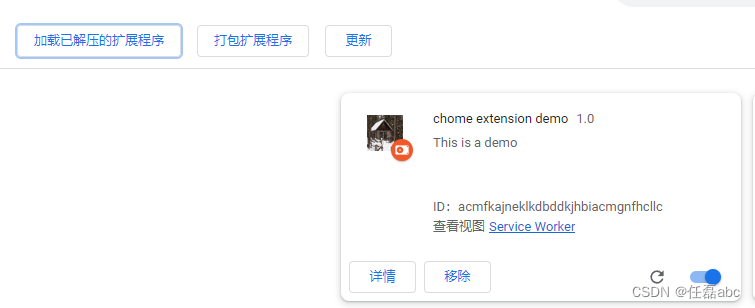
这样扩展程序就导入到了谷歌扩展当中
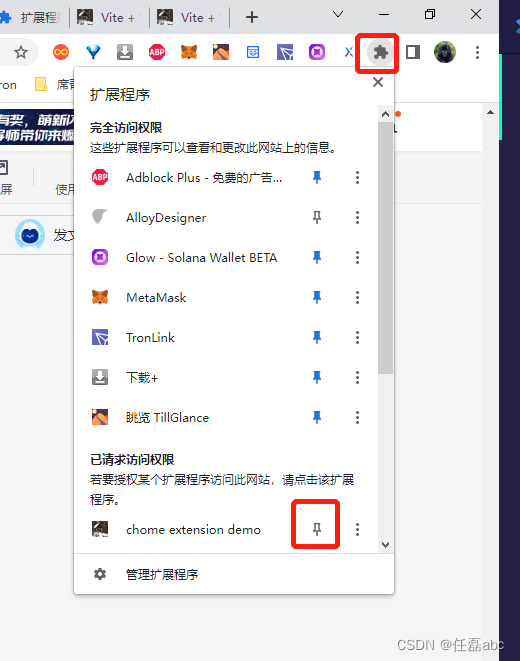
点击那个树叶一样的按钮,找到刚才导入的扩展固定,就可以看到在扩展栏目里面 看到刚才 导入的demo
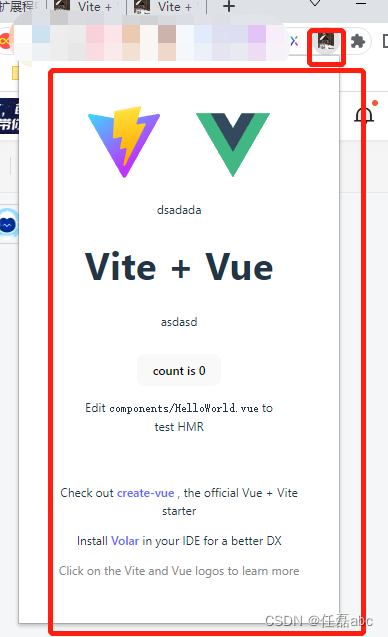
具体代码可以查看 chrome-extension-demo
声明:本文内容由网友自发贡献,不代表【wpsshop博客】立场,版权归原作者所有,本站不承担相应法律责任。如您发现有侵权的内容,请联系我们。转载请注明出处:https://www.wpsshop.cn/w/我家自动化/article/detail/390311
推荐阅读
相关标签


