- 1数据分析环境搭建
- 2【机器学习】一文搞懂算法模型之:LSTM_lstm模型
- 3Git基本操作,一篇文章就够了!_胖梅gitee
- 4【紫光同创盘古PGX-Lite 7K教程】——(盘古PGX-Lite 7K开发板/PGC7KD-6IMBG256第七章)数字钟实验例程
- 5C语言编程学习必备的一些网站,干货收藏!_c语言入门编程学习网站
- 6【机器学习】在Python中使用XGBoost_evallist=[(dtrain,'train'),(dtest,'eval')]
- 7理解Stable Diffusion、LoRA、Dreambooth、Hypernetworks、Textual Inversion、Checkpoint_dreambooth和lora区别
- 82024年必知的20大开源项目工具!
- 9Python爬虫——新手使用代理ip详细教程_爬虫代理
- 10labelme标注信息统计及使用方法_labelme标注技巧
前端之CSS布局一览_前端css布局
赞
踩
终于学到了我最期望的地方了。。。
CSS布局
CSS布局技术允许我们拾取网页中的元素,并且控制它们相对正常布局流、周边元素、父容器或者主视口/窗口的位置。
布局类型
- 正常布局流
- display属性
- 弹性盒子
- 网格
- 浮动
- 定位
- CSS 表格布局
- 多列布局
正常布局流
就是浏览器默认的HTML布局方式。
其他布局方式都会覆盖掉默认布局样式。
display属性
设置元素的行为方式。
值:
- block 块; p li
- inline 内联; a
- inline-block内联块。
在布局中,另外两个值才是最重要的:
- display:flex
- display:grid
弹性盒子 Flexbox
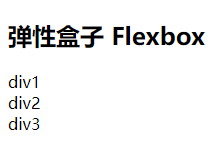
Flexbox 是CSS 弹性盒子布局模块。用于创建横向或是纵向的一维页面布局。
用法:
在父元素属性中加入 display:flex ,它所有的子元素都会变成flex item,按照flex进行布局。
flex布局:整整齐齐排成一行,是因为父元素上flex-direction的初值是row。它们全都被拉伸至和最高的元素高度相同,是因为父元素上align-items属性的初值是stretch。这就意味着所有的子元素都会被拉伸到它们的flex容器的高度,在这个案例里就是所有flex项中最高的一项。所有项目都从容器的开始位置进行排列,排列成一行后,在尾部留下一片空白。
<body>
    <h2>弹性盒子 Flexbox</h2>
    <div class="wrapper">
        <div>div1</div>
        <div>div2</div>
        <div>div3</div>
    </div>
</body>
- 1
- 2
- 3
- 4
- 5
- 6
- 7
- 8

加上样式
<style>
/* 弹性盒子 Flexbox
-------------------------------------------------- */

.wrapper {
    display: flex;
}

div>div {
    background-color: aquamarine;
}
</style>
- 1
- 2
- 3
- 4
- 5
- 6
- 7
- 8
- 9
- 10
- 11
- 12

改变flex项在flex布局中占用宽/高的方式,允许它们通过伸缩来适应可用空间。eg:
flex属性
<style>
/* 弹性盒子 Flexbox
-------------------------------------------------- */

.wrapper {
    display: flex;
}

.wrapper>div {
    background-color: aquamarine;
    flex: 1;
}
</style>
- 1
- 2
- 3
- 4
- 5
- 6
- 7
- 8
- 9
- 10
- 11
- 12
- 13


Grid布局
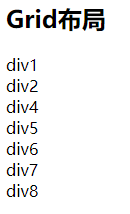
Flexbox用于设计横向或纵向的布局,而Grid布局则被设计用于同时在两个维度上把元素按行和列排列整齐。
用法:
- 在父元素的加入
display: grid
声明Grid布局。 - 然后用 grid-template-rows 和 grid-template-columns 分别定义了行和列的轨道。
- 再用grid-gap设置行列之间的间隙。
    <h2>Grid布局</h2>
    <div class="wrapper2">
        <div>div1</div>
        <div>div2</div>
        <div>div4</div>
        <div>div5</div>
        <div>div6</div>
        <div>div7</div>
        <div>div8</div>
    </div>
- 1
- 2
- 3
- 4
- 5
- 6
- 7
- 8
- 9
- 10

加入
<style>

</style>
- 1
- 2
- 3
fr等份,1fr 就是一等份,2fr 占两等份
浮动 ——应用 float 值,诸如 left 能够让块级元素互相并排成一行,而不是一个堆叠在另一个上面。
position 属性 — 允许你精准设置盒子中的盒子的位置,正常布局流中,默认为 static ,使用其它值会引起元素不同的布局方式,例如将元素固定到浏览器视口的左上角。
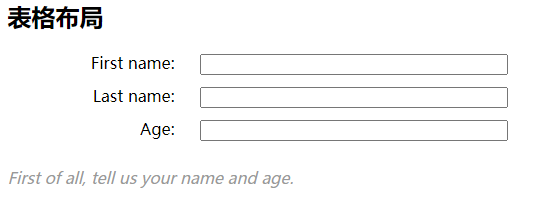
表格布局— 表格的布局方式可以用在非表格内容上,可以使用display: table和相关属性在非表元素上使用。
多列布局— 这个 Multi-column layout 属性 可以让块按列布局,比如报纸的内容就是一列一列排布的。
float 浮动
让一个元素“浮动”(float)起来,然后周围的内容就会在这个被设置浮动(float)的元素周围环绕起来。

<style>
/* float 布局
-------------------------------------------------- */

.wrapper3 .box {
    float: right;
    width: 100px;
    height: 100px;
    background-color: hotpink;
}
</style>
- 1
- 2
- 3
- 4
- 5
- 6
- 7
- 8
- 9
- 10
- 11
    <h2>float 浮动</h2>
    <div class="wrapper3">
        <div>
            <div class="box">
                box
            </div>
            <p>Lorem ipsum dolor sit amet, consectetur adipiscing elit. Nulla luctus aliquam dolor, eu lacinia lorem placerat vulputate. Duis felis orci, pulvinar id metus ut, rutrum luctus orci. Cras porttitor imperdiet nunc, at ultricies tellus laoreet
                sit amet. Sed auctor cursus massa at porta. Integer ligula ipsum, tristique sit amet orci vel, viverra egestas ligula. Curabitur vehicula tellus neque, ac ornare ex malesuada et. In vitae convallis lacus. Aliquam erat volutpat. Suspendisse
                ac imperdiet turpis. Aenean finibus sollicitudin eros pharetra congue. Duis ornare egestas augue ut luctus. Proin blandit quam nec lacus varius commodo et a urna. Ut id ornare felis, eget fermentum sapien.</p>
        </div>
    </div>
- 1
- 2
- 3
- 4
- 5
- 6
- 7
- 8
- 9
- 10
- 11
    <h2>float 浮动</h2>
    <div class="wrapper3">
        <div class="box">
            box
        </div>
        <div>
            <p>Lorem ipsum dolor sit amet, consectetur adipiscing elit. Nulla luctus aliquam dolor, eu lacinia lorem placerat vulputate. Duis felis orci, pulvinar id metus ut, rutrum luctus orci. Cras porttitor imperdiet nunc, at ultricies tellus laoreet
                sit amet. Sed auctor cursus massa at porta. Integer ligula ipsum, tristique sit amet orci vel, viverra egestas ligula. Curabitur vehicula tellus neque, ac ornare ex malesuada et. In vitae convallis lacus. Aliquam erat volutpat. Suspendisse
                ac imperdiet turpis. Aenean finibus sollicitudin eros pharetra congue. Duis ornare egestas augue ut luctus. Proin blandit quam nec lacus varius commodo et a urna. Ut id ornare felis, eget fermentum sapien.</p>
        </div>
    </div>
- 1
- 2
- 3
- 4
- 5
- 6
- 7
- 8
- 9
- 10
- 11
.box是p的兄弟也好,
是p爸爸也好
结果都是这样的:

position 定位
定位(positioning)能够让我们把一个元素从它原本在正常布局流(normal flow)中应该在的位置移动到另一个位置。定位(positioning)并不是一种用来给你做主要页面布局的方式,它更像是让你去管理和微调页面中的一个特殊项的位置。

    <h2>position 定位</h2>
    <div class="wrapper4">
        <p>I am a basic block level element.</p>
        <p class="positioned">I am a basic block level element.</p>
        <p>I am a basic block level element.</p>
    </div>
- 1
- 2
- 3
- 4
- 5
- 6
- 7
<style>
/* position  定位布局
-------------------------------------------------- */

body {
    width: 500px;
    margin: 0 auto;
}

.wrapper4 p {
    background-color: rgb(207, 232, 220);
    border: 2px solid rgb(79, 185, 227);
    padding: 10px;
    margin: 10px;
    border-radius: 5px;
}
</style>
- 1
- 2
- 3
- 4
- 5
- 6
- 7
- 8
- 9
- 10
- 11
- 12
- 13
- 14
- 15
- 16
- 17

相对定位
<style>
/* 相对定位 */

.positioned {
	/* 相对于正常布局所在位置,或者说是对外边框的一个外边框进行设置 */
    position: relative;

	/* 在外边距外的上方添加了一段距离 */
    top: 30px;
    /* 在外边距外的左方添加了一段距离 */
    left: 30px;
}
</style>
- 1
- 2
- 3
- 4
- 5
- 6
- 7
- 8
- 9
- 10
- 11
- 12
- 13

绝对定位
<style>
/* 绝对定位 */

.wrapper4 .positioned {
    position: absolute;
    background-color: blue;
    top: 30px;
    left: 30px;
}
</style>
- 1
- 2
- 3
- 4
- 5
- 6
- 7
- 8
- 9
- 10
指定元素与页面边界(相对于html元素)的顶部和左边的距离。

固定定位
- 固定定位(fixed positioning)同绝对定位(absolute positioning)一样,将元素从文档流(document flow)当中移出了。
- 定位的坐标不会应用于"容器"边框来计算元素的位置,而是会应用于视口(viewport)边框。由此,我们可以用来固定位置的菜单,不受页面滚动的影响。
在这个例子里面,我们在HTML加了三段很长的文本来使得页面可滚动,又加了一个带有position: fixed的盒子。
    <h2>position 定位</h2>
    <div class="wrapper4">
        <div class="positioned">Fixed</div>
        <p>Paragraph 1.</p>
        <p>Paragraph 2.</p>
        <p>Paragraph 3.</p>
    </div>
- 1
- 2
- 3
- 4
- 5
- 6
- 7
<style>
/* 固定定位 */

.wrapper4 .positioned {
    position: fixed;
    background-color: blue;
    top: 30px;
    left: 30px;
}
</style>
- 1
- 2
- 3
- 4
- 5
- 6
- 7
- 8
- 9
- 10


粘性定位
粘性定位(sticky positioning)是最后一种定位方式。是静态定位(static positioning)和固定定位(fixed positioning)相混合。当一个元素被指定了position: sticky时,它会在正常布局流中滚动,直到它出现在了我们给它设定的相对于容器的位置,这时候它就会停止随滚动移动,就像它被应用了position: fixed一样。

表格布局

多列布局
<style>
.container {
    column-width: 200px;
}
</style>
- 1
- 2
- 3
- 4
- 5
    <h2>多列布局</h2>
    <div class="wrapper7">

        <div class="container">
            <h1>Multi-column layout</h1>
            <p>Paragraph 1.</p>
            <p>Paragraph 2.</p>
        </div>

    </div>
- 1
- 2
- 3
- 4
- 5
- 6
- 7
- 8
- 9
- 10

只有 floats 和 positioning 是CSS 布局中可靠且跨浏览器兼容的
下一节: 前端之弹性盒子布局


