- 1大数据、人工智能学习书籍推荐——Python计算机视觉编程_ptyhon 计算机视觉推荐书籍
- 22016年9月下旬校园招聘面经(美团、百度、58同城、华为、微店 11月10号更新)_现有两个行数为1亿行的文本文件
- 3如何搭建一个成功的短剧制作平台
- 4细说 TCP 内核参数_tcp_synack_retries(1),2024年最新Golang面试题中高级_tcp synack retries
- 5基于wine葡萄酒数据集的分类方法研究
- 6「布道师系列文章」宝兰德徐清康解析 Kafka 和 AutoMQ 的监控
- 7国外服务器购买网站有哪些?2024排名前五的国外服务器平台_国外服务器网站
- 8【Shell 命令集合 系统管理 】Linux 以超级用户(root)的身份执行特权命令 sudo命令 使用指南_sudo root
- 9EDIUS11新版中国首发!新增多个AI功能比Sora更强!_edius11新功能
- 10带你一起分析cut the rope(切绳子游戏)中绳子的制作方法_cocoscreator割绳子
centos安装flink,通过windows访问webui_flink官网下载
赞
踩
1. 安装flink
1.1. flink的下载
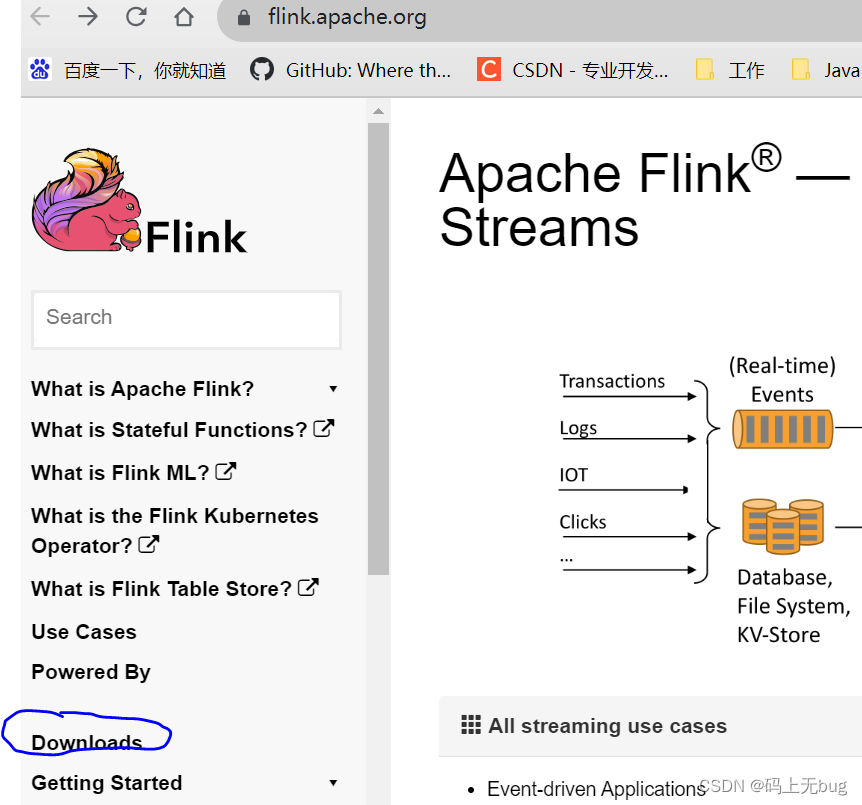
通过flink官网下载flink安装包
https://flink.apache.org/

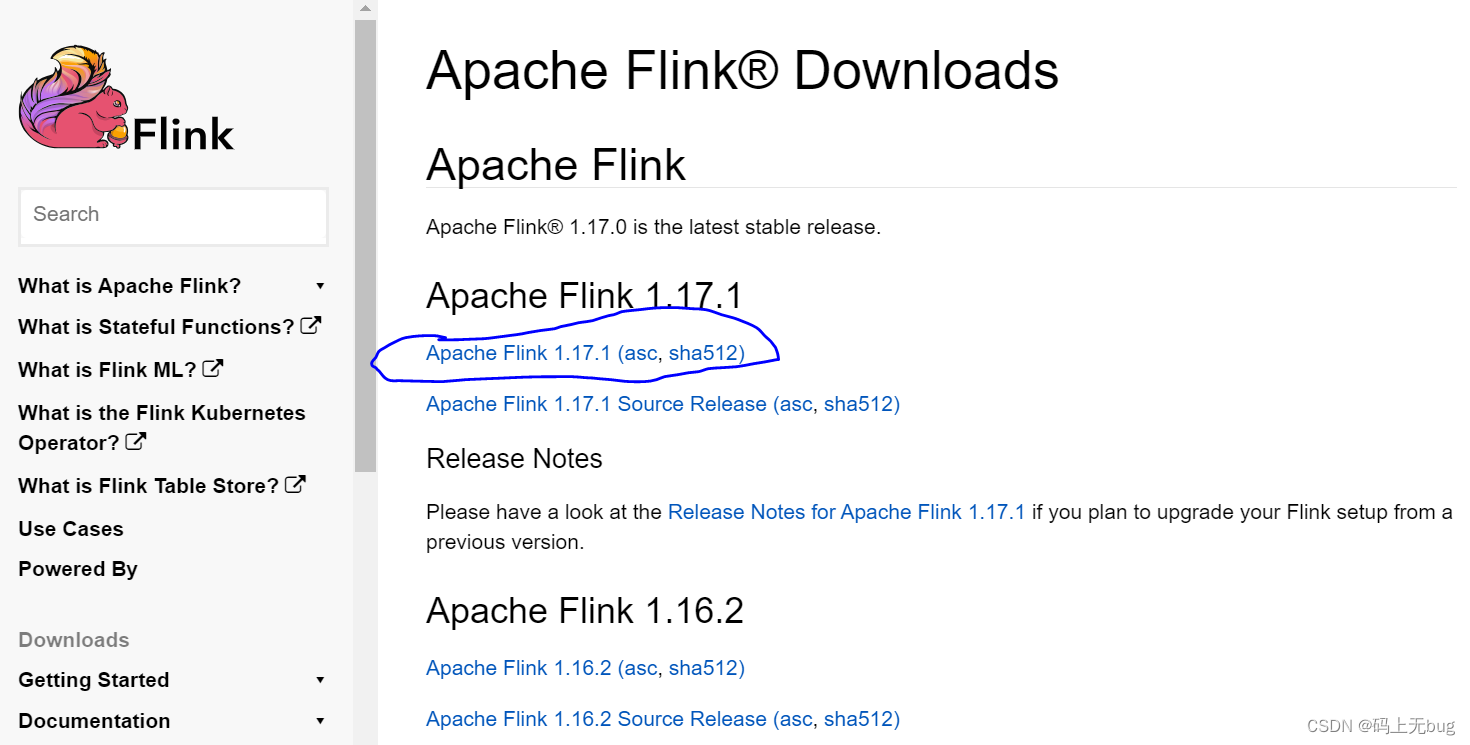
下载安装包

1.2 flink在centos上的安装
将下载好的flink-1.17.1-bin-scala_2.12.tgz安装包放到centos目录下

解压文件:
[root@localhost ~]# tar -zxvf flink-1.17.1-bin-scala_2.12.tgz
- 1
会解压出来一个目录flink-1.17.1
2 配置flink
2.1 配置flink-conf.yaml文件
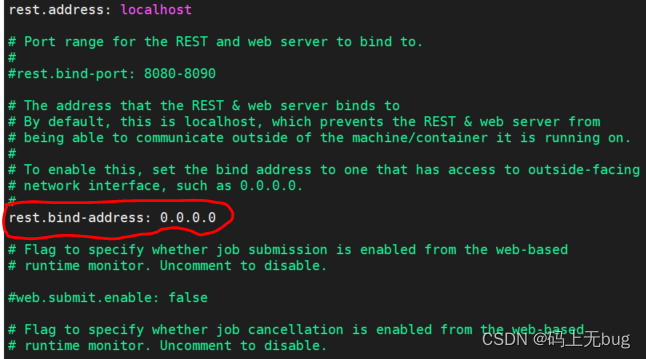
进入到flink-1.17.1/conf目录下修改flink-conf.yaml文件,修改rest.bind-address配置为0.0.0.0,这个非常关键,是为了能在任何地方,比如windows的浏览器上访问flink web ui,

2.2 java jdk的配置是前提条件, 别忘了一定要提前配置好jdk
参考这个文章,简单高效
Linux快速配置Java环境,非常详细
2.3 一个大坑,一定要避免,那就是centos的防火墙要关闭,并确认是否关闭成功
会用到的命令如下,
a. 查看防火墙状态:firewall-cmd --state
如果是not running状态,说明没有启动防火墙
b. 关闭防火墙:systemctl stop firewalld.service
c. 设置开机禁启:systemctl disable firewalld.service
========================
以下为常用防火墙命令
查看防火墙状态:firewall-cmd --state
查看防火墙版本:firewall-cmd --version
更多防火墙状态:systemctl status firewalld.service
开启防火墙:systemctl start firewalld.service
关闭防火墙:systemctl stop firewalld.service
重启防火墙:systemctl restart firewalld.service
设置开机自启:systemctl enable firewalld.service
设置开机禁启:systemctl disable firewalld.service
查看是否自启:systemctl is-enabled firewalld.service
查看自启列表:systemctl list-unit-files|grep enabled
3. 访问flink web ui
3.1 启动flink的standalone集群
在flink的bin目录下,使用如下命令:
[root@localhost bin]# ./start-cluster.sh
Starting cluster.
Starting standalonesession daemon on host localhost.localdomain.
Starting taskexecutor daemon on host localhost.localdomain.
- 1
- 2
- 3
- 4
- 5
关闭flink的命令为:./stop-cluster.sh,一定要在bin目录下执行。
3.2 访问web ui
在windows的浏览器中输入
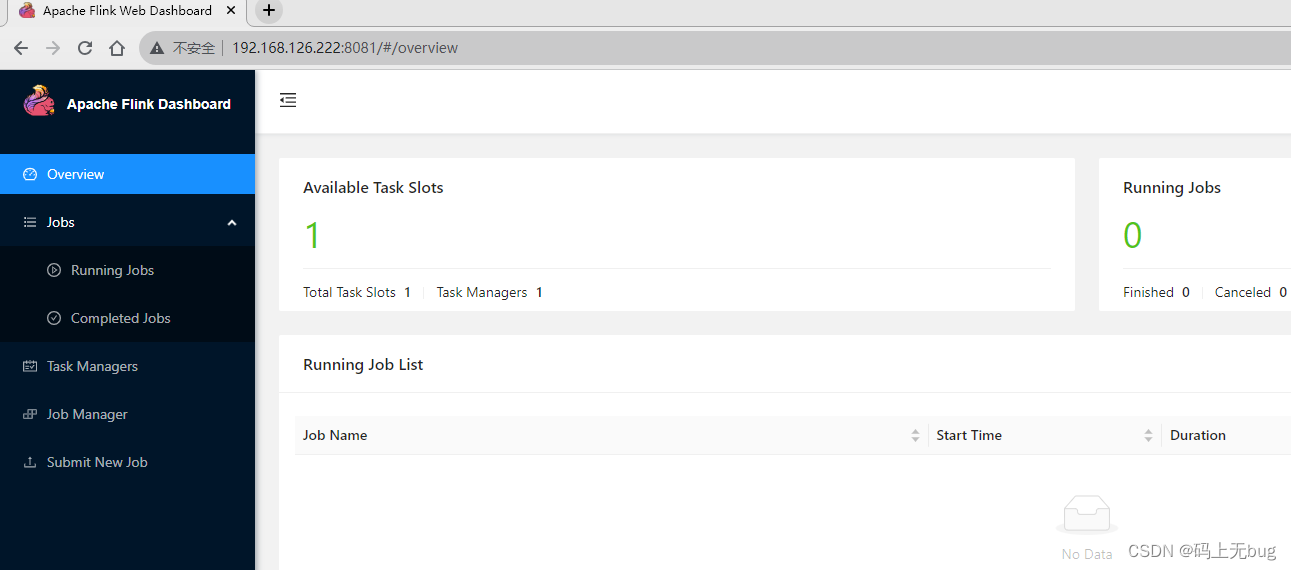
http://[centos的ip地址]:8081即可
出现如下页面说明配置成功:


