- 1android.os.DeadObjectException的解决办法_android.os.deadobjectexception: transaction failed
- 2java注解实战
- 3C# 读取config文件_c#读取dllconfig
- 4猿创征文|开源监控软件Zabbix6部署实战_zabbix6一键
- 5史上最全因果推断合集-2(阿里大文娱智能营销增益模型)_广告与因果推断
- 6PTA——重排链表_给定一个单链表 l 1 →l 2 → →l n 1 →l n ,请编写程序将链表重新排列为
- 7wr703n刷openwrt智能控制--进入哦penwrt系统_multiple packages (libgcc1 and libgcc1) providing
- 8openwrt 锐捷 单线多拨_openwrt单线多拨
- 9[Intensive Reading]目标检测(object detection)系列(七) R-FCN:位置敏感的Faster R-CNN_位置敏感的目标检测
- 10sudo和apt是什么的缩写_sudo apt是什么意思
一文了解Flutter的GetX框架_flutter getx
赞
踩
关于Get
- GetX 是 Flutter 上的一个轻量且强大的解决方案:高性能的状态管理、智能的依赖注入和便捷的路由管理。
- GetX 有3个基本原则:
- 性能: GetX 专注于性能和最小资源消耗。GetX 打包后的apk占用大小和运行时的内存占用与其他状态管理插件不相上下。
- 效率: GetX 的语法非常简捷,并保持了极高的性能,能极大缩短开发时长。
- 结构: GetX 可以将界面、逻辑、依赖和路由完全解耦,逻辑更清晰,代码更容易维护。
- GetX 并不臃肿,却很轻量。如果你只使用状态管理,只有状态管理模块会被编译,其他没用到的东西都不会被编译到你的代码中。它拥有众多的功能,但这些功能都在独立的容器中,只有在使用后才会启动。
- Getx有一个庞大的生态系统,能够在Android、iOS、Web、Mac、Linux、Windows和你的服务器上用同样的代码运行。
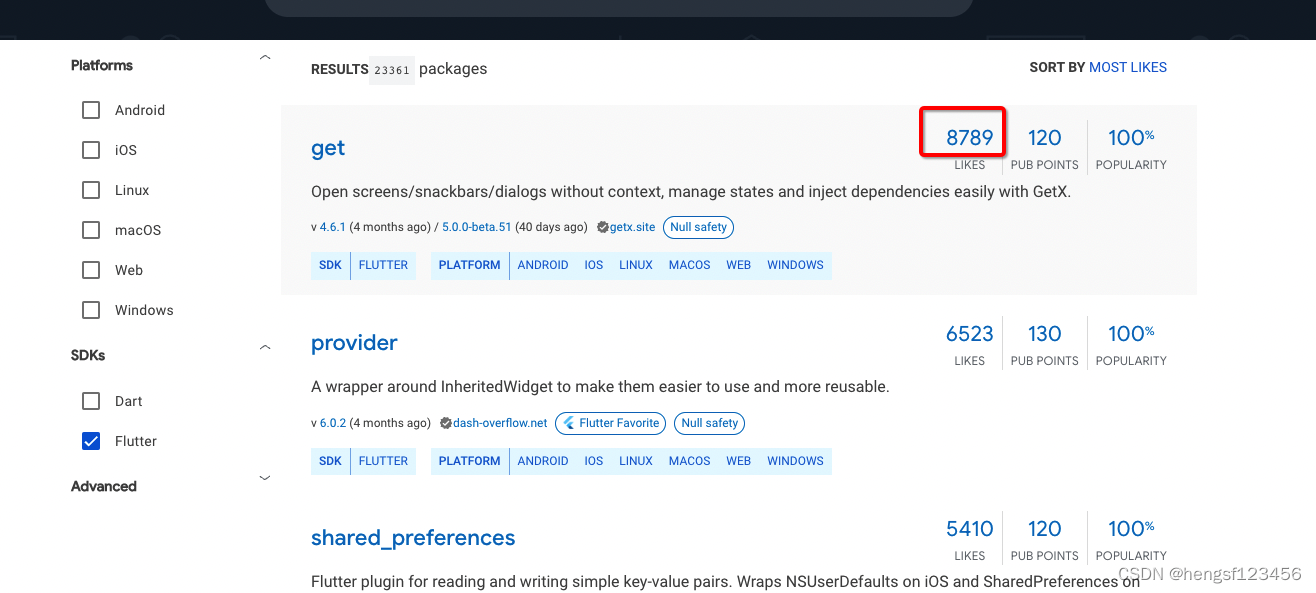
在Flutter三方库中,也是likes最高的
GetX的计数器示例
Flutter默认创建的 "计数器 "项目有100多行(含注释),这里使用 GetX 重写一个计数器 。
而完成这一切只需 26 行代码(含注释)
- 步骤1. 在你的MaterialApp前添加 “Get”,将其变成GetMaterialApp。
void main() => runApp(GetMaterialApp(home: Home()));
- 1
GetMaterialApp只是对MaterialApp封装了一层,它的子组件是默认的MaterialApp。
如果你只用Get来进行状态管理或依赖管理,就没有必要使用GetMaterialApp。GetMaterialApp对于路由、snackbar、国际化、bottomSheet、对话框以及与路由相关的高级apis和没有上下文(context)的情况下是必要的。
- 第二步: 创建你的业务逻辑类,并将所有的变量,方法和控制器放在里面。 你可以使用一个简单的".obs "使任何变量成为可观察的。
class Controller extends GetxController{
  var count = 0.obs;
  increment() => count++;
}
- 1
- 2
- 3
- 4
- 第三步: 创建你的界面,使用StatelessWidget节省一些内存,使用Get你可能不再需要使用StatefulWidget。
class Home extends StatelessWidget {

  @override
  Widget build(context) {

    // 使用Get.put()实例化你的类,使其对当下的所有子路由可用。
    final Controller c = Get.put(Controller());

    return Scaffold(
      // 使用Obx(()=>每当改变计数时,就更新Text()。
      appBar: AppBar(title: Obx(() => Text("Clicks: ${c.count}"))),

      // 用一个简单的Get.to()即可代替Navigator.push那8行,无需上下文!
      body: Center(child: ElevatedButton(
              child: Text("Go to Other"), onPressed: () => Get.to(Other()))),
      floatingActionButton:
          FloatingActionButton(child: Icon(Icons.add), onPressed: c.increment));
  }
}

class Other extends StatelessWidget {
  // 你可以让Get找到一个正在被其他页面使用的Controller,并将它返回给你。
  final Controller c = Get.find();

  @override
  Widget build(context){
     // 访问更新后的计数变量
     return Scaffold(body: Center(child: Text("${c.count}")));
  }
}

- 1
- 2
- 3
- 4
- 5
- 6
- 7
- 8
- 9
- 10
- 11
- 12
- 13
- 14
- 15
- 16
- 17
- 18
- 19
- 20
- 21
- 22
- 23
- 24
- 25
- 26
- 27
- 28
- 29
- 30
Get三大功能
状态管理
目前,Flutter有几种状态管理器。但是,它们中的大多数都涉及到使用ChangeNotifier来更新widget,这对于功能复杂的应用是比较麻烦的。在Flutter的官方文档中查看到,ChangeNotifier使用了1个或多个监听器来达到状态管理。
A class that can be extended or mixed in that provides a change notification API using VoidCallback for notifications.
It is O(1) for adding listeners and O(N) for removing listeners and dispatching notifications (where N is the number of listeners).
Get是一个微框架,而不仅仅是一个状态管理器,既可以单独使用,也可以与其他状态管理器结合使用,意味着引用进我们的项目中,并不会影响之前的功能。
Get有两个不同的状态管理器:简单的状态管理器(GetBuilder)和响应式状态管理器(GetX)。
响应式状态管理器
响应式状态管理器使用响应式编程。
- 你不需要创建StreamControllers.
- 你不需要为每个变量创建一个StreamBuilder。
- 你不需要为每个状态创建一个类。
- 你不需要为一个初始值创建一个get。
比如现在有一个名称变量,并且希望每次改变它时,所有使用它的小组件都会自动刷新。
var name = 'Abc';
- 1
要想让它变得可观察,你只需要在它的末尾加上".obs"。
var name = 'Abc'.obs;
- 1
而在UI中,当你想显示该值并在值变化时更新页面,只需这样做。
Obx(() => Text("${controller.name}"));
- 1
我们把这个".obs"变量称为 Rx 。
原理就是创建了一个 "Stream "的 “String”,分配了初始值 “Abc”,我们通知所有使用 "Abc "的widgets,它们现在 "属于 "这个变量,当_Rx_的值发生变化时,它们也要随之改变,监听流的变化。
如果name是"Abc",你把它改成了"Abc",因为它进行增量变化,所以界面上不会有任何变化,也不会重建Widget。
声明一个响应式变量
你有3种方法可以把一个变量变成是 “可观察的”。
1 - 第一种是使用 Rx{Type}。
// 建议使用初始值,但不是强制性的
final name = RxString('');
final isLogged = RxBool(false);
final count = RxInt(0);
final balance = RxDouble(0.0);
final items = RxList<String>([]);
final myMap = RxMap<String, int>({});
- 1
- 2
- 3
- 4
- 5
- 6
- 7
2 - 第二种是使用 Rx,规定泛型 Rx<Type>。
  final name = Rx<String>('');
  final isLogged = Rx<bool>(false);
  final count = Rx<int>(0);
  final balance = Rx<double>(0.0);
  final number = Rx<num>(0)
  final items = Rx<List<String>>([]);
  final myMap = Rx<Map<String, int>>({});
- 1
- 2
- 3
- 4
- 5
- 6
- 7
- 8
3 - 第三种更实用、更简单、更可取的方法,只需添加 .obs 作为value的属性。
final name = ''.obs;
final isLogged = false.obs;
final count = 0.obs;
final balance = 0.0.obs;
final number = 0.obs;
final items = <String>[].obs;
final myMap = <String, int>{}.obs;

// 自定义类 - 可以是任何类
final user = User().obs;
- 1
- 2
- 3
- 4
- 5
- 6
- 7
- 8
- 9
- 10
数据变化监听
除了使用 Obx 实现界面数据自动刷新外,GetX 提供了多种手动方式对响应式变量进行数据变化监听
///每次`count1`变化时调用。
ever(count1, (_) => print("$_ has been changed"));

///只有在变量$_第一次被改变时才会被调用。
once(count1, (_) => print("$_ was changed once"));

///防DDos - 每当用户停止输入1秒时调用,例如。
debounce(count1, (_) => print("debouce$_"), time: Duration(seconds: 1));

///忽略1秒内的所有变化。
interval(count1, (_) => print("interval $_"), time: Duration(seconds: 1));
- 1
- 2
- 3
- 4
- 5
- 6
- 7
- 8
- 9
- 10
- 11
这些手动监听方式(除 "debounce "外)都有一个名为 "condition"的参数,它可以是一个 "bool "或一个返回 "bool "的回调。 这个condition定义了callback函数何时执行。
所有这些方法都会返回一个Worker实例,你可以用它来取消(通过dispose())worker。
ever当数据发生改变时触发everAll和 "ever "很像,只是监听的是多个响应式变量的变化,当其中一个发生变化就会触发回调once只在变量第一次被改变时被调用debounce防抖,即延迟一定时间调用,且在规定时间内只有最后一次改变会触发回调。如设置时间为 1 秒,发生了3次数据变化,每次间隔500毫秒,则只有最后一次变化会触发回调。interval时间间隔内只有最后一次变化会触发回调。如设置时间间隔为1秒,则在1秒内无论点击多少次都只有最后一次会触发回调,然后进入下一次的时间间隔。
简单状态管理器
Get有一个极其轻巧简单的状态管理器,它不使用ChangeNotifier,可以满足特别是对Flutter新手的需求,而且不会给大型应用带来问题。
- 只更新需要的小部件。
- 不使用changeNotifier,状态管理器使用较少的内存(接近0mb)。
- 真正的解耦你的项目! 控制器一定不要在你的UI中,把你的TextEditController,或者你使用的任何控制器放在你的Controller类中。
- 仅在必要时使用流。你可以在你的控制器里面正常使用你的StreamControllers,也可以正常使用StreamBuilder,一个流消耗合理的内存,响应式编程很美,但是你不应该滥用它。
- 更新widgets而不需要为此花费内存。Get只存储GetBuilder的创建者ID,必要时更新该GetBuilder。get ID存储在内存中的消耗非常低,即使是成千上万的GetBuilders。当你创建一个新的GetBuilder时,你实际上是在共享拥有创建者ID的GetBuilder的状态。不会为每个GetBuilder创建一个新的状态,这为大型应用节省了大量的内存。基本上你的应用程序将是完全无状态的,而少数有状态的Widgets(在GetBuilder内)将有一个单一的状态,因此更新一个状态将更新所有的状态。状态只是一个。
- Get有很强大的控制器内存管理,会在合适的时候进行销毁或创建。
用法
// 创建控制器类并扩展GetxController。
class Controller extends GetxController {
  int counter = 0;
  void increment() {
    counter++;
    update(); // 当调用增量时,使用update()来更新用户界面上的计数器变量。
  }
}
// 在你的Stateless/Stateful类中,当调用increment时,使用GetBuilder来更新Text。
GetBuilder<Controller>(
  init: Controller(), // 首次启动
  builder: (_) => Text(
    '${_.counter}',
  ),
)
//只在第一次时初始化你的控制器。第二次使用ReBuilder时,不要再使用同一控制器。一旦将控制器标记为 "init "的部件部署完毕,你的控制器将自动从内存中移除。你不必担心这个问题,Get会自动做到这一点,只是要确保你不要两次启动同一个控制器。
- 1
- 2
- 3
- 4
- 5
- 6
- 7
- 8
- 9
- 10
- 11
- 12
- 13
- 14
- 15
- 16
无需StatefulWidgets
使用StatefulWidgets意味着不必要地存储整个界面的状态,甚至因为如果你需要最小化地重建一个widget,你会把它嵌入一个Consumer/Observer/BlocProvider/GetBuilder/GetX/Obx中,这将是另一个StatefulWidget。 StatefulWidget类是一个比StatelessWidget大的类,它将分配更多的内存,只使用一两个类之间可能不会有明显的区别,但当你有100个类时,它肯定会有区别! 除非你需要使用混合器,比如TickerProviderStateMixin,否则完全没有必要使用StatefulWidget与Get。
你可以直接从GetBuilder中调用StatefulWidget的所有方法。 例如,如果你需要调用initState()或dispose()方法,你可以直接调用它们。
GetBuilder<Controller>(
  initState: (_) => Controller.to.fetchApi(),
  dispose: (_) => Controller.to.closeStreams(),
  builder: (s) => Text('${s.username}'),
),
- 1
- 2
- 3
- 4
- 5
比这更好的方法是直接从控制器中使用onInit()和onClose()方法。
@override
void onInit() {
  fetchApi();
  super.onInit();
}
- 1
- 2
- 3
- 4
- 5
如果你想在控制器第一次被调用的那一刻启动一个方法,你不需要为此使用构造函数,在控制器内有onInit();和onClose();方法就是为此而创建的,它们会在Controller被创建,或者第一次使用时被调用,这取决于你是否使用Get.lazyPut。
其他使用方法
你可以直接在GetBuilder值上使用Controller实例。
GetBuilder<Controller>(
  init: Controller(),
  builder: (value) => Text(
    '${value.counter}', //here
  ),
),
- 1
- 2
- 3
- 4
- 5
- 6
你可能还需要在GetBuilder之外的控制器实例,你可以使用这些方法来实现。
class Controller extends GetxController {
  static Controller get to => Get.find();
[...]
}
//view
GetBuilder<Controller>(
  init: Controller(), // 每个控制器只用一次
  builder: (_) => Text(
    '${Controller.to.counter}', //here
  )
),
- 1
- 2
- 3
- 4
- 5
- 6
- 7
- 8
- 9
- 10
- 11
或者
class Controller extends GetxController {
 // static Controller get to => Get.find(); // with no static get
[...]
}
// on stateful/stateless class
GetBuilder<Controller>(
  init: Controller(), // 每个控制器只用一次
  builder: (_) => Text(
    '${Get.find<Controller>().counter}', //here
  ),
),
- 1
- 2
- 3
- 4
- 5
- 6
- 7
- 8
- 9
- 10
- 11
唯一标识
如果你想只更新某个或者特定的widget控件,你可以给它们分配唯一的ID。
GetBuilder<Controller>(
  id: 'text', //这里
  init: Controller(), // 每个控制器只用一次
  builder: (_) => Text(
    '${Get.find<Controller>().counter}', //here
  ),
),
- 1
- 2
- 3
- 4
- 5
- 6
- 7
并更新它:
update(['text']);
- 1
还可以为更新设置条件。
update(['text'], counter < 10);
- 1
GetX会自动进行重建,并且只重建使用被更改的变量的小组件,如果您将一个变量更改为与之前相同的变量,并且不意味着状态的更改,GetX不会重建小组件以节省内存和CPU周期(界面上正在显示3,而您再次将变量更改为3。在大多数状态管理器中,这将导致一个新的重建,但在GetX中,如果事实上他的状态已经改变,那么widget将只被再次重建)
依赖管理
Get有一个简单而强大的依赖管理器,它允许你只用1行代码就能检索到与你的Bloc或Controller相同的类,无需Provider上下文,无需 inheritedWidget。
Controller controller = Get.put(Controller()); // 而不是 Controller controller = Controller();
- 1
你是在Get实例中实例化它,而不是在你正在使用的类中实例化你的类,这将使它在整个App中可用。 所以你可以正常使用你的控制器(或Bloc类)。
controller生命周期
比方说,我们有这样的情况。
Class a => Class B (has controller X) => Class C (has controller X)
- 1
在A类中,控制器还没有进入内存,因为你还没有使用它(Get是懒加载)。在类B中,你使用了控制器,并且它进入了内存。在C类中,你使用了与B类相同的控制器,Get会将控制器B的状态与控制器C共享,同一个控制器还在内存中。如果你关闭C屏和B屏,Get会自动将控制器X从内存中移除,释放资源,因为a类没有使用该控制器。
如果你再次导航到B,控制器X将再次进入内存,如果你没有去C类,而是再次回到a类,Get将以同样的方式将控制器从内存中移除。如果类C没有使用控制器,你把类B从内存中移除,就没有类在使用控制器X,同样也会被处理掉。唯一能让Get乱了阵脚的例外情况,是如果你意外地从路由中删除了B,并试图使用C中的控制器,在这种情况下,B中的控制器的创建者ID被删除了,Get被设计为从内存中删除每一个没有创建者ID的控制器。如果你打算这样做,在B类的GetBuilder中添加 "autoRemove: false "标志,并在C类的GetBuilder中使用adopID = true;
实例方法
Get.put()
最常见的插入依赖关系的方式。例如,对于你的视图的控制器来说:
Get.put<SomeClass>(SomeClass());
Get.put<LoginController>(LoginController(), permanent: true);
Get.put<ListItemController>(ListItemController, tag: "some unique string");
- 1
- 2
- 3
这是你使用put时可以设置的所有选项。
Get.put<S>(
  // 必备:你想得到保存的类,比如控制器或其他东西。
  // 注:"S "意味着它可以是任何类型的类。
  S dependency

  // 可选:当你想要多个相同类型的类时,可以用这个方法。
  // 因为你通常使用Get.find<Controller>()来获取一个类。
  // 你需要使用标签来告诉你需要哪个实例。
  // 必须是唯一的字符串
  String tag,

  // 可选:默认情况下,get会在实例不再使用后进行销毁
  // (例如:一个已经销毁的视图的Controller)
  // 但你可能需要这个实例在整个应用生命周期中保留在那里,就像一个sharedPreferences的实例或其他东西。
  //所以你设置这个选项
  // 默认值为false
  bool permanent = false,

  // 可选:允许你在测试中使用一个抽象类后,用另一个抽象类代替它,然后再进行测试。
  // 默认为false
  bool overrideAbstract = false,

  // 可选:允许你使用函数而不是依赖(dependency)本身来创建依赖。
  // 这个不常用
  InstanceBuilderCallback<S> builder,
)
- 1
- 2
- 3
- 4
- 5
- 6
- 7
- 8
- 9
- 10
- 11
- 12
- 13
- 14
- 15
- 16
- 17
- 18
- 19
- 20
- 21
- 22
- 23
- 24
- 25
- 26
Get.lazyPut
可以懒加载一个依赖,这样它只有在使用时才会被实例化。这对于计算代价高的类来说非常有用,或者如果你想在一个地方实例化几个类(比如在Bindings类中),而且你知道你不会在那个时候使用这个类。
///只有当第一次使用Get.find<ApiMock>时,ApiMock才会被调用。
Get.lazyPut<ApiMock>(() => ApiMock());

Get.lazyPut<FirebaseAuth>(
  () {
    // ... some logic if needed
    return FirebaseAuth();
  },
  tag: Math.random().toString(),
  fenix: true
)

Get.lazyPut<Controller>( () => Controller() )
- 1
- 2
- 3
- 4
- 5
- 6
- 7
- 8
- 9
- 10
- 11
- 12
- 13
这是你在使用lazyPut时可以设置的所有选项。
Get.lazyPut<S>(
  // 强制性:当你的类第一次被调用时,将被执行的方法。
  InstanceBuilderCallback builder,

  // 可选:和Get.put()一样,当你想让同一个类有多个不同的实例时,就会用到它。
  // 必须是唯一的
  String tag,

  // 可选:类似于 "永久",
  // 不同的是,当不使用时,实例会被丢弃,但当再次需要使用时,Get会重新创建实例,
  // 就像 bindings api 中的 "SmartManagement.keepFactory "一样。
  // 默认值为false
  bool fenix = false

)
- 1
- 2
- 3
- 4
- 5
- 6
- 7
- 8
- 9
- 10
- 11
- 12
- 13
- 14
- 15
Get.putAsync
如果你想注册一个异步实例,你可以使用Get.putAsync。
Get.putAsync<SharedPreferences>(() async {
  final prefs = await SharedPreferences.getInstance();
  await prefs.setInt('counter', 12345);
  return prefs;
});

Get.putAsync<YourAsyncClass>( () async => await YourAsyncClass() )
- 1
- 2
- 3
- 4
- 5
- 6
- 7
这都是你在使用putAsync时可以设置的选项。
Get.putAsync<S>(

  // 必备:一个将被执行的异步方法,用于实例化你的类。
  AsyncInstanceBuilderCallback<S> builder,

  // 可选:和Get.put()一样,当你想让同一个类有多个不同的实例时,就会用到它。
  // 必须是唯一的
  String tag,

  // 可选:与Get.put()相同,当你需要在整个应用程序中保持该实例的生命时使用。
  // 默认值为false
  bool permanent = false
)
- 1
- 2
- 3
- 4
- 5
- 6
- 7
- 8
- 9
- 10
- 11
- 12
- 13
使用实例化方法/类
Get为你的控制器自动 "寻找"在堆栈中并没有销毁的数据,你不需要任何额外的依赖关系。
final controller = Get.find<Controller>();
// 或者
Controller controller = Get.find();
- 1
- 2
- 3
然后你就可以恢复你在后面获得的控制器数据。
Text(controller.textFromApi);
- 1
由于返回的值是一个正常的类,你可以做任何你想做的事情。
int count = Get.find<SharedPreferences>().getInt('counter');
print(count); // out: 12345
- 1
- 2
区别
首先,让我们来看看Get.lazyPut的 "fenix "和其他方法的 “permanent”。
permanent和fenix的根本区别在于你想如何存储实例。
强化:默认情况下,GetX会在不使用实例时删除它们。 这意味着 如果页面1有控制器1,页面2有控制器2,而你从堆栈中删除了第一个路由,(比如你使用Get.off()或Get.offNamed())控制器1失去了它的使用,所以它将被删除。
但是如果你想选择使用permanent:true,那么控制器就不会在这个过渡中丢失–这对于你想在整个应用程序中保持生命的服务来说非常有用。
fenix则是针对那些你不担心在页面变化之间丢失的服务,但当你需要该服务时,你希望它还活着。所以基本上,它会处理未使用的控制器/服务/类,但当你需要它时,它会 重新创建一个新的实例。
- Get.put和Get.putAsync的创建顺序是一样的,不同的是,第二个方法使用的是异步方法创建和初始化实例。put是直接插入内存,使用内部方法
insert,参数permanent: false和isSingleton: true(这个isSingleton参数只是告诉它是使用dependency上的依赖,还是使用FcBuilderFunc上的依赖),之后,调用Get.find(),立即初始化内存中的实例。 - Get.lazyPut。顾名思义,这是一个懒加载的过程。实例被创建了,但它并没有被调用来立即使用,而是一直等待被调用。与其他方法相反,这里没有调用 “insert”。取而代之的是,实例被插入到内存的另一个部分,这个部分负责判断实例是否可以被重新创建,我们称之为 “工厂”。如果我们想创建一些以后使用的东西,它不会和现在使用的东西混在一起。这就是 "fenix "的魔力所在:如果你选择留下 “fenix: false”,并且你的 "smartManagement "不是 “keepFactory”,那么当使用 "Get.find "时,实例将把内存中的位置从 "工厂 "改为普通实例内存区域。紧接着,默认情况下,它将从 "工厂 "中移除。现在,如果你选择 “fenix: true”,实例将继续存在这个专用的部分,甚至进入公共区域,以便将来再次被调用。
Bindings
这个包最大的区别之一,也许就是可以将路由、状态管理器和依赖管理器完全集成。 当一个路由从Stack中移除时,所有与它相关的控制器、变量和对象的实例都会从内存中移除。如果你使用的是流或定时器,它们会自动关闭,你不必担心这些。 在2.10版本中,Get完全实现了Bindings API。 现在你不再需要使用init方法了。如果你不想的话,你甚至不需要键入你的控制器。你可以在适当的地方启动你的控制器和服务来实现。 Binding类是一个将解耦依赖注入的类,同时 "Bindings "路由到状态管理器和依赖管理器。 这使得Get可以知道当使用某个控制器时,哪个页面正在显示,并知道在哪里以及如何销毁它。 此外,Binding类将允许你拥有SmartManager配置控制。你可以配置依赖关系,当从堆栈中删除一个路由时,或者当使用它的widget被布置时,或者两者都不布置。你将有智能依赖管理为你工作,但即使如此,你也可以按照你的意愿进行配置。
Bindings类
- 创建一个类并实现Binding
class HomeBinding implements Bindings {}
- 1
你的IDE会自动要求你重写 "dependencies"方法,然后插入你要在该路由上使用的所有类。
class HomeBinding implements Bindings {
  @override
  void dependencies() {
    Get.lazyPut<HomeController>(() => HomeController());
    Get.put<Service>(()=> Api());
  }
}

class DetailsBinding implements Bindings {
  @override
  void dependencies() {
    Get.lazyPut<DetailsController>(() => DetailsController());
  }
}
- 1
- 2
- 3
- 4
- 5
- 6
- 7
- 8
- 9
- 10
- 11
- 12
- 13
- 14
现在你只需要通知你的路由,你将使用该 Binding 来建立路由管理器、依赖关系和状态之间的连接。
- 使用别名路由:
getPages: [
  GetPage(
    name: '/',
    page: () => HomeView(),
    binding: HomeBinding(),
  ),
  GetPage(
    name: '/details',
    page: () => DetailsView(),
    binding: DetailsBinding(),
  ),
];
- 1
- 2
- 3
- 4
- 5
- 6
- 7
- 8
- 9
- 10
- 11
- 12
- 使用正常路由。
Get.to(Home(), binding: HomeBinding());
Get.to(DetailsView(), binding: DetailsBinding())
- 1
- 2
至此,你不必再担心你的应用程序的内存管理,Get将为你做这件事。
Binding类在调用路由时被调用,你可以在你的GetMaterialApp中创建一个 "initialBinding "来插入所有将要创建的依赖关系。
GetMaterialApp(
  initialBinding: SampleBind(),
  home: Home(),
);
- 1
- 2
- 3
- 4
BindingsBuilder
创建Bindings的默认方式是创建一个实现Bindings的类,但是,你也可以使用BindingsBuilder回调,这样你就可以简单地使用一个函数来实例化任何你想要的东西。
例子:
getPages: [
  GetPage(
    name: '/',
    page: () => HomeView(),
    binding: BindingsBuilder(() {
      Get.lazyPut<ControllerX>(() => ControllerX());
      Get.put<Service>(()=> Api());
    }),
  ),
  GetPage(
    name: '/details',
    page: () => DetailsView(),
    binding: BindingsBuilder(() {
      Get.lazyPut<DetailsController>(() => DetailsController());
    }),
  ),
];
- 1
- 2
- 3
- 4
- 5
- 6
- 7
- 8
- 9
- 10
- 11
- 12
- 13
- 14
- 15
- 16
- 17
这样一来,你就可以避免为每条路径创建一个 Binding 类,使之更加简单。
两种方式都可以完美地工作,我们希望您使用最适合您的风格。
FlutterBinding
还可以在项目启动时,使用flutter的binding去绑定。
Future<void> init() async {
  final sharedPreference = await SharedPreferences.getInstance();

  Get.lazyPut(() => sharedPreference);
  // api client
  Get.lazyPut(() => ApiClient(appBaseUrl: AppConstants.BASE_URL));

  // repos
  Get.lazyPut(() => PopularProductRepo(apiClient: Get.find()));
  Get.lazyPut(() => RecommendedProductRepo(apiClient: Get.find()));
  Get.lazyPut(() => CartRepo(sharedPreferences: Get.find()));
  Get.lazyPut(() => AuthRepository(apiClient: Get.find(), sharedPreferences: Get.find()));

  // controllers
  Get.lazyPut(() => AuthController(authRepository: Get.find()));
  Get.lazyPut(() => PopularProductController(popularProductRepo: Get.find()));
  Get.lazyPut(() => RecommendedProductController(recommendedProductRepo: Get.find()));
  // 这里使用lazyput会导致提取释放,而报错--解决报错就是在之前的页面中使用一下,这样就不会释放,或者直接put进去
  Get.lazyPut(() => CartController(cartRepo: Get.find()));
  // Get.put(CartController(cartRepo: Get.find()));
}

-----------------------------
// 然后在启动app时调用
import 'helper/dependencies.dart' as dep;

Future<void> main() async {
  WidgetsFlutterBinding.ensureInitialized();
  await dep.init();

  runApp(const MyApp());
}
- 1
- 2
- 3
- 4
- 5
- 6
- 7
- 8
- 9
- 10
- 11
- 12
- 13
- 14
- 15
- 16
- 17
- 18
- 19
- 20
- 21
- 22
- 23
- 24
- 25
- 26
- 27
- 28
- 29
- 30
- 31
- 32
这样不会去绑定到对应的页面,只有在对应的页面使用到的时候,才会加载。
智能管理
GetX 默认情况下会将未使用的控制器从内存中移除。 但是如果你想改变GetX控制类的销毁方式,你可以用SmartManagement类设置不同的行为。
如何改变
如果你想改变这个配置(你通常不需要),就用这个方法。
void main () {
  runApp(
    GetMaterialApp(
      smartManagement: SmartManagement.onlyBuilders //这里
      home: Home(),
    )
  )
}
- 1
- 2
- 3
- 4
- 5
- 6
- 7
- 8
SmartManagement.full
这是默认的。销毁那些没有被使用的、没有被设置为永久的类。在大多数情况下,你会希望保持这个配置不受影响。如果你是第一次使用GetX,那么不要改变这个配置。
SmartManagement.onlyBuilders
使用该选项,只有在init:中启动的控制器或用Get.lazyPut()加载到Binding中的控制器才会被销毁。
如果你使用Get.put()或Get.putAsync()或任何其他方法,SmartManagement将没有权限移除这个依赖。
在默认行为下,即使是用 "Get.put "实例化的widget也会被移除,这与SmartManagement.onlyBuilders不同。
SmartManagement.keepFactory
就像SmartManagement.full一样,当它不再被使用时,它将删除它的依赖关系,但它将保留它们的工厂,这意味着如果你再次需要该实例,它将重新创建该依赖关系。
Bindings的工作原理
Bindings会创建过渡性工厂,在你点击进入另一个页面的那一刻,这些工厂就会被创建,一旦换屏动画发生,就会被销毁。 这种情况发生得非常快,以至于分析器甚至都来不及注册。 当你再次导航到这个页面时,一个新的临时工厂将被调用,所以这比使用SmartManagement.keepFactory更可取,但如果你不想创建Bindings,或者想让你所有的依赖关系都在同一个Binding上,它肯定会帮助你。 Factories占用的内存很少,它们并不持有实例,而是一个具有你想要的那个类的 "形状 "的函数。 这在内存上的成本很低,但由于这个库的目的是用最少的资源获得最大的性能,所以Get连工厂都默认删除。 请使用对你来说最方便的方法。
- 如果你使用多个Bindings,不要使用SmartManagement.keepFactory。它被设计成在没有Bindings的情况下使用,或者在GetMaterialApp的初始Binding中链接一个Binding。
- 使用Bindings是完全可选的,你也可以在使用给定控制器的类上使用
Get.put()和Get.find()。 然而,如果你使用Services或任何其他抽象,我建议使用Bindings来更好地组织。
路由
配置路由
return GetMaterialApp(
                  debugShowCheckedModeBanner: false,
                  title: 'Flutter Demo',
                  theme: ThemeData(
                    primarySwatch: Colors.blue,
                  ),
                  initialRoute: RouterHelper.getSplashPage(),
                  getPages: RouterHelper.routes,
                );

class RouterHelper {
  static const String splashPage = '/splash-page';
  static const String initial = '/';
  static const String cartPage = '/cart-page';

  static String getInitial() => initial;
  static String getCartPage() => cartPage;
  static String getSplashPage() => splashPage;

  static List<GetPage> routes = [
    GetPage(name: splashPage, page: () => const SplashScreen()),
    GetPage(name: initial, page: () => const HomePage()).
    GetPage(
        name: cartPage,
        page: () {
          return const CartPage();
        },
        transition: Transition.fadeIn
    ),
  ];
}
- 1
- 2
- 3
- 4
- 5
- 6
- 7
- 8
- 9
- 10
- 11
- 12
- 13
- 14
- 15
- 16
- 17
- 18
- 19
- 20
- 21
- 22
- 23
- 24
- 25
- 26
- 27
- 28
- 29
- 30
- 31
路由和原生路由同时设置会有问题,配置了
pages会和routes,会只生效pages
路由跳转
只要包裹了GetMaterialApp,之后跳转路由可以不用获取context,可以在任何地方直接跳转。
导航到新屏幕:
Get.to(NextScreen());
- 1
通过路由导航:
Get.toNamed('/details');
- 1
关闭snackbars、dialogs、bottomsheets或任何你通常会用Navigator.pop(context)关闭的东西;
Get.back();
- 1
转到下一个屏幕并且没有返回上一个屏幕的选项(用于 SplashScreens、登录屏幕等)
Get.off(NextScreen());
- 1
转到下一个屏幕并取消所有先前的路线(在购物车、投票和测试中很有用)
Get.offAll(NextScreen());
- 1
路由传参数
方式一:
Get.toNamed('/detail', arguments: {'abc':5});
- 1
方式二:
使用**?**拼接后面参数
Get.toNamed('/detail?abc=5');
- 1
使用id标识某一个特定的路由,可以做专门跳转
Get.toNamed('/detail', id: 2);
- 1
返回指定路由页面
Get.back(id: 2);
- 1
返回时候传参数
Get.back(result: 'ccccc');
- 1
路由获取参数
传参数的方式一的获取方式:
// 在build方法内获取
var params = Get.arguments;
- 1
- 2
传参数的方式二的获取方式:
// 在build方法内获取
var params = Get.parameters;
- 1
- 2
返回时候获取参数
var result = await Get.toNamed('/detail');
- 1
SnackBars
以前要使用 Flutter 制作简单的 SnackBar,您必须获取 Scaffold 的上下文,或者您必须使用附加到 Scaffold 的 GlobalKey
final snackBar = SnackBar(
  content: Text('Hi!'),
  action: SnackBarAction(
    label: 'I am a old and ugly snackbar :(',
    onPressed: (){}
  ),
);
// Find the Scaffold in the widget tree and use
// it to show a SnackBar.
Scaffold.of(context).showSnackBar(snackBar);
- 1
- 2
- 3
- 4
- 5
- 6
- 7
- 8
- 9
- 10
使用GetX
Get.snackbar('Hi', 'i am a modern snackbar');
- 1
使用 Get,您所要做的就是从代码中的任何位置调用 Get.snackbar,或者根据需要自定义它!
Get.snackbar(
  "Hey i'm a Get SnackBar!", // title
  "It's unbelievable! I'm using SnackBar without context, without boilerplate, without Scaffold, it is something truly amazing!", // message
  icon: Icon(Icons.alarm),
  shouldIconPulse: true,
  onTap:(){},
  barBlur: 20,
  isDismissible: true,
  duration: Duration(seconds: 3),
);

  // ALL FEATURES //
  //     Color colorText,
  //     Duration duration,
  //     SnackPosition snackPosition,
  //     Widget titleText,
  //     Widget messageText,
  //     bool instantInit,
  //     Widget icon,
  //     bool shouldIconPulse,
  //     double maxWidth,
  //     EdgeInsets margin,
  //     EdgeInsets padding,
  //     double borderRadius,
  //     Color borderColor,
  //     double borderWidth,
  //     Color backgroundColor,
  //     Color leftBarIndicatorColor,
  //     List<BoxShadow> boxShadows,
  //     Gradient backgroundGradient,
  //     TextButton mainButton,
  //     OnTap onTap,
  //     bool isDismissible,
  //     bool showProgressIndicator,
  //     AnimationController progressIndicatorController,
  //     Color progressIndicatorBackgroundColor,
  //     Animation<Color> progressIndicatorValueColor,
  //     SnackStyle snackStyle,
  //     Curve forwardAnimationCurve,
  //     Curve reverseAnimationCurve,
  //     Duration animationDuration,
  //     double barBlur,
  //     double overlayBlur,
  //     Color overlayColor,
  //     Form userInputForm
  ///
- 1
- 2
- 3
- 4
- 5
- 6
- 7
- 8
- 9
- 10
- 11
- 12
- 13
- 14
- 15
- 16
- 17
- 18
- 19
- 20
- 21
- 22
- 23
- 24
- 25
- 26
- 27
- 28
- 29
- 30
- 31
- 32
- 33
- 34
- 35
- 36
- 37
- 38
- 39
- 40
- 41
- 42
- 43
- 44
- 45
- 46
如果你更喜欢传统的snackbar,或者想从头开始定制它,包括只添加一行(Get.snackbar 使用强制性的标题和消息),你可以使用 Get.rawSnackbar();它提供了构建 Get.snackbar 的 原生 API。
Dialogs
打开对话框:
Get.dialog(YourDialogWidget());
- 1
打开默认对话框:
Get.defaultDialog(
  onConfirm: () => print("Ok"),
  middleText: "Dialog made in 3 lines of code"
);
- 1
- 2
- 3
- 4
您还可以使用 Get.generalDialog 代替 showGeneralDialog。
对于所有其他 Flutter 对话框小部件,包括 cupertinos,您可以使用 Get.overlayContext 代替 context,并在代码中的任何位置打开它。对于不使用 Overlay 的小部件,您可以使用 Get.context。这两个上下文将在 99% 的情况下用于替换 UI 的上下文,除非在没有导航上下文的情况下使用了 inheritWidget。
BottomSheets
Get.bottomSheet 类似于 showModalBottomSheet,但不需要上下文。
Get.bottomSheet(
  Container(
    child: Wrap(
      children: <Widget>[
        ListTile(
          leading: Icon(Icons.music_note),
          title: Text('Music'),
          onTap: () {}
        ),
        ListTile(
          leading: Icon(Icons.videocam),
          title: Text('Video'),
          onTap: () {},
        ),
      ],
    ),
  )
);
- 1
- 2
- 3
- 4
- 5
- 6
- 7
- 8
- 9
- 10
- 11
- 12
- 13
- 14
- 15
- 16
- 17
- 18
嵌套导航
Get让Flutter的嵌套导航更加简单。 你不需要context,而是通过Id找到你的导航栈。
- 注意:创建平行导航堆栈可能是危险的。理想的情况是不要使用NestedNavigators,或者尽量少用。如果你的项目需要它,请继续,但请记住,在内存中保持多个导航堆栈可能不是一个好主意(消耗RAM)。
看看它有多简单:
Navigator(
  key: Get.nestedKey(1), // create a key by index
  initialRoute: '/',
  onGenerateRoute: (settings) {
    if (settings.name == '/') {
      return GetPageRoute(
        page: () => Scaffold(
          appBar: AppBar(
            title: Text("Main"),
          ),
          body: Center(
            child: TextButton(
              color: Colors.blue,
              onPressed: () {
                Get.toNamed('/second', id:1); // navigate by your nested route by index
              },
              child: Text("Go to second"),
            ),
          ),
        ),
      );
    } else if (settings.name == '/second') {
      return GetPageRoute(
        page: () => Center(
          child: Scaffold(
            appBar: AppBar(
              title: Text("Main"),
            ),
            body: Center(
              child:  Text("second")
            ),
          ),
        ),
      );
    }
  }
),
- 1
- 2
- 3
- 4
- 5
- 6
- 7
- 8
- 9
- 10
- 11
- 12
- 13
- 14
- 15
- 16
- 17
- 18
- 19
- 20
- 21
- 22
- 23
- 24
- 25
- 26
- 27
- 28
- 29
- 30
- 31
- 32
- 33
- 34
- 35
- 36
- 37
兼容使用
如果不使用GetX的语法,只要把 Navigator(大写)改成 navigator(小写),你就可以拥有标准导航的所有功能,而不需要使用context,例如:
// 默认的Flutter导航
Navigator.of(context).push(
  context,
  MaterialPageRoute(
    builder: (BuildContext context) {
      return HomePage();
    },
  ),
);

// 使用Flutter语法获得,而不需要context。
navigator.push(
  MaterialPageRoute(
    builder: (_) {
      return HomePage();
    },
  ),
);

// get语法 (这要好得多)
Get.to(HomePage());
- 1
- 2
- 3
- 4
- 5
- 6
- 7
- 8
- 9
- 10
- 11
- 12
- 13
- 14
- 15
- 16
- 17
- 18
- 19
- 20
- 21
实用工具
国际化
翻译
翻译被保存为一个简单的键值字典映射。 要添加自定义翻译,请创建一个类并扩展翻译。
import 'package:get/get.dart';

class Messages extends Translations {
  @override
  Map<String, Map<String, String>> get keys => {
        'zh_CN': {
          'hello': '你好 世界',
          'logged_in': '用 @name 和 @email登陆',
        },
        'de_DE': {
          'hello': 'Hallo World',
          'logged_in': 'logged in as @name with email @email',
        }
      };
}
- 1
- 2
- 3
- 4
- 5
- 6
- 7
- 8
- 9
- 10
- 11
- 12
- 13
- 14
- 15
使用翻译
只要将.tr追加到指定的键上,就会使用Get.locale和Get.fallbackLocale的当前值进行翻译。
Text('hello'.tr);
// 拼接参数
Text('logged_in'.trParams({
  'name': 'Jhon',
  'email': 'jhon@example.com'
  }));
- 1
- 2
- 3
- 4
- 5
- 6
语言
传递参数给GetMaterialApp来定义语言和翻译。
return GetMaterialApp(
    translations: Messages(), // 你的翻译
    locale: Locale('zh', 'CN'), // 将会按照此处指定的语言翻译
    fallbackLocale: Locale('en', 'US'), // 添加一个回调语言选项,以备上面指定的语言翻译不存在
);
- 1
- 2
- 3
- 4
- 5
改变语言
调用Get.updateLocale(locale)来更新语言环境。然后翻译会自动使用新的locale。
var locale = Locale('en', 'US');
Get.updateLocale(locale);
- 1
- 2
系统语言
要读取系统语言,可以使用window.locale。
import 'dart:ui' as ui;

return GetMaterialApp(
    locale: ui.window.locale,
);
- 1
- 2
- 3
- 4
- 5
改变主题
请不要使用比GetMaterialApp更高级别的widget来更新主题,这可能会造成键重复。很多人习惯于创建一个 "ThemeProvider "的widget来改变应用主题,这在GetX™中是绝对没有必要的。
你可以创建你的自定义主题,并简单地将其添加到Get.changeTheme中,而无需任何模板。
Get.changeTheme(ThemeData.light());
- 1
如果你想在 "onTap "中创建类似于改变主题的按钮,你可以结合两个GetX™ API来实现。
- 检查是否使用了深色的 "Theme "的API,以及 "Theme "更改API。
- 而
ThemeChange API,你可以把下面的代码放在onPressed里。
Get.changeTheme(Get.isDarkMode? ThemeData.light(): ThemeData.dark());
- 1
当.darkmode被激活时,它将切换到light主题,当light主题被激活时,它将切换到dark主题。
GetConnect
GetConnect可以便捷的通过http或websockets进行前后台通信。
默认配置
你能轻松的通过extend GetConnect就能使用GET/POST/PUT/DELETE/SOCKET方法与你的Rest API或websockets通信。
class UserProvider extends GetConnect {
  // Get request
  Future<Response> getUser(int id) => get('http://youapi/users/$id');
  // Post request
  Future<Response> postUser(Map data) => post('http://youapi/users', body: data);
  // Post request with File
  Future<Response<CasesModel>> postCases(List<int> image) {
    final form = FormData({
      'file': MultipartFile(image, filename: 'avatar.png'),
      'otherFile': MultipartFile(image, filename: 'cover.png'),
    });
    return post('http://youapi/users/upload', form);
  }

  GetSocket userMessages() {
    return socket('https://yourapi/users/socket');
  }
}
- 1
- 2
- 3
- 4
- 5
- 6
- 7
- 8
- 9
- 10
- 11
- 12
- 13
- 14
- 15
- 16
- 17
- 18
自定义配置
GetConnect具有多种自定义配置。你可以配置base Url,配置响应,配置请求,添加权限验证,甚至是尝试认证的次数,除此之外,还可以定义一个标准的解码器,该解码器将把您的所有请求转换为您的模型,而不需要任何额外的配置。
class HomeProvider extends GetConnect {
  @override
  void onInit() {
    // All request will pass to jsonEncode so CasesModel.fromJson()
    httpClient.defaultDecoder = CasesModel.fromJson;
    httpClient.baseUrl = 'https://api.covid19api.com';
    // baseUrl = 'https://api.covid19api.com'; // It define baseUrl to
    // Http and websockets if used with no [httpClient] instance

    // It's will attach 'apikey' property on header from all requests
    httpClient.addRequestModifier((request) {
      request.headers['apikey'] = '12345678';
      return request;
    });

    // Even if the server sends data from the country "Brazil",
    // it will never be displayed to users, because you remove
    // that data from the response, even before the response is delivered
    httpClient.addResponseModifier<CasesModel>((request, response) {
      CasesModel model = response.body;
      if (model.countries.contains('Brazil')) {
        model.countries.remove('Brazilll');
      }
    });

    httpClient.addAuthenticator((request) async {
      final response = await get("http://yourapi/token");
      final token = response.body['token'];
      // Set the header
      request.headers['Authorization'] = "$token";
      return request;
    });

    //Autenticator will be called 3 times if HttpStatus is
    //HttpStatus.unauthorized
    httpClient.maxAuthRetries = 3;
  }
  }

  @override
  Future<Response<CasesModel>> getCases(String path) => get(path);
}
- 1
- 2
- 3
- 4
- 5
- 6
- 7
- 8
- 9
- 10
- 11
- 12
- 13
- 14
- 15
- 16
- 17
- 18
- 19
- 20
- 21
- 22
- 23
- 24
- 25
- 26
- 27
- 28
- 29
- 30
- 31
- 32
- 33
- 34
- 35
- 36
- 37
- 38
- 39
- 40
- 41
- 42
GetPage 中间件
GetPage现在有个新的参数可以把列表中的Get中间件按指定顺序执行。
注意: 当GetPage有中间件时,所有的子page会自动有相同的中间件。
优先级
设置中间件的优先级定义Get中间件的执行顺序。
final middlewares = [
  GetMiddleware(priority: 2),
  GetMiddleware(priority: 5),
  GetMiddleware(priority: 4),
  GetMiddleware(priority: -8),
];
- 1
- 2
- 3
- 4
- 5
- 6
这些中间件会按这个顺序执行 -8 => 2 => 4 => 5
Redirect
当被调用路由的页面被搜索时,这个函数将被调用。它将RouteSettings作为重定向的结果。或者给它null,就没有重定向了。
RouteSettings redirect(String route) {
  final authService = Get.find<AuthService>();
  return authService.authed.value ? null : RouteSettings(name: '/login')
}
- 1
- 2
- 3
- 4
onPageCalled
在调用页面时,创建任何东西之前,这个函数会先被调用。 您可以使用它来更改页面的某些内容或给它一个新页面。
GetPage onPageCalled(GetPage page) {
  final authService = Get.find<AuthService>();
  return page.copyWith(title: 'Welcome ${authService.UserName}');
}
- 1
- 2
- 3
- 4
OnBindingsStart
这个函数将在绑定初始化之前被调用。 在这里,您可以更改此页面的绑定。
List<Bindings> onBindingsStart(List<Bindings> bindings) {
  final authService = Get.find<AuthService>();
  if (authService.isAdmin) {
    bindings.add(AdminBinding());
  }
  return bindings;
}
- 1
- 2
- 3
- 4
- 5
- 6
- 7
OnPageBuildStart
这个函数将在绑定初始化之后被调用。 在这里,您可以在创建绑定之后和创建页面widget之前执行一些操作。
GetPageBuilder onPageBuildStart(GetPageBuilder page) {
  print('bindings are ready');
  return page;
}
- 1
- 2
- 3
- 4
OnPageBuilt
这个函数将在GetPage.page调用后被调用,并给出函数的结果,并获取将要显示的widget。
OnPageDispose
这个函数将在处理完页面的所有相关对象(Controllers, views, …)之后被调用。
其他高级API
// 给出当前页面的args。
Get.arguments

//给出以前的路由名称
Get.previousRoute

// 给出要访问的原始路由,例如,rawRoute.isFirst()
Get.rawRoute

// 允许从GetObserver访问Rounting API。
Get.routing

// 检查 snackbar 是否打开
Get.isSnackbarOpen

// 检查 dialog 是否打开
Get.isDialogOpen

// 检查 bottomsheet 是否打开
Get.isBottomSheetOpen

// 删除一个路由。
Get.removeRoute()

//反复返回,直到表达式返回真。
Get.until()

// 转到下一条路由,并删除所有之前的路由,直到表达式返回true。
Get.offUntil()

// 转到下一个命名的路由,并删除所有之前的路由,直到表达式返回true。
Get.offNamedUntil()

//检查应用程序在哪个平台上运行。
GetPlatform.isAndroid
GetPlatform.isIOS
GetPlatform.isMacOS
GetPlatform.isWindows
GetPlatform.isLinux
GetPlatform.isFuchsia

//检查设备类型
GetPlatform.isMobile
GetPlatform.isDesktop
//所有平台都是独立支持web的!
//你可以知道你是否在浏览器内运行。
//在Windows、iOS、OSX、Android等系统上。
GetPlatform.isWeb


// 相当于.MediaQuery.of(context).size.height,
//但不可改变。
Get.height
Get.width

// 提供当前上下文。
Get.context

// 在你的代码中的任何地方,在前台提供 snackbar/dialog/bottomsheet 的上下文。
Get.contextOverlay

// 注意:以下方法是对上下文的扩展。
// 因为在你的UI的任何地方都可以访问上下文,你可以在UI代码的任何地方使用它。

// 如果你需要一个可改变的高度/宽度(如桌面或浏览器窗口可以缩放),你将需要使用上下文。
context.width
context.height

// 让您可以定义一半的页面、三分之一的页面等。
// 对响应式应用很有用。
// 参数: dividedBy (double) 可选 - 默认值:1
// 参数: reducedBy (double) 可选 - 默认值:0。
context.heightTransformer()
context.widthTransformer()

/// 类似于 MediaQuery.of(context).size。
context.mediaQuerySize()

/// 类似于 MediaQuery.of(context).padding。
context.mediaQueryPadding()

/// 类似于 MediaQuery.of(context).viewPadding。
context.mediaQueryViewPadding()

/// 类似于 MediaQuery.of(context).viewInsets。
context.mediaQueryViewInsets()

/// 类似于 MediaQuery.of(context).orientation;
context.orientation()

///检查设备是否处于横向模式
context.isLandscape()

///检查设备是否处于纵向模式。
context.isPortrait()

///类似于MediaQuery.of(context).devicePixelRatio。
context.devicePixelRatio()

///类似于MediaQuery.of(context).textScaleFactor。
context.textScaleFactor()

///查询设备最短边。
context.mediaQueryShortestSide()

///如果宽度大于800,则为真。
context.showNavbar()

///如果最短边小于600p,则为真。
context.isPhone()

///如果最短边大于600p,则为真。
context.isSmallTablet()

///如果最短边大于720p,则为真。
context.isLargeTablet()

///如果当前设备是平板电脑,则为真
context.isTablet()

///根据页面大小返回一个值<T>。
///可以给值为:
///watch:如果最短边小于300
///mobile:如果最短边小于600
///tablet:如果最短边(shortestSide)小于1200
///desktop:如果宽度大于1200
context.responsiveValue<T>()
- 1
- 2
- 3
- 4
- 5
- 6
- 7
- 8
- 9
- 10
- 11
- 12
- 13
- 14
- 15
- 16
- 17
- 18
- 19
- 20
- 21
- 22
- 23
- 24
- 25
- 26
- 27
- 28
- 29
- 30
- 31
- 32
- 33
- 34
- 35
- 36
- 37
- 38
- 39
- 40
- 41
- 42
- 43
- 44
- 45
- 46
- 47
- 48
- 49
- 50
- 51
- 52
- 53
- 54
- 55
- 56
- 57
- 58
- 59
- 60
- 61
- 62
- 63
- 64
- 65
- 66
- 67
- 68
- 69
- 70
- 71
- 72
- 73
- 74
- 75
- 76
- 77
- 78
- 79
- 80
- 81
- 82
- 83
- 84
- 85
- 86
- 87
- 88
- 89
- 90
- 91
- 92
- 93
- 94
- 95
- 96
- 97
- 98
- 99
- 100
- 101
- 102
- 103
- 104
- 105
- 106
- 107
- 108
- 109
- 110
- 111
- 112
- 113
- 114
- 115
- 116
- 117
- 118
- 119
- 120
- 121
- 122
- 123
- 124
- 125
- 126
- 127
ValueBuilder
StatefulWidget的简化,它与.setState回调一起工作,并接受更新的值。
ValueBuilder<bool>(
  initialValue: false,
  builder: (value, updateFn) => Switch(
    value: value,
    onChanged: updateFn, // 你可以用( newValue )=> updateFn( newValue )。
  ),
  // 如果你需要调用 builder 方法之外的东西。
  onUpdate: (value) => print("Value updated: $value"),
  onDispose: () => print("Widget unmounted"),
),
- 1
- 2
- 3
- 4
- 5
- 6
- 7
- 8
- 9
- 10
GetView
这是个很实用的Widget。
它是一个对已注册的Controller有一个名为controller的getter的const Stateless的Widget,仅此而已。
 class AwesomeController extends GetxController {
   final String title = 'My Awesome View';
 }

  // 一定要记住传递你用来注册控制器的`Type`!
 class AwesomeView extends GetView<AwesomeController> {
   @override
   Widget build(BuildContext context) {
     return Container(
       padding: EdgeInsets.all(20),
       child: Text( controller.title ), // 只需调用 "controller.something"。
     );
   }
 }
- 1
- 2
- 3
- 4
- 5
- 6
- 7
- 8
- 9
- 10
- 11
- 12
- 13
- 14
GetxService
这个类就像一个 “GetxController”,它共享相同的生命周期(“onInit()”、“onReady()”、“onClose()”)。 但里面没有 “逻辑”。它只是通知GetX的依赖注入系统,这个子类不能从内存中删除。
所以这对保持你的 "服务 "总是可以被Get.find()获取到并保持运行是超级有用的。比如 ApiService,StorageService,CacheService。
Future<void> main() async {
  await initServices(); /// 等待服务初始化.
  runApp(SomeApp());
}

/// 在你运行Flutter应用之前,让你的服务初始化是一个明智之举。
因为你可以控制执行流程(也许你需要加载一些主题配置,apiKey,由用户自定义的语言等,所以在运行ApiService之前加载SettingService。
///所以GetMaterialApp()不需要重建,可以直接取值。
void initServices() async {
  print('starting services ...');
  ///这里是你放get_storage、hive、shared_pref初始化的地方。
  ///或者moor连接,或者其他什么异步的东西。
  await Get.putAsync(() => DbService().init());
  await Get.putAsync(SettingsService()).init();
  print('All services started...');
}

class DbService extends GetxService {
  Future<DbService> init() async {
    print('$runtimeType delays 2 sec');
    await 2.delay();
    print('$runtimeType ready!');
    return this;
  }
}

class SettingsService extends GetxService {
  void init() async {
    print('$runtimeType delays 1 sec');
    await 1.delay();
    print('$runtimeType ready!');
  }
}
- 1
- 2
- 3
- 4
- 5
- 6
- 7
- 8
- 9
- 10
- 11
- 12
- 13
- 14
- 15
- 16
- 17
- 18
- 19
- 20
- 21
- 22
- 23
- 24
- 25
- 26
- 27
- 28
- 29
- 30
- 31
- 32
- 33
实际删除一个GetxService的唯一方法是使用Get.reset(),它就像"热重启 "你的应用程序。
所以如果你需要在你的应用程序的生命周期内对一个类实例进行绝对的持久化,请使用GetxService。
我们在项目中可以这样使用,封装了网络请求的基类
import 'package:get/get.dart';

class ApiClient extends GetConnect implements GetxService{
  late String token;
  final String appBaseUrl;

  late Map<String, String> _mainHeaders;

  ApiClient({required this.appBaseUrl}){
    baseUrl = appBaseUrl;
    timeout = const Duration(seconds: 30);
    token=AppConstants.TOKEN;
    _mainHeaders={
      'Content-type': 'application/json; charset=UTF-8',
      'Authorization': 'Bearer $token'
    };
  }

  Future<Response> getData(String uri) async {
    try{
      Response response = await get(uri);
      return response;
    }catch(e){
      return Response(statusCode: 1, statusText: e.toString());
    }
  }
	// 还有post、download等等其他操作
  ...

}
- 1
- 2
- 3
- 4
- 5
- 6
- 7
- 8
- 9
- 10
- 11
- 12
- 13
- 14
- 15
- 16
- 17
- 18
- 19
- 20
- 21
- 22
- 23
- 24
- 25
- 26
- 27
- 28
- 29
- 30
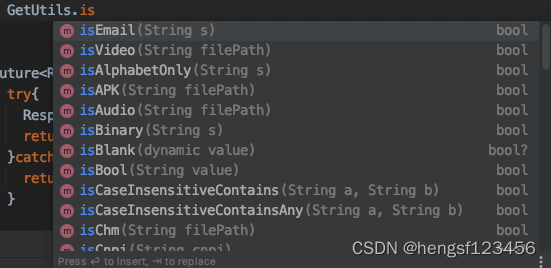
GetUtils
GetUtils 是getx为咱们提供一些罕用的工具类库,包含值是否为空、是否是数字、是否是视频、图片、音频、PPT、Word、APK、邮箱、手机号码、日期、MD5、SHA1等等
// 使用方式
GetUtils.isEmail('');
- 1
- 2