- 1用Processing写一个根据音乐变化的黑白格游戏
- 2github javaguide_GitHub上收获Star数排名前10的Java项目
- 3gepc 增强数据的加载 patch enhance_.stack(patches)
- 4(一)手把手教你如何通过ARM DesignStart计划在FPGA上搭建一个Cortex-M3软核_手把手教你搭建cortex软核
- 5pixhawk 光流--位置估计--姿态估计--位置控制--姿态控制_motorspeed = map(abs(tiltangle), 0, 90, 0, 500);
- 6数据结构之二叉树(JAVA实现)_java实现二叉树
- 7yolov5 配置环境,训练自己的数据集,实现识别图片,视频,视频流及代码注释_yolov5检测视频流
- 8select case when if 的一些用法
- 9解析xml文件的几种技术_解释xml文档内容的技术包括下列哪些项
- 10基于python的人脸识别门禁系统_python人脸识别门禁系统
nginx的安装、配置、使用、实战(反向代理,部署vue项目)_vue nginx
赞
踩
作者:ChenZhen
博客地址:https://www.chenzhen.space/
版权:本文为博主 ChenZhen 的原创文章,本文版权归作者所有,转载请附上原文出处链接及本声明。
如果对你有帮助,请给一个小小的star⭐
这是我最近学习nginx时做的笔记
1.nginx的下载与安装
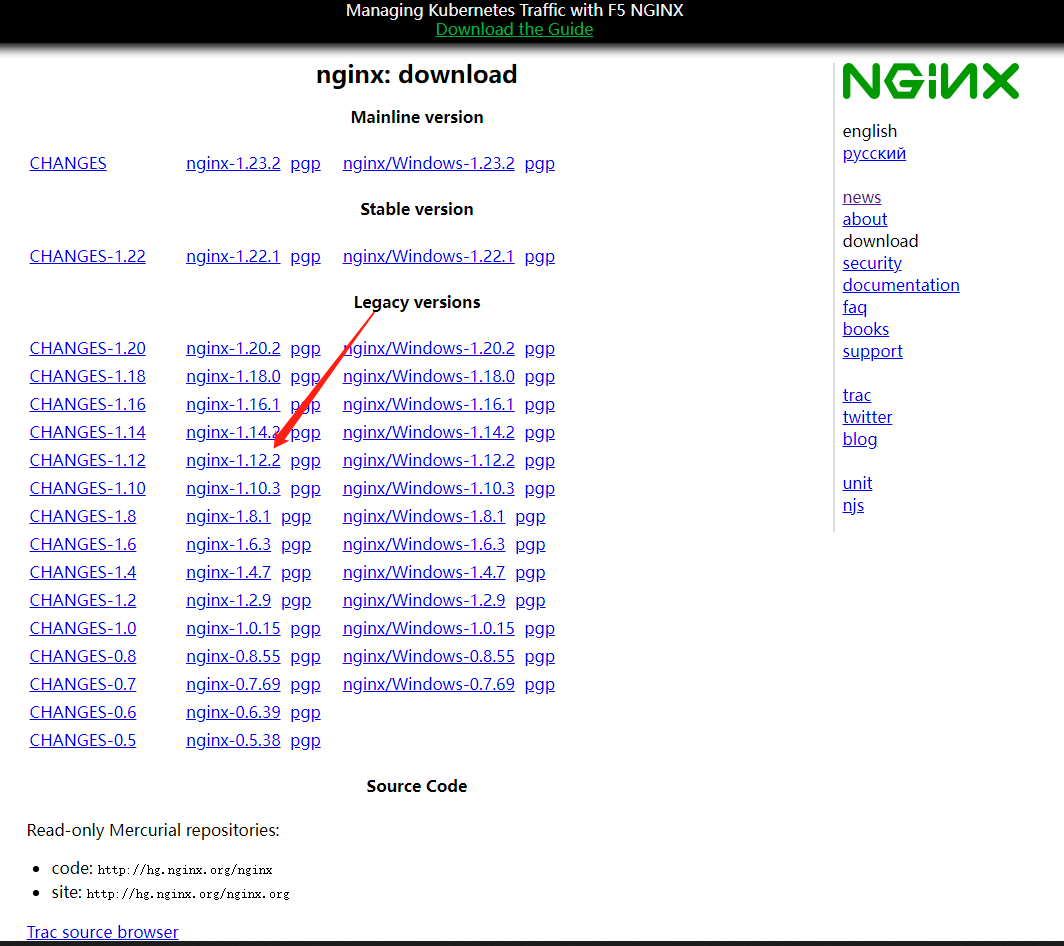
到nginx的官网下载nginx的压缩包,我们下载的是1.12.2的版本
注意:我使用的是centos7版本
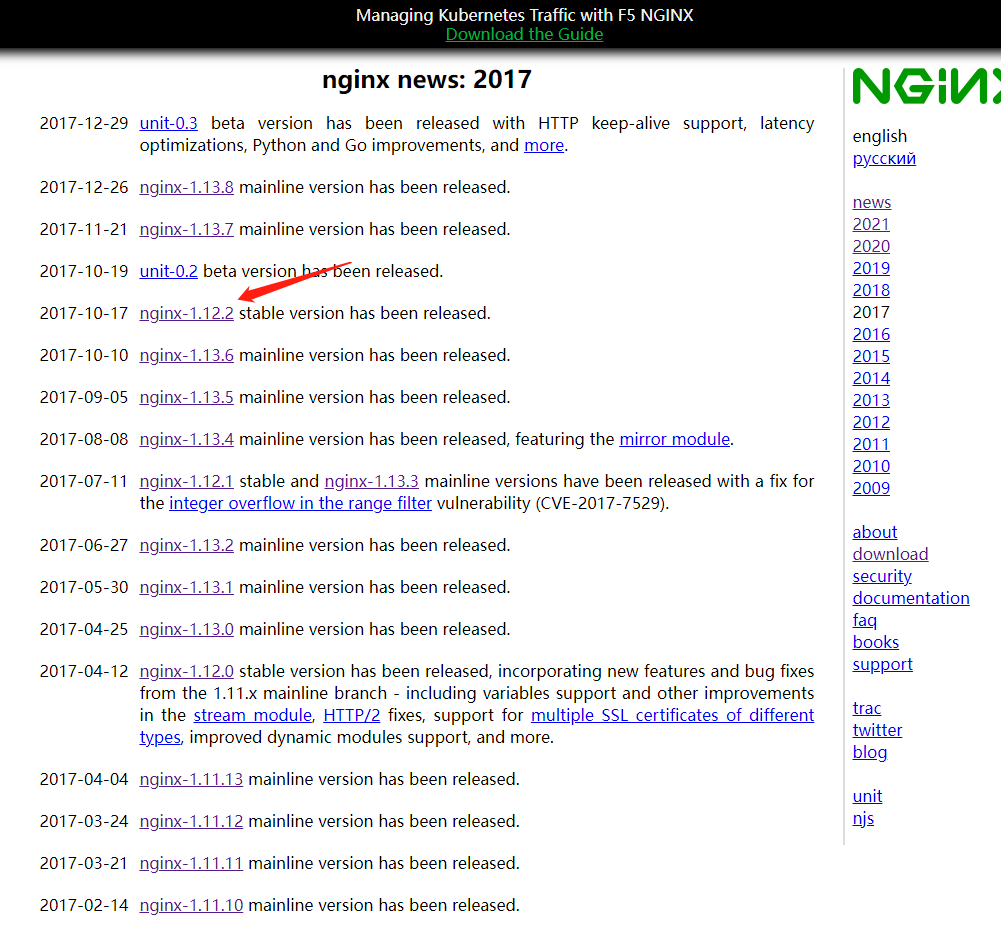
注意这里选择1.12.2版本的linux压缩包,压缩包后缀名是tar.gz,
下载后将文件通过远程传输工具放到你的linux目录下,我这里将文件放到/opt目录下

输入命令解压nginx压缩包
tar -zxvf nginx-1.12.2.tar.gz
- 1

解压后得到

进入该目录文件


输入命令执行configure脚本文件
–prefix参数后的值表示你的安装目录,这里我选择将nginx安装到
/usr/local/nginx下
–with-http_ssl_module表示安装时增加ssl模块,就算不加该参数也可以安装成功,但是后面如果你要使用https服务的话可能要重新安装该模块,所以建议直接安装上。
./configure --prefix=/usr/local/nginx --with-http_ssl_module
- 1
此时注意:在安装nginx时会出现若干警告和报错,都是因为缺少了部分的依赖库,如果出现以下提示,请先装上依赖库后在重新运行./configure安装
如果提示:
bash error: C compiler cc is not found说明缺少C语言的编译器
可以先执行命令安装c语言编译器
bash yum install -y gcc然后再执行
./configure --prefix=/usr/local/nginx --with-http_ssl_module
这里我在使用yum命令安装软件时遇到一个这样的问题,导致在线无法下载依赖库
Downloading packages:
No Presto metadata available for base
pcre-devel-8.32-17.el7.x86_64. FAILED
http://mirrors.nju.edu.cn/centos/7.9.2009/os/x86_64/Packages/pcre-devel-8.32-17.el7.x86_64.rpm: [Errno 14] curl#6 - "Could not resolve host: mirrors.nju.edu.cn; Unknown error"
正在尝试其它镜像。
pcre-devel-8.32-17.el7.x86_64. FAILED
http://mirrors.bupt.edu.cn/centos/7.9.2009/os/x86_64/Packages/pcre-devel-8.32-17.el7.x86_64.rpm: [Errno 14] curl#6 - "Could not resolve host: mirrors.bupt.edu.cn; Unknown error"
正在尝试其它镜像。
pcre-devel-8.32-17.el7.x86_64. FAILED
http://mirrors.njupt.edu.cn/centos/7.9.2009/os/x86_64/Packages/pcre-devel-8.32-17.el7.x86_64.rpm: [Errno 14] curl#6 - "Could not resolve host: mirrors.njupt.edu.cn; Unknown error"
正在尝试其它镜像。
pcre-devel-8.32-17.el7.x86_64. FAILED
http://mirrors.huaweicloud.com/centos/7.9.2009/os/x86_64/Packages/pcre-devel-8.32-17.el7.x86_64.rpm: [Errno 14] curl#6 - "Could not resolve host: mirrors.huaweicloud.com; Unknown error"
正在尝试其它镜像。
pcre-devel-8.32-17.el7.x86_64. FAILED
http://mirrors.ustc.edu.cn/centos/7.9.2009/os/x86_64/Packages/pcre-devel-8.32-17.el7.x86_64.rpm: [Errno 14] curl#6 - "Could not resolve host: mirrors.ustc.edu.cn; Unknown error"
正在尝试其它镜像。
pcre-devel-8.32-17.el7.x86_64. FAILED
http://mirrors.tuna.tsinghua.edu.cn/centos/7.9.2009/os/x86_64/Packages/pcre-devel-8.32-17.el7.x86_64.rpm: [Errno 14] curl#6 - "Could not resolve host: mirrors.tuna.tsinghua.edu.cn; Unknown error"
正在尝试其它镜像。
pcre-devel-8.32-17.el7.x86_64. FAILED
http://mirrors.cqu.edu.cn/CentOS/7.9.2009/os/x86_64/Packages/pcre-devel-8.32-17.el7.x86_64.rpm: [Errno 14] curl#6 - "Could not resolve host: mirrors.cqu.edu.cn; Unknown error"
正在尝试其它镜像。
pcre-devel-8.32-17.el7.x86_64. FAILED
http://mirrors.bfsu.edu.cn/centos/7.9.2009/os/x86_64/Packages/pcre-devel-8.32-17.el7.x86_64.rpm: [Errno 14] curl#6 - "Could not resolve host: mirrors.bfsu.edu.cn; Unknown error"
正在尝试其它镜像。
pcre-devel-8.32-17.el7.x86_64. FAILED
http://mirrors.aliyun.com/centos/7.9.2009/os/x86_64/Packages/pcre-devel-8.32-17.el7.x86_64.rpm: [Errno 14] curl#6 - "Could not resolve host: mirrors.aliyun.com; Unknown error"
正在尝试其它镜像。
pcre-devel-8.32-17.el7.x86_64. FAILED
http://mirrors.163.com/centos/7.9.2009/os/x86_64/Packages/pcre-devel-8.32-17.el7.x86_64.rpm: [Errno 14] curl#6 - "Could not resolve host: mirrors.163.com; Unknown error"- ETA
正在尝试其它镜像。
- 1
- 2
- 3
- 4
- 5
- 6
- 7
- 8
- 9
- 10
- 11
- 12
- 13
- 14
- 15
- 16
- 17
- 18
- 19
- 20
- 21
- 22
- 23
- 24
- 25
- 26
- 27
- 28
- 29
- 30
- 31
- 32
- 33
我们编辑配置文件resolv.conf
vim /etc/resolv.conf
- 1
在下面加上
nameserver 8.8.8.8
nameserver 114.114.114.114
- 1
- 2
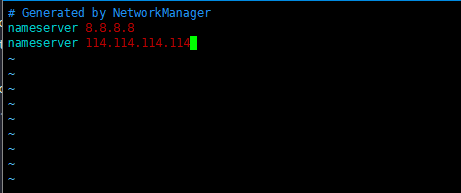
即可解决
如果提示:
./configure: error: the HTTP rewrite module requires the PCRE library. You can either disable the module by using --without-http_rewrite_module option, or install the PCRE library into the system, or build the PCRE library statically from the source with nginx by using --with-pcre=<path> option.输入命令安装依赖
yum install -y pcre pcre-devel如图安装完毕
如果提示:
./configure: error: the HTTP gzip module requires the zlib library. You can either disable the module by using --without-http_gzip_module option, or install the zlib library into the system, or build the zlib library statically from the source with nginx by using --with-zlib=<path> option.我们输入命令安装依赖
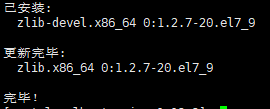
yum install -y zlib zlib-devel如图安装完毕
如果没有出现以上的错误,或者依赖都安装完成,我们运行./configure安装命令后会出现下面信息
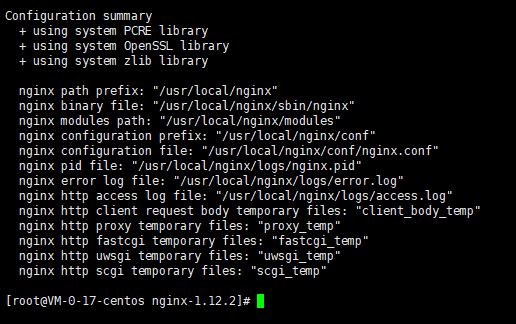
我们输入
make
- 1
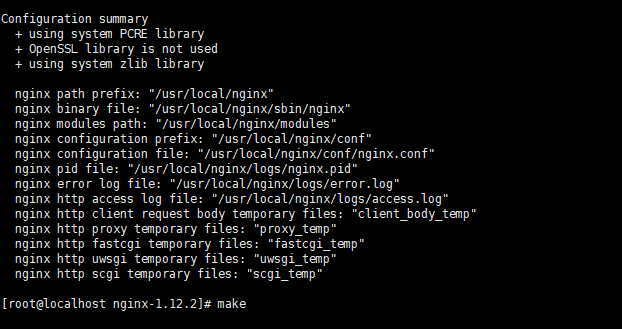
等它的指令执行完后再输入
make install
- 1
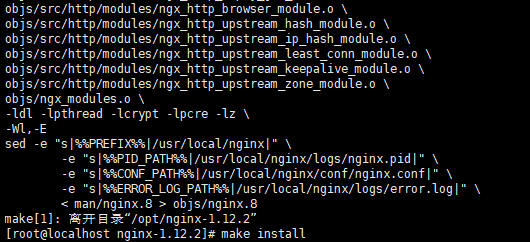
自此nginx的安装完成,我们进入安装目录/usr/local下查看
发现了一个nginx的文件夹,证明安装完成

我们进入目录内,可以看到有以下文件
cd nginx/
- 1

进入sbin目录
cd sbin/
- 1
运行sbin目录下的脚本文件nginx
./nginx
- 1
打开浏览器输入我们的Linux的ip地址加端口号访问nginx服务器,nginx默认端口为80所以可以省略端口号
当然这有个前提就是你的Linux防火墙已经开放了80端口号,如果没有请更新防火墙
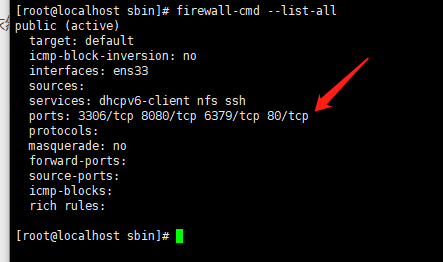
查看开放的所有端口号
firewall-cmd --list-all
- 1
我们可以看到这边没有开放80端口号,只有3306、8080、6379
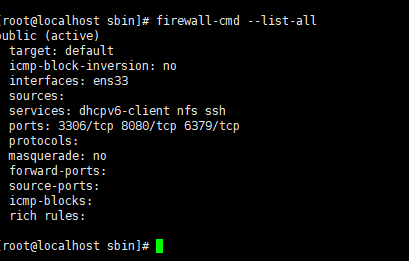
使用命令开放80端口号,–permanent代表永久开启,重启依然生效
firewall-cmd --permanent --add-port=80/tcp
- 1
修改配置后要重启防火墙
firewall-cmd --reload
- 1
重新查看
firewall-cmd --list-all
- 1
添加成功
在浏览器输入ip地址重新访问nginx,可以看到访问成功!!

2.nginx的常用命令
进入 nginx 的sbin目录中,在此目录中才能使用命令!
cd /usr/local/nginx/sbin
- 1
1、查看 nginx 版本号
./nginx -v
- 1
2、启动 nginx
./nginx
- 1
3、停止 nginx
./nginx -s stop
- 1
4、重新加载 nginx
./nginx -s reload
- 1
3.Nginx 的配置文件
1、nginx 配置文件位置
nginx 安装目录下,其默认的配置文件都放在这个目录的 conf 目录下,而主配置文件
nginx.conf 也在其中,后续对 nginx 的使用基本上都是对此配置文件进行相应的修改
cd /usr/local/nginx/conf/nginx.conf
- 1
2、配置文件中的内容
我们可以很明显的将 nginx.conf 配置文件分为三部分:
第一部分:全局块
从配置文件开始到 events 块之间的内容,主要会设置一些影响 nginx 服务器整体运行的配置指令,主要包括配
置运行 Nginx 服务器的用户(组)、允许生成的 worker process 数,进程 PID 存放路径、日志存放路径和类型以
及配置文件的引入等。
比如:worker_processes 1
这是 Nginx 服务器并发处理服务的关键配置工作线程数,worker_processes 值越大,可以支持的并发处理量也越多,但是
会受到硬件、软件等设备的制约
第二部分:events 块
比如上面的配置:
events {
    worker_connections  1024;
}
- 1
- 2
- 3
events 块涉及的指令主要影响 Nginx 服务器与用户的网络连接,常用的设置包括是否开启对多 work process
下的网络连接进行序列化,是否允许同时接收多个网络连接,选取哪种事件驱动模型来处理连接请求,每个 word
process 可以同时支持的最大连接数等。
上述例子就表示每个 work process 支持的最大连接数为 1024.
这部分的配置对 Nginx 的性能影响较大,在实际中应该灵活配置。
第三部分:http 块
这算是 Nginx 服务器配置中最频繁的部分,代理、缓存和日志定义等绝大多数功能和第三方模块的配置都在这里。
需要注意的是:http 块也可以包括 http 全局块、server 块
①、http 全局块
http 全局块配置的指令包括文件引入、MIME-TYPE 定义、日志自定义、连接超时时间、单链接请求数上限等。
②、server 块
这块和虚拟主机有密切关系,虚拟主机从用户角度看,和一台独立的硬件主机是完全一样的,该技术的产生是为了
节省互联网服务器硬件成本。
每个 http 块可以包括多个 server 块,而每个 server 块就相当于一个虚拟主机。 而每个 server 块也分为全局 server 块,以及可以同时包含多个 locaton 块。
1、全局 server 块
最常见的配置是本虚拟机主机的监听配置和本虚拟主机的名称或 IP 配置。
2、location 块
一个 server 块可以配置多个 location 块。
这块的主要作用是基于 Nginx 服务器接收到的请求字符串(例如 server_name/uri-string),对虚拟主机名称
(也可以是 IP 别名)之外的字符串(例如 前面的 /uri-string)进行匹配,对特定的请求进行处理。地址定向、数据缓
存和应答控制等功能,还有许多第三方模块的配置也在这里进行。
4.反向代理
接下来使用nginx简单配置一个反向代理的实例
实现效果:使用 nginx 反向代理,根据访问的路径跳转到不同端口的服务中
nginx 监听端口为 9001,在本地windows机中访问虚拟机的nginx,
我的虚拟机的ip为192.168.186.43,本地window的ip为192.168.0.112
访问 http://192.168.186.43:9001/eduoss/ 直接跳转到 192.168.0.112:8002
访问 http://192.168.186.43:9001/edu/ 直接跳转到 192.168.0.112:8001
配置如下
server {

        listen       9001;#nginx监听的端口
        server_name  localhost;

        location / {
            root   html;
            index  index.html index.htm;
        }
	location ~ /eduoss/ {
		proxy_pass http://192.168.0.112:8002;
	}
	location ~ /edu/ {
		proxy_pass http://192.168.0.112:8001;
	}


        error_page   500 502 503 504  /50x.html;
        location = /50x.html {
            root   html;
        }


    }
- 1
- 2
- 3
- 4
- 5
- 6
- 7
- 8
- 9
- 10
- 11
- 12
- 13
- 14
- 15
- 16
- 17
- 18
- 19
- 20
- 21
- 22
- 23
- 24
- 25
- 26
实战 部署vue项目
配置 Nginx:找到 Nginx 的配置文件,一般位于 /etc/nginx/nginx.conf 或 /etc/nginx/conf.d/default.conf。编辑该文件,添加以下配置块来指向 Vue 项目的构建目录:
server {
    listen 80;  # 监听的端口号

    server_name xxxxxx;  # 域名或服务器 IP,可以填localhost

	location / {
	            root   /home/www/dist;  # Vue 项目打包后的dist所在的路径
	            index  index.html index.htm;
	            try_files $uri $uri/ /index.html;
	        }
	}
- 1
- 2
- 3
- 4
- 5
- 6
- 7
- 8
- 9
- 10
- 11
运行命令启动或重启 Nginx 服务:
在sbin目录下
./nginx -s reload
- 1
访问你的域名或服务器 IP,如果一切配置正确,你应该能够看到 Vue 项目在 Nginx 上成功部署并运行。
注意
如果你不想用根路径 / 来映射你的前端目录,例如你有一个域名www.example.com,你想让url:www.example.com/app作为你的首页路径
但是当你直接修改路径"/“为”/app"时:
location /app/ {
    root   /home/www/dist;
    index  index.html index.htm;
    try_files $uri $uri/ /index.html;
}
- 1
- 2
- 3
- 4
- 5
访问 www.example.com/app 路径时会出现 404 错误
这可能是由于 Nginx 的 root 指令与 location 块配合使用时的路径匹配问题。
在第一个配置中,root 指令的值为 /home/www/dist,然后将其与 location /app/ 配置块中的 URI 进行匹配。
Nginx 会将匹配到的 URI 附加到 root 指令的值后面,从而确定文件的绝对路径。
因此,对于 /app/ 路径,Nginx 将尝试查找 /home/www/dist/app/ 目录下的文件。如果你的项目没有放在这个目录结构,就会出现 404 错误。
为了解决这个问题,你可以尝试使用 alias 指令代替 root 指令。alias 指令可以直接指定文件的绝对路径。例如:
你应该按下面的方法设置:
location /app {
            alias /home/www/dist/;
            index  index.html index.htm;
            try_files $uri $uri/ /index.html;
        }
- 1
- 2
- 3
- 4
- 5
注意此处**/app**后面不应再有斜杠/
alias是目录别名,root是最上层目录的定义
alias后必须用 “/” 结束,不然找不到文件,root可有可无


