- 1【 香橙派 AIpro评测】烧系统运行部署LLMS大模型跑开源yolov5物体检测并体验Jupyter Lab AI 应用样例(新手入门)
- 2linux的重要知识点_linux中的重要知识点
- 3深度学习:05 卷积神经网络介绍(CNN)_tride 池化
- 4sequoiadb java使用_Java开发基础_Java驱动_开发_JSON实例_文档中心_SequoiaDB巨杉数据库...
- 5AI时代,人工智能是开发者的助手还是替代者?
- 6大模型之SORA技术学习_sora模型csdn
- 7风险评估:IIS的安全配置,IIS安全基线检查加固
- 8pytorch之torch基础学习_torch 学习
- 9heic图片转换_heic-convert
- 10SpringCloud实战【九】: SpringCloud服务间调用_springcloud服务与服务之间的调用
iOS UI自动化--WebDriverAgent安装及使用
赞
踩
一、WebDriverAgent Appium fork地址:GitHub - appium/WebDriverAgent: A WebDriver server for iOS and tvOS
二、Clone到本地:GitHub - appium/WebDriverAgent: A WebDriver server for iOS and tvOS
三、进入项目目录,双击启动文件WebDriverAgent.xcodeproj,在Xcode中打开项目
修改配置信息:
1、进入菜单Product → Scheme → WebDriverAgentRunner
2、进入菜单Product → Destination → 连接的手机,例如,iPhonexxx
3、在TARGETS中选择WebDriverAgentRunner
4、点击 Signing & Capabilities 卡片
4-1、勾选Automatically manage signing
4-2、Team中选择自己的Apple 开发帐号
4-3、将Bundle Identifier修改为:com.glazxxx.WebDriverAgentRunner 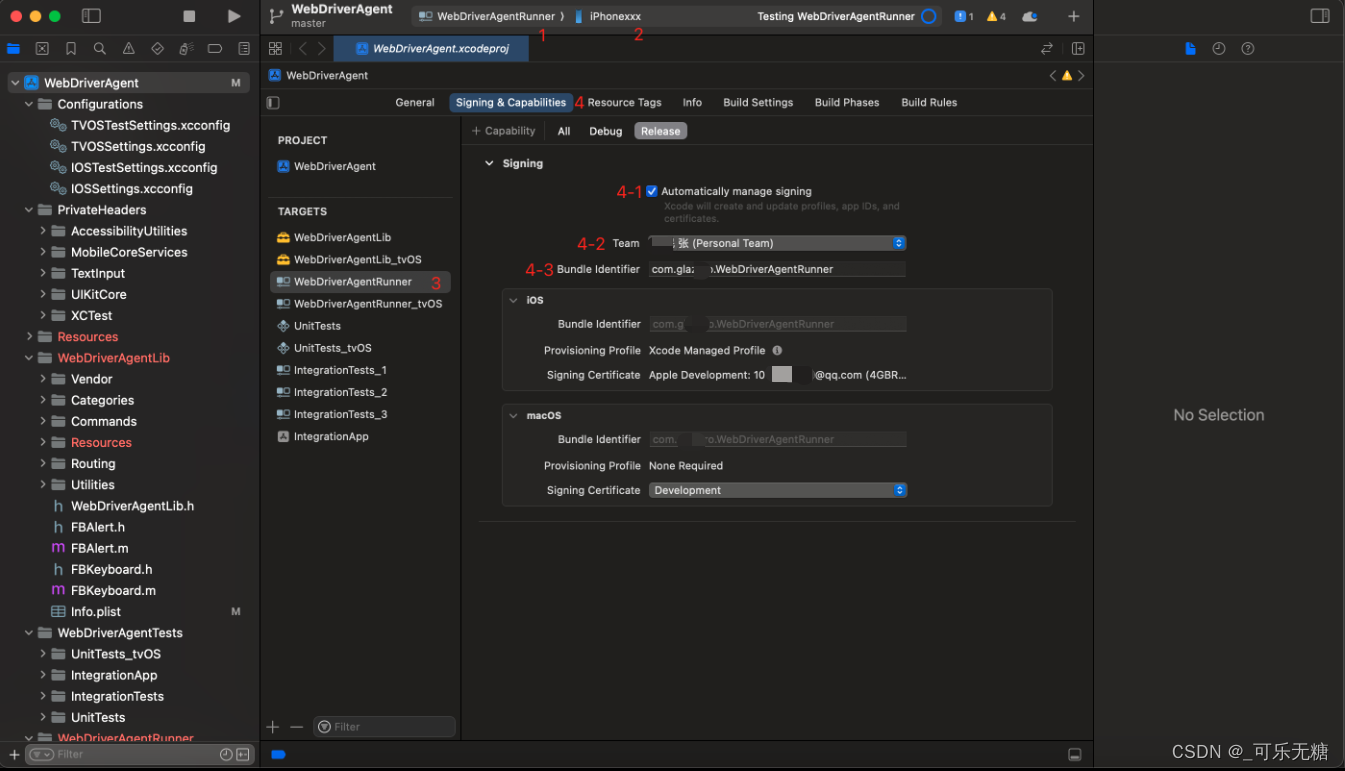
5、点击 Build Settings 卡片
5-1、将Packaging中的Product Bundle Identifier修改为:com.glazxxx.WebDriverAgentRunner 
6、进入菜单Product → Test 
四、build成功后Xcode控制台打印日志如下,生成Server URL,例如,http://10.8.0.160:8100 
五、在浏览器中访问http://10.8.0.160:8100/status 
【注意】通过浏览器访问WebDriverAgent Server URL时,要关闭电脑的代理
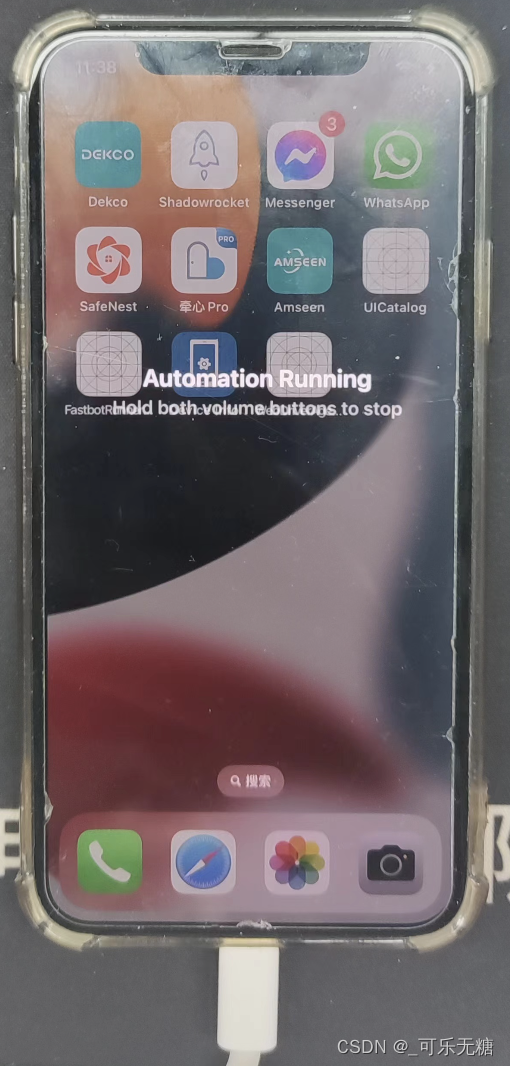
六、在手机上安装成功后的效果