- 1Linux调度策略及线程优先级设置_init_kgsl_core_init sched_priority
- 2国产AI大模型Kimi爆火!概念梳理
- 3【我的Android进阶之旅】解决Android项目编译报错: Program type already present : com.xxx.xxxx.BuildConfig_android program type already present: *** buildcon
- 42台威联通如何异地组网?
- 5头歌:Spark案例剖析 - 谷歌网页排名引擎PageRank实战
- 6【Navicat】Navicat Premium12 下载、安装、激活、过期解决方法——永久使用_navicat 12下载安装
- 7在变量前面加个叹号什么意思_聊一聊Stata中时间变量的处理
- 8pyspark使用方法_pyspark使用教程
- 9Python 自动化(十八)admin后台管理_python admin
- 10【Vue】yarn 安装包时权限不足或者文件夹被占用导致安装失败_yarn安装失败
Android——六大基本布局总结,android面试项目经验_android 布局
赞
踩
android:layout_width=“wrap_content”
android:layout_height=“wrap_content”
android:text=“确定”/>
<Button
android:id=“@+id/button1”
android:layout_width=“wrap_content”
android:layout_height=“wrap_content”
android:text=“取消” />
<LinearLayout
android:layout_width=“match_parent”
android:layout_height=“wrap_content”
android:orientation=“horizontal” >
<TextView
android:layout_width=“wrap_content”
android:layout_height=“200dp”
android:layout_weight=“1”
android:background=“#ff0000”
android:text=“红色”/>
<TextView
android:layout_width=“wrap_content”
android:layout_height=“200dp”
android:layout_weight=“1”
android:background=“#00ff00”
android:text=“绿色”/>
<TextView
android:layout_width=“wrap_content”
android:layout_height=“200dp”
android:layout_weight=“1”
android:background=“#0000ff”
android:text=“蓝色”/>
<TextView
android:layout_width=“wrap_content”
android:layout_height=“200dp”
android:layout_weight=“2”
android:background=“#00ffff”
android:text=“青色”/>
(二)相对布局****RelativeLayout
相对布局可以让子控件相对于兄弟控件或父控件进行布局,可以设置子控件相对于兄弟控件或父控件进行上下左右对齐。
RelativeLayout能替换一些嵌套视图,当我们用LinearLayout来实现一个简单的布局但又使用了过多的嵌套时,就可以考虑使用RelativeLayout重新布局。
相对布局就是一定要加Id才能管理。
RelativeLayout中子控件常用属性:
1、相对于父控件,例如:android:layout_alignParentTop=“true”
android:layout_alignParentTop 控件的顶部与父控件的顶部对齐;
android:layout_alignParentBottom 控件的底部与父控件的底部对齐;
android:layout_alignParentLeft 控件的左部与父控件的左部对齐;
android:layout_alignParentRight 控件的右部与父控件的右部对齐;
2、相对给定Id控件,例如:android:layout_above=“@id/**”
android:layout_above 控件的底部置于给定ID的控件之上;
android:layout_below 控件的底部置于给定ID的控件之下;
android:layout_toLeftOf 控件的右边缘与给定ID的控件左边缘对齐;
android:layout_toRightOf 控件的左边缘与给定ID的控件右边缘对齐;
android:layout_alignBaseline 控件的baseline与给定ID的baseline对齐;
android:layout_alignTop 控件的顶部边缘与给定ID的顶部边缘对齐;
android:layout_alignBottom 控件的底部边缘与给定ID的底部边缘对齐;
android:layout_alignLeft 控件的左边缘与给定ID的左边缘对齐;
android:layout_alignRight 控件的右边缘与给定ID的右边缘对齐;
3、居中,例如:android:layout_centerInParent=“true”
android:layout_centerHorizontal 水平居中;
android:layout_centerVertical 垂直居中;
android:layout_centerInParent 父控件的中央;
先来看一下效果:

版本低了,文本框可以在AndroidManifest.xml里更改主体:

下面来看看代码:
<RelativeLayout xmlns:android=“http://schemas.android.com/apk/res/android”
xmlns:tools=“http://schemas.android.com/tools”
android:layout_width=“match_parent”
android:layout_height=“match_parent”
android:padding=“10dp”
tools:context=“ r e l a t i v e P a c k a g e . {relativePackage}. relativePackage.{activityClass}” >
<TextView
android:id=“@+id/text1”
android:layout_width=“wrap_content”
android:layout_height=“wrap_content”
android:layout_alignBaseline=“@+id/et1”
android:text=“@string/username” />
<EditText
android:id=“@+id/et1”
android:layout_width=“match_parent”
android:layout_height=“wrap_content”
android:layout_toRightOf=“@id/text1”
android:layout_marginTop=“23dp”
android:inputType=“text”
android:maxLines=“12”
android:hint=“用户名” />
<TextView
android:id=“@+id/text2”
android:layout_width=“wrap_content”
android:layout_height=“wrap_content”
android:layout_alignBaseline=“@+id/et2”
android:text=“@string/pwd” />
<EditText
android:id=“@+id/et2”
android:layout_width=“match_parent”
android:layout_height=“wrap_content”
android:layout_below=“@id/et1”
android:layout_marginTop=“23dp”
android:inputType=“text”
android:maxLines=“12”
android:layout_toRightOf=“@id/text2”
android:hint=“密码” />
<Button
android:id=“@+id/button1”
android:layout_width=“100dp”
android:layout_height=“wrap_content”
android:layout_alignBaseline=“@+id/button2”
android:layout_alignBottom=“@+id/button2”
android:layout_marginRight=“14dp”
android:layout_toLeftOf=“@+id/button2”
android:text=“登录” />
<Button
android:id=“@+id/button2”
android:layout_width=“100dp”
android:layout_height=“wrap_content”
android:layout_alignRight=“@+id/et2”
android:layout_below=“@+id/et2”
android:layout_marginTop=“23dp”
android:text=“退出” />
(三)层布局FrameLayout
帧布局或叫层布局,从屏幕左上角按照层次堆叠方式布局,后面的控件覆盖前面的控件。
该布局在开发中设计地图经常用到,因为是按层次方式布局,我们需要实现层面显示的样式时就可以
采用这种布局方式,比如我们要实现一个类似百度地图的布局,我们移动的标志是在一个图层的上面。
在普通功能的软件设计中用得也不多。层布局主要应用就是地图方面。
上面有三层颜色,点击下面的案列上面会出现对应的样式

activity_main.xml中代码:
<LinearLayout xmlns:android=“http://schemas.android.com/apk/res/android”
xmlns:tools=“http://schemas.android.com/tools”
android:id=“@+id/LinearLayout1”
android:layout_width=“match_parent”
android:layout_height=“match_parent”
android:orientation=“vertical”
tools:context=“ r e l a t i v e P a c k a g e . {relativePackage}. relativePackage.{activityClass}” >
<FrameLayout
android:id=“@+id/frame”
android:layout_width=“match_parent”
android:layout_margin=“20dp”
android:layout_height=“wrap_content” >
<TextView
android:id=“@+id/text1”
android:layout_width=“match_parent”
android:layout_height=“300dp”
android:background=“#0000ff” />
<TextView
android:id=“@+id/text2”
android:layout_width=“match_parent”
android:layout_height=“300dp”
android:background=“#00ff00” />
<TextView
android:id=“@+id/text3”
android:layout_width=“match_parent”
android:layout_height=“300dp”
android:background=“#ff0000” />
<LinearLayout
android:id=“@+id/linear”
android:layout_width=“match_parent”
android:layout_height=“wrap_content”
android:orientation=“horizontal” >
<Button
android:id=“@+id/button1”
android:layout_width=“wrap_content”
android:layout_height=“wrap_content”
android:layout_weight=“1”
android:layout_marginLeft=“20dp”
android:background=“#0000ff”
android:text=“颜色1”/>
<Button
android:id=“@+id/button2”
android:layout_width=“wrap_content”
android:layout_height=“wrap_content”
android:layout_weight=“1”
android:layout_marginRight=“20dp”
android:layout_marginLeft=“20dp”
android:background=“#00ff00”
android:text=“颜色2”/>
<Button
android:id=“@+id/button3”
android:layout_width=“wrap_content”
android:layout_height=“wrap_content”
android:layout_weight=“1”
android:background=“#ff0000”
android:layout_marginRight=“20dp”
android:text=“颜色3”/>
MainActivity.java中代码:
public class MainActivity extends Activity {
private FrameLayout frame;
private TextView text1;
private TextView text2;
private TextView text3;
private Button button1;
private Button button2;
private Button button3;
private OnClickListener listener = new OnClickListener() {
@Override
public void onClick(View v) {
switch (v.getId()) {
case R.id.button1:
//删除
frame.removeView(text1);
//创建
frame.addView(text1);
break;
case R.id.button2:
frame.removeViewInLayout(text2);
frame.addView(text2);
break;
case R.id.button3:
frame.removeViewInLayout(text3);
frame.addView(text3);
break;
default:
break;
}
}
};
@Override
protected void onCreate(Bundle savedInstanceState) {
super.onCreate(savedInstanceState);
setContentView(R.layout.activity_main);
frame = (FrameLayout) findViewById(R.id.frame);
text1 = (TextView) findViewById(R.id.text1);
text2 = (TextView) findViewById(R.id.text2);
text3 = (TextView) findViewById(R.id.text3);
button1 = (Button) findViewById(R.id.button1);
button2 = (Button) findViewById(R.id.button2);
button3 = (Button) findViewById(R.id.button3);
button1.setOnClickListener(listener);
button2.setOnClickListener(listener);
button3.setOnClickListener(listener);
}
}
(四)绝对布局AbsoluteLayout
绝对布局中将所有的子元素通过设置android:layout_x 和 android:layout_y属性,将子元素的坐标位置固定下来,即坐标(android:layout_x, android:layout_y) ,layout_x用来表示横坐标,layout_y用来表示纵坐标。屏幕左上角为坐标(0,0),横向往右为正方,纵向往下为正方。实际应用中,这种布局用的比较少,因为Android终端一般机型比较多,各自的屏幕大小。分辨率等可能都不一样,如果用绝对布局,可能导致在有的终端上显示不全等。所有基本不会使用,这里就不多介绍了。
(五)表格布局TableLayout
表格布局,适用于多行多列的布局格式,每个TableLayout是由多个TableRow组成,一个TableRow就表示TableLayout中的每一行,这一行可以由多个子元素组成。实际上TableLayout和TableRow都是LineLayout线性布局的子类。但是TableRow的参数android:orientation属性值固定为horizontal,且android:layout_width=MATCH_PARENT,android:layout_height=WRAP_CONTENT。所以TableRow实际是一个横向的线性布局,且所以子元素宽度和高度一致。
注意:在TableLayout中,单元格可以为空,但是不能跨列,意思是只能不能有相邻的单元格为空。
TableLayout常用属性:
android:shrinkColumns:设置可收缩的列,内容过多就收缩显示到第二行
android:stretchColumns:设置可伸展的列,将空白区域填充满整个列
android:collapseColumns:设置要隐藏的列
列的索引从0开始,shrinkColumns和stretchColumns可以同时设置。
子控件常用属性:
android:layout_column:第几列
android:layout_span:占据列数
效果图是一个计数器页面:

代码(这里这是页面,数据处理部分,完整功能计算器请访问:https://blog.csdn.net/qq_40205116/article/details/88550843):
<TableLayout xmlns:android=“http://schemas.android.com/apk/res/android”
xmlns:tools=“http://schemas.android.com/tools”
android:id=“@+id/TableLayout1”
android:layout_width=“match_parent”
android:layout_height=“match_parent”
android:stretchColumns=“*” >
<TextView
android:id=“@+id/text”
android:layout_width=“match_parent”
android:layout_height=“150dp”
android:background=“@android:color/holo_blue_bright”
android:textSize=“30dp”
android:gravity=“center|right”
android:text=“” />
<TableRow
android:layout_width=“match_parent”
android:layout_height=“match_parent”
android:layout_weight=“1” >
<Button
android:id=“@+id/btn01”
android:layout_width=“wrap_content”
android:layout_height=“match_parent”
android:text=“C” />
<Button
android:id=“@+id/btn02”
android:layout_width=“wrap_content”
android:layout_height=“match_parent”
android:text=“←” />
<Button
android:layout_width=“wrap_content”
android:layout_height=“match_parent”
android:text=“%” />
<Button
android:layout_width=“wrap_content”
android:layout_height=“match_parent”
android:text=“÷” />
<TableRow
android:layout_width=“match_parent”
android:layout_height=“match_parent”
android:layout_weight=“1” >
<Button
android:layout_width=“wrap_content”
android:layout_height=“match_parent”
android:text=“7” />
<Button
android:layout_width=“wrap_content”
android:layout_height=“match_parent”
android:text=“8” />
<Button
android:layout_width=“wrap_content”
android:layout_height=“match_parent”
android:text=“9” />
<Button
android:layout_width=“wrap_content”
android:layout_height=“match_parent”
android:text=“x” />
<TableRow
android:layout_width=“match_parent”
android:layout_height=“match_parent”
android:layout_weight=“1” >
<Button
android:layout_width=“wrap_content”
android:layout_height=“match_parent”
android:text=“4” />
<Button
android:layout_width=“wrap_content”
android:layout_height=“match_parent”
android:text=“5” />
<Button
android:layout_width=“wrap_content”
android:layout_height=“match_parent”
android:text=“6” />
<Button
android:layout_width=“wrap_content”
android:layout_height=“match_parent”
android:text=“-” />
自我介绍一下,小编13年上海交大毕业,曾经在小公司待过,也去过华为、OPPO等大厂,18年进入阿里一直到现在。
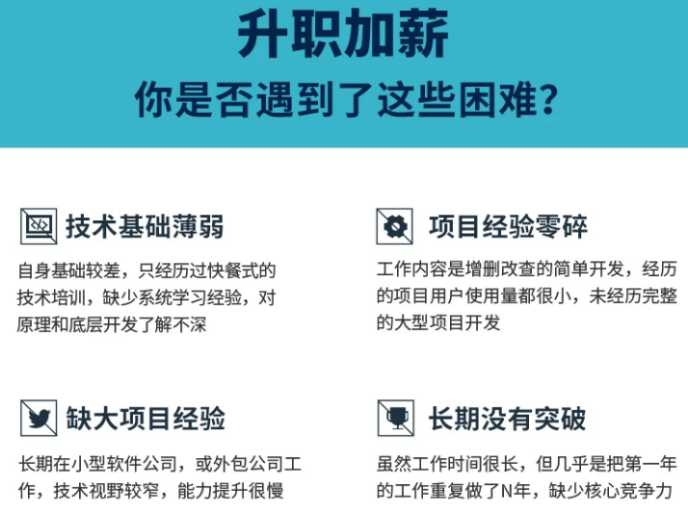
深知大多数初中级Android工程师,想要提升技能,往往是自己摸索成长或者是报班学习,但对于培训机构动则近万的学费,着实压力不小。自己不成体系的自学效果低效又漫长,而且极易碰到天花板技术停滞不前!
因此收集整理了一份《2024年Android移动开发全套学习资料》,初衷也很简单,就是希望能够帮助到想自学提升又不知道该从何学起的朋友,同时减轻大家的负担。
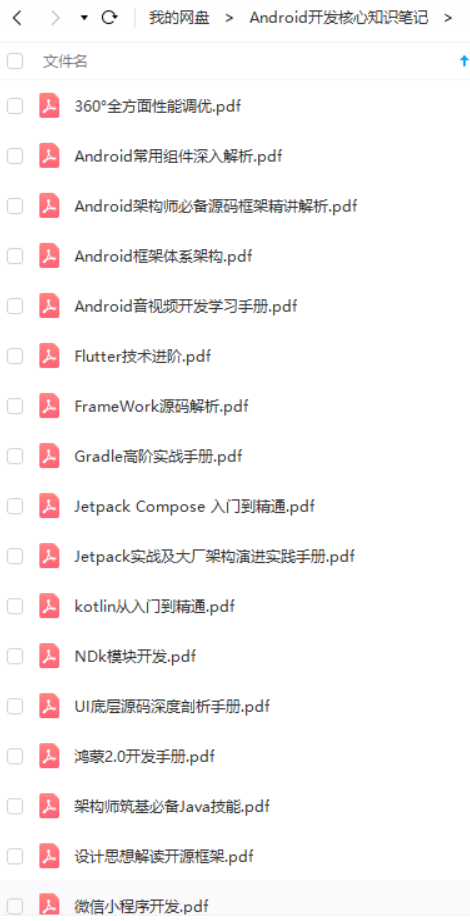
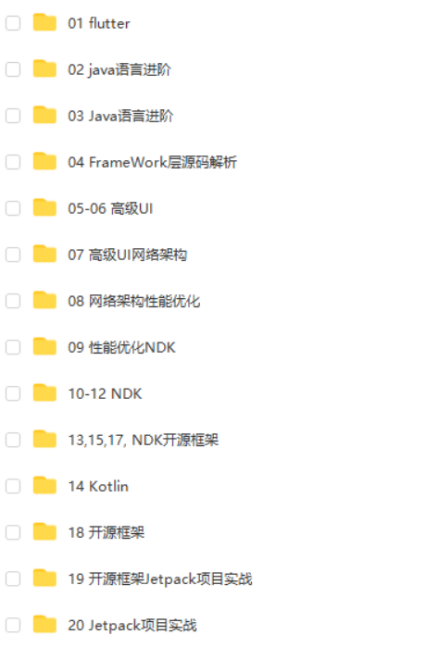
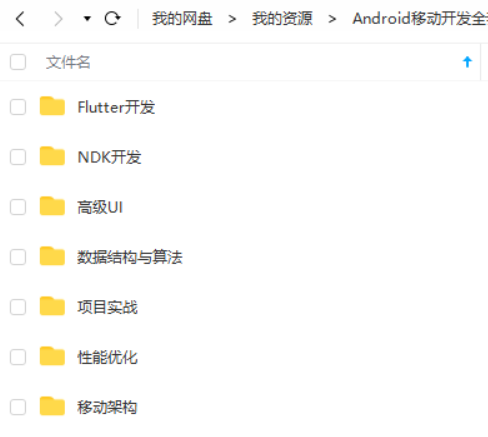

既有适合小白学习的零基础资料,也有适合3年以上经验的小伙伴深入学习提升的进阶课程,基本涵盖了95%以上Android开发知识点,真正体系化!
由于文件比较大,这里只是将部分目录截图出来,每个节点里面都包含大厂面经、学习笔记、源码讲义、实战项目、讲解视频,并且会持续更新!
如果你觉得这些内容对你有帮助,可以扫码获取!!(备注:Android)

题外话
我在一线互联网企业工作十余年里,指导过不少同行后辈。帮助很多人得到了学习和成长。
我意识到有很多经验和知识值得分享给大家,也可以通过我们的能力和经验解答大家在IT学习中的很多困惑,所以在工作繁忙的情况下还是坚持各种整理和分享。但苦于知识传播途径有限,很多程序员朋友无法获得正确的资料得到学习提升,故此将并将重要的Android进阶资料包括自定义view、性能优化、MVC与MVP与MVVM三大框架的区别、NDK技术、阿里面试题精编汇总、常见源码分析等学习资料。
【Android思维脑图(技能树)】
知识不体系?这里还有整理出来的Android进阶学习的思维脑图,给大家参考一个方向。
希望我能够用我的力量帮助更多迷茫、困惑的朋友们,帮助大家在IT道路上学习和发展~
《互联网大厂面试真题解析、进阶开发核心学习笔记、全套讲解视频、实战项目源码讲义》点击传送门即可获取!
中…(img-IEUG8RON-1712375283964)]
既有适合小白学习的零基础资料,也有适合3年以上经验的小伙伴深入学习提升的进阶课程,基本涵盖了95%以上Android开发知识点,真正体系化!
由于文件比较大,这里只是将部分目录截图出来,每个节点里面都包含大厂面经、学习笔记、源码讲义、实战项目、讲解视频,并且会持续更新!
如果你觉得这些内容对你有帮助,可以扫码获取!!(备注:Android)

题外话
我在一线互联网企业工作十余年里,指导过不少同行后辈。帮助很多人得到了学习和成长。
我意识到有很多经验和知识值得分享给大家,也可以通过我们的能力和经验解答大家在IT学习中的很多困惑,所以在工作繁忙的情况下还是坚持各种整理和分享。但苦于知识传播途径有限,很多程序员朋友无法获得正确的资料得到学习提升,故此将并将重要的Android进阶资料包括自定义view、性能优化、MVC与MVP与MVVM三大框架的区别、NDK技术、阿里面试题精编汇总、常见源码分析等学习资料。
【Android思维脑图(技能树)】
知识不体系?这里还有整理出来的Android进阶学习的思维脑图,给大家参考一个方向。
[外链图片转存中…(img-q0mDIY0O-1712375283965)]
希望我能够用我的力量帮助更多迷茫、困惑的朋友们,帮助大家在IT道路上学习和发展~
《互联网大厂面试真题解析、进阶开发核心学习笔记、全套讲解视频、实战项目源码讲义》点击传送门即可获取!


