- 1踩坑总结,Fiddler抓包-抓不到包的常见原因 + 解决方法(超详细)_fiddler抓不到包
- 2CP01大语言模型ChatGLM3-6B使用CLI代码进行代码调用初体验
- 3安卓mysql数据库连接工具类_mysql连接数据库工具类
- 4关于c和c++里全局变量或者设备配置信息定义的要点汇总,extern_#define extern extern
- 5代码生成的原理解析:从Codex、GitHub Copliot到CodeLlama、CodeGeex_codex代码生成
- 6安装navicat详细流程_navicat安装
- 7【我的Android进阶之旅】Android Studio如何同时打开多个项目?_anroidstudio不能同时开两个项目
- 8flink源码阅读第一篇—入口
- 9记录 Dubbo+Zookeeper 学习Demo_dubbo+zk 官网demo
- 10HarmonyOS应用开发——使用HUAWEI DevEco Studio创建第一个程序 HELLO WORLD!_怎么用devceo写一个app
Docker部署前后端分离项目的三种方式
赞
踩
方式一:通过两个容器部署
1、部署前端
1.1、指定前端向后端请求的BASE_URL
比如:http://10.61.4.42:7777/traffic,这里的7777是Docker部署后端时linux的本地端口,即7777:80,80是后端配置文件中指定的端口。
export const BASE_URL = 'http://10.61.4.42:7777/traffic'
- 1
1.2、打包前端项目生成dist文件夹
1.3、linux本地创建default.conf和Dockerfile
1、default.conf:linux本机创建的配置文件,用于覆盖nginx内部的配置文件
server {
    listen       80;
    server_name  10.61.4.42; # 修改为docker服务宿主机的ip
    location / {
        root   /usr/share/nginx/html;
        index  index.html index.htm;
        try_files $uri $uri/ /index.html =404;
    }
     location /traffic {
      proxy_pass http://10.61.4.42:7777/traffic;
    }
    error_page   500 502 503 504  /404;
    location = /50x.html {
        root   html;
    }
}
- 1
- 2
- 3
- 4
- 5
- 6
- 7
- 8
- 9
- 10
- 11
- 12
- 13
- 14
- 15
- 16
2、Dockerfile:打包镜像。(default.conf和Dockerfile中端口都为80,该端口是容器内端口,也是nginx监听的端口,是默认的)
# 镜像nginx
FROM nginx
# 作者
MAINTAINER ZhangSH<xxx@163.com>
# 将前端dist文件中的内容复制到nginx目录
ENV TimeZone=Asia/Shanghai
# 将前端dist文件中的内容复制到nginx目录
COPY dist  /usr/share/nginx/html/
# 用本地的nginx配置文件覆盖镜像的Nginx配置
COPY default.conf /etc/nginx/conf.d
EXPOSE 80
- 1
- 2
- 3
- 4
- 5
- 6
- 7
- 8
- 9
- 10
- 11
1.4、将dist文件夹和以上两个文件同级放置
![[外链图片转存失败,源站可能有防盗链机制,建议将图片保存下来直接上传(img-HLH071fz-1686796785634)(C:\zsh\系统软件\Typora\workplace\images\image-20230612211226885.png)]](https://img-blog.csdnimg.cn/7cf663eb646046fbb379b16894a61da2.png)
1.5、打包镜像
在Dockerfile目录执行build打包镜像。
docker build -t 镜像名 .
# -t指明镜像名
# .不能丢
- 1
- 2
- 3
1.6、启动容器实例
docker run -d -p 8088:80 --name 容器实例名 镜像名
# 8088为linux本地端口,也是浏览器地址栏中输入的端口(可任意设置),docker会将其映射到容器实例中的80端口,然后nginx会监听到该端口
- 1
- 2
2、部署后端
2.1、指定端口和context-path
server:
  port: 80
  servlet:
        context-path: /traffic
- 1
- 2
- 3
- 4
2.2、处理跨域问题
@Configuration
@EnableWebMvc
public class CorsConfig implements WebMvcConfigurer {
    @Override
    public void addCorsMappings(CorsRegistry registry) {
        registry.addMapping("/**")
                .allowedOrigins("*")
                .allowedHeaders("*")
                .allowedMethods("GET", "POST", "PUT", "OPTIONS", "DELETE", "PATCH")
                .maxAge(3600);
    }
}
- 1
- 2
- 3
- 4
- 5
- 6
- 7
- 8
- 9
- 10
- 11
- 12
2.3、打jar包
2.4、创建Dockerfile文件
# 镜像jdk1.8
FROM openjdk:8-jre-alpine
# 作者
MAINTAINER ZhangSH<xxx@163.com>
RUN echo "Asia/Shanghai" > /etc/timezone
# 拷贝并取别名
COPY *.jar /app.jar
EXPOSE 80
ENTRYPOINT ["java","-jar","app.jar"]
- 1
- 2
- 3
- 4
- 5
- 6
- 7
- 8
- 9
2.5、打包镜像
Dockerfile文件要和jar包在同一目录下,因为Dockerfile文件的COPY是当前目录下的jar包
![[外链图片转存失败,源站可能有防盗链机制,建议将图片保存下来直接上传(img-bhnhM20e-1686796785635)(C:\zsh\系统软件\Typora\workplace\images\image-20230612213854889.png)]](https://img-blog.csdnimg.cn/defb58503d7e45b78d713f3d352b96d2.png)
docker build -t 镜像名 .
# -t指明镜像名
# .不能丢
- 1
- 2
- 3
2.6、启动容器实例
docker run -d -p 7777:80 --name 容器实例名 镜像名
# 7777为linux本地端口,也是前端的BASE_URL中指定的端口号,docker会将7777映射到容器实例中的80端口,然后nginx会监听到该端口
- 1
- 2
方式二:通过compose编排容器自动部署
通过compose编排可以自动化部署前后端项目(包括中间件等)
文件目录结构:
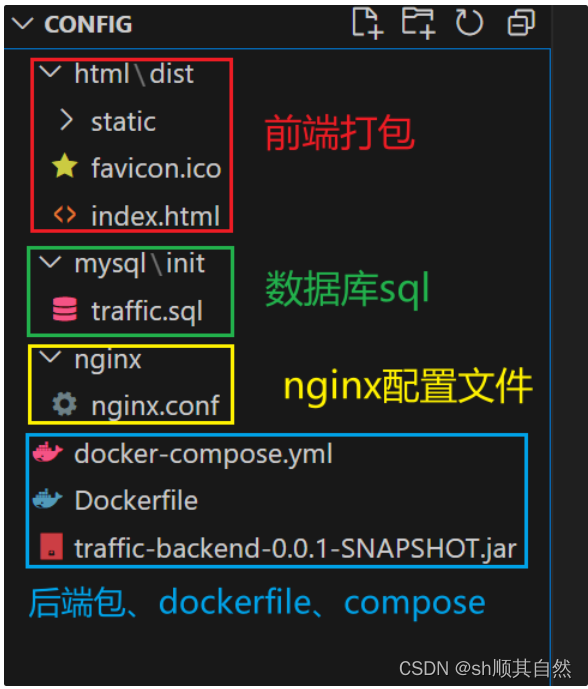
nginx.conf
server {
    listen       80;
    server_name  2xxxxxxxxx9;

    location / {
        root   /usr/share/nginx/html;
        index  index.html index.htm;
        try_files $uri $uri/ /index.html last;
    }

    error_page   500 502 503 504  /50x.html;
    location = /50x.html {
        root   /usr/share/nginx/html;
    }
}
- 1
- 2
- 3
- 4
- 5
- 6
- 7
- 8
- 9
- 10
- 11
- 12
- 13
- 14
- 15
Dockerfile(后端)
# 镜像jdk1.8
FROM openjdk:8-jre-alpine
# 作者
MAINTAINER ZhangSH<xxx@163.com>
RUN echo "Asia/Shanghai" > /etc/timezone
# 拷贝并取别名
COPY *.jar /app.jar
EXPOSE 80
ENTRYPOINT ["java","-jar","app.jar"]
- 1
- 2
- 3
- 4
- 5
- 6
- 7
- 8
- 9
docker-compose.yaml
version: '3'
services:
  nginx:
    image: nginx:latest
    container_name: nginx
    restart: always
    volumes:
      - ./nginx/nginx.conf:/etc/nginx/nginx.conf
      - ./html/dist:/usr/share/nginx/html/
    ports:
      - "8080:80"
    networks:
      data_security:
        ipv4_address: 192.128.0.8
    privileged: true

  mysql:
    image: mysql:8.0.26
    container_name: mysql
    security_opt: # 忽略安全性检查
      - seccomp:unconfined
    cap_add:
      - SYS_NICE
    restart: always
    environment:
      - TZ=Asia/Shanghai
      - MYSQL_ROOT_PASSWORD=Root123!
      - MYSQL_DATABASE=traffic
      # - MYSQL_USER: 'root'
      # - MYSQL_PASSWORD: 'password'
      # - MYSQL_ROOT_HOST: '%'
    volumes: # 挂载sql文件
      - ./mysql/init/:/docker-entrypoint-initdb.d/
    ports:
      - "3306:3306"
    networks:
      data_security:
        ipv4_address: 192.128.0.2
    command:
      --default-authentication-plugin=mysql_native_password
      --character-set-server=utf8mb4
      --collation-server=utf8mb4_unicode_ci
      --sql-mode=''
      --interactive_timeout=259200
      --wait_timeout=259200

  myweb:
    image: web/test1
    build: . # 执行当前目录下的Dockerfile文件打包镜像
    ports:
      - "7777:80"
    depends_on:
      - mysql
    networks:
      data_security:
        ipv4_address: 192.128.0.4

# 容器内部网络组
networks:
  data_security:
    driver: bridge
    ipam:
      config:
        - subnet: 192.128.0.0/16
- 1
- 2
- 3
- 4
- 5
- 6
- 7
- 8
- 9
- 10
- 11
- 12
- 13
- 14
- 15
- 16
- 17
- 18
- 19
- 20
- 21
- 22
- 23
- 24
- 25
- 26
- 27
- 28
- 29
- 30
- 31
- 32
- 33
- 34
- 35
- 36
- 37
- 38
- 39
- 40
- 41
- 42
- 43
- 44
- 45
- 46
- 47
- 48
- 49
- 50
- 51
- 52
- 53
- 54
- 55
- 56
- 57
- 58
- 59
- 60
- 61
- 62
- 63
- 64
方式三:将前后端项目打成一个镜像部署
将前后端打成一个docker镜像并作为容器启动,同时通过反向代理对接另一个服务端。即:一个客户端,两个服务端。
服务结构: 共三个容器实例
- 前端A、后端A(一个容器实例)
- 后端B(一个容器实例)
- 数据库MySQL(一个容器实例)
目标:
- 将前端A、后端B打包成一个镜像并作为容器实例启动
- 将后端B作为其他服务,以nginx反向代理的方式为前端A提供服务
步骤:
1、打包前后端项目
-
前端A: 2xx.xx.xx.xx9:6868(ip和端口,用于发送请求的BASE_URL,❗也是nginx的ip和监听端口)
-
后端A: 2xx.xx.xx.xx9:7777(容器启动时以本地7777端口启动)
-
后端B: 2xx.xx.xx.xx9:7777(容器启动时以本地6666端口启动)
分别得到:前端A的dist文件夹、后端A的jar包、后端B的jar包
2、编写nginx.conf文件
该文件会在Dockerfile文件中使用,**作用:**覆盖服务器中nginx的配置文件,使用该nginx.conf文件。
该文件中通过location指定了url中包含/roadSection的请求转发到后端B。
user nginx;
worker_processes auto;
error_log /var/log/nginx/error.log;
pid /run/nginx.pid;

# Load dynamic modules. See /usr/share/doc/nginx/README.dynamic.
include /usr/share/nginx/modules/*.conf;

events {
    worker_connections 1024;
}

http {
    log_format  main  '$remote_addr - $remote_user [$time_local] "$request" '
                      '$status $body_bytes_sent "$http_referer" '
                      '"$http_user_agent" "$http_x_forwarded_for"';

    access_log  /var/log/nginx/access.log  main;

    sendfile            on;
    tcp_nopush          on;
    tcp_nodelay         on;
    keepalive_timeout   65;
    types_hash_max_size 2048;

    include             /etc/nginx/mime.types;
    default_type        application/octet-stream;

    # Load modular configuration files from the /etc/nginx/conf.d directory.
    # See http://nginx.org/en/docs/ngx_core_module.html#include
    # for more information.
    include /etc/nginx/conf.d/*.conf;
	# ❗nginx监听的端口,需要在Dockerfile中暴露出来
    server {
        listen       6868 default_server;
        listen       [::]:6868 default_server;
        server_name  2xx.xx.xx.xx9;
        root         /usr/share/nginx/html;

        # Load configuration files for the default server block.
        include /etc/nginx/default.d/*.conf;
		# ❗反向代理,前端请求的url发送到nginx,由nginx根据location规则匹配做对应的转发
        location ~ /roadSection {
        	# ❗反向代理重写url,正则表达式拼接
            rewrite ^/(.*)$ /$1 break;
            # ❗后端B的ip和端口
            proxy_pass http://2xx.xx.xx.xx9:6666;
        }

        location / {
            root   /usr/share/nginx/html;
            index  index.html index.htm;
            try_files $uri $uri/ /index.html last;
        }

        error_page   500 502 503 504  /50x.html;
        location = /50x.html {
            root   /usr/share/nginx/html;
        }
    }
}
- 1
- 2
- 3
- 4
- 5
- 6
- 7
- 8
- 9
- 10
- 11
- 12
- 13
- 14
- 15
- 16
- 17
- 18
- 19
- 20
- 21
- 22
- 23
- 24
- 25
- 26
- 27
- 28
- 29
- 30
- 31
- 32
- 33
- 34
- 35
- 36
- 37
- 38
- 39
- 40
- 41
- 42
- 43
- 44
- 45
- 46
- 47
- 48
- 49
- 50
- 51
- 52
- 53
- 54
- 55
- 56
- 57
- 58
- 59
- 60
- 61
3、编写Dockerfile文件
该文件用于构建一个镜像,其中包括nginx、jdk环境,以及前端A包dist、后端Ajar包。(mysql数据库是单独起了一个容器实例)
FROM centos:7
MAINTAINER ZhangSH<xxx@163.com>
# 当前目录挂载到容器内的tmp
VOLUME /tmp
# 安装java
RUN yum -y install java
# 安装epel源
RUN yum -y install epel-release
# 安装nginx
RUN yum -y install nginx
# 将jar包添加到容器中并更名为app.jar
ADD traffic-backend-0.0.1-SNAPSHOT.jar app.jar
# 把自己本地的html里放的前端项目,放入nginx默认的资源目录里
COPY dist /usr/share/nginx/html
# 将自己的nginx.conf 配置文件放到docker里nginx默认的配置文件位置
COPY nginx.conf /etc/nginx/nginx.conf
# 将nginx监听的端口6868暴露出来,启动容器实例时通过--net=host不用指定端口映射,会默认使用这个端口
EXPOSE 6868
# 运行jar包,ENTRYPOINT这条命令只能出现一次,如有多条,则只执行最后一条。该命令只有容器启动时才执行
ENTRYPOINT ["java","-jar","/app.jar"]
- 1
- 2
- 3
- 4
- 5
- 6
- 7
- 8
- 9
- 10
- 11
- 12
- 13
- 14
- 15
- 16
- 17
- 18
- 19
- 20
4、将文件放到服务器

5、将前端A和后端B打成一个镜像
在/usr/zsh/dockerOneImage目录下执行命令:docker build -t 镜像名 .,这里是test

6、启动该镜像容器实例
命令:docker run -d --name 容器名 --net=host 镜像名
-d: 后台运行容器,并返回容器ID;
–net=host: 指定容器的网络连接类型,四种类型:bridge/host/none/container;
通过docker ps查看:
![[外链图片转存失败,源站可能有防盗链机制,建议将图片保存下来直接上传(img-rHWbG1iz-1686880718076)(C:\zsh\系统软件\Typora\workplace\images\image-20230615103102200.png)]](https://img-blog.csdnimg.cn/17b2767ceffb449ab3873822642ff143.png)
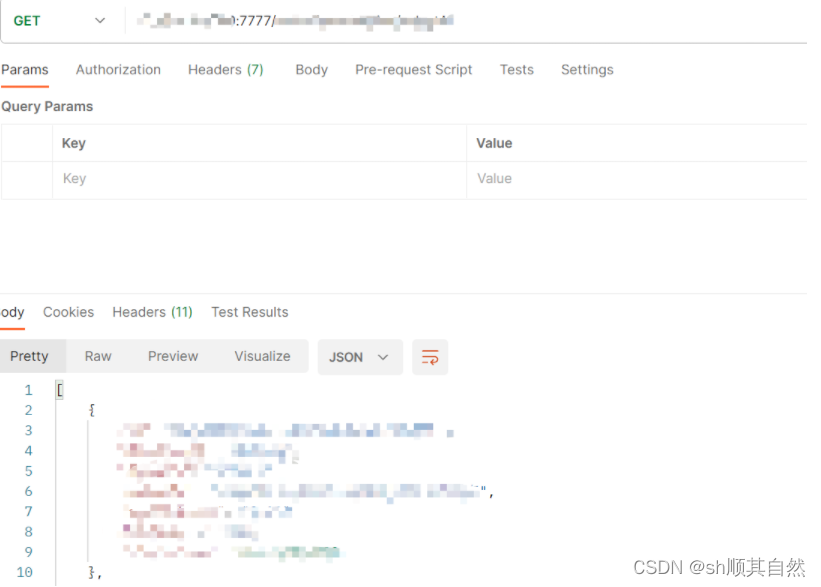
通过postman测试,发现**后端A(端口7777)**正常启动了:
7、❗❗❗启动该容器里的nginx服务器
通过docker exec -it 刚刚的容器名 nginx来启动nginx,此时会使用之前Dockerfile中暴露出来的端口6868,也是nginx.conf中监听的端口。
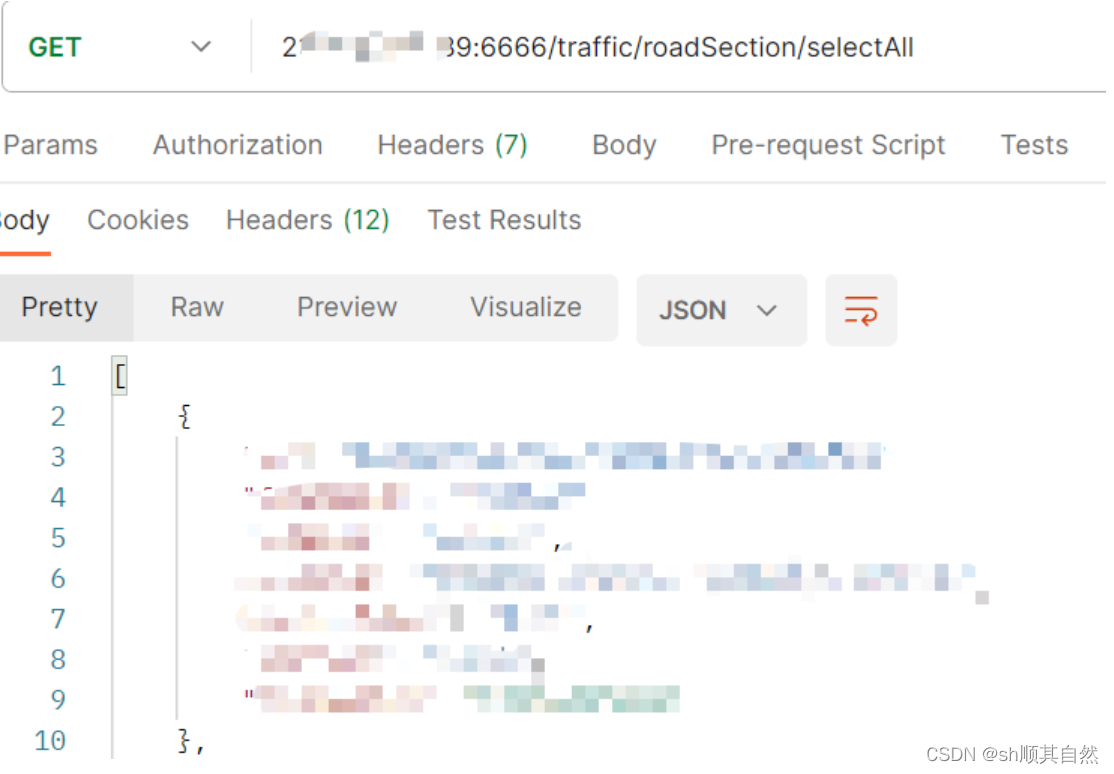
8、启动后端B

9、查看已启动服务
通过netstat -ntlp可查看已启动服务的端口信息:

10、测试
已启动容器:
![[外链图片转存失败,源站可能有防盗链机制,建议将图片保存下来直接上传(img-rJFztLNj-1686880718076)(C:\zsh\系统软件\Typora\workplace\images\image-20230616095420524.png)]](https://img-blog.csdnimg.cn/4fe0ab8ecc9e45a680ea0a871709e071.png)
后端A:正常
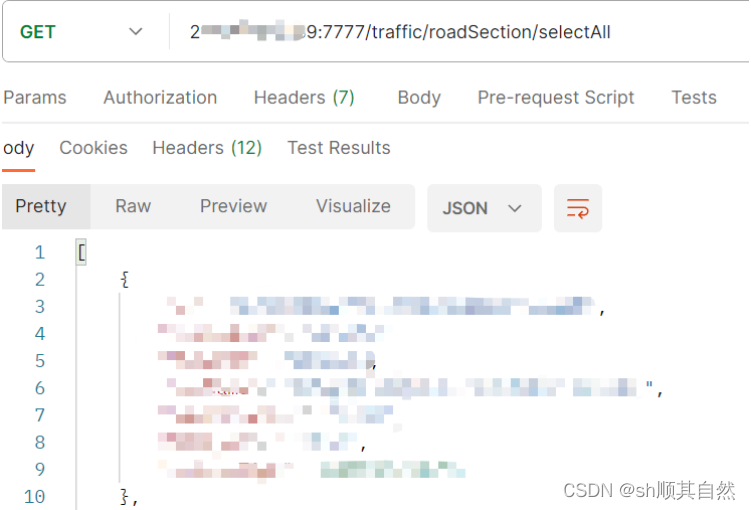
后端B:正常

网页:
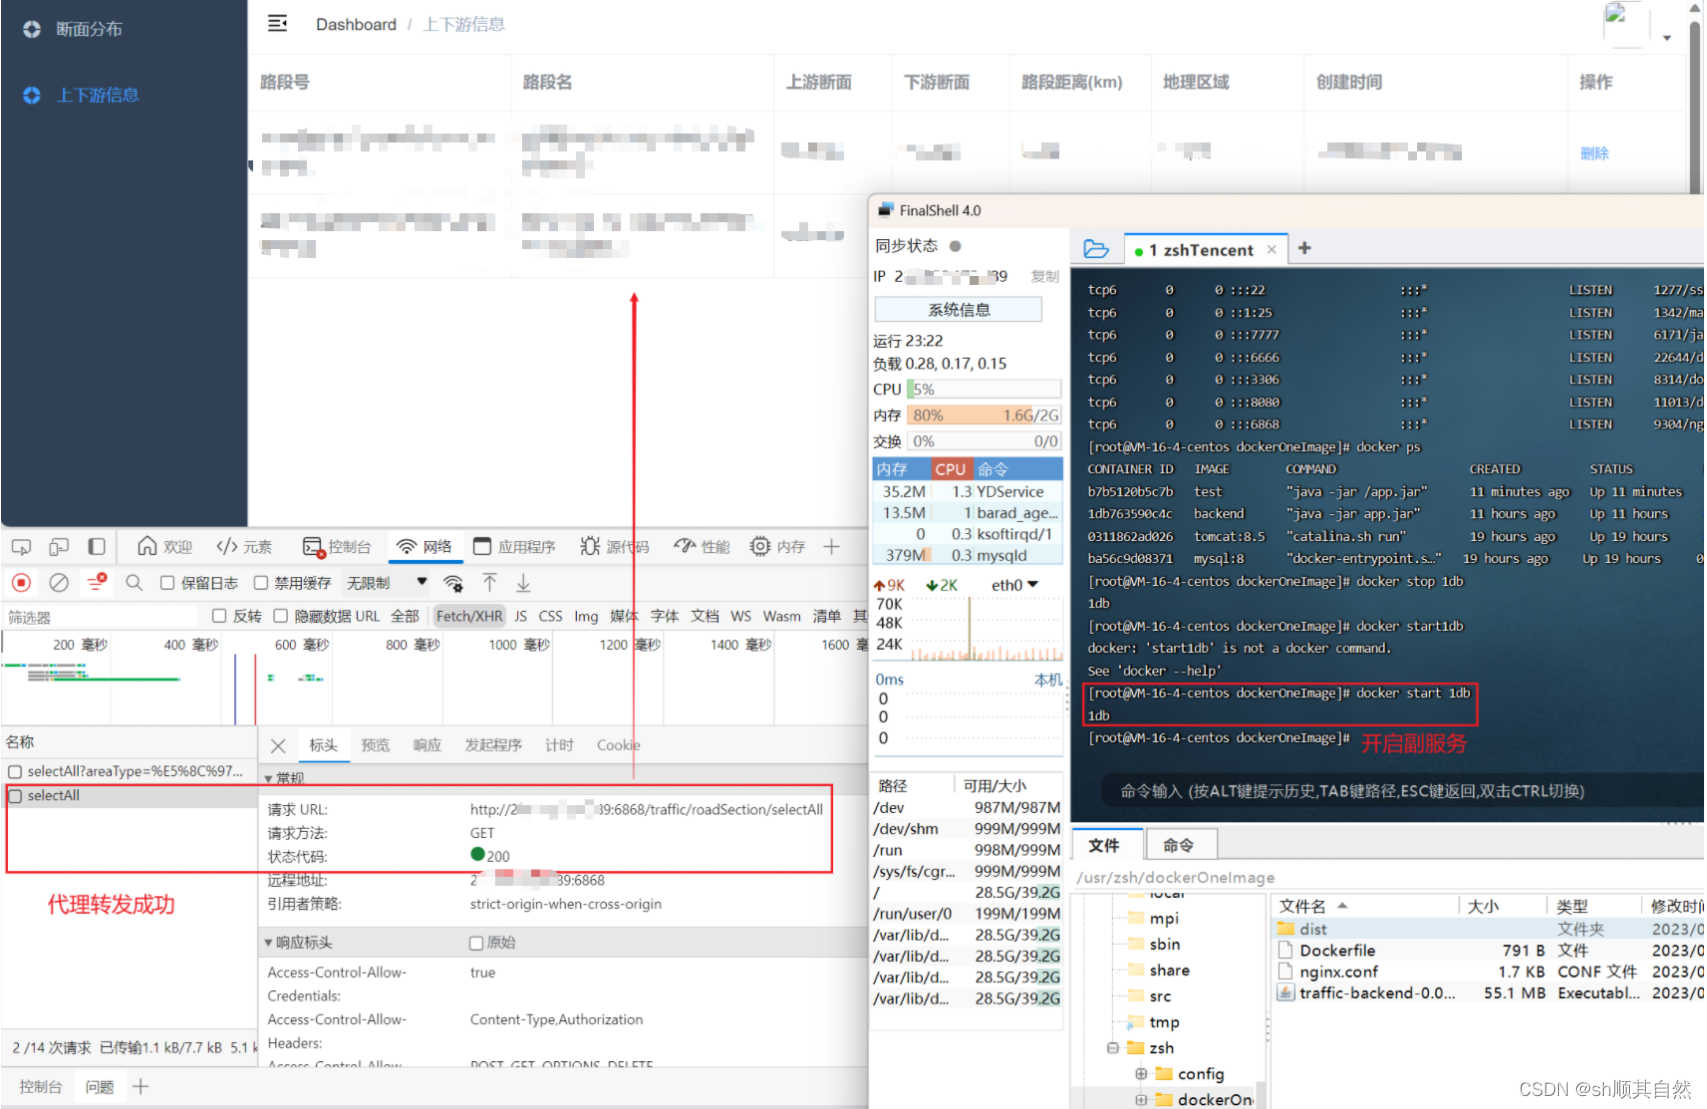
1)关闭后端B的容器实例时,反向代理转发失败。
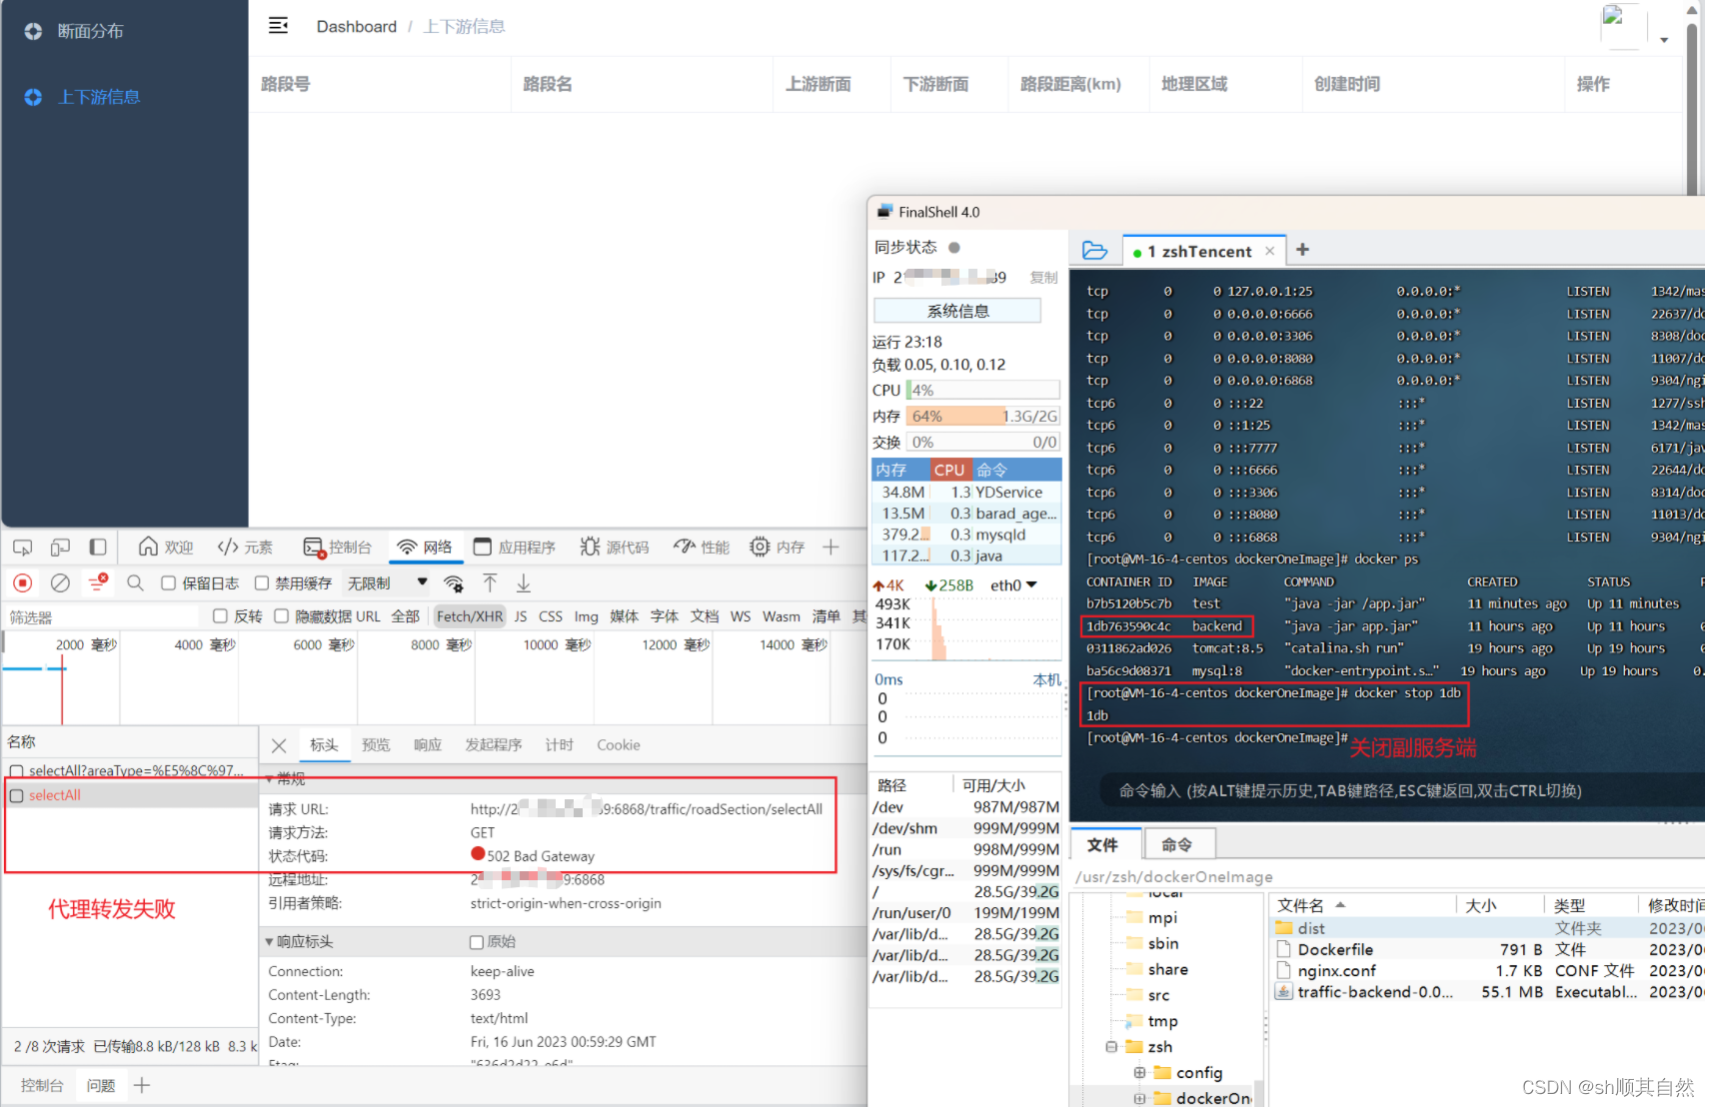
2)开启后端B的容器实例时,反向代理转发成功。
