Windows全新安装 StableDiffusion WebUI_windows 下安装stable diffusion
赞
踩
依赖软件
GIT
下载页面 https://git-scm.com/download/win
直接下载使用这个地址 https://github.com/git-for-windows/git/releases/download/v2.40.0.windows.1/Git-2.40.0-64-bit.exe
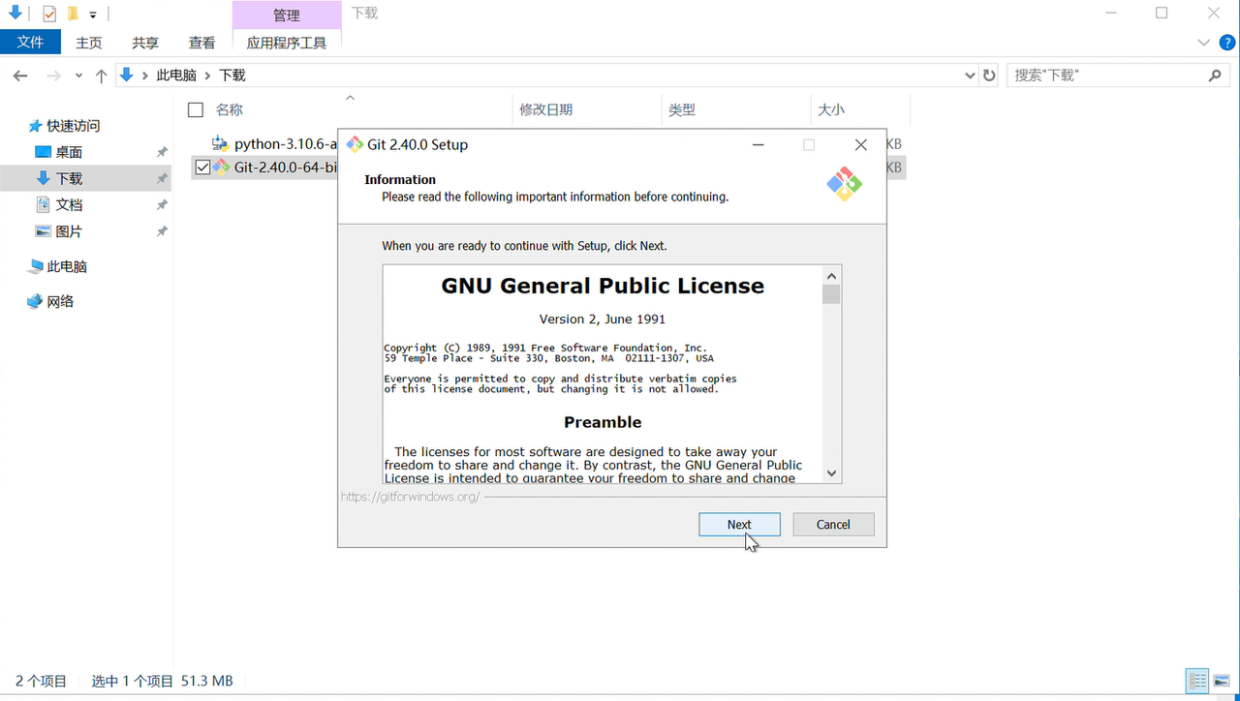
双击下载好的文件,然后一直点击 “Next”。
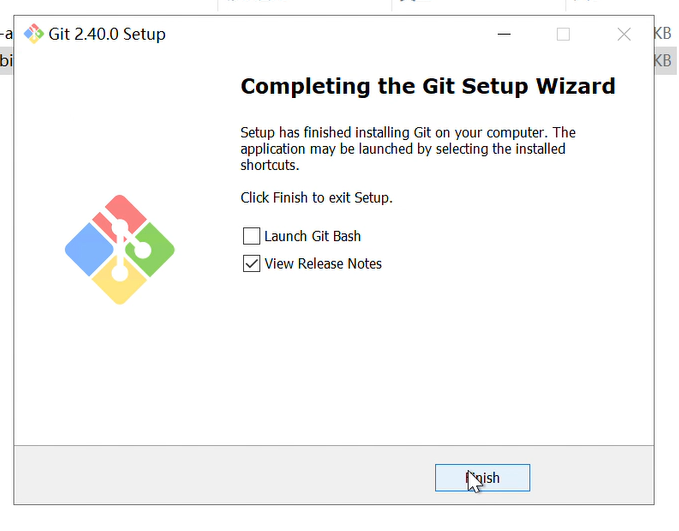
最后取消那个“View Release Notes”前的√,然后点击“Finish”
Python
安装这个版本:3.10.6
下载页面 https://www.python.org/downloads/ 或 https://www.python.org/downloads/release/python-3106/
直接下载使用这个地址 https://www.python.org/ftp/python/3.10.6/python-3.10.6-amd64.exe
双击下载的文件,
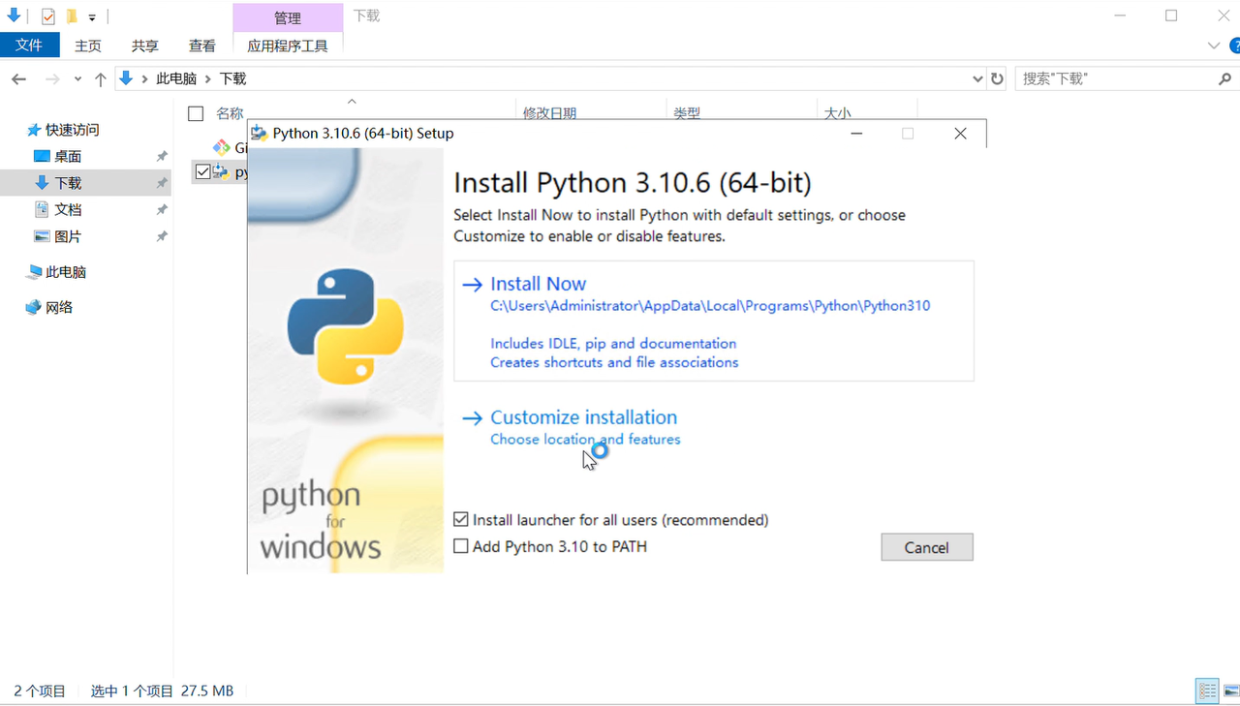
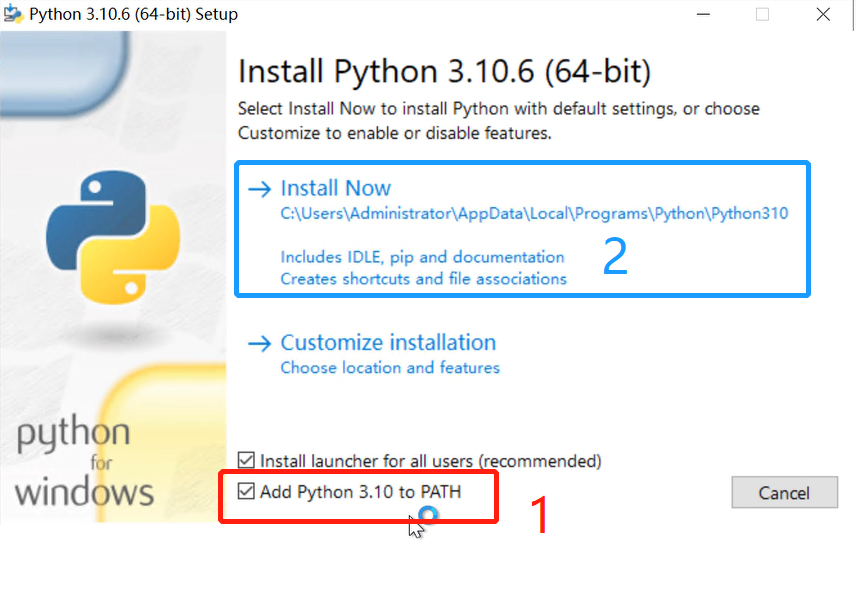
勾上“Add Python 3.10 to PATH”,再点上面的“Install Now”
最后点击一下“Disabled path length limit”再关闭
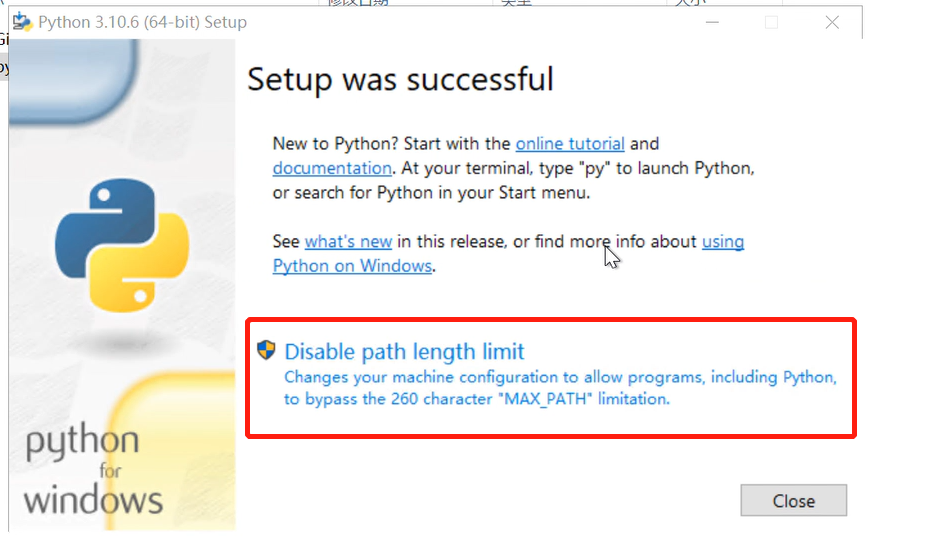
安装StableDiffusion WebUI前的准备
第一 检查之前安装的软件是否正常
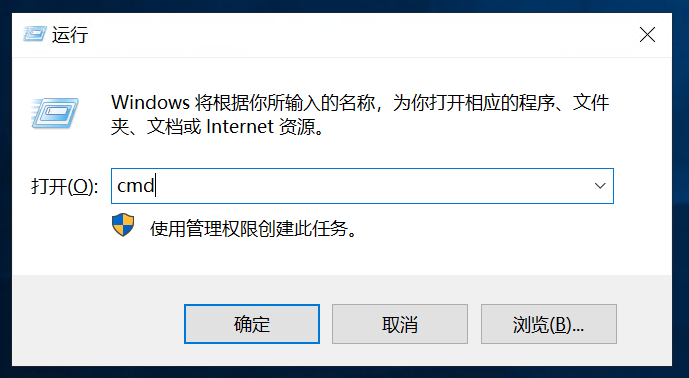
同时按下“WIN+R”在弹出的对话框中输入cmd(或者全大写CMD都可以)然后直接回车或者点击确定按钮
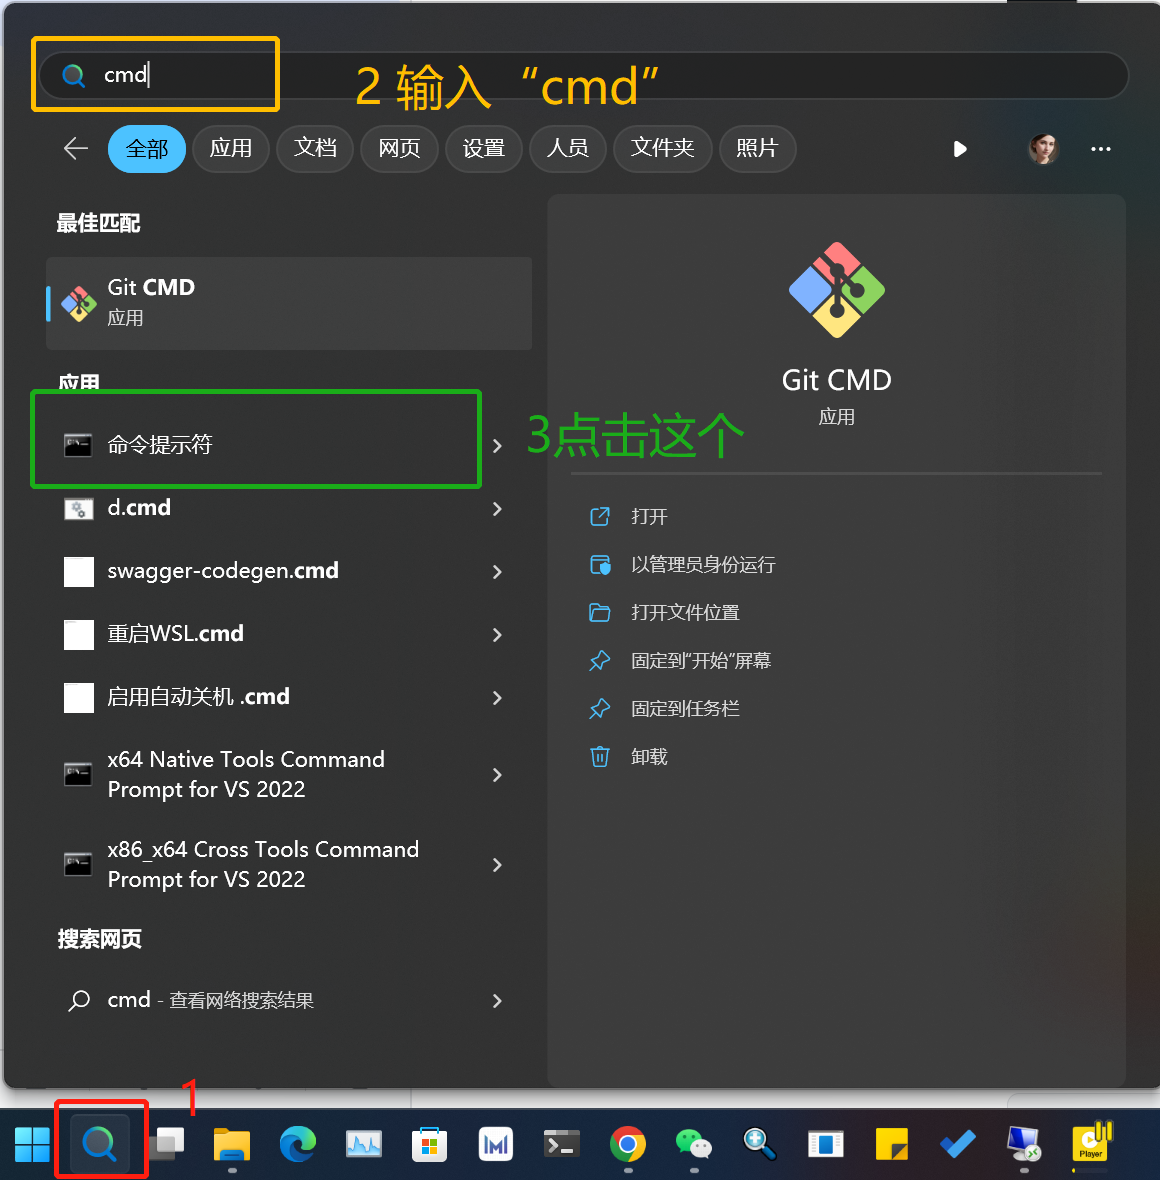
或者点击任务栏上的搜索图标也是输入cmd
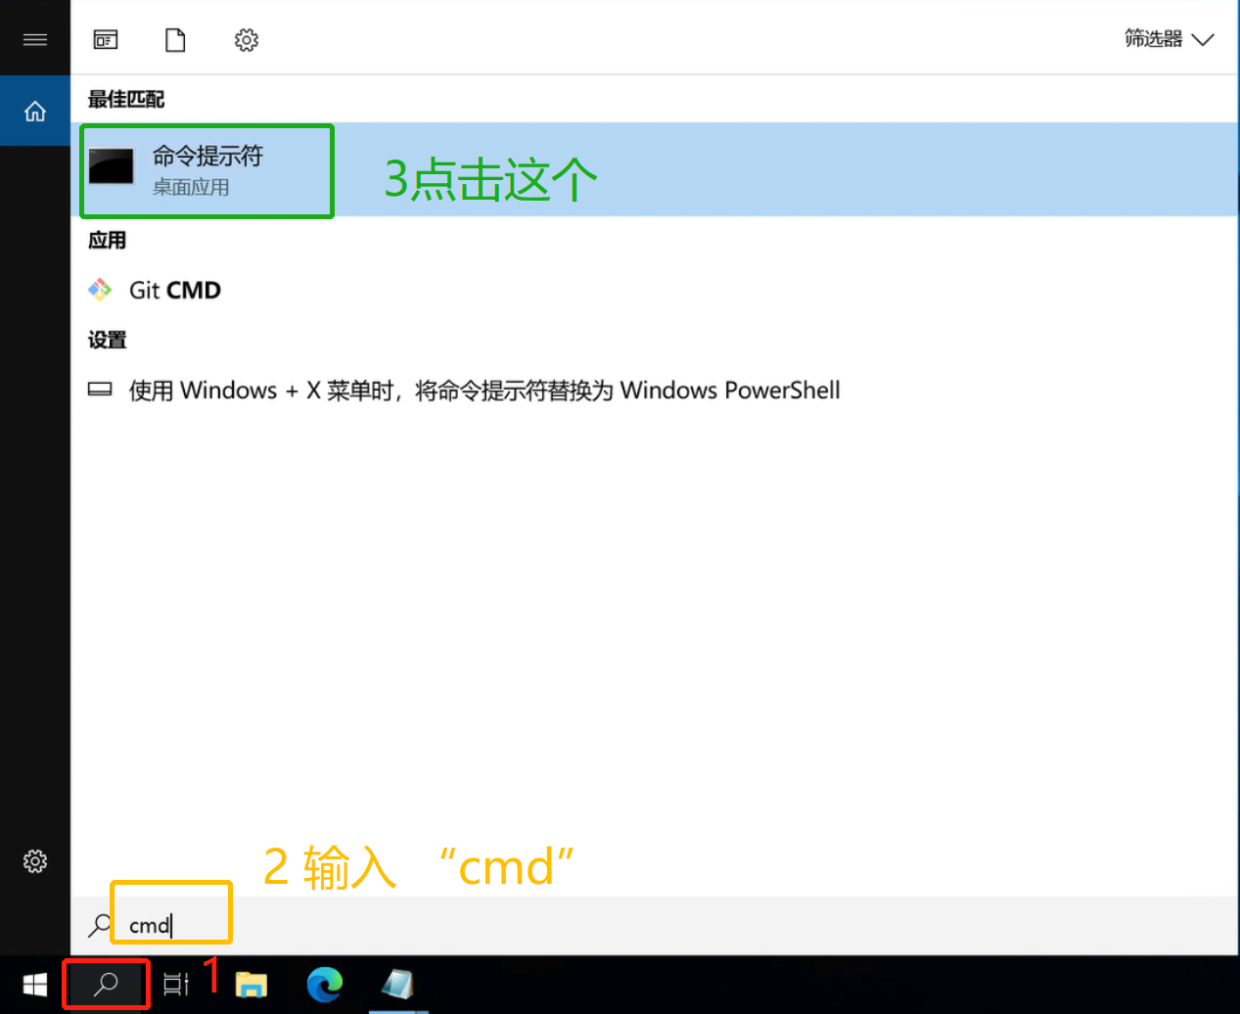
不同版本的Windows有细微差别
然后会打开一个黑色的窗口(细微差别可忽视)
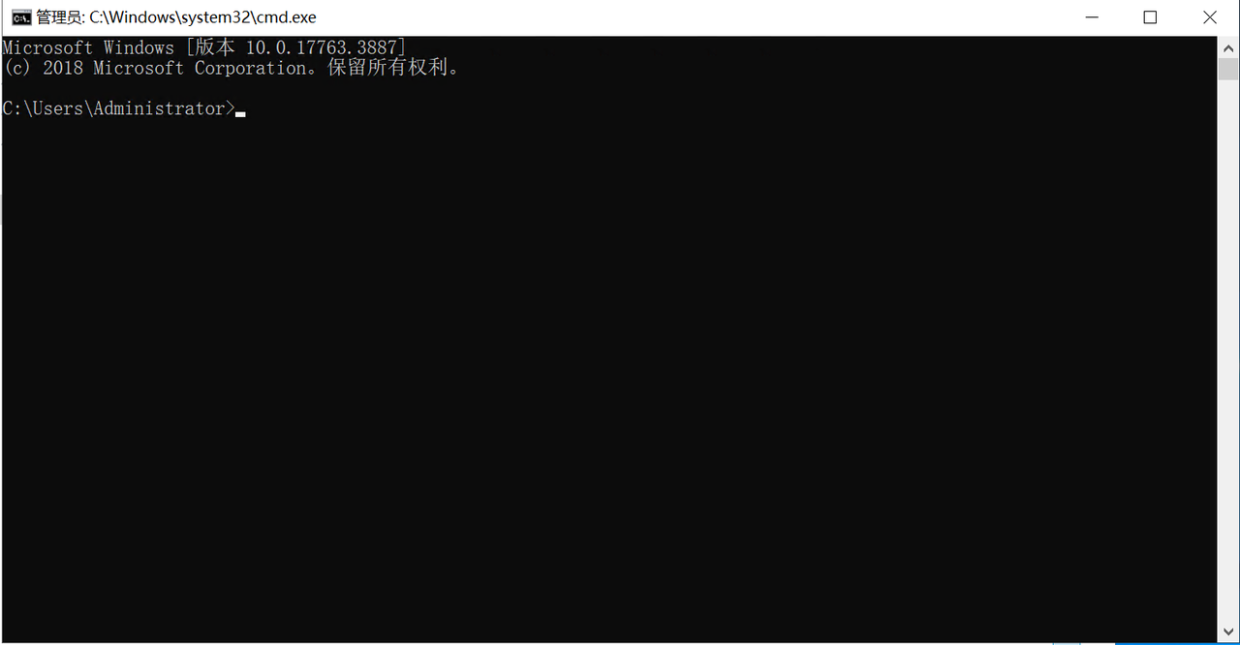
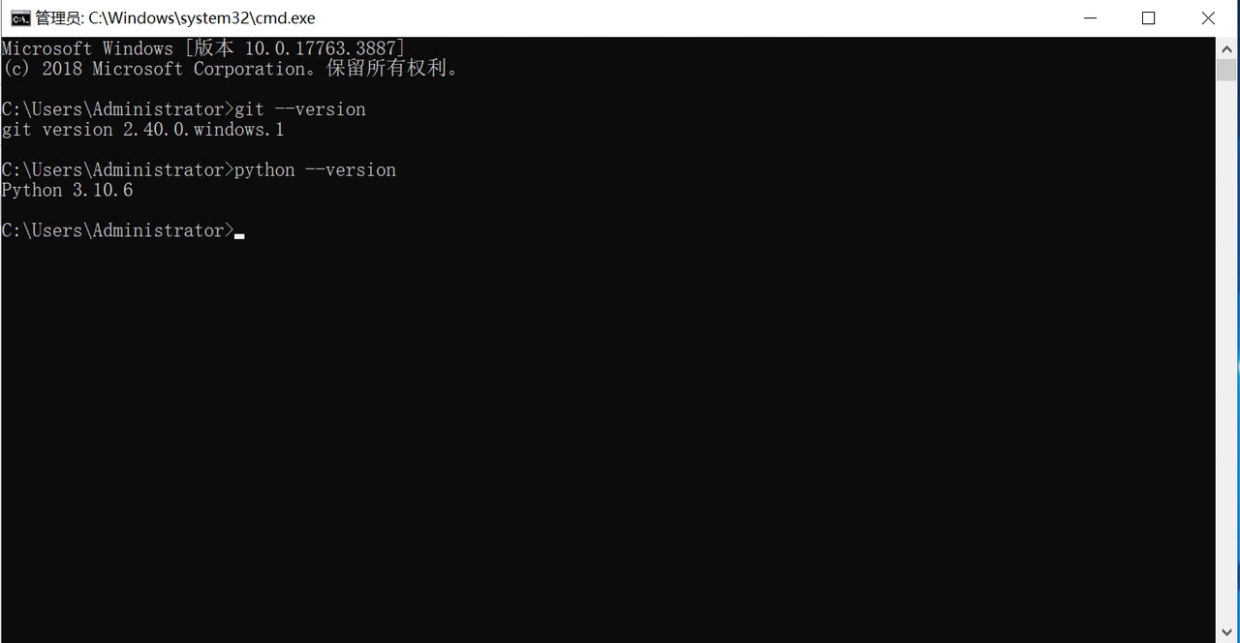
输入(或者直接粘贴)git --version和python --version记得要分开并且最后回车
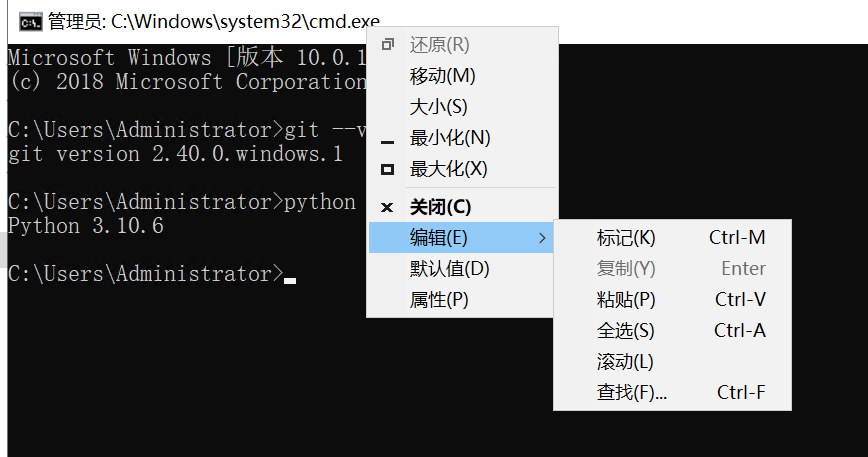
如何粘贴?
在那个黑色窗口的标题栏上点击右键,在出现的菜单上选择”编辑“->“粘贴”
命令参考:
c:\Users\Administrator>git --version
git version 2.40.0.windows.1

c:\Users\Administrator>python --version
Python 3.10.6
- 1
- 2
- 3
- 4
- 5
第二 加速一下Python的pip
国内的一些安装源镜像地址
阿里云 https://mirrors.aliyun.com/pypi/simple/
中国科技大学 https://pypi.mirrors.ustc.edu.cn/simple/
豆瓣(douban) https://pypi.douban.com/simple/
清华大学 https://pypi.tuna.tsinghua.edu.cn/simple/
还是在刚才那个黑色的窗口
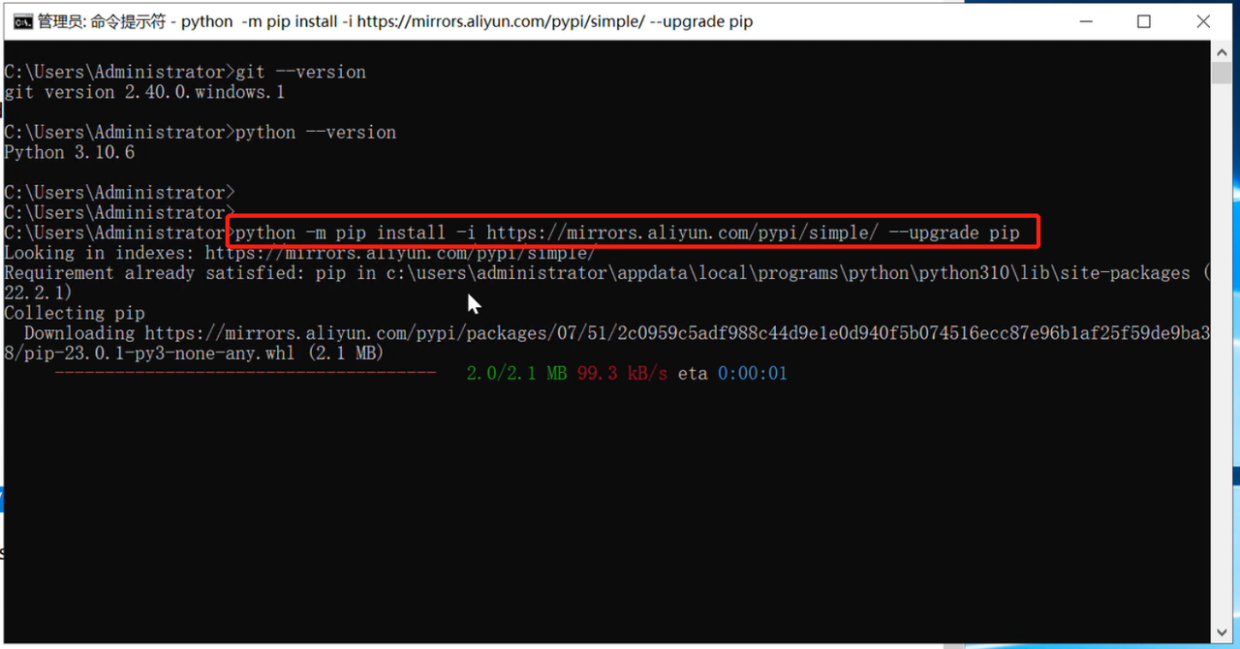
更新pip,输入命令:python -m pip install -i https://pypi.tuna.tsinghua.edu.cn/simple/ --upgrade pip并回车
配置源(全局),输入命令:pip config set global.index-url https://mirrors.aliyun.com/pypi/simple/并回车
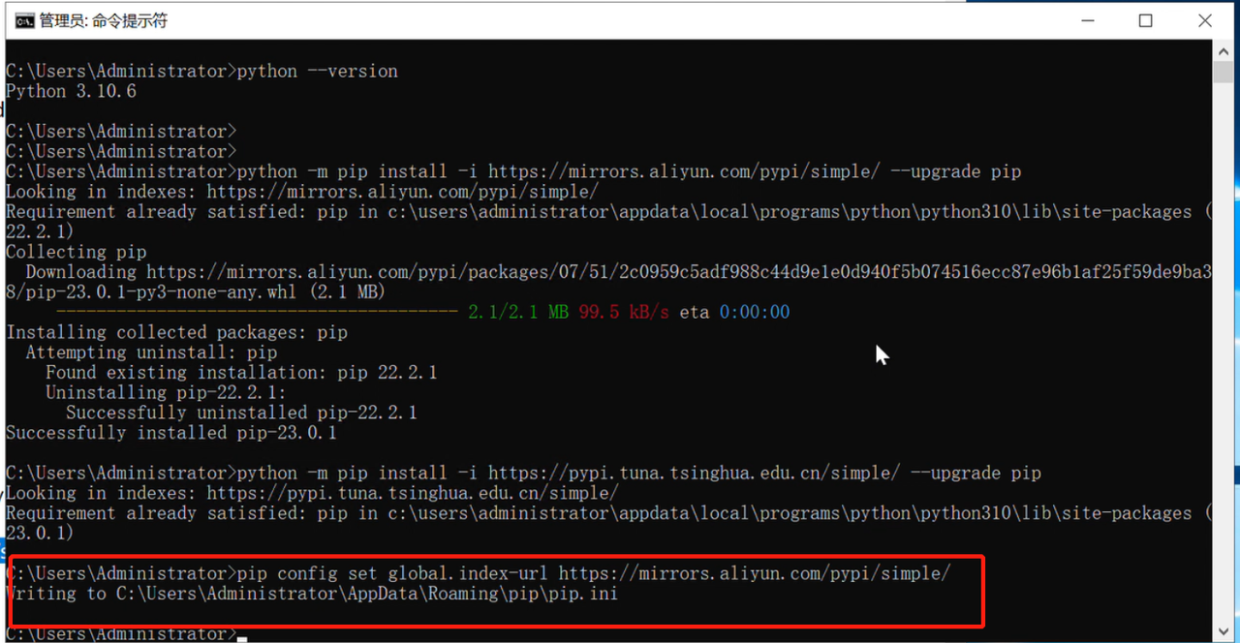
使用pip install torch 测试一下速度,如果速度太慢(几百kb勉强接受,最好是有几mb以上的速度),可以用上面列出的其他镜像试试(比如清华大学的)
pip config set global.index-url https://mirrors.aliyun.com/pypi/simple/

可以重复操作找到一个比较快(和地区、时间都有关系,也可以不用直接用默认的)的源地址
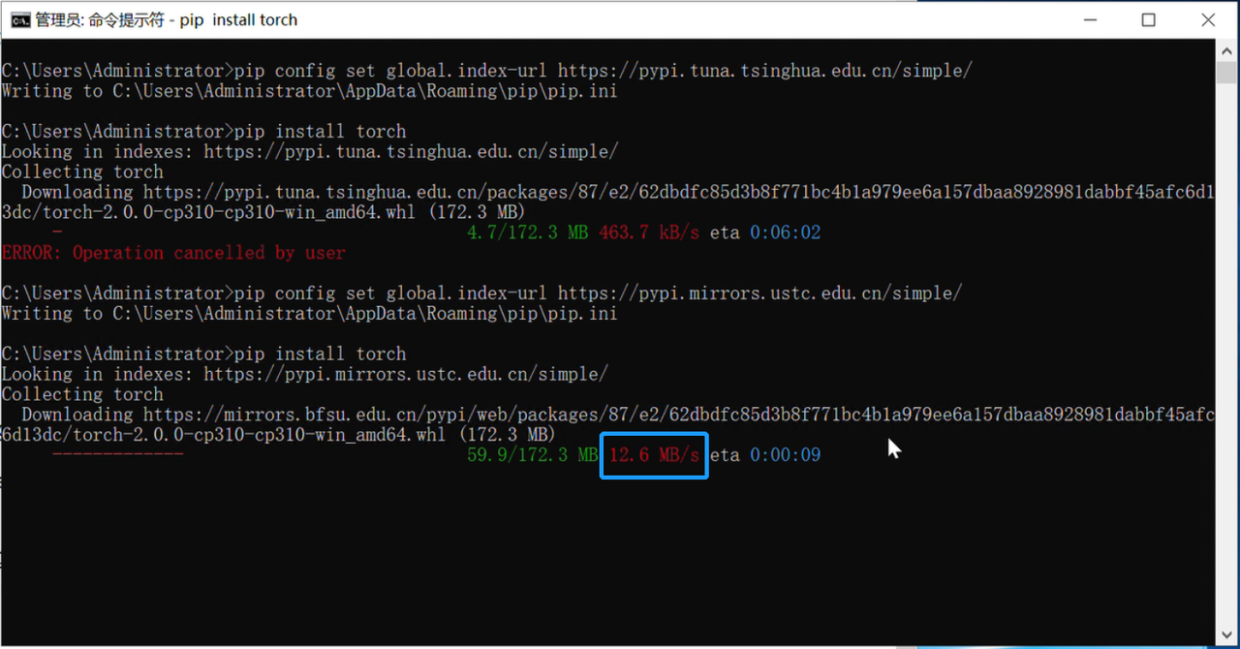
恢复默认源:pip config set global.index-url https://pypi.Python.org/simple/
命令参考:
c:\>python -m pip install -i https://pypi.tuna.tsinghua.edu.cn/simple/ --upgrade pip
c:\>pip config set global.index-url https://mirrors.aliyun.com/pypi/simple/
c:\>pip install torch
# 使用 Ctrl+C 可以终止
- 1
- 2
- 3
- 4
安装Stable Diffusion Webui
准备工作目录
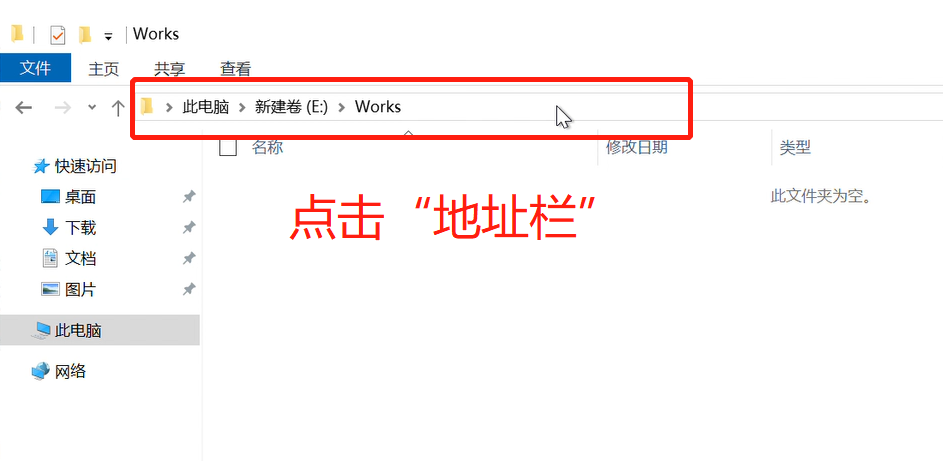
打开“文件资源管理器”,在非C:盘例如E:盘创建一个目录(例如Works,或者用现有的“工作目录”也可以)
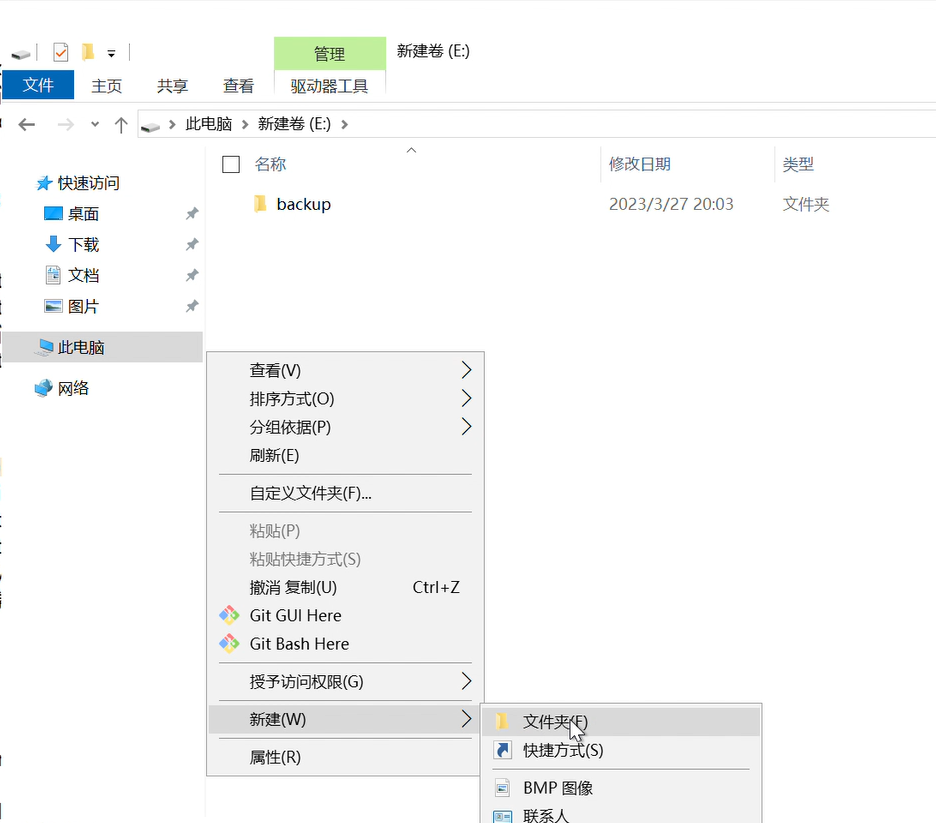
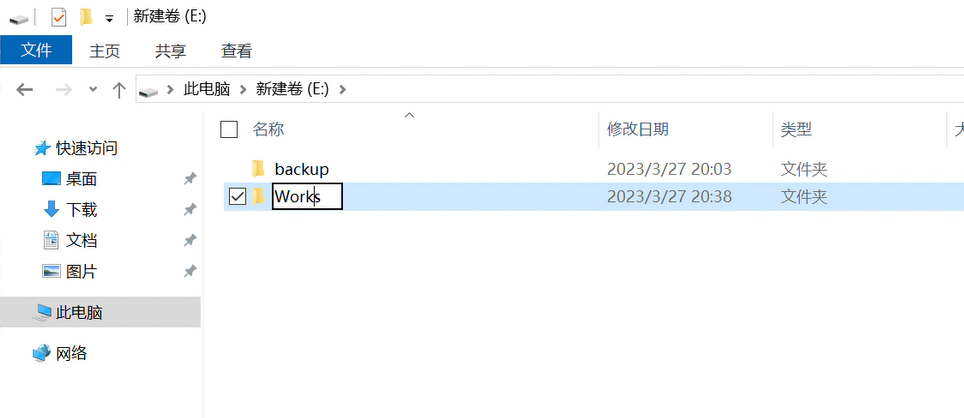
点击“地址栏”
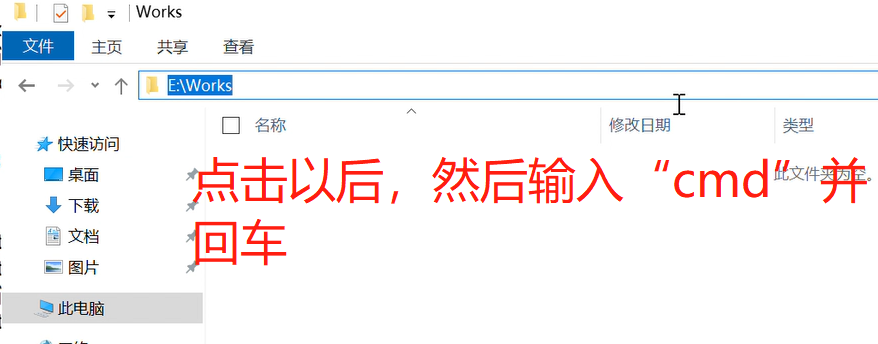
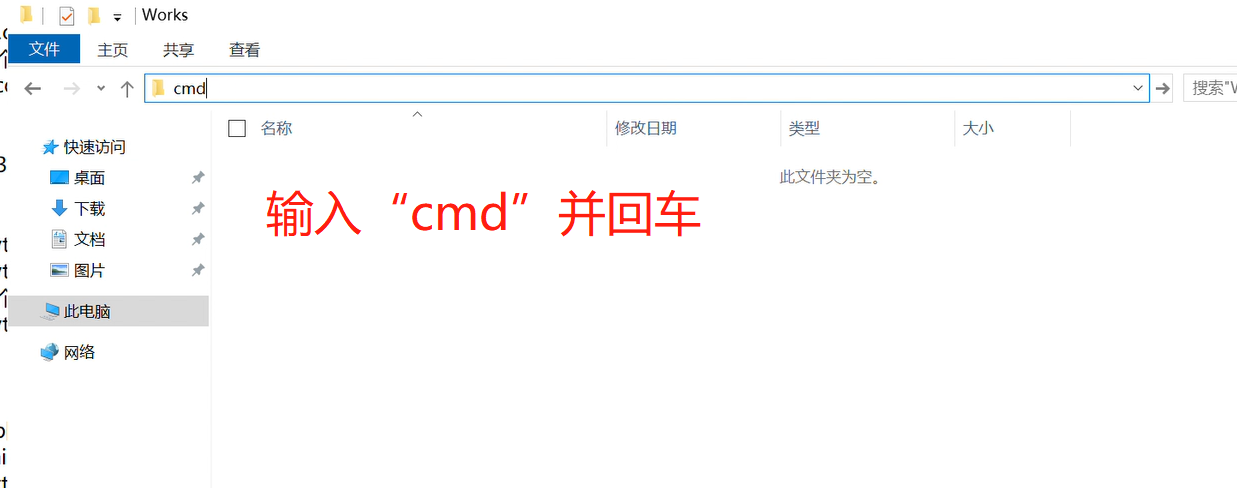
输入cmd并回车
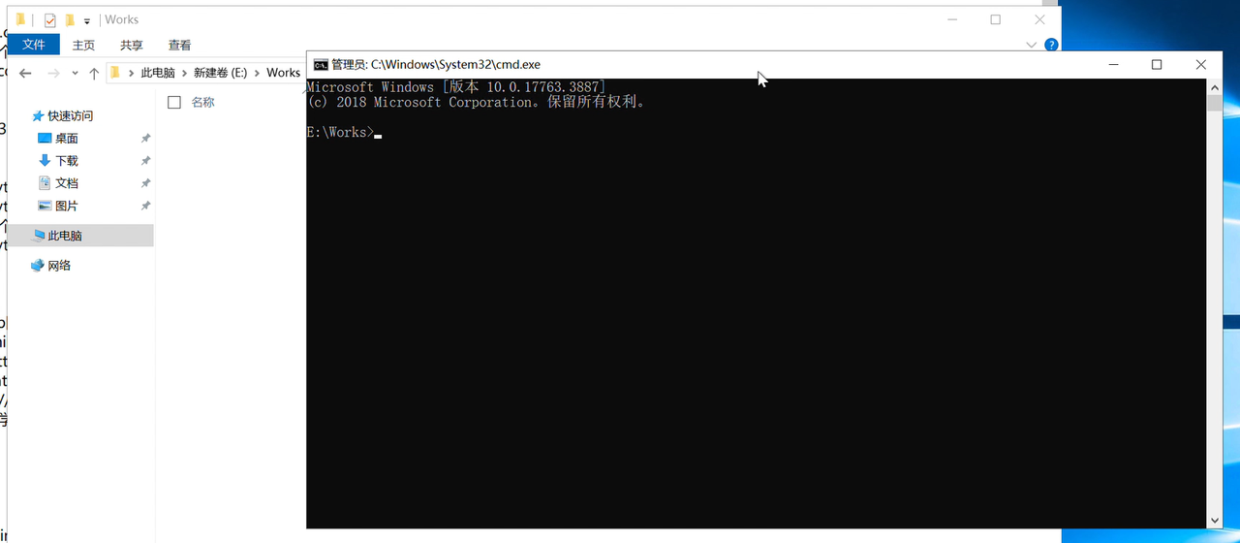
会出现一个“黑色窗口”并已经自动进入这个工作目录下。
克隆程序
输入命令git clone https://github.com/AUTOMATIC1111/stable-diffusion-webui并回车开始克隆。

如果网络不通畅会失败,这时候重新执行就可以了。
安装、配置
输入cd stable-diffusion-webui并回车
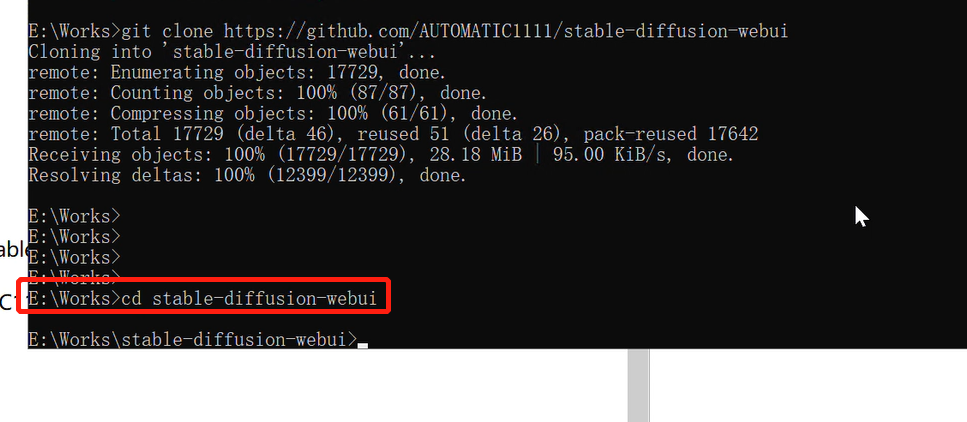
这个时候可以(非必要)提前安装一下中文语言包(之后还需要配置启用才能生效,也可以以后在UI上安装)
输入命令git clone https://github.com/dtlnor/stable-diffusion-webui-localization-zh_CN extensions\stable-diffusion-webui-localization-zh_CN并回车
安装配置启动WebUI,输入命令webui-user.bat并回车
过程根据网络不同从十来分钟到几十分钟(甚至更长)。中途可能会报错,一般是网络问题直接重试即可。

如果报错信息包含这样的内容,说明你的电脑系统没有可用的显卡。
AssertionError: Torch is not able to use GPU; add --skip-torch-cuda-test to COMMANDLINE_ARGS variable to disable this check
在经过漫长的安装过程,成功启动的样子是这样的,注意红色框框,有这个信息说明安装好了。
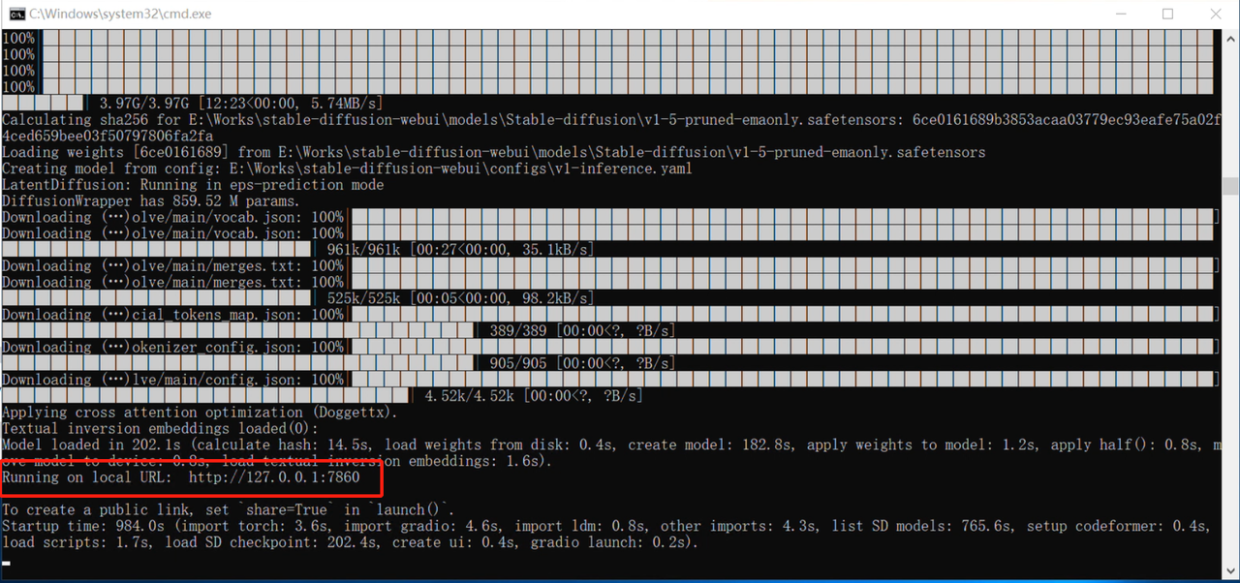
这时候可以用Ctrl+c,停止程序。以后再启动的时候在安装目录下“E:\Works\stable-diffusion-webui”直接找到刚才那个“webui-user.bat”双击就行(只要等十多秒)。或者添加一个“快捷方式”到桌面上。
后续
添加一个“快捷方式”到桌面上。
使用“文件资源管理器”导航到安装目录下“E:\Works\stable-diffusion-webui”找到“webui-user"。使用右键功能。
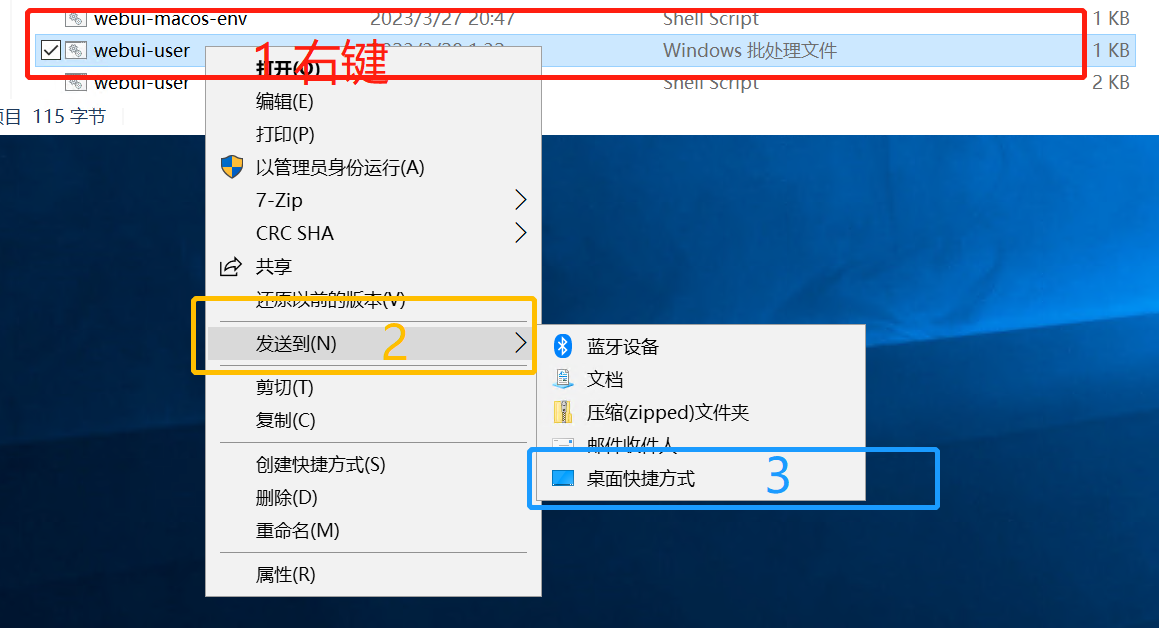
注意:你会看到多个“webui-user",选择后面有显示“Windows 批处理文件”的那个!
命令参考
E:\Works>git clone https://github.com/AUTOMATIC1111/stable-diffusion-webui
# 等待执行完毕
E:\Works>cd stable-diffusion-webui
# 安装插件
# 中文包
E:\Works\stable-diffusion-webui>git clone https://github.com/dtlnor/stable-diffusion-webui-localization-zh_CN extensions\stable-diffusion-webui-localization-zh_CN
# 图片浏览器
E:\Works\stable-diffusion-webui>git clone https://github.com/AlUlkesh/stable-diffusion-webui-images-browser extensions\stable-diffusion-webui-images-browser
# 自动安装并启动
E:\Works\stable-diffusion-webui>webui-user.bat
- 1
- 2
- 3
- 4
- 5
- 6
- 7
- 8
- 9
- 10


