- 1垂直滤波和水平滤波的区别_变声导论-变声器原理及实现(基音分类与滤波系统实现)...
- 22023最新高薪岗位大爆料,大模型算法工程师!凭什么人均月薪50K_大语言模型工资csdn
- 3中间件的分类_操作系统数据库中间件归位哪一类
- 4中间件_c++中间件
- 5ASM磁盘管理:从初始化参数到自动化管理的全面解析_oracle asm文件自动管理参数
- 6python学习 文本特征提取(二) CountVectorizer TfidfVectorizer 中文处理_countvectorizer中文
- 7生动说明Transformer,BERT,预训练模型的含义和关系_bert和transformer的关系
- 8手把手教会你如何通过ChatGPT API实现上下文对话_js调用chatgptapi回答上下文
- 9word2vec结合TF_IDF进行多标签文本分类(三)_word2vec和tfidf的结合
- 10C#测试调用PaddleSharp模块识别图片文字_paddleocrsharp
一文读懂vue+scss实现主题换肤功能_css变量+data-theme实现换肤
赞
踩
前言
web实现主题换肤方案有很多种,例如css变量、动态加载样式文件、js变量。目前流行工程化开发自然少不了css预处理(less/scss)方案,这也是目前在脚手架项目中比较流行实现方案。less/scss实现主题换肤本质就是动态切换节点某个变量,这个变量可以是HTML标签属性值也可以是类名,这个变量位置既可以是最顶层也可以是需要换肤地方(子节点)。变量如果是类名的话需要设置一个独一无二的名称,这个我们无法保证后面开发一不小心类名被重复了特别是团队协同开发,所以更好的选择变量是属性值。
看如下代码:
//顶层方案
  [data-theme="red"] .title{
     color:red
  }
  [data-theme="blue"] .title{
     color:blue
  }
//子节点方案
 .title[data-theme="red"]{
     color:red
  }
  .title[data-theme="blue"]{
     color:blue
  }
- 1
- 2
- 3
- 4
- 5
- 6
- 7
- 8
- 9
- 10
- 11
- 12
- 13
- 14
两种方式我们通过改变data-theme值都能使title对应节点加载不同样式,区别地方在于顶层方案data-theme是设置在title上级标签上,子节点方案是设置在title本身上,这意味着每个title(子节点)都要设置data-theme,而顶层方案只要在页面最顶级父元素设置一次就可以,比如在html标签或者body标签设置,显而易见顶层方案更好。网上关于less/scss属性选择器实现主题换肤教程很多,大部分讲的不够细特别对sass语法不熟的人理解起来比较困难,本文将以顶层属性方案代码实现结合sass语法讲解,一步步讲解实现过程,通俗易懂。
一、实现原理分析
所有的主题切换方案的本质都是动态改变css样式,区别就在于变量的绑定形式。属性选择器实现方法是在页面顶层标签(比如html或者body)上设置一个data-theme属性,子节点样式类名前面加上属性选择器,通过改变属性值就能切换子节点样式达到换肤效果。具体分析往下看.
假设我们在html标签上定义了一个red红色主题属性,页面有个标题文字
<!DOCTYPE html>
<html  data-theme="red">
  <head>
  </head>
  <body>
    <div class="title">标题</div>
  </body>
</html>
- 1
- 2
- 3
- 4
- 5
- 6
- 7
- 8
- 9
接下来我们设置title颜色,通过属性选择器让它跟data-theme关联
<style>
   [data-theme="red"] .title{
     color:red
  }
</style>
- 1
- 2
- 3
- 4
- 5
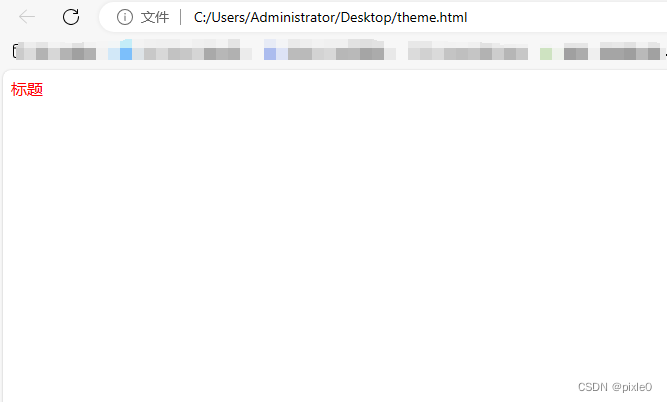
此时标题字体颜色就变成红色

假设还有绿色、蓝色主题,这时候我们继续定义,增加title样式
<style>
      /**红色主题*/
      [data-theme="red"] .title {
        color: red;
      }
      /**绿色主题*/
      [data-theme="green"] .title {
        color: green;
      }
      /**蓝色主题*/
      [data-theme="blue"] .title {
        color: blue;
      }
</style>
- 1
- 2
- 3
- 4
- 5
- 6
- 7
- 8
- 9
- 10
- 11
- 12
- 13
- 14
这时候我们只要改变html标签上 data-theme值就能切换其他主题
例如:蓝色主题
```html
<!DOCTYPE html>
<html  data-theme="blue">
  <head>
  </head>
  <body>
    <div class="title">标题</div>
  </body>
</html>
- 1
- 2
- 3
- 4
- 5
- 6
- 7
- 8
- 9
- 10

而动态修改data-theme值直接通过dom操作即可
document.documentElement.setAttribute('data-theme','blue')
- 1
通过上面简单示例,属性选择器换肤方案实现基本原理和实现过程我们就了解了,但是实际开发中我们可能有很多主题,假设10个主题,那意味着每个类名下需要写10遍样式,主题样式没有统一地方管理,如果后续要改动的话还要去每个地方修改非常麻烦混乱,这个时候就需要css预处理帮我们简化和统一管理。
二、scss实现
1.theme.scss
首先新建一个主题文件theme.scss并定义一个主题变量$themes,里面写入所有主题样式
theme.scss
$themes: (
  //红色主题
  red:
    (
      font-color: red,//字体颜色
      border-color: rgb(243, 73, 73),//边框颜色
      background-color:rgb(240, 2, 2),//背景色
    ),
  //绿色主题
  green:
    (
      font-color: green,
      border-color: rgb(16, 218, 16),
      background-color:rgb(38, 110, 38),
    ),
  //蓝色主题
  blue:
    (
      font-color: blue,
      border-color: rgb(23, 23, 175),
      background-color:rgb(18, 18, 94),
    )
);
- 1
- 2
- 3
- 4
- 5
- 6
- 7
- 8
- 9
- 10
- 11
- 12
- 13
- 14
- 15
- 16
- 17
- 18
- 19
- 20
- 21
- 22
- 23
- 24
- 25
ps:我们定义的$themes在sass中是个Maps类型数据,Maps类型数据类似关联数组又或者类似js的对象,以key/value键值对出现并用()包裹起来,Maps数据可以进行遍历
2.handle.scss
定义完主题变量后我们需要动态生成所有主题样式,我们新建一个handle.scss文件来处理相关逻辑
实现目标类似生成如下样式:
<style>
      /**红色主题*/
      [data-theme="red"] .title {
        color: red;
      }
      /**绿色主题*/
      [data-theme="green"] .title {
        color: green;
      }
      /**蓝色主题*/
      [data-theme="blue"] .title {
        color: blue;
      }
</style>
- 1
- 2
- 3
- 4
- 5
- 6
- 7
- 8
- 9
- 10
- 11
- 12
- 13
- 14
Sass提供了@each指令可以对Map数据进行循环遍历,所以我们可以使用@each去遍历所有主题$themes生成对应样式。
scss语法回顾
如果对scss语法很熟的这部分可以跳过
1. @each遍历
@each 指令的格式是 $var in list, $var 可以是任何变量名,比如 $length 或者 $name,而 list 是一连串的值,也就是值列表,可以是单值集合或者多值集合或者Map数据类型。
@each 将变量 $var 作用于值列表中的每一个项,然后输出结果,类似js forEach,例如:
- 遍历单值集合:
@each $animal in puma, sea-slug, egret, salamander {
  .#{$animal}-icon {
    background-image: url('/images/#{$animal}.png');
  }
}
- 1
- 2
- 3
- 4
- 5
编译为
.puma-icon {
  background-image: url('/images/puma.png'); }
.sea-slug-icon {
  background-image: url('/images/sea-slug.png'); }
.egret-icon {
  background-image: url('/images/egret.png'); }
.salamander-icon {
  background-image: url('/images/salamander.png'); }
- 1
- 2
- 3
- 4
- 5
- 6
- 7
- 8
- 遍历多值集合:
@each $animal, $color, $cursor in (puma, black, default),
                                  (sea-slug, blue, pointer),
                                  (egret, white, move) {
  .#{$animal}-icon {
    background-image: url('/images/#{$animal}.png');
    border: 2px solid $color;
    cursor: $cursor;
  }
}
- 1
- 2
- 3
- 4
- 5
- 6
- 7
- 8
- 9
编译为
.puma-icon {
  background-image: url('/images/puma.png');
  border: 2px solid black;
  cursor: default; }
.sea-slug-icon {
  background-image: url('/images/sea-slug.png');
  border: 2px solid blue;
  cursor: pointer; }
.egret-icon {
  background-image: url('/images/egret.png');
  border: 2px solid white;
  cursor: move; }
- 1
- 2
- 3
- 4
- 5
- 6
- 7
- 8
- 9
- 10
- 11
- 12
- 遍历Maps:
$list: (
  r: red,
  b: black,
  g: green,
);

@each $key, $value in $list {
  .#{$key}-theme {
    color: $value;
  }
}
- 1
- 2
- 3
- 4
- 5
- 6
- 7
- 8
- 9
- 10
- 11
编译为
.r-theme{
    color: red;
}
.b-theme{
    color: black;
}
.g-theme{
    color: green;
}
- 1
- 2
- 3
- 4
- 5
- 6
- 7
- 8
- 9
2. Maps值获取
通过内置函数map-get
map-get(
m
a
p
,
map,
map,key1,$key2,…):根据给定的 key 值,返回 map 中相关的值,多层传多个key参数
$list: (
  r: red,
  b: (
    y:yellow
  ),
  g: green,
);

map-get($list,"r")//red
map-get($list,"b","y")//yellow
- 1
- 2
- 3
- 4
- 5
- 6
- 7
- 8
- 9
- 10
3. 混合指令@mixin
混合指令(Mixin)用于定义可重复使用的样式,避免了使用无语意的 class,比如 .float-left。混合指令可以包含所有的 CSS 规则,绝大部分 Sass 规则,甚至通过参数功能引入变量,输出多样化的样式。
混合指令的用法是在 @mixin 后添加名称与样式,比如名为 large-text 的混合通过下面的代码定义:
@mixin large-text {
  font: {
    family: Arial;
    size: 20px;
    weight: bold;
  }
  color: #ff0000;
}
- 1
- 2
- 3
- 4
- 5
- 6
- 7
- 8
- 9
混合也需要包含选择器和属性,甚至可以用 & 引用父选择器:
@mixin clearfix {
  display: inline-block;
  &:after {
    content: ".";
    display: block;
    height: 0;
    clear: both;
    visibility: hidden;
  }
  * html & { height: 1px }
}
- 1
- 2
- 3
- 4
- 5
- 6
- 7
- 8
- 9
- 10
- 11
使用 @include 指令引用混合样式,格式是在其后添加混合名称,以及需要的参数(可选):
@mixin sexy-border($color, $width) {
  border: {
    color: $color;
    width: $width;
    style: dashed;
  }
}
p { @include sexy-border(blue, 1in); }
- 1
- 2
- 3
- 4
- 5
- 6
- 7
- 8
编译为
p {
  border-color: blue;
  border-width: 1in;
  border-style: dashed;
   }
- 1
- 2
- 3
- 4
- 5
@conten可以t向混合样式中导入内容,@content类似vue中slot插槽可以先占位,在引用地方插入代码
例如:
@mixin apply-to-ie6-only {
  * html {
    @content;
  }
}
@include apply-to-ie6-only {
  #logo {
    background-image: url(/logo.gif);
  }
}
- 1
- 2
- 3
- 4
- 5
- 6
- 7
- 8
- 9
- 10
编译为
* html #logo {
  background-image: url(/logo.gif);
}
- 1
- 2
- 3
scss实现换肤核心逻辑
回顾完Sass基础用法后,回归正题,接下来是实现换肤核心逻辑:
新建文件handle.scss:
@import "./theme.scss";

//主题遍历生成样式
@mixin theme-foreach {
  @each $theme-name, $theme-map in $themes {
    $theme-map: $theme-map !global;//变量通过!global提升为全局变量,供后续取值使用
    [data-theme="#{$theme-name}"] & {
       //插槽占位
      @content;
    }
  }
}
//获取主题属性值
@function theme-value($key) {
  @return map-get($theme-map, $key);
}

//设置字体颜色
@mixin font-color {
  @include theme-foreach {
    color: theme-value("font-color") !important;
  }
}

//设置边框颜色
@mixin border-color {
  @include theme-foreach {
    border-color: theme-value("border-color") !important;
  }
}

//设置背景颜色
@mixin background-color {
  @include theme-foreach {
    background-color: theme-value("background-color") !important;
  }
}
- 1
- 2
- 3
- 4
- 5
- 6
- 7
- 8
- 9
- 10
- 11
- 12
- 13
- 14
- 15
- 16
- 17
- 18
- 19
- 20
- 21
- 22
- 23
- 24
- 25
- 26
- 27
- 28
- 29
- 30
- 31
- 32
- 33
- 34
- 35
- 36
- 37
- 38
代码分析:
$themes: (
  //红色主题
  red:
    (
      font-color: red,//字体颜色
      border-color: rgb(243, 73, 73),//边框颜色
      background-color:rgb(240, 2, 2),//背景色
    ),
  //绿色主题
  green:
    (
      font-color: green,
      border-color: rgb(16, 218, 16),
      background-color:rgb(38, 110, 38),
    ),
  //蓝色主题
  blue:
    (
      font-color: blue,
      border-color: rgb(23, 23, 175),
      background-color:rgb(18, 18, 94),
    )
);
- 1
- 2
- 3
- 4
- 5
- 6
- 7
- 8
- 9
- 10
- 11
- 12
- 13
- 14
- 15
- 16
- 17
- 18
- 19
- 20
- 21
- 22
- 23
//主题遍历生成样式
@mixin theme-foreach {
  @each $theme-name, $theme-map in $themes {
    $theme-map: $theme-map !global;//变量通过!global提升为全局变量,供后续取值使用
    [data-theme="#{$theme-name}"] & {
       //插槽占位
      @content;
    }
  }
}
- 1
- 2
- 3
- 4
- 5
- 6
- 7
- 8
- 9
- 10
@mixin theme-foreach 通过循环遍历$themes变量,拿到每一种主题的Maps值,Maps值为主题定义的所有css属性值并通过!global提升为全局变量,后续在生成每种主题属性选择器后代样式,编译后类似:
[data-theme="red"] .xxxx{
     ......//占位符
}
[data-theme="green"] .xxxx{
     ......//占位符
}
[data-theme="blue"] .xxxx{
     ......//占位符
}
.....
- 1
- 2
- 3
- 4
- 5
- 6
- 7
- 8
- 9
- 10
其中xxxx用&代入,@include放置在哪个class下xxxx就是哪个class
在每种样式设置混入中调用@mixin theme-foreach
//获取主题属性值
@function theme-value($key) {
  @return map-get($theme-map, $key);
}

//设置字体颜色
@mixin font-color {
  @include theme-foreach {
    color: theme-value("font-color") !important;
  }
}
- 1
- 2
- 3
- 4
- 5
- 6
- 7
- 8
- 9
- 10
- 11
@include 内部代码为占位符内容,上面设置字体颜色编译后等价于
[data-theme="red"] .xxxx{
   color: theme-value("font-color") !important;//占位符
}
[data-theme="green"] .xxxx{
   color: theme-value("font-color") !important;//占位符
}
[data-theme="blue"] .xxxx{
   color: theme-value("font-color") !important;//占位符
}
- 1
- 2
- 3
- 4
- 5
- 6
- 7
- 8
- 9
其中,theme-value(“font-color”)为一个函数
@function theme-value($key) {
  @return map-get($theme-map, $key);
}
- 1
- 2
- 3
返回当前主题Maps内部key对应value值,这就是为啥当前主题Maps要提升为全局变量。
以红色主题为例:
$theme-map值为:
   (
      font-color: red,//字体颜色
      border-color: rgb(243, 73, 73),//边框颜色
      background-color:rgb(240, 2, 2),//背景色
    )
- 1
- 2
- 3
- 4
- 5
map-get( $theme-map, “font-color”)=red
color: theme-value("font-color") !important;//占位符
- 1
将被编译为:
color: red !important;//占位符
- 1
最终调用@mixin font-color将被编译为:
[data-theme="red"] .xxxx{
   color: red !important;//占位符
}
[data-theme="green"] .xxxx{
   color: green !important;//占位符
}
[data-theme="blue"] .xxxx{
   color: blue !important;//占位符
}
- 1
- 2
- 3
- 4
- 5
- 6
- 7
- 8
- 9
ps:注意[data-theme="#{$theme-name}"] &中间有个空格表示后代选择器
页面引用:
<template>
  <div class="container">
     <button class="btn">按钮</button>
     <div class="title">标题</div>
  </div>
</template>

<style lang="scss" scoped>
@import '../../theme/handle.scss';
 .btn{
  margin-left: 20px;
  padding: 4px 10px;
  border-style: solid;
  @include border-color;//设置边框颜色
  @include font-color;//设置字体颜色
}

 .title{
   margin-left: 10px;
  padding: 10px 20px;
  display: inline-block;
  @include background-color;//设置背景色
 }
</style>
- 1
- 2
- 3
- 4
- 5
- 6
- 7
- 8
- 9
- 10
- 11
- 12
- 13
- 14
- 15
- 16
- 17
- 18
- 19
- 20
- 21
- 22
- 23
- 24
动态切换主题
- 设置红色:
<script>
   document.documentElement.setAttribute('data-theme','red')
</script>
- 1
- 2
- 3
效果:

- 设置绿色
<script>
   document.documentElement.setAttribute('data-theme','green')
</script>
- 1
- 2
- 3

- 设置蓝色:
<script>
   document.documentElement.setAttribute('data-theme','blue')
</script>
- 1
- 2
- 3
效果:

应用于UI库样式修改
第三方UI库例如elementUI样式穿透修改或者全局修改一样生效
<template>
  <div class="container">
      <el-button type="primary"> 主题</el-button>
  </div>
</template>
<script>
  document.documentElement.setAttribute('data-theme','red')
</script>
<style lang="scss" scoped>
@import '../../theme/handle.scss';
.container {
   &::v-deep .el-button--primary{
    background-color: #fff;
     @include font-color;
     @include border-color;
   }
}
</style>
- 1
- 2
- 3
- 4
- 5
- 6
- 7
- 8
- 9
- 10
- 11
- 12
- 13
- 14
- 15
- 16
- 17
- 18
效果:

绿色
<script>
  document.documentElement.setAttribute('data-theme','green')
</script>
- 1
- 2
- 3

三、设置主题相关scss为全局变量
每次页面使用都要导入handle.scss很是麻烦,脚手架项目我们完全可以把handle.scss内部混入设置为全局变量
以vue-lic为例:
在vue.config.js添加:
css: {
    loaderOptions: {
      scss: {
        // 根据自己样式文件的位置调整
        prependData: `@import "~@/theme/handle.scss";`,
      },
    },
  }
- 1
- 2
- 3
- 4
- 5
- 6
- 7
- 8

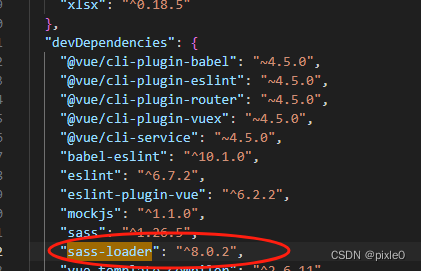
由于 sass-loader 版本不同,loaderOptions 中的 additionalData 的键名也不同
sass-loader v8以下版本, 这个选项名是 “data”
sass-loader v8版本, 这个选项名是 “prependData”
sass-loader v10以上版本, 这个选项名是 “additionalData”
当前sass-loader版本可以打开package.json查看

设置完就可以在页面直接使用handle.scss内部变量、方法、混入:
<style lang="scss" scoped>
  $t:$themes;
 .btn{
  margin-left: 20px;
  padding: 4px 10px;
  border-style: solid;
  @include border-color;//设置边框颜色
  @include font-color;//设置字体颜色
}

 .title{
   margin-left: 10px;
  padding: 10px 20px;
  display: inline-block;
  @include background-color;//设置背景色
 }
</style>
- 1
- 2
- 3
- 4
- 5
- 6
- 7
- 8
- 9
- 10
- 11
- 12
- 13
- 14
- 15
- 16
- 17


