热门标签
热门文章
- 1LINUX TCP/IP内核参数调优(适用于拉大流场景,但延迟、抖动会增大)
- 2butterknife的简单使用_com.jakewharton:butterknife
- 3Unity脚本之场景(Scene)跳转/转换_unity场景跳转代码
- 4019、Python+fastapi,第一个Python项目走向第19步:windows 11 下的pycharm远程连接ubuntu 24.04 服务器
- 5CA-CFAR代码实现
- 65G网络架构_5g网络结构
- 7php获取图片格式(图片后缀)_php 获取图片后缀
- 8C#实战:图像清晰度增强介绍和案例实践_c#使用opencv提高图片清晰度
- 9MyBatis第二章-MyBatis入门程序_mybatis入门程序实验
- 10Python GUI初学者计划1——PySide2和PyQt5库的安装_python的pyqt5的pyside2
当前位置: article > 正文
VTK —— 二、教程六 - 为模型加入3D微件(按下i键隐藏或显示)(附完整源码)
作者:凡人多烦事01 | 2024-05-07 05:04:20
赞
踩
VTK —— 二、教程六 - 为模型加入3D微件(按下i键隐藏或显示)(附完整源码)
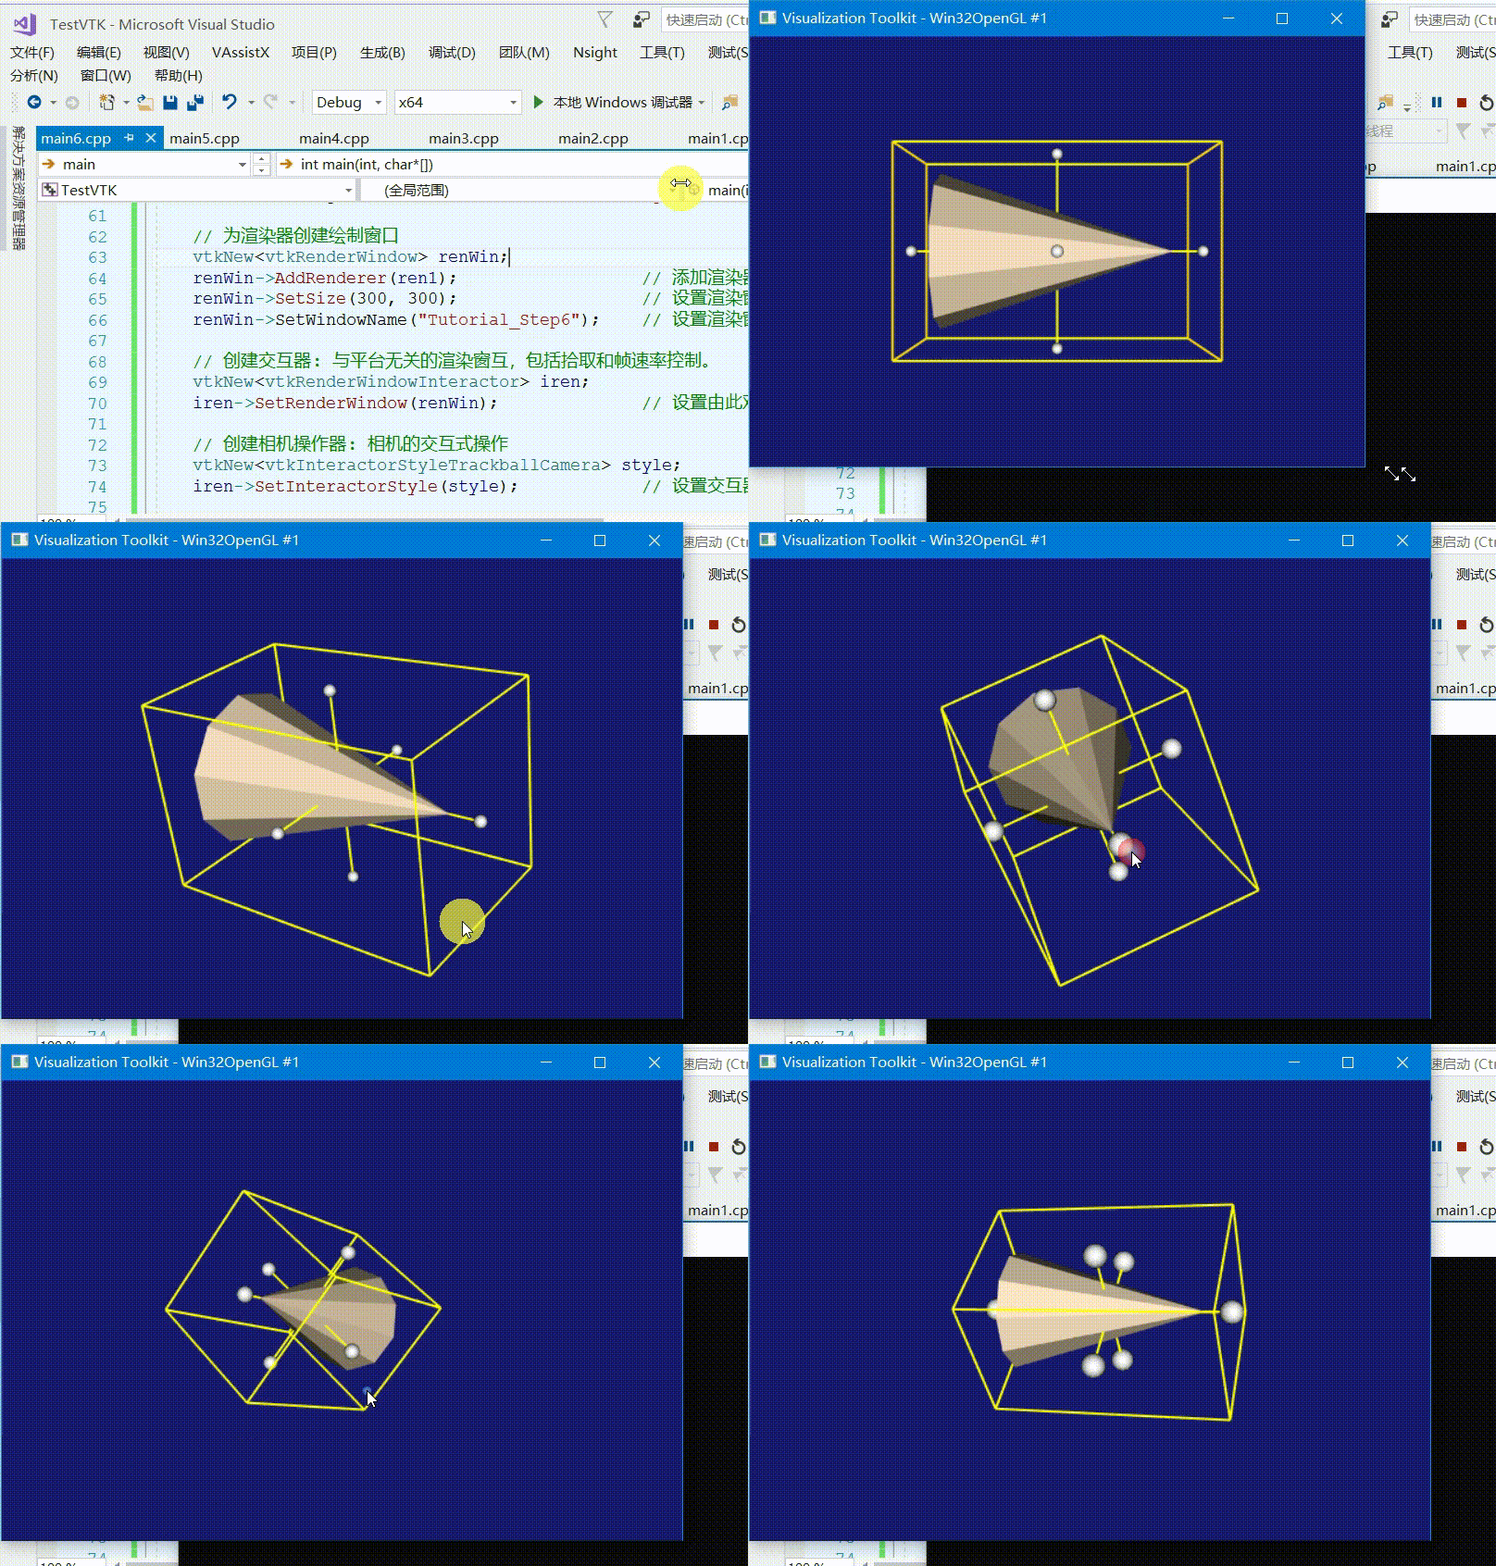
代码效果

本代码编译运行均在如下链接文章生成的库执行成功,若无VTK库则请先参考如下链接编译vtk源码:
VTK —— 一、Windows10下编译VTK源码,并用Vs2017代码测试(附编译流程、附编译好的库、vtk测试源码)
教程描述
本示例演示介绍 3D 微件。3D 微件利用了前面介绍的事件/观察者设计模式。它们通常在场景中具有特定的表示形式,可以使用鼠标和键盘进行交互式选择和操作。当小组件作时,它们又会调用诸如 StartInteractionEvent、InteractionEvent 和 EndInteractionEvent 等事件,这些事件可用于操作小组件嵌入的场景。3D 小部件在上一个示例中设置的事件循环的上下文中工作。
完整源码
#include <vtkActor.h>
#include <vtkBoxWidget.h>
#include <vtkCamera.h>
#include <vtkCommand.h>
#include <vtkConeSource.h>
#include <vtkInteractorStyleTrackballCamera.h>
#include <vtkNamedColors.h>
#include <vtkNew.h>
#include <vtkPolyDataMapper.h>
#include <vtkProperty.h>
#include <vtkRenderWindow.h>
#include <vtkRenderWindowInteractor.h>
#include <vtkRenderer.h>
#include <vtkTransform.h>

namespace {
	//
	// Similar to Tutorial_Step2.cxx, we define a callback for interaction.
	//
	class vtkMyCallback : public vtkCommand
	{
	public:
		static vtkMyCallback* New()
		{
			return new vtkMyCallback;
		}
		void Execute(vtkObject* caller, unsigned long, void*) override
		{
			vtkNew<vtkTransform> t;
			auto widget = reinterpret_cast<vtkBoxWidget*>(caller);
			widget->GetTransform(t);
			widget->GetProp3D()->SetUserTransform(t);
		}
	};
} // namespace

int main(int, char*[])
{
	// 创建VTK命名颜色
	vtkNew<vtkNamedColors> colors;

	// 创建多边形圆锥体
	vtkNew<vtkConeSource> cone;
	cone->SetHeight(3.0);		  // 设置圆锥体的高度
	cone->SetRadius(1.0);		  // 设置圆锥的底半径
	cone->SetResolution(10);	  // 设置用于表示圆锥的刻面数

	// 将多边形数据映射到图形基元映射器
	vtkNew<vtkPolyDataMapper> coneMapper;
	coneMapper->SetInputConnection(cone->GetOutputPort());	// 设置给定输入端口索引的连接

	// 创建渲染场景中的实体(几何体和属性)
	vtkNew<vtkActor> coneActor;
	coneActor->SetMapper(coneMapper);											 // 设置映射器: 将参与者连接到可视化管道末尾
	coneActor->GetProperty()->SetColor(colors->GetColor3d("Bisque").GetData());	 // 设置模型颜色

	// 创建渲染器
	vtkNew<vtkRenderer> ren1;
	ren1->AddActor(coneActor);											// 在渲染器中添加实体
	ren1->SetBackground(colors->GetColor3d("MidnightBlue").GetData());	// 设置渲染屏幕背景色

	// 为渲染器创建绘制窗口
	vtkNew<vtkRenderWindow> renWin;
	renWin->AddRenderer(ren1);					// 添加渲染器
	renWin->SetSize(300, 300);					// 设置渲染窗口的大小
	renWin->SetWindowName("Tutorial_Step6");	// 设置渲染窗口名称

	// 创建交互器: 与平台无关的渲染窗互,包括拾取和帧速率控制。
	vtkNew<vtkRenderWindowInteractor> iren;
	iren->SetRenderWindow(renWin);				// 设置由此对象控制的渲染窗口

	// 创建相机操作器: 相机的交互式操作
	vtkNew<vtkInteractorStyleTrackballCamera> style;
	iren->SetInteractorStyle(style);			// 设置交互器的操作模式

	// 创建正交六面体3D小部件
	vtkNew<vtkBoxWidget> boxWidget;
	boxWidget->SetInteractor(iren);				// 此方法用于将小组件与渲染窗互器相关联。
	boxWidget->SetPlaceFactor(1.25);			// 设置一个表示放置时小部件缩放比例的因子
	boxWidget->GetOutlineProperty()->SetColor(colors->GetColor3d("Gold").GetData());	// 设置颜色
	boxWidget->SetProp3D(coneActor);			// 指定要放置小部件的vtkProp3D。
	boxWidget->PlaceWidget();					// 此方法用于初始放置小部件
	vtkNew<vtkMyCallback> callback;				// 添加观察者
	boxWidget->AddObserver(vtkCommand::InteractionEvent, callback);						// 添加观察者
	boxWidget->On();							// 按下'i'键,隐藏或显示(on默认显示)

	// 初始化交互器,准备处理事件并将Enabled标志设置为true
	iren->Initialize();
	// 启动交互器事件循环
	iren->Start();

	return EXIT_SUCCESS;
}
- 1
- 2
- 3
- 4
- 5
- 6
- 7
- 8
- 9
- 10
- 11
- 12
- 13
- 14
- 15
- 16
- 17
- 18
- 19
- 20
- 21
- 22
- 23
- 24
- 25
- 26
- 27
- 28
- 29
- 30
- 31
- 32
- 33
- 34
- 35
- 36
- 37
- 38
- 39
- 40
- 41
- 42
- 43
- 44
- 45
- 46
- 47
- 48
- 49
- 50
- 51
- 52
- 53
- 54
- 55
- 56
- 57
- 58
- 59
- 60
- 61
- 62
- 63
- 64
- 65
- 66
- 67
- 68
- 69
- 70
- 71
- 72
- 73
- 74
- 75
- 76
- 77
- 78
- 79
- 80
- 81
- 82
- 83
- 84
- 85
- 86
- 87
- 88
- 89
- 90
- 91
- 92
- 93
笔者
笔者 - jxd
声明:本文内容由网友自发贡献,不代表【wpsshop博客】立场,版权归原作者所有,本站不承担相应法律责任。如您发现有侵权的内容,请联系我们。转载请注明出处:https://www.wpsshop.cn/w/凡人多烦事01/article/detail/547536
推荐阅读
相关标签


