
热门标签
热门文章
- 12024年最全在mac(PyCharm)上搭建树莓派pico Python(micropython)编译环境,2024年最新关于Python开发的面试经验总结_pycharm micropython
- 2干货 | 10分钟带你彻底了解column generation(列生成)算法的原理附java代码
- 3SQL Server远程连接的设置_sqlserver远程连接设置
- 4数据库的主流技术概述_主流数据库技术
- 5(一)从零搭建通用管理系统后台SpringBoot+Vue详细流程——开发环境搭建_springboot+vue 项目开发环境搭建
- 6统计思维如何帮助大数据应用从人工走向智能?(下)
- 7技术沟通的4个技巧
- 8《淘宝技术这十年》读书笔记 (三). 创造技术TFS和Tair
- 9如何完美解决升级 IntelliJ IDEA 最新版之后遇到 Git 记住密码功能失效的问题_idea git remember失效的问题
- 10Linux Deploy Ubuntu 安装JDK MYSQL TOMCAT_骁龙820 ubuntu
当前位置: article > 正文
Elasticsearch 7.13.2 多节点集群(含配置xpack及创建设置证书和私钥)安装部署指南_es集群配置xpack
作者:在线问答5 | 2024-07-18 09:02:12
赞
踩
es集群配置xpack
一、兼容性检查
1.1 操作系统兼容性
elasticsearch不同版本对操作系统有兼容性要求,可参照如下官方链接查看ES和操作系统兼容需求列表。
产品和操作系统: https://www.elastic.co/cn/support/matrix#matrix_os
1.2 JVM兼容性
elasticsearch不同版本对JVM有兼容性要求,可参照如下官方链接查看ES和JVM兼容需求列表。
产品和JVM: https://www.elastic.co/cn/support/matrix#matrix_jvm
二、环境准备
2.1 环境列表
| 服务器IP | 主机名称 | 角色 | 端口号 | 操作系统版本 |
|---|---|---|---|---|
| 10.110.7.39 | xsky-node1 | master | 9200、9201 | CentOS Linux release 7.9.2009 (Core) |
| 10.110.7.40 | xsky-node2 | master | 9200、9201 | CentOS Linux release 7.9.2009 (Core) |
| 10.110.7.41 | xsky-node3 | master | 9200、9201 | CentOS Linux release 7.9.2009 (Core) |
2.2 关闭防火墙
- -- root 用户执行,所有节点
- systemctl stop firewalld && systemctl disable firewalld
- systemctl status firewalld
2.3 设置内核参数
- -- root 用户执行,所有节点
-
- sed -e '/^vm.max_map_count/d' \
- -i.bak \
- /etc/sysctl.conf; \
- sed -e '$a vm.max_map_count=655360' \
- -i.bak \
- /etc/sysctl.conf; \
- sed -e '/^* soft nofile/d' \
- -e '/^* hard nofile/d' \
- -e '/^elasticsearch soft nofile/d' \
- -e '/^elasticsearch hard nofile/d' \
- -e '/^* soft memlock/d' \
- -e '/^* hard memlock/d' \
- -e '/^elasticsearch soft memlock/d' \
- -e '/^elasticsearch hard memlock/d' \
- -i.bak \
- /etc/security/limits.conf; \
- sed -e '$a * soft nofile 655350' \
- -e '$a * hard nofile 655350' \
- -e '$a elasticsearch soft nofile 655350' \
- -e '$a elasticsearch hard nofile 655350' \
- -e '$a * soft memlock unlimited' \
- -e '$a * hard memlock unlimited' \
- -e '$a elasticsearch soft memlock unlimited' \
- -e '$a elasticsearch hard memlock unlimited' \
- -i.bak \
- /etc/security/limits.conf; \
-
- sysctl -p

2.4 关闭交换分区
- -- root 用户执行,所有节点
- swapoff -a;
-
- # 注释/etc/fstab文件swap信息
- # /dev/mapper/centos-swap swap swap defaults 0 0
2.5 安装JDK
- # root 用户执行,所有节点
- wget https://download.java.net/openjdk/jdk11/ri/openjdk-11+28_linux-x64_bin.tar.gz
- tar -zxvf openjdk-11+28_linux-x64_bin.tar.gz
- chown -R root:root /usr/java
-
- # 编辑/etc/profile文件,文件末尾添加如下内容
- export JAVA_HOME=/usr/java/jdk-11
- export ES_JAVA_HOME=/usr/java/jdk-11
- export PATH=$ES_JAVA_HOME/bin:$PATH
- export PATH=$JAVA_HOME/bin:$PATH
-
- # 执行source /etc/profile使其生效
2.6 创建用户
- # elasticsearch 7启动需要使用普通用户
- # 使用root用户创建esuser用户
- groupadd esuser
- useradd -g esuser esuser
2.7 创建目录
- # 使用root用户,所有节点都操作
- # 创建存放数据及日志目录
- # 生产环境建议单独挂载目录
- mkdir -p /path/to
- chown -R esuser:esuser /path
三、安装部署elasticsearch
3.1 下载二进制安装包
- # esuser用户
- mkdir /home/esuser/deploy
- wget https://artifacts.elastic.co/downloads/elasticsearch/elasticsearch-7.13.2-linux-x86_64.tar.gz /home/soft
- tar -zxvf /home/soft/elasticsearch-7.13.2-linux-x86_64.tar.gz -C /home/esuser/deploy
- chown -R esuser:esuser /home/esuser/deploy
- su - esuser
- mv /home/esuser/deploy/elasticsearch-7.13.2 /home/esuser/deploy/elasticsearch-7.13.2-9300
- cp -a /home/esuser/deploy/elasticsearch-7.13.2-9300 /home/esuser/deploy/elasticsearch-7.13.2-9301
3.2 配置elasticsearch.yml
分别在每个节点配置9300和9301两个目录elasticsearch.yml文件,内容分别如下:
9300目录elasticsearch.yml
- -- esuser用户,所有节点
- -- 注意每个节点需该对应配置文件信息
- cd elasticsearch-7.13.2-9300/config
-
- cat elasticsearch.yml 内容如下(过滤#)
- # ======================== Elasticsearch Configuration =========================
- cluster.name: es-cluster
- # ------------------------------------ Node ------------------------------------
- node.name: node-7.39-9300 # node.name要根据对应节点进行修改,不能相同
- node.attr.rack: r1
- node.attr.type: hot
- node.master: true
- node.data: true
- node.ingest: false
- node.ml: false
- cluster.remote.connect: false
- thread_pool.write.queue_size: 1000
- # ----------------------------------- Paths ------------------------------------
- path.data: /path/to/data-9300
- path.logs: /path/to/logs-9300
- # ----------------------------------- Memory -----------------------------------
- bootstrap.memory_lock: true
- bootstrap.system_call_filter: false
- # ---------------------------------- Network -----------------------------------
- network.host: 10.110.7.39 # network.host要和物理服务器IP对应,不能相同
- http.port: 9200
- transport.tcp.port: 9300
- # --------------------------------- Discovery ----------------------------------
- cluster.initial_master_nodes: ["node-7.39-9300", "node-7.39-9301", "node-7.40-9300", "node-7.40-9301", "node-7.41-9300", "node-7.41-9301"]
- discovery.zen.ping.unicast.hosts: ["10.110.7.39:9300","10.110.7.39:9301", "10.110.7.40:9300","10.110.7.40:9301", "10.110.7.41:9300","10.110.7.41:9301"]
- discovery.zen.minimum_master_nodes: 3
- discovery.zen.fd.ping_timeout: 60s
- discovery.zen.fd.ping_retries: 3
- discovery.zen.fd.ping_interval: 10s
- # ---------------------------------- Gateway -----------------------------------
- # ---------------------------------- Various -----------------------------------
- xpack.security.enabled: true
- xpack.security.transport.ssl.enabled: true
- xpack.security.transport.ssl.verification_mode: certificate
- xpack.security.transport.ssl.keystore.path: certs/elastic-certificates.p12
- xpack.security.transport.ssl.truststore.path: certs/elastic-certificates.p12
- xpack.security.http.ssl.supported_protocols: [ "TLSv1.3", "TLSv1.2", "TLSv1.1", "TLSv1" ]
- http.cors.enabled: true
- http.cors.allow-origin: "*"
- http.cors.allow-headers: Authorization,X-Requested-With,Content-Length,Content-Type
- http.max_content_length: 1000mb
- action.destructive_requires_name: true
- xpack.security.audit.enabled: true
- xpack.security.audit.logfile.events.exclude: ["access_granted"]
- xpack:
- security:
- authc:
- realms:
- native:
- native11:
- order: 0
- ldap.ldap1:
- order: 1
- url: ["ldap://authldap.vemic.com:389","ldap://ldap-proxy.vemic.com:389"]
- cache:
- ttl: 60m
- user_dn_templates:
- - "cn={0},cn=users,dc=xxx,dc=com"
- group_search:
- base_dn: "cn=users,dc=focuschina,dc=com"
- unmapped_groups_as_roles: false
- xpack.notification.email:
- default_account: 110
- account:
- 110:
- profile: standard
- smtp:
- auth: true
- host: 192.168.16.190
- user: 110@xxx.com
9301目录elasticsearch.yml
- -- 注意每个节点需该对应配置文件信息
- cd elasticsearch-7.13.2-9301/config
-
- # ======================== Elasticsearch Configuration =========================
- cluster.name: es-cluster
- # ------------------------------------ Node ------------------------------------
- node.name: node-7.39-9301 # node.name要根据节点进行对应修改
- node.attr.rack: r1
- node.attr.type: hot
- node.master: true
- node.data: true
- node.ingest: false
- node.ml: false
- cluster.remote.connect: false
- thread_pool.write.queue_size: 1000
- # ----------------------------------- Paths ------------------------------------
- path.data: /path/to/data-9300
- path.logs: /path/to/logs-9300
- # ----------------------------------- Memory -----------------------------------
- bootstrap.memory_lock: true
- bootstrap.system_call_filter: false
- # ---------------------------------- Network -----------------------------------
- network.host: 10.110.7.39 # network.host要和物理服务器IP对应
- http.port: 9201
- transport.tcp.port: 9301
- # --------------------------------- Discovery ----------------------------------
- cluster.initial_master_nodes: ["node-7.39-9300", "node-7.39-9301", "node-7.40-9300", "node-7.40-9301", "node-7.41-9300", "node-7.41-9301"]
- discovery.zen.ping.unicast.hosts: ["10.110.7.39:9300","10.110.7.39:9301", "10.110.7.40:9300","10.110.7.40:9301", "10.110.7.41:9300","10.110.7.41:9301"]
- discovery.zen.minimum_master_nodes: 3
- discovery.zen.fd.ping_timeout: 60s
- discovery.zen.fd.ping_retries: 3
- discovery.zen.fd.ping_interval: 10s
- # ---------------------------------- Gateway -----------------------------------
- # ---------------------------------- Various -----------------------------------
- xpack.security.enabled: true
- xpack.security.transport.ssl.enabled: true
- xpack.security.transport.ssl.verification_mode: certificate
- xpack.security.transport.ssl.keystore.path: certs/elastic-certificates.p12
- xpack.security.transport.ssl.truststore.path: certs/elastic-certificates.p12
- xpack.security.http.ssl.supported_protocols: [ "TLSv1.3", "TLSv1.2", "TLSv1.1", "TLSv1" ]
- http.cors.enabled: true
- http.cors.allow-origin: "*"
- http.cors.allow-headers: Authorization,X-Requested-With,Content-Length,Content-Type
- http.max_content_length: 1000mb
- action.destructive_requires_name: true
- xpack.security.audit.enabled: true
- xpack.security.audit.logfile.events.exclude: ["access_granted"]
- xpack:
- security:
- authc:
- realms:
- native:
- native11:
- order: 0
- ldap.ldap1:
- order: 1
- url: ["ldap://authldap.vemic.com:389","ldap://ldap-proxy.vemic.com:389"]
- cache:
- ttl: 60m
- user_dn_templates:
- - "cn={0},cn=users,dc=xxx,dc=com"
- group_search:
- base_dn: "cn=users,dc=focuschina,dc=com"
- unmapped_groups_as_roles: false
- xpack.notification.email:
- default_account: 110
- account:
- 110:
- profile: standard
- smtp:
- auth: true
- host: 192.168.16.190
- user: 110@xxx.com
3.2 配置jvm.options
分别配置9300和9301两个目录jvm.options文件,内容如下:
- -Xms8g
- -Xmx8g
-
- -XX:+UseConcMarkSweepGC
- -XX:CMSInitiatingOccupancyFraction=75
- -XX:+UseCMSInitiatingOccupancyOnly
-
- -Des.networkaddress.cache.ttl=60
- -Des.networkaddress.cache.negative.ttl=10
- -XX:+AlwaysPreTouch
- -Xss1m
- -Djava.awt.headless=true
- -Dfile.encoding=UTF-8
- -Djna.nosys=true
- -XX:-OmitStackTraceInFastThrow
- -Dio.netty.noUnsafe=true
- -Dio.netty.noKeySetOptimization=true
- -Dio.netty.recycler.maxCapacityPerThread=0
- -Dlog4j.shutdownHookEnabled=false
- -Dlog4j2.disable.jmx=true
- -Djava.io.tmpdir=${ES_TMPDIR}
- -XX:+HeapDumpOnOutOfMemoryError
- -XX:HeapDumpPath=data
- -XX:ErrorFile=logs/hs_err_pid%p.log
-
- 8:-XX:+PrintGCDetails
- 8:-XX:+PrintGCDateStamps
- 8:-XX:+PrintTenuringDistribution
- 8:-XX:+PrintGCApplicationStoppedTime
- 8:-Xloggc:logs/gc.log
- 8:-XX:+UseGCLogFileRotation
- 8:-XX:NumberOfGCLogFiles=32
- 8:-XX:GCLogFileSize=64m
-
- 9-:-Xlog:gc*,gc+age=trace,safepoint:file=logs/gc.log:utctime,pid,tags:filecount=32,filesize=64m
- 9-:-Djava.locale.providers=COMPAT
-
- 10-:-XX:UseAVX=2
3.3 开启安全认证
3.3.1 生成节点证书
– 只需在一个节点生成凭证即可
3.3.1.1 创建证书办法机构CA
- # esuser用户操作,在其中一节点操作
- cd /home/esuser/deploy/elasticsearch-7.13.2-9300
- [esuser@xsky-node1 elasticsearch-7.13.2-9300]$ ./bin/elasticsearch-certutil ca
- This tool assists you in the generation of X.509 certificates and certificate
- signing requests for use with SSL/TLS in the Elastic stack.
-
- The 'ca' mode generates a new 'certificate authority'
- This will create a new X.509 certificate and private key that can be used
- to sign certificate when running in 'cert' mode.
-
- Use the 'ca-dn' option if you wish to configure the 'distinguished name'
- of the certificate authority
-
- By default the 'ca' mode produces a single PKCS#12 output file which holds:
- * The CA certificate
- * The CA's private key
- If you elect to generate PEM format certificates (the -pem option), then the output will
- be a zip file containing individual files for the CA certificate and private key
-
- Please enter the desired output file [elastic-stack-ca.p12]: # 按回车
- Enter password for elastic-stack-ca.p12 : # 按回车
-
- # 该命令默认在当前目录生成elastic-stack-ca.p12 单个证书文件,该文件是PKCS#12密钥库
- # 其中包含CA的公共证书和用于对每个节点的证书签名的私钥
3.3.1.2 生成证书和私钥
- # esuser用户操作,在其中一节点操作
- [esuser@xsky-node1 elasticsearch-7.13.2-9300]$ ./bin/elasticsearch-certutil cert --ca elastic-stack-ca.p12
- This tool assists you in the generation of X.509 certificates and certificate
- signing requests for use with SSL/TLS in the Elastic stack.
-
- The 'cert' mode generates X.509 certificate and private keys.
- * By default, this generates a single certificate and key for use
- on a single instance.
- * The '-multiple' option will prompt you to enter details for multiple
- instances and will generate a certificate and key for each one
- * The '-in' option allows for the certificate generation to be automated by describing
- the details of each instance in a YAML file
-
- * An instance is any piece of the Elastic Stack that requires an SSL certificate.
- Depending on your configuration, Elasticsearch, Logstash, Kibana, and Beats
- may all require a certificate and private key.
- * The minimum required value for each instance is a name. This can simply be the
- hostname, which will be used as the Common Name of the certificate. A full
- distinguished name may also be used.
- * A filename value may be required for each instance. This is necessary when the
- name would result in an invalid file or directory name. The name provided here
- is used as the directory name (within the zip) and the prefix for the key and
- certificate files. The filename is required if you are prompted and the name
- is not displayed in the prompt.
- * IP addresses and DNS names are optional. Multiple values can be specified as a
- comma separated string. If no IP addresses or DNS names are provided, you may
- disable hostname verification in your SSL configuration.
-
- * All certificates generated by this tool will be signed by a certificate authority (CA)
- unless the --self-signed command line option is specified.
- The tool can automatically generate a new CA for you, or you can provide your own with
- the --ca or --ca-cert command line options.
-
- By default the 'cert' mode produces a single PKCS#12 output file which holds:
- * The instance certificate
- * The private key for the instance certificate
- * The CA certificate
- If you specify any of the following options:
- * -pem (PEM formatted output)
- * -keep-ca-key (retain generated CA key)
- * -multiple (generate multiple certificates)
- * -in (generate certificates from an input file)
- then the output will be be a zip file containing individual certificate/key files
-
- Enter password for CA (elastic-stack-ca.p12) : # 按回车
- Please enter the desired output file [elastic-certificates.p12]: # 按回车
- Enter password for elastic-certificates.p12 : # 按回车
-
- Certificates written to /home/esuser/deploy/elasticsearch-7.13.2-9300/elastic-certificates.p12
-
- This file should be properly secured as it contains the private key for
- your instance.
-
- This file is a self contained file and can be copied and used 'as is'
- For each Elastic product that you wish to configure, you should copy
- this '.p12' file to the relevant configuration directory
- and then follow the SSL configuration instructions in the product guide.
-
- For client applications, you may only need to copy the CA certificate and
- configure the client to trust this certificate.
-
- # 命令执行完后会在当前目录生成elastic-certificates.p12文件,此文件是各个节点通信凭证
3.3.1.3 移动凭证到指定目录
- # esuser用户,每个节点都需操作
- # 创建目录
- mkdir ~$ES_HOME/config/certs
-
- # 移动凭证到指定目录
- mv elastic-certificates.p12 ~$ES_HOME/config/certs
- mv elastic-stack-ca.p12 ~$ES_HOME/config/certs
-
- # 设置权限
- chmod 777 ~$ES_HOME/config/certs/elastic*.p12
3.3.2 拷贝文件
- # 当以上操作完成后,我们可以将在10.110.7.39上的deploy打包拷贝到其它物理服务器,并对每台物理服务器上的elasticsearch.yml文件进行对应修改
- # 只需调整 node.name、network.host,要分别和当前节点对应
- [root@xsky-node1 ~]# su - esuser
- [esuser@xsky-node1 ~]$ tar -cf deploy.tar ./deploy
- [esuser@xsky-node1 ~]$ scp deploy.tar 10.110.7.40:/home/esuser
- [esuser@xsky-node1 ~]$ scp deploy.tar 10.110.7.41:/home/esuser
-
- # 然后分别使用esuser用户在10.110.7.40/41解压deploy.tar,修改对应节点的elasticsearch.yml文件
3.3.3 启动验证
- -- 10.110.7.39
- [root@xsky-node1 ~]# su esuser
- [esuser@xsky-node1 root]$ cd /home/esuser/deploy
- [esuser@xsky-node1 deploy]$ ./elasticsearch-7.13.2-9300/bin/elasticsearch
- [esuser@xsky-node1 deploy]$ ./elasticsearch-7.13.2-9301/bin/elasticsearch
-
- -- 10.110.7.40
- [root@xsky-node1 ~]# su esuser
- [esuser@xsky-node2 root]$ cd /home/esuser/deploy
- [esuser@xsky-node2 deploy]$ ./elasticsearch-7.13.2-9300/bin/elasticsearch
- [esuser@xsky-node2 deploy]$ ./elasticsearch-7.13.2-9301/bin/elasticsearch
-
- -- 10.110.7.41
- [root@xsky-node1 ~]# su esuser
- [esuser@xsky-node3 root]$ cd /home/esuser/deploy
- [esuser@xsky-node3 deploy]$ ./elasticsearch-7.13.2-9300/bin/elasticsearch
- [esuser@xsky-node3 deploy]$ ./elasticsearch-7.13.2-9301/bin/elasticsearch
此时,待启动日志里不再报 master not discovered yet, this node has not previously joined a bootstrapped (v7+) cluster,其它节点已加入集群,再进行设置密码操作。
3.3.4 设置密码
使用esuser用户,只需在其中一个节点执行
- # esuser用户
- [root@xsky-node1 ~]# su - esuser
- [esuser@xsky-node1 elasticsearch-7.13.2-9300]$ ./bin/elasticsearch-setup-passwords interactive
- Initiating the setup of passwords for reserved users elastic,apm_system,kibana,kibana_system,logstash_system,beats_system,remote_monitoring_user.
- You will be prompted to enter passwords as the process progresses.
- Please confirm that you would like to continue [y/N]y # 输入y,按回车
-
-
- Enter password for [elastic]:
- Reenter password for [elastic]:
- Enter password for [apm_system]:
- Reenter password for [apm_system]:
- Enter password for [kibana_system]:
- Reenter password for [kibana_system]:
- Enter password for [logstash_system]:
- Reenter password for [logstash_system]:
- Enter password for [beats_system]:
- Reenter password for [beats_system]:
- Enter password for [remote_monitoring_user]:
- Reenter password for [remote_monitoring_user]:
- Changed password for user [apm_system]
- Changed password for user [kibana_system]
- Changed password for user [kibana]
- Changed password for user [logstash_system]
- Changed password for user [beats_system]
- Changed password for user [remote_monitoring_user]
- Changed password for user [elastic]
-
- # 还可以使用auto命令自动创建密码,如下所示:
- -rw-r--r-- 1 esuser esuser 2710 Jun 11 2021 README.asciidoc
- [esuser@xsky-node1 elasticsearch-7.13.2-9300]$ ./bin/elasticsearch-setup-passwords auto
- Initiating the setup of passwords for reserved users elastic,apm_system,kibana,kibana_system,logstash_system,beats_system,remote_monitoring_user.
- The passwords will be randomly generated and printed to the console.
- Please confirm that you would like to continue [y/N]y
-
-
- Changed password for user apm_system
- PASSWORD apm_system = ACZcJwVF3PO9P0NTKW2g
-
- Changed password for user kibana_system
- PASSWORD kibana_system = 3V9pXFd0X0C7Hwud7dyW
-
- Changed password for user kibana
- PASSWORD kibana = 3V9pXFd0X0C7Hwud7dyW
-
- Changed password for user logstash_system
- PASSWORD logstash_system = 4DNP3g7wljAfT0Arqnka
-
- Changed password for user beats_system
- PASSWORD beats_system = PauMKgnG10iZ5lN8HI9A
-
- Changed password for user remote_monitoring_user
- PASSWORD remote_monitoring_user = tCEzXCmupyZx43GST9Cs
-
- Changed password for user elastic
- PASSWORD elastic = 8sLIYpBKixfvD3KX8DE9
3.3.5 浏览器查看验证
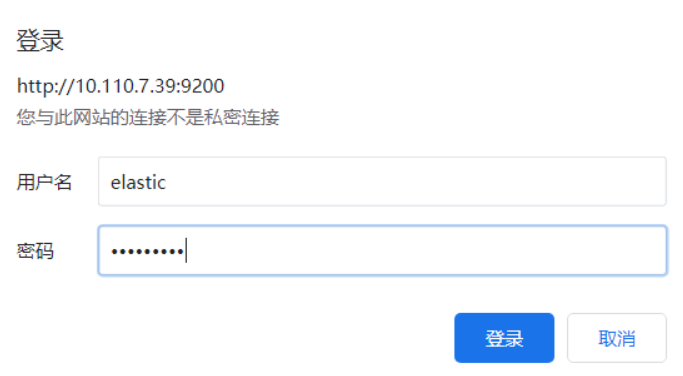
1) 方式一
打开浏览器,输入 http://10.110.7.39:9200, 注意账号是 elastic,而非自己创建的普通用户,密码是设置的密码
输出结果如下:
- {
- "name" : "node-7.39-9300",
- "cluster_name" : "es-cluster",
- "cluster_uuid" : "YJieTmJ4Qa6DjZE4j4Ba1Q",
- "version" : {
- "number" : "7.13.2",
- "build_flavor" : "default",
- "build_type" : "tar",
- "build_hash" : "4d960a0733be83dd2543ca018aa4ddc42e956800",
- "build_date" : "2021-06-10T21:01:55.251515791Z",
- "build_snapshot" : false,
- "lucene_version" : "8.8.2",
- "minimum_wire_compatibility_version" : "6.8.0",
- "minimum_index_compatibility_version" : "6.0.0-beta1"
- },
- "tagline" : "You Know, for Search"
- }
2)方式二
curl -XGET -u elastic:password http://:端口号/_cluster/health?pretty
- [root@xsky-node1 ~]# curl -XGET -u elastic:esuser123 http://10.110.7.39:9200/_cluster/health?pretty
- {
- "cluster_name" : "es-cluster",
- "status" : "green",
- "timed_out" : false,
- "number_of_nodes" : 6,
- "number_of_data_nodes" : 6,
- "active_primary_shards" : 1,
- "active_shards" : 2,
- "relocating_shards" : 0,
- "initializing_shards" : 0,
- "unassigned_shards" : 0,
- "delayed_unassigned_shards" : 0,
- "number_of_pending_tasks" : 0,
- "number_of_in_flight_fetch" : 0,
- "task_max_waiting_in_queue_millis" : 0,
- "active_shards_percent_as_number" : 100.0
- }
声明:本文内容由网友自发贡献,不代表【wpsshop博客】立场,版权归原作者所有,本站不承担相应法律责任。如您发现有侵权的内容,请联系我们。转载请注明出处:https://www.wpsshop.cn/w/在线问答5/article/detail/844655
推荐阅读

相关标签

