- 1OBS直播软件使用NDI协议输入输出_obs ndi
- 2八数码难题——启发算法_给出八数码问题的两种启发式搜索算法的open表、closed表和搜索图g,在纸上画出
- 3绝对能看懂的kmp算法,超清晰多图,一步步详解!_kmp图解
- 4jpsall脚本
- 5Python 生成 JWT(json web token) 及 解析方式_python jwt token解析(1)_python 实现jwt生成
- 6python 情感分析实例_基于Python的情感分析案例
- 7深入浅出分析kafka客户端程序设计 ----- 消费者篇----万字总结_kafka消费者代码
- 8.Net Core3.1 使用Docker 部署在Centos 7_centos的docker安装netapp3.1
- 9Python气象数据分析:风速预报订正、台风预报数据智能订正、机器学习预测风电场的风功率、浅水模型、预测ENSO等_python绘制气象数值预报
- 10Docker拉取镜像失败?connect: connection refused
slowfast训练自己数据---保姆级教程-看这一篇就够了
赞
踩
SlowFast—数据准备
提示:以下是本篇文章正文内容,下面案例可供参考
前情提示:我废了不少时间,足够详细,耐心读完希望可以帮到你。
一、创建一个存放视频的文件夹
注意:我们如果有多个视频,视频的长度一定要保证!!!
比如:1.MP4时长为35s、2.MP4时长为60s、3.MP4时长为55s
那么视频的最大限度为35s.范围在1-35s切割
视频时长不固定容易报错,我们小白选手还是 暂时规规矩矩的入门先
创建一个名叫"cutVideo2"的文件夹,存放视频,我这里放了1个16s的视频
- 1
视频链接:拳击视频
阿里云盘:https://www.aliyundrive.com/s/j8njsmwf2Gp
提取码:1sz0


二、切割视频(我这里切成3s,方便快速训练)
下面是使用ffmpeg将一段长视频裁剪为3秒视频的命令。
ffmpeg -ss 00:00:00.0 -to 00:00:3.0 -i "cutVideo2/1.mp4" "shortVideoTrain/A.mp4"
- 1

生成的3s视频:

三、切割视频为图片
需要将第二步生成的3s视频,切割成图片
切割两次
第一种是,把视频按照每秒1帧来裁剪
这样裁剪的目的是用来标注,因为ava数据集就是1秒1帧的标志。
创建shortVideoTrainCut文件夹

这是一个shell脚本,命令行输入touch cut_one.sh创建脚本,vim cut_one.sh写入以下内容,chmod -R 777 * 给该路径下的所有文件添加权限, ./cut_one.sh执行脚本。
#切割图片,每秒1帧
IN_DATA_DIR="./shortVideoTrain/"
OUT_DATA_DIR="./shortVideoTrainCut/"

if [[ ! -d "${OUT_DATA_DIR}" ]]; then
  echo "${OUT_DATA_DIR} doesn't exist. Creating it.";
  mkdir -p ${OUT_DATA_DIR}
fi

for video in $(ls -A1 -U ${IN_DATA_DIR}/*)
do
  video_name=${video##*/}

  if [[ $video_name = *".webm" ]]; then
    video_name=${video_name::-5}
  else
    video_name=${video_name::-4}
  fi

  out_video_dir=${OUT_DATA_DIR}/${video_name}/
  mkdir -p "${out_video_dir}"

  out_name="${out_video_dir}/${video_name}_%06d.jpg"

  ffmpeg -i "${video}" -r 1 -q:v 1 "${out_name}"
done
- 1
- 2
- 3
- 4
- 5
- 6
- 7
- 8
- 9
- 10
- 11
- 12
- 13
- 14
- 15
- 16
- 17
- 18
- 19
- 20
- 21
- 22
- 23
- 24
- 25
- 26
输出:
1、shortVideoTrainCut/A 2、A/.jpg、.jpg
第二种,把视频按照每秒30帧来裁剪
这样裁剪的目的是,用于slowfast的训练,因为slowfast,在slow流里,1秒会采集到15帧,在fast流里,1秒会采集到2帧。
创建shortVideoFrames文件夹

这是一个shell脚本,命令行输入touch cut_two.sh创建脚本,vim cut_two.sh写入以下内容,chmod -R 777 * 给该路径下的所有文件添加权限, ./cut_two.sh执行脚本。
#切割图片,每秒30帧
IN_DATA_DIR="./shortVideoTrain/"
OUT_DATA_DIR="./shortVideoFrames/"

if [[ ! -d "${OUT_DATA_DIR}" ]]; then
  echo "${OUT_DATA_DIR} doesn't exist. Creating it.";
  mkdir -p ${OUT_DATA_DIR}
fi

for video in $(ls -A1 -U ${IN_DATA_DIR}/*)
do
  video_name=${video##*/}

  if [[ $video_name = *".webm" ]]; then
    video_name=${video_name::-5}
  else
    video_name=${video_name::-4}
  fi

  out_video_dir=${OUT_DATA_DIR}/${video_name}/
  mkdir -p "${out_video_dir}"

  out_name="${out_video_dir}/${video_name}_%06d.jpg"

  ffmpeg -i "${video}" -r 30 -q:v 1 "${out_name}"
done
- 1
- 2
- 3
- 4
- 5
- 6
- 7
- 8
- 9
- 10
- 11
- 12
- 13
- 14
- 15
- 16
- 17
- 18
- 19
- 20
- 21
- 22
- 23
- 24
- 25
- 26
- 27
输出:
1、shortVideoFrames/A
 2、A/.jpg、.jpg(别人的3s视频,是90张,我这里比较奇怪,可能我这个视频帧数又高吧,硬着头皮往下走)


四、使用faster rcnn自动框人(先进行目标检测部分,预标注)
-
搭建环境
这块不会搭环境的话就去查,slowfast搭建环境。比较麻烦(不用相信什么用低版本,我就是用的最高版本搭建的,当然有的版本没有对应包的话,去官网查一下,如果没有,换版本就完了)
我这里直接是直接把我的虚拟环境打包,你们放到自己的虚拟环境下,conda env list 查看一下虚拟环境的路径
放在envs下,激活环境去跑代码,缺啥补啥pip list:这个不要照搬照抄,如果哪个包实在没有装不上,再来参考我的版本(py39) root@2ad67fc2c365:/data/data1/mafeng/data/demo_py/slowfast_data# pip list Package Version Editable project location ----------------------- ------------ ----------------------------------------------------------- absl-py 1.3.0 antlr4-python3-runtime 4.9.3 asttokens 2.1.0 av 10.0.0 backcall 0.2.0 black 22.3.0 brotlipy 0.7.0 cachetools 5.2.0 certifi 2022.9.24 cffi 1.15.1 charset-normalizer 2.0.4 click 8.1.3 cloudpickle 2.2.0 contourpy 1.0.6 cryptography 38.0.1 cycler 0.11.0 decorator 4.4.2 detectron2 0.6 /data/data1/mafeng/data/demo_py/data_demo/detectron2_repo executing 1.2.0 fairscale 0.4.6 filelock 3.8.0 fonttools 4.38.0 future 0.18.2 fvcore 0.1.5 google-auth 2.14.0 google-auth-oauthlib 0.4.6 grpcio 1.50.0 huggingface-hub 0.10.1 hydra-core 1.2.0 idna 3.4 imageio 2.22.3 imageio-ffmpeg 0.4.7 importlib-metadata 5.0.0 iopath 0.1.9 ipython 8.6.0 jedi 0.18.1 joblib 1.2.0 kiwisolver 1.4.4 Markdown 3.4.1 MarkupSafe 2.1.1 matplotlib 3.6.2 matplotlib-inline 0.1.6 mkl-fft 1.3.1 mkl-random 1.2.2 mkl-service 2.4.0 moviepy 1.0.3 mypy-extensions 0.4.3 natsort 8.2.0 networkx 2.8.8 numpy 1.23.3 oauthlib 3.2.2 omegaconf 2.2.3 opencv-python 4.6.0.66 packaging 21.3 pandas 1.5.1 parameterized 0.8.1 parso 0.8.3 pathspec 0.10.1 pexpect 4.8.0 pickleshare 0.7.5 Pillow 9.2.0 pip 22.2.2 platformdirs 2.5.2 portalocker 2.6.0 proglog 0.1.10 prompt-toolkit 3.0.32 protobuf 3.19.6 psutil 5.9.3 ptyprocess 0.7.0 pure-eval 0.2.2 pyasn1 0.4.8 pyasn1-modules 0.2.8 pycocotools 2.0.6 pycparser 2.21 pydot 1.4.2 Pygments 2.13.0 pyOpenSSL 22.0.0 pyparsing 3.0.9 PySocks 1.7.1 python-dateutil 2.8.2 pytorchvideo 0.1.5 pytz 2022.6 PyYAML 6.0 requests 2.28.1 requests-oauthlib 1.3.1 rsa 4.9 scikit-learn 1.1.3 scipy 1.9.3 seaborn 0.12.1 setuptools 59.5.0 simplejson 3.17.6 six 1.16.0 sklearn 0.0 slowfast 1.0 /data/data1/mafeng/data/demo_py/SlowFast-haooooooqi-patch-2 stack-data 0.6.0 tabulate 0.9.0 tensorboard 2.10.1 tensorboard-data-server 0.6.1 tensorboard-plugin-wit 1.8.1 termcolor 2.1.0 threadpoolctl 3.1.0 timm 0.6.11 tomli 2.0.1 torch 1.9.1+cu111 torchaudio 0.9.1 torchvision 0.10.1+cu111 tqdm 4.64.1 traitlets 5.5.0 typing_extensions 4.3.0 urllib3 1.26.12 wcwidth 0.2.5 Werkzeug 2.2.2 wheel 0.37.1 yacs 0.1.8 zipp 3.10.0
- 1
- 2
- 3
- 4
- 5
- 6
- 7
- 8
- 9
- 10
- 11
- 12
- 13
- 14
- 15
- 16
- 17
- 18
- 19
- 20
- 21
- 22
- 23
- 24
- 25
- 26
- 27
- 28
- 29
- 30
- 31
- 32
- 33
- 34
- 35
- 36
- 37
- 38
- 39
- 40
- 41
- 42
- 43
- 44
- 45
- 46
- 47
- 48
- 49
- 50
- 51
- 52
- 53
- 54
- 55
- 56
- 57
- 58
- 59
- 60
- 61
- 62
- 63
- 64
- 65
- 66
- 67
- 68
- 69
- 70
- 71
- 72
- 73
- 74
- 75
- 76
- 77
- 78
- 79
- 80
- 81
- 82
- 83
- 84
- 85
- 86
- 87
- 88
- 89
- 90
- 91
- 92
- 93
- 94
- 95
- 96
- 97
- 98
- 99
- 100
- 101
- 102
- 103
- 104
- 105
- 106
- 107
- 108
- 109
- 110
- 111
- 112
- 113
- 114
- 115
- 116
- 117
- 118
- 119
- 120
虚拟环境路径:

我给兄弟们,压缩了环境,如果先用我的虚拟环境,下载下来直接放在envs下解压,然后激活环境。链接:https://share.weiyun.com/J0WemttJ 密码:ky3ham虚拟环境打包链接
-
下载代码
因为我环境已经搭建好了,所有我就直接下载代码,开始跑了,小伙伴么 ,搭建好环境之后再往下跟。 git clone https://github.com/facebookresearch/detectron2 detectron2_repo- 1
- 2

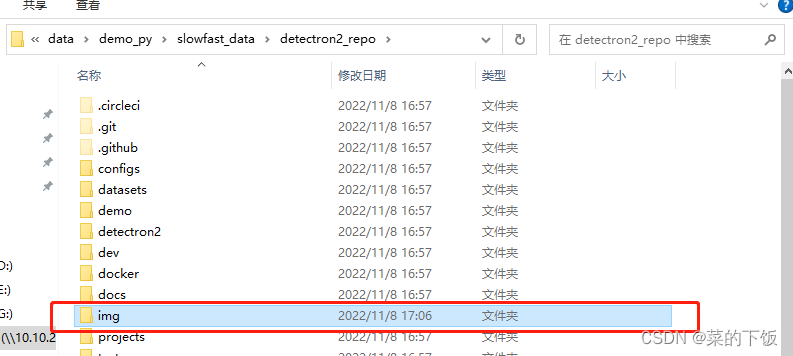
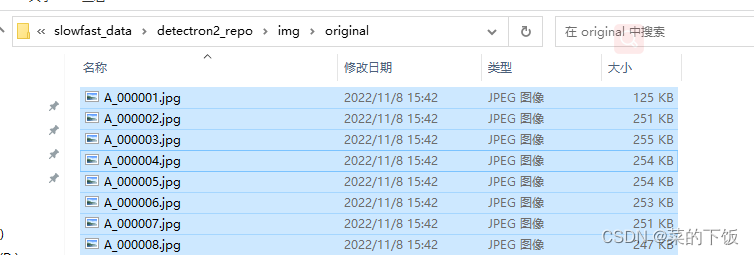
下载好了,进入detectron2_repo这个工程下,创建img文件夹,创建original文件夹,创建detection文件夹,detecion.csv文件,把之前那92张照片拷贝到original下


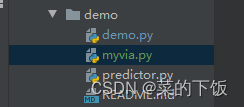
在目录/detectron2_repo/demo/下创建myvia.py这个文件:
代码如下(有注释):#Copyright (c) Facebook, Inc. and its affiliates. import argparse import glob import multiprocessing as mp import os import time import cv2 import tqdm import os from detectron2.config import get_cfg from detectron2.data.detection_utils import read_image from detectron2.utils.logger import setup_logger from predictor import VisualizationDemo import csv import pandas as pd #导入pandas包 import re # constants WINDOW_NAME = "COCO detections" def setup_cfg(args): # load config from file and command-line arguments cfg = get_cfg() # To use demo for Panoptic-DeepLab, please uncomment the following two lines. # from detectron2.projects.panoptic_deeplab import add_panoptic_deeplab_config # noqa # add_panoptic_deeplab_config(cfg) cfg.merge_from_file(args.config_file) cfg.merge_from_list(args.opts) # Set score_threshold for builtin models cfg.MODEL.RETINANET.SCORE_THRESH_TEST = args.confidence_threshold cfg.MODEL.ROI_HEADS.SCORE_THRESH_TEST = args.confidence_threshold cfg.MODEL.PANOPTIC_FPN.COMBINE.INSTANCES_CONFIDENCE_THRESH = args.confidence_threshold cfg.freeze() return cfg def get_parser(): parser = argparse.ArgumentParser(description="Detectron2 demo for builtin configs") parser.add_argument( "--config-file", default="configs/quick_schedules/mask_rcnn_R_50_FPN_inference_acc_test.yaml", metavar="FILE", help="path to config file", ) parser.add_argument("--webcam", action="store_true", help="Take inputs from webcam.") parser.add_argument("--video-input", help="Path to video file.") parser.add_argument( "--input", nargs="+", help="A list of space separated input images; " "or a single glob pattern such as 'directory/*.jpg'", ) parser.add_argument( "--output", help="A file or directory to save output visualizations. " "If not given, will show output in an OpenCV window.", ) parser.add_argument( "--confidence-threshold", type=float, default=0.5, help="Minimum score for instance predictions to be shown", ) parser.add_argument( "--opts", help="Modify config options using the command-line 'KEY VALUE' pairs", default=[], nargs=argparse.REMAINDER, ) return parser if __name__ == "__main__": mp.set_start_method("spawn", force=True) args = get_parser().parse_args() setup_logger(name="fvcore") logger = setup_logger() logger.info("Arguments: " + str(args)) #图片的输入和输出文件夹 imgOriginalPath = './img/original/' imgDetectionPath= './img/detection' # 读取文件下的图片名字 for i,j,k in os.walk(imgOriginalPath): # k 存储了图片的名字 #imgInputPaths用于存储图片完整地址 #使用.sort()防止乱序 k.sort() imgInputPaths = k countI=0 for namek in k: #循环将图片的完整地址加入imgInputPaths中 imgInputPath = imgOriginalPath + namek imgInputPaths[countI]=imgInputPath countI = countI + 1 break #修改args里输入图片的里路径 args.input = imgInputPaths #修改args里输出图片的路径 args.output = imgDetectionPath cfg = setup_cfg(args) demo = VisualizationDemo(cfg) #创建csv csvFile = open("./img/detection.csv", "w+",encoding="gbk") #创建写的对象 CSVwriter = csv.writer(csvFile) #先写入columns_name #写入列的名称 CSVwriter.writerow(["filename","file_size","file_attributes","region_count","region_id","region_shape_attributes","region_attributes"]) #写入多行用CSVwriter #写入多行 #CSVwriter.writerows([[1,a,b],[2,c,d],[3,d,e]]) #csvFile.close() #https://blog.csdn.net/xz1308579340/article/details/81106310?utm_medium=distribute.pc_relevant.none-task-blog-2%7Edefault%7EBlogCommendFromMachineLearnPai2%7Edefault-3.control&dist_request_id=&depth_1-utm_source=distribute.pc_relevant.none-task-blog-2%7Edefault%7EBlogCommendFromMachineLearnPai2%7Edefault-3.control if args.input: if len(args.input) == 1: args.input = glob.glob(os.path.expanduser(args.input[0])) assert args.input, "The input path(s) was not found" for path in tqdm.tqdm(args.input, disable=not args.output): # use PIL, to be consistent with evaluation img = read_image(path, format="BGR") start_time = time.time() predictions,visualized_output = demo.run_on_image(img) #只要检测结果是人的目标结果 mask = predictions["instances"].pred_classes == 0 pred_boxes = predictions["instances"].pred_boxes.tensor[mask] #在路径中正则匹配图片的名称 ImgNameT = re.findall(r'[^\\/:*?"<>|\r\n]+$', path) ImgName = ImgNameT[0] #获取图片大小(字节) ImgSize = os.path.getsize(path) #下面的为空(属性不管) img_file_attributes="{"+"}" #每张图片检测出多少人 img_region_count = len(pred_boxes) #region_id表示在这张图中,这是第几个人,从0开始数 region_id = 0 #region_attributes 为空 img_region_attributes = "{"+"}" #循环图中检测出的人的坐标,然后做修改,以适应via for i in pred_boxes: #将i中的数据类型转化为可以用的数据类型(list) iList = i.cpu().numpy().tolist() #数据取整,并将坐标数据放入到 img_region_shape_attributes = {"\"name\"" : "\"rect\"" , "\"x\"" : int(iList[0]) , "\"y\"" : int(iList[1]) ,"\"width\"" : int(iList[2]-iList[0]) , "\"height\"" : int(iList[3]-iList[1]) } #将信息写入csv中 CSVwriter.writerow([ImgName,ImgSize,'"{}"',img_region_count,region_id,str(img_region_shape_attributes),'"{}"']) region_id = region_id + 1 logger.info( "{}: {} in {:.2f}s".format( path, "detected {} instances".format(len(predictions["instances"])) if "instances" in predictions else "finished", time.time() - start_time, ) ) if args.output: if os.path.isdir(args.output): assert os.path.isdir(args.output), args.output out_filename = os.path.join(args.output, os.path.basename(path)) else: assert len(args.input) == 1, "Please specify a directory with args.output" out_filename = args.output visualized_output.save(out_filename) else: cv2.namedWindow(WINDOW_NAME, cv2.WINDOW_NORMAL) cv2.imshow(WINDOW_NAME, visualized_output.get_image()[:, :, ::-1]) if cv2.waitKey(0) == 27: break # esc to quit #关闭csv csvFile.close()
- 1
- 2
- 3
- 4
- 5
- 6
- 7
- 8
- 9
- 10
- 11
- 12
- 13
- 14
- 15
- 16
- 17
- 18
- 19
- 20
- 21
- 22
- 23
- 24
- 25
- 26
- 27
- 28
- 29
- 30
- 31
- 32
- 33
- 34
- 35
- 36
- 37
- 38
- 39
- 40
- 41
- 42
- 43
- 44
- 45
- 46
- 47
- 48
- 49
- 50
- 51
- 52
- 53
- 54
- 55
- 56
- 57
- 58
- 59
- 60
- 61
- 62
- 63
- 64
- 65
- 66
- 67
- 68
- 69
- 70
- 71
- 72
- 73
- 74
- 75
- 76
- 77
- 78
- 79
- 80
- 81
- 82
- 83
- 84
- 85
- 86
- 87
- 88
- 89
- 90
- 91
- 92
- 93
- 94
- 95
- 96
- 97
- 98
- 99
- 100
- 101
- 102
- 103
- 104
- 105
- 106
- 107
- 108
- 109
- 110
- 111
- 112
- 113
- 114
- 115
- 116
- 117
- 118
- 119
- 120
- 121
- 122
- 123
- 124
- 125
- 126
- 127
- 128
- 129
- 130
- 131
- 132
- 133
- 134
- 135
- 136
- 137
- 138
- 139
- 140
- 141
- 142
- 143
- 144
- 145
- 146
- 147
- 148
- 149
- 150
- 151
- 152
- 153
- 154
- 155
- 156
- 157
- 158
- 159
- 160
- 161
- 162
- 163
- 164
- 165
- 166
- 167
- 168
- 169
- 170
- 171
- 172
- 173
- 174
- 175
- 176
- 177
- 178
- 179
- 180
- 181
- 182
- 183
- 184
- 185
- 186
- 187
- 188
- 189
- 190
- 191
- 192
- 193
- 194
- 195
- 196
- 197
- 198
- 199
- 200
- 201
- 202
- 203
运行:
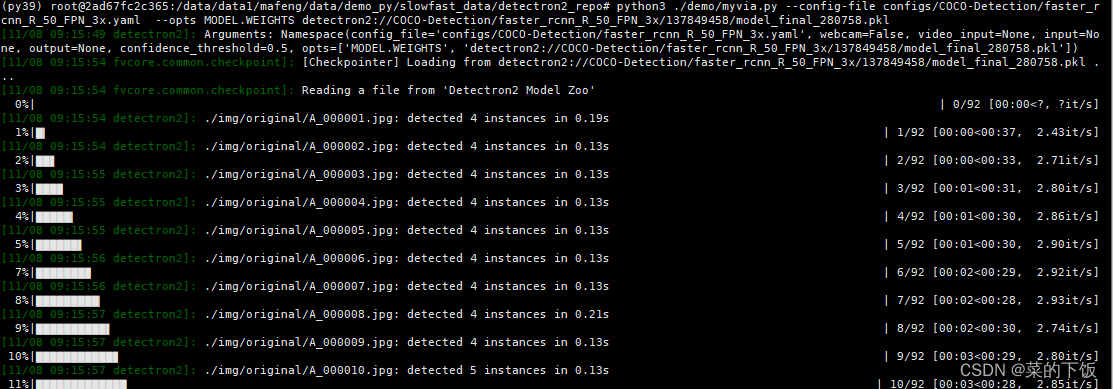
进入到目录:/detectron2_repo中,输入命令:python3 ./demo/myvia.py --config-file configs/COCO-Detection/faster_rcnn_R_50_FPN_3x.yaml --opts MODEL.WEIGHTS detectron2://COCO-Detection/faster_rcnn_R_50_FPN_3x/137849458/model_final_280758.pkl- 1
- 2
开始预标注了。

标注完的结果在这里
虽然检测图里除了人,还检测出了其他类别,但写入到csv中的结果,只写入了人,这个类别

在文件夹detectron2_repo/img/中的detection.csv还不能直接用,要做一点点修改,修改如下:使用文本编辑器打开detection.csv
要做的修改就是将这里面的全部 ’ 去掉(去掉全部的单引号)

-
在via中导入图片(via是网页版本的标注工具)
vai下载地址:https://share.weiyun.com/tRqFq9ZT


