- 1C++迭代器 iterator详解_c++ iterator
- 207代码随想录训练营day07|哈希表part02
- 3基于C++的学生信息管理系统_c++信息管理系统
- 4如何构造linux根文件系统_nsenter.c:(.text.nsenter_main+0x184): undefined re
- 5Pyecharts一文速学-绘制树状图参数详解+Python代码_python绘制树状图
- 6SCons上手教程_scons教程
- 7DOCKER容器中安装JDK1. 8 详细步骤_docker安装jdk1.8
- 8本科学计算机数学吗,计算机科学本科核心课程教材·计算机数学
- 9JavaWeb中Servlet、web应用和web站点的路径细节("/"究竟代表着什么)
- 10统信UOS专业版服务器无人值守安装_uos 无人值守grub参数
【云驻共创】华为云AI之用Python定制我的《本草纲目女孩》_本草钢目程序
赞
踩
前言
近日,《本草纲目》毽子操的视频刷屏网络。公司里更是多了很多刘畊宏女孩,在520到来之际特意奉献这篇文章给大家。如果有心仪的女孩这篇文章可以帮助你哦。
歌词:抬腿!拍腿!,侧边的肥肉咔咔掉,人鱼线马甲线我都要!刘畊宏的男孩女孩看过来。
让我们来用Python定制出心仪的“本草纲目女孩”,敲出魔性的代码舞蹈,520,准备好心仪女孩的舞蹈视频,把这份别出心裁的礼物给TA❤️。
一、华为云ModelArts-Notebook介绍
1.华为云ModelArts-Notebook
ModelArts集成了基于开源的Jupyter Notebook和JupyterLab,可为您提供在线的交互式开发调试工具。您无需关注安装配置,在ModelArts管理控制台直接使用Notebook,编写和调测模型训练代码,然后基于该代码进行模型的训练。
其中,ModelArts还提供了华为自研的分布式训练加速框架MoXing,您可以在Notebook中使用MoXing编写训练脚本,让您代码编写更加高效、代码更加简洁。
1.1 Jupyter Notebook是什么
Jupyter Notebook是一个可以在浏览器中使用的交互式的计算应用程序,该应用程序的所有可见的内容,以笔记本文档表示,包括计算的输入和输出、解释文本、数学、图像和对象的富媒体等表示。因此,Jupyter Notebook可以实现将代码、文字完美结合起来,非常适合从事机器学习、数据分析等数据科学工作的人员。
Jupyter Notebook相关文档:https://docs.jupyter.org/en/latest/
1.2 JupyterLab是什么
JupyterLab是一个交互式的开发环境,是Jupyter Notebook的下一代产品,可以使用它编写Notebook、操作终端、编辑MarkDown文本、打开交互模式、查看csv文件及图片等功能。
JupyterLab相关文档:https://jupyterlab.readthedocs.io/en/stable/
1.3 什么是Moxing
MoXing是华为云ModelArts团队自研的分布式训练加速框架,它构建于开源的深度学习引擎TensorFlow、MXNet、PyTorch、Keras之上。相对于TensorFlow和MXNet原生API而言,MoXing API让模型代码的编写更加简单,允许用户只需要关心数据输入(input_fn)和模型构建(model_fn)的代码,即可实现任意模型在多GPU和分布式下的高性能运行,降低了TensorFlow和MXNet的使用门槛。另外,MoXing-TensorFlow还将支持自动超参选择和自动模型结构搜索,用户无需关心超参和模型结构,做到模型全自动学习。
Moxing相关文档:https://github.com/huaweicloud/ModelArts-Lab/tree/master/docs/moxing_api_doc
2.Python-Opencv
Python由荷兰数学和计算机科学研究学会的吉多·范罗苏姆于1990年代初设计,作为一门叫做ABC语言的替代品。Python提供了高效的高级数据结构,还能简单有效地面向对象编程。Python语法和动态类型,以及解释型语言的本质,使它成为多数平台上写脚本和快速开发应用的编程语言,随着版本的不断更新和语言新功能的添加,逐渐被用于独立的、大型项目的开发。
Python解释器易于扩展,可以使用C语言或C++(或者其他可以通过C调用的语言)扩展新的功能和数据类型。Python也可用于可定制化软件中的扩展程序语言。Python丰富的标准库,提供了适用于各个主要系统平台的源码或机器码。
OpenCV用C++语言编写,它具有C++,Python,Java和MATLAB接口,并支持Windows,Linux,Android和Mac OS,OpenCV主要倾向于实时视觉应用,并在可用时利用MMX和SSE指令,如今也提供对于C#、Ch、Ruby,GO的支持。
opencv-python的github网址:https://pypi.org/project/opencv-python/
OpenCV官网:https://opencv.org/
二、本地案例实现Python定制我的《本草纲目女孩》
1.案例实现流程
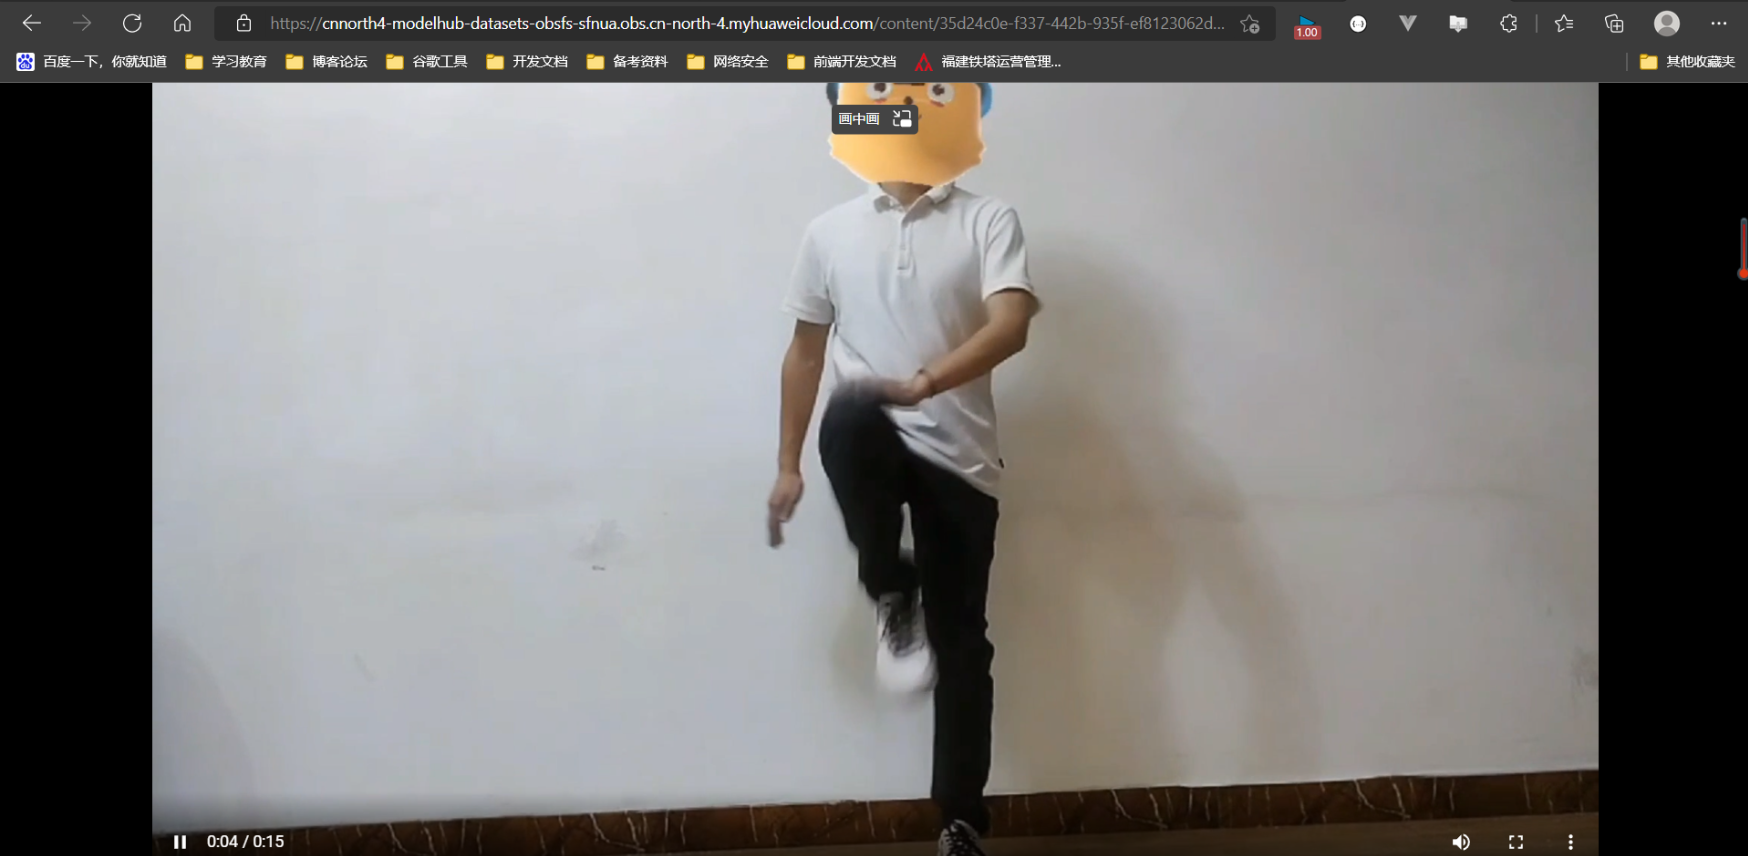
众所周知,视频是由一帧帧图像构成,Opencv处理视频图像信息的原理就是将视频转为一帧帧图像,处理完图像后再转换为视频。
用Python实现案例流程如下:

2.案例环境部署
2.1 本机环境
- vs2022
- anaconda(已经包括opencv和PIL)
- python
2.2 安装对应的anaconda包
anaconda这是一个非常常用的python包集成管理工具,其中预安装了很多python库,使得我们不需要去手动安装各种的第三方库,我们知道自己取手动安装的过程中,很容易就会遇到一些报错,解决起来也非常的麻烦。
anaconda官网:https://www.anaconda.com/products/distribution#Downloads

下载完软件包一路点击安装就行了,安装成功后会出现如下界面。

查看是否安装成功命令:conda --version

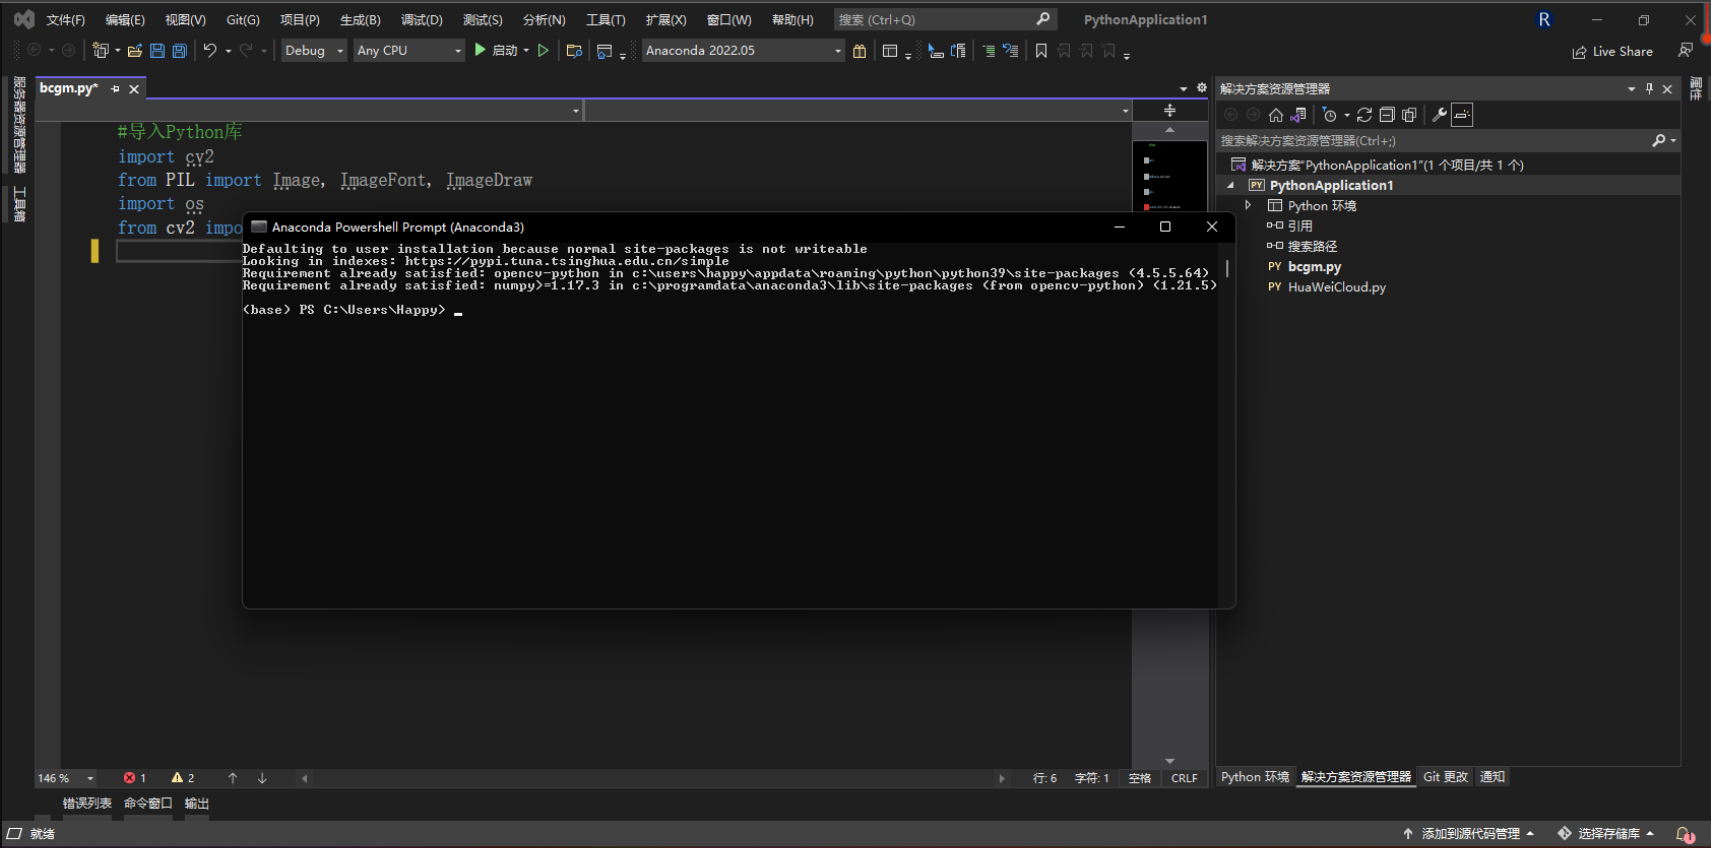
2.3 安装opencv-python
进入anaconda控制台输入如下命令:
pip install opencv-python
- 1
3.案例实现代码
本案例的实现过程主要分为以下几步:
1. 导入数据
2. 导入库函数
3. 将视频转化为图像帧
4. 对图片帧进行ASCII码的转换
5. 将转换好的图片帧合成视频
- 1
- 2
- 3
- 4
- 5
3.1 导入数据
3.2 导入库函数
#导入Python库
import cv2
from PIL import Image,ImageFont,ImageDraw
import os
from cv2 import VideoWriter, VideoWriter_fourcc, imread, resize
- 1
- 2
- 3
- 4
- 5
3.3 将视频转化为图像帧
#将视频转换为图片存入目标文件夹

def video_to_pic(vp):
    number = 0

    # 判断载入的视频是否可以打开
    if vp.isOpened():

        #r:布尔型 (True 或者False),代表有没有读取到图片,frame:表示截取到的一帧的图片的数据,是个三维数组
        r,frame = vp.read()

        #判断文件夹是否存在,不存在的话则新建文件夹
        if not os.path.exists('cache_pic'):
            os.mkdir('cache_pic')
        os.chdir('cache_pic')

    else:
        r = False

    #遍历视频,并将每一帧图片写入文件夹
    while r:
        number += 1
        cv2.imwrite(str(number)+'.jpg',frame)
        r,frame = vp.read()

    print('\n由视频一共生成了{}张图片!'.format(number))

    # 修改当前工作目录至主目录
    os.chdir("..")
    return number
- 1
- 2
- 3
- 4
- 5
- 6
- 7
- 8
- 9
- 10
- 11
- 12
- 13
- 14
- 15
- 16
- 17
- 18
- 19
- 20
- 21
- 22
- 23
- 24
- 25
- 26
- 27
- 28
- 29
- 30
3.4 对图片帧进行ASCII码的转换
#将图片进行批量化处理

def star_to_char(number, save_pic_path):

    #判断文件夹是否存在,不存在的话则新建文件夹
    if not os.path.exists('cache_char'):
        os.mkdir('cache_char')

    # 生成目标图片文件的路径列表
    img_path_list = [save_pic_path + r'/{}.jpg'.format(i) for i in range(1, number + 1)]
    task = 0

    for image_path in img_path_list:

        # 获取图片的分辨率
        img_width, img_height = Image.open(image_path).size
        task += 1

        #处理图片,并显示处理进程
        img_to_char(image_path, img_width, img_height, task)

        print('{}/{} is processed.'.format(task, number))

    print('=======================')
    print('All pictures were processed!')
    print('=======================')
    return 0

# 将图片转换为灰度图像后进行ascii_char中的ASCII值输出
# 函数输入像素RGBA值,输出对应的字符码。其原理是将字符均匀地分布在整个灰度范围内,像素灰度值落在哪个区间就对应哪个字符码。

def get_char(r, g, b, alpha=256):

    #ascii_char就是字符列表,用来将不同灰度的像素进行不同字符体替换的参照。
    ascii_char = list("#RMNHQODBWGPZ*@$C&98?32I1>!:-;. ")

    #alpha在为0的时候便是完全透明的图片,所以返回空
    if alpha == 0:
        return ''

    length = len(ascii_char)

    #转为灰度图
    #RGBA是代表Red(红色)、Green(绿色)、Blue(蓝色)和Alpha的色彩空间,Alpha通道一般用作不透明度参数
    #如果一个像素的alpha通道数值为0%,那它就是完全透明的,而数值为100%则意味着一个完全不透明的像素

    gray = int(0.2126 * r + 0.7152 * g + 0.0722 * b)
    # unit = (256.0 + 1) / len(ascii_char)
    unit = 256 / len(ascii_char)
    return ascii_char[int(gray / unit)]


def img_to_char(image_path, raw_width, raw_height, task):
    width = int(raw_width / 6)
    height = int(raw_height / 15)

    # 以RGB模式打开
    im = Image.open(image_path).convert('RGB')
    im = im.resize((width, height), Image.NEAREST)

    txt = ''
    color = []

    #遍历图片的每个像素
    for i in range(height):
        for j in range(width):
            pixel = im.getpixel((j, i))

            # 将颜色加入进行索引
            color.append((pixel[0], pixel[1], pixel[2]))
            if len(pixel) == 4:
                txt += get_char(pixel[0], pixel[1], pixel[2], pixel[3])
            else:
                txt += get_char(pixel[0], pixel[1], pixel[2])
        txt += '\n'
        color.append((255, 255, 255))

    im_txt = Image.new("RGB", (raw_width, raw_height), (255, 255, 255))
    dr = ImageDraw.Draw(im_txt)
    font = ImageFont.load_default().font
    x, y = 0, 0
    font_w, font_h = font.getsize(txt[1])
    font_h *= 1.37  # 调整字体大小
    for i in range(len(txt)):
        if (txt[i] == '\n'):
            x += font_h
            y = -font_w
        dr.text((y, x), txt[i], fill=color[i])
        y += font_w

    #存储处理后的图片至文件夹
    os.chdir('cache_char')
    im_txt.save(str(task) + '.jpg')

    #直接进入新创建的文件夹将生成的图片直接存入文件夹中
    os.chdir("..")
    return 0
- 1
- 2
- 3
- 4
- 5
- 6
- 7
- 8
- 9
- 10
- 11
- 12
- 13
- 14
- 15
- 16
- 17
- 18
- 19
- 20
- 21
- 22
- 23
- 24
- 25
- 26
- 27
- 28
- 29
- 30
- 31
- 32
- 33
- 34
- 35
- 36
- 37
- 38
- 39
- 40
- 41
- 42
- 43
- 44
- 45
- 46
- 47
- 48
- 49
- 50
- 51
- 52
- 53
- 54
- 55
- 56
- 57
- 58
- 59
- 60
- 61
- 62
- 63
- 64
- 65
- 66
- 67
- 68
- 69
- 70
- 71
- 72
- 73
- 74
- 75
- 76
- 77
- 78
- 79
- 80
- 81
- 82
- 83
- 84
- 85
- 86
- 87
- 88
- 89
- 90
- 91
- 92
- 93
- 94
- 95
- 96
- 97
3.5 将转换好的图片帧合成视频
# 进度条显示
def process_bar(percent, start_str='', end_str='', total_length=0):
    bar = ''.join("■ " * int(percent * total_length)) + ''
    bar = '\r' + start_str + bar.ljust(total_length) + ' {:0>4.1f}%|'.format(percent * 100) + end_str
    print(bar, end='', flush=True)

#图片帧合成视频

def jpg_to_video(char_image_path, FPS):

    # 设置视频编码器,这里使用MP42编码器
    video_fourcc = VideoWriter_fourcc(*"MP42")

    # 生成目标字符图片文件的路径列表
    char_img_path_list = [char_image_path + r'/{}.jpg'.format(i) for i in range(1, number + 1)]

    # 获取图片的分辨率
    char_img_test = Image.open(char_img_path_list[1]).size
    if not os.path.exists('video'):
        os.mkdir('video')
    video_writter = VideoWriter('video/output.avi', video_fourcc, FPS, char_img_test)
    sum = len(char_img_path_list)
    count = 0
    for image_path in char_img_path_list:
        img = cv2.imread(image_path)
        video_writter.write(img)
        end_str = '100%'
        count = count + 1
        process_bar(count / sum, start_str='', end_str=end_str, total_length=15)

    video_writter.release()
    print('\n')
    print('=======================')
    print('The video is finished!')
    print('=======================')
- 1
- 2
- 3
- 4
- 5
- 6
- 7
- 8
- 9
- 10
- 11
- 12
- 13
- 14
- 15
- 16
- 17
- 18
- 19
- 20
- 21
- 22
- 23
- 24
- 25
- 26
- 27
- 28
- 29
- 30
- 31
- 32
- 33
- 34
- 35
3.6 主函数
if __name__ == "__main__":
    #初始视频路径
    video_path = 'test_demo0510.mp4'

    #原始视频转为图片的图片保存路径
    save_pic_path = 'cache_pic'

    #图片经处理后的图片保存路径
    save_charpic_path = 'cache_char'

    # 读取视频
    vp = cv2.VideoCapture(video_path)

    # 将视频转换为图片 并进行计数,返回总共生成了多少张图片
    number = video_to_pic(vp)

    # 计算视频帧数
    FPS = vp.get(cv2.CAP_PROP_FPS)

    # 将图像进行字符串处理后
    star_to_char(number, save_pic_path)

    vp.release()

    # 将图片合成为视频
    jpg_to_video(save_charpic_path, FPS)
- 1
- 2
- 3
- 4
- 5
- 6
- 7
- 8
- 9
- 10
- 11
- 12
- 13
- 14
- 15
- 16
- 17
- 18
- 19
- 20
- 21
- 22
- 23
- 24
- 25
- 26
3.7 运行结果
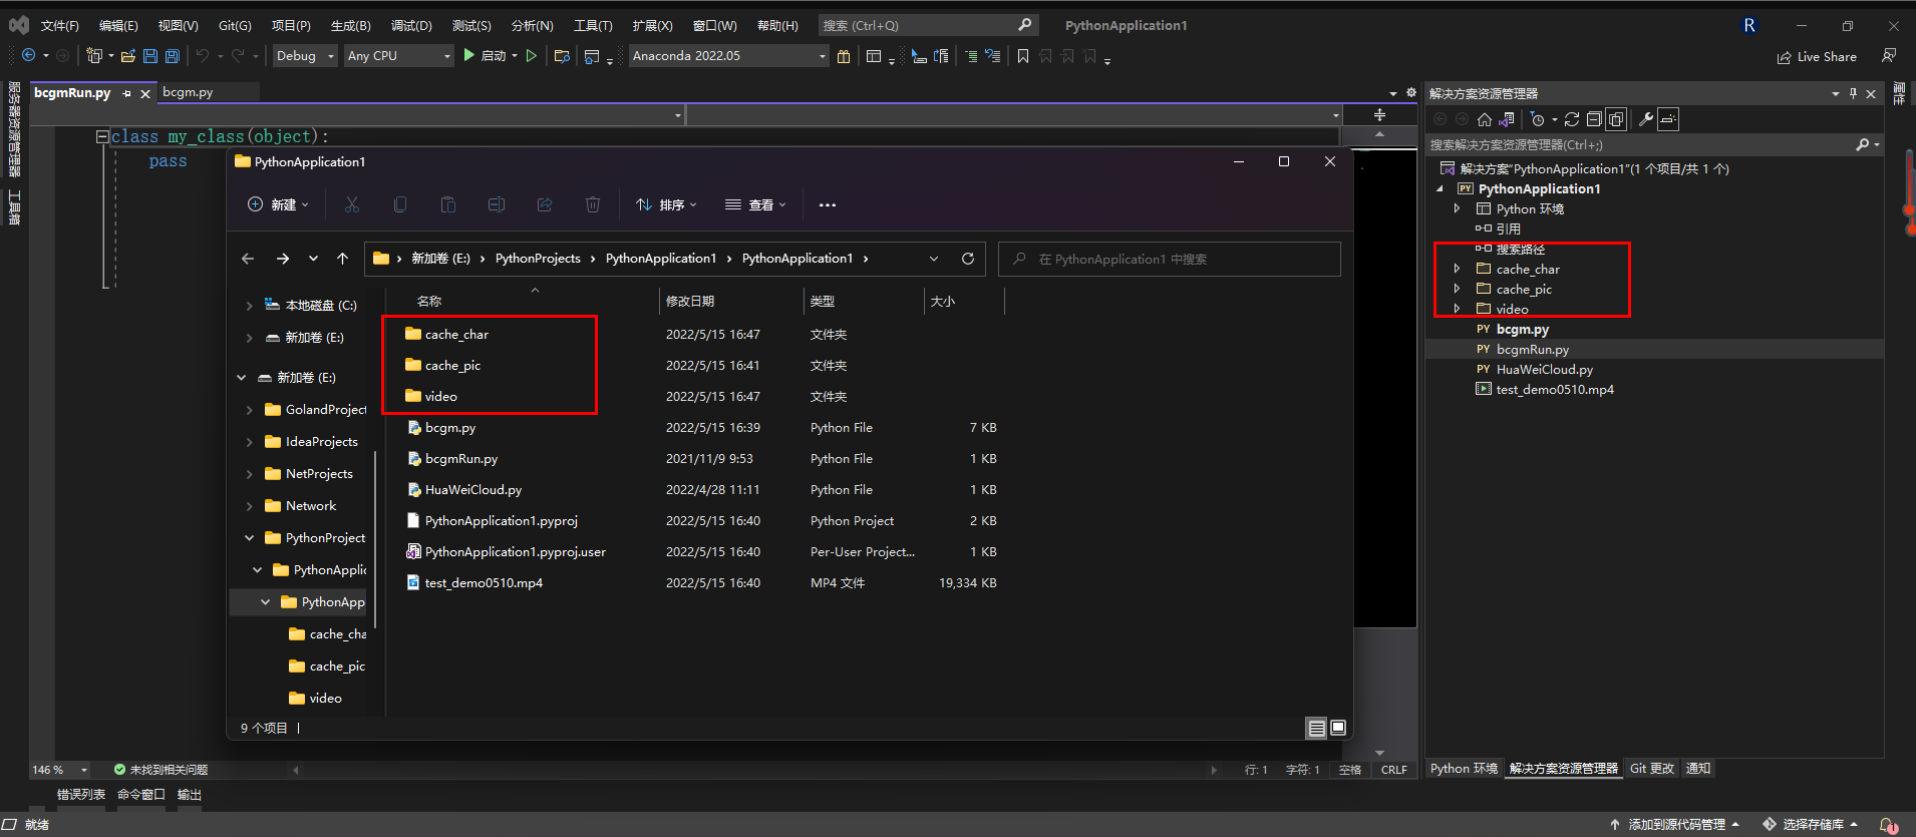
运行后一共生成了382张图片,和视频文件,保存在如下文件夹下。
4.案例播放代码
import cv2
from IPython.display import clear_output, Image, display

def show_video(video_path, show_text):
    video = cv2.VideoCapture(video_path)

    while True:
        try:
            clear_output(wait=True)
            # 读取视频
            ret, frame = video.read()
            if not ret:
                break
            height, width, _ = frame.shape
            cv2.putText(frame, show_text, (0, 100), cv2.FONT_HERSHEY_TRIPLEX, 3.65, (255, 0, 0), 2)
            frame = cv2.resize(frame, (int(width / 2), int(height / 2)))
            _, ret = cv2.imencode('.jpg', frame)

            display(Image(data=ret))

        except KeyboardInterrupt:
            video.release()

#视频循环播放
i=1
while i>0:
    show_video('video/output.avi',str(i))
    i=i+1
- 1
- 2
- 3
- 4
- 5
- 6
- 7
- 8
- 9
- 10
- 11
- 12
- 13
- 14
- 15
- 16
- 17
- 18
- 19
- 20
- 21
- 22
- 23
- 24
- 25
- 26
- 27
- 28
三、华为云AI实现Python定制我的《本草纲目女孩》
1.基础配置
"本草纲目"健身操字符串视频操作实例的案例页面如下:https://developer.huaweicloud.com/develop/aigallery/Notebook/detail?id=c81526e5-cc88-497f-8a21-41a5632e014e
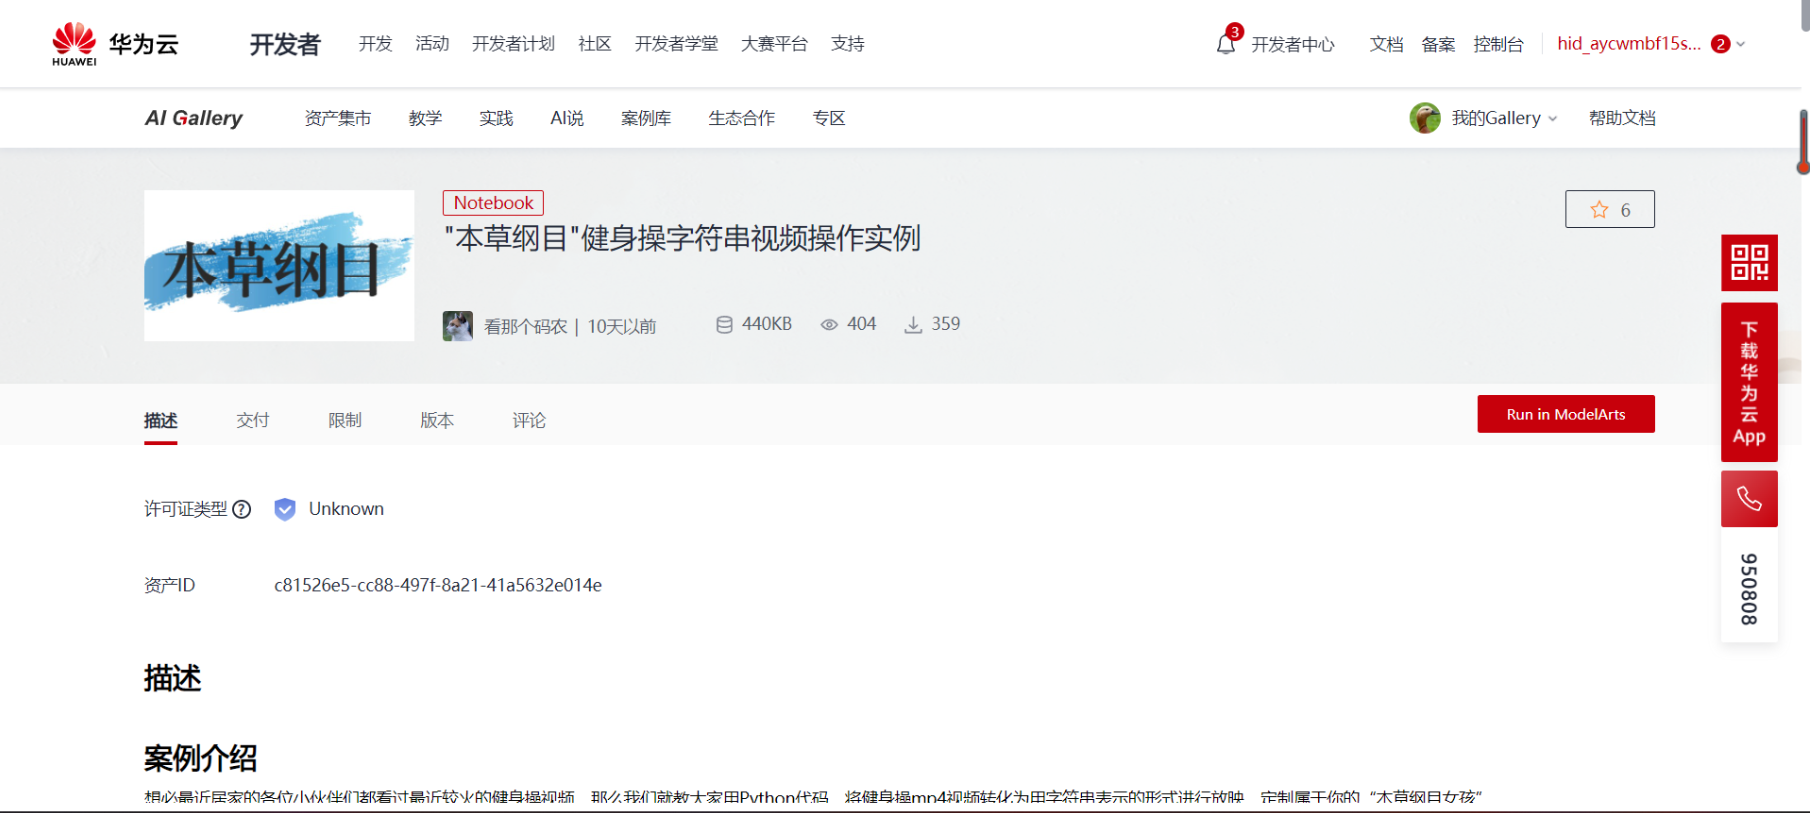
点击Run in ModelArts,进入JupyterLab页面。
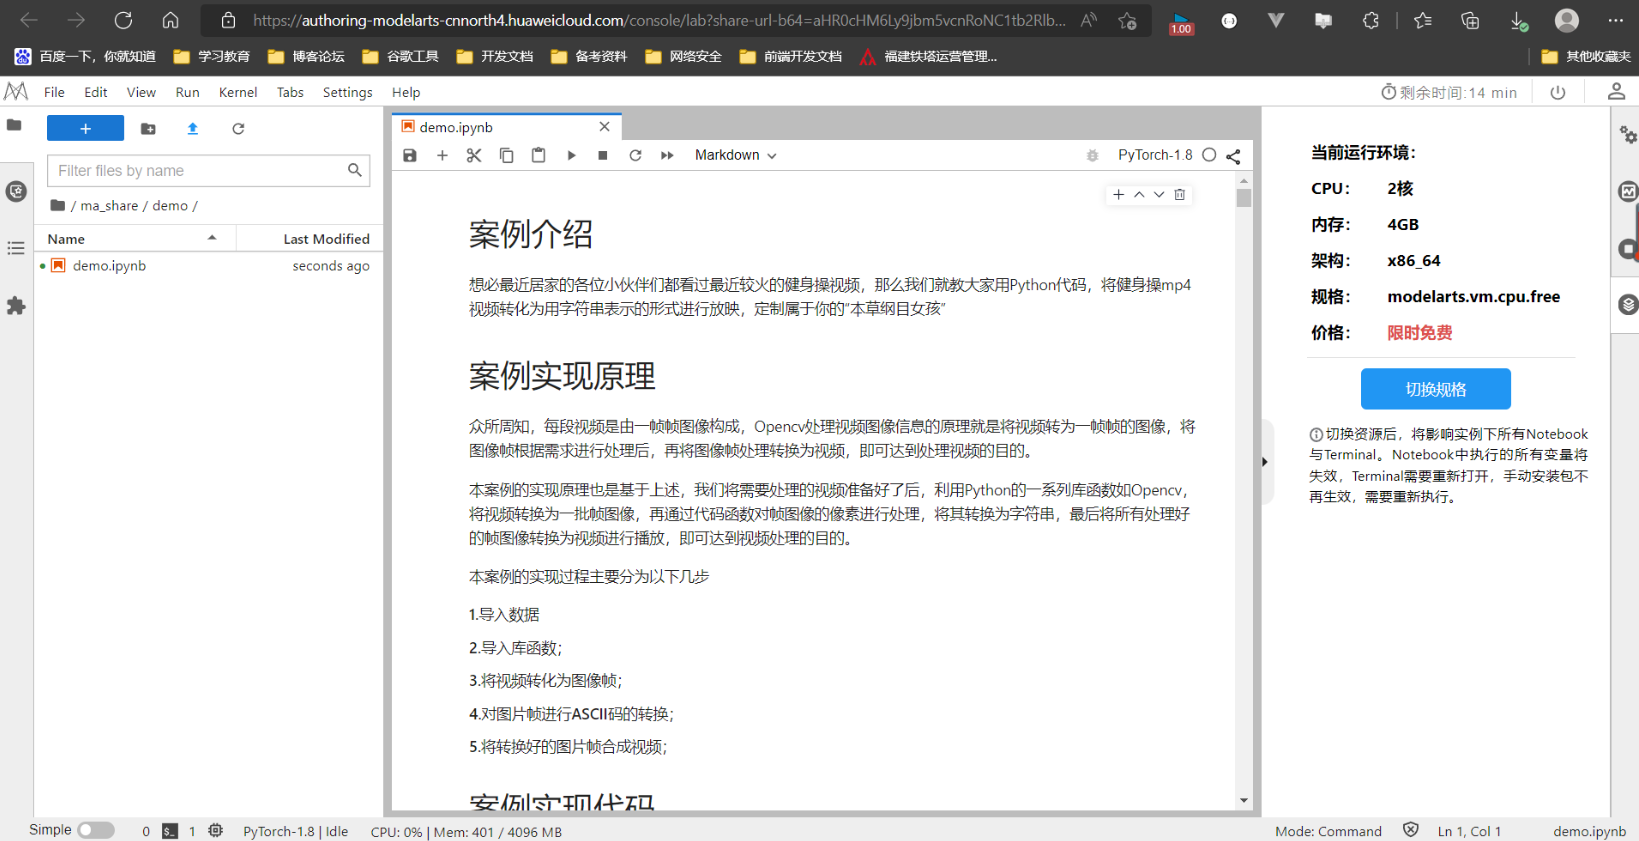
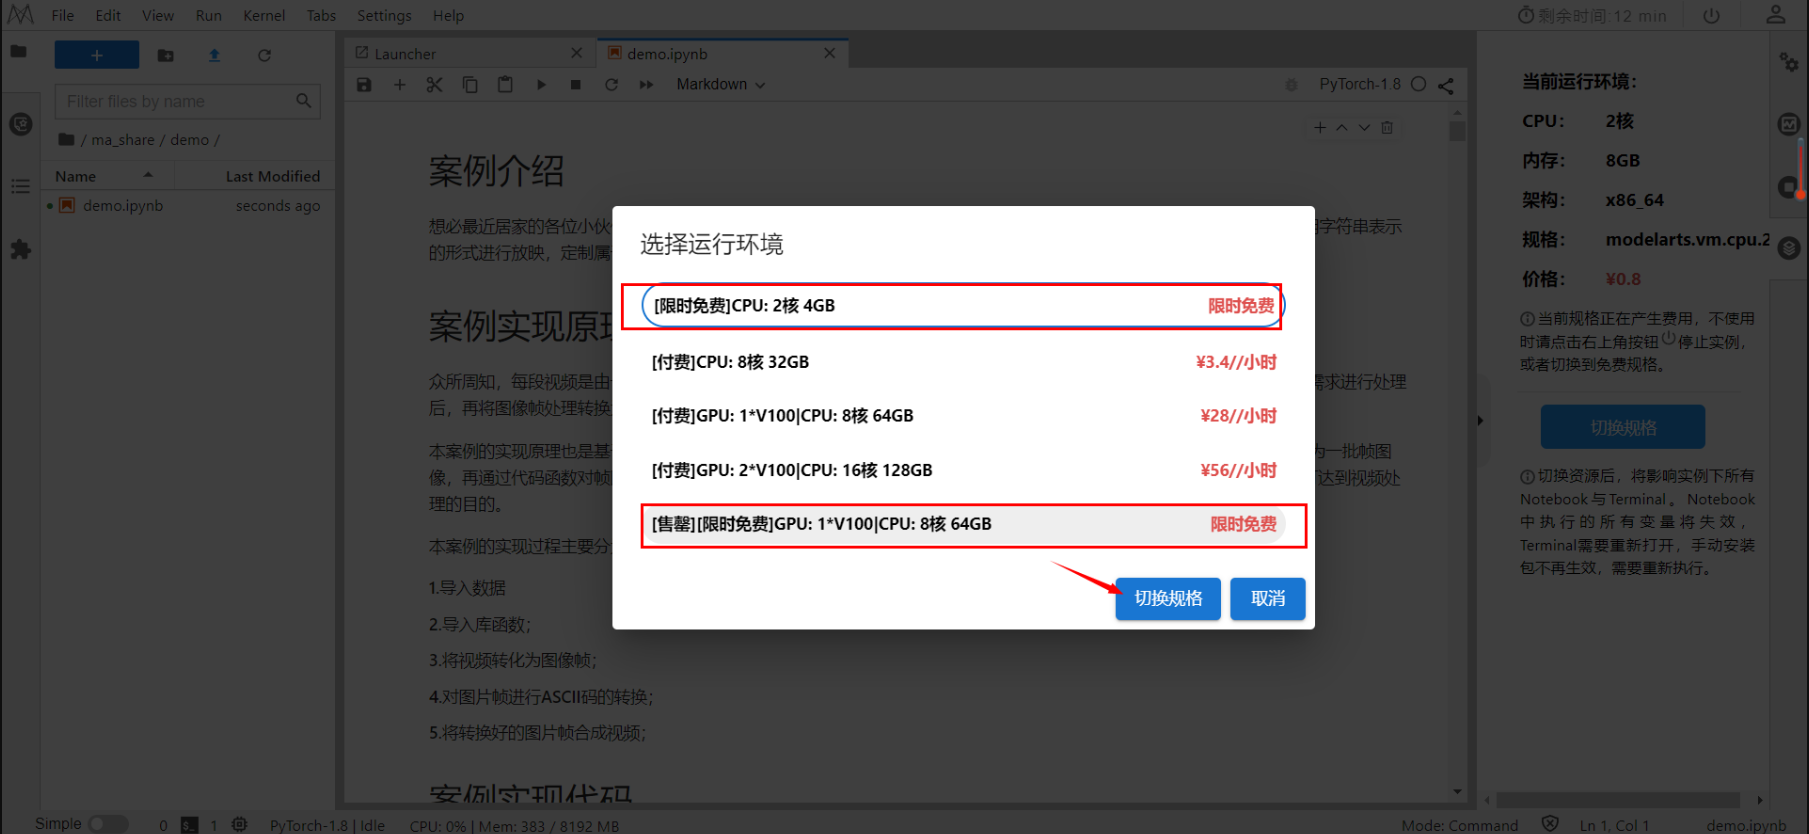
配置当前运行环境,切换规格,并选择免费的就好了。
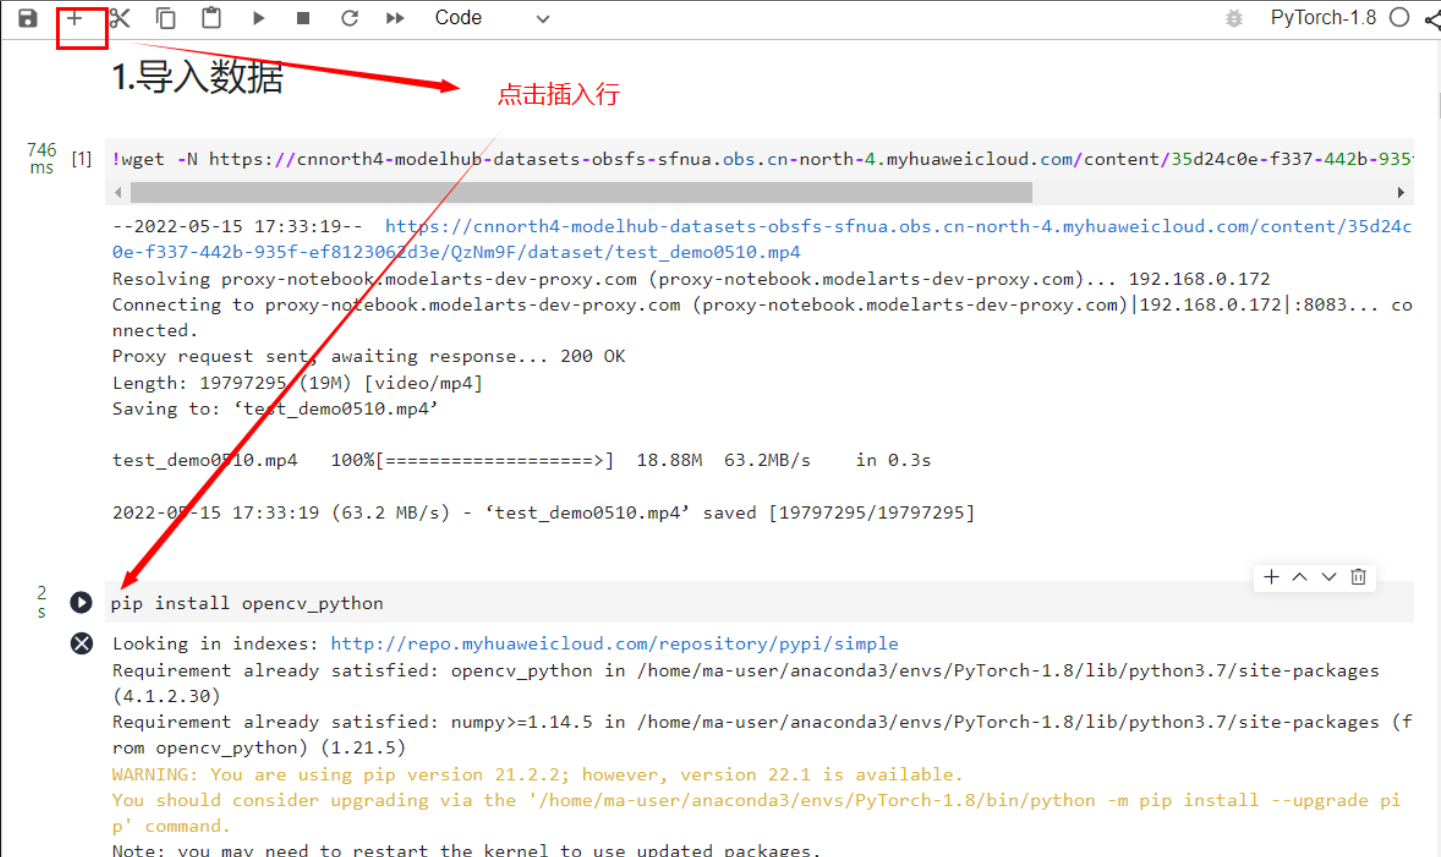
2.导入数据
选择下方代码,点击运行。
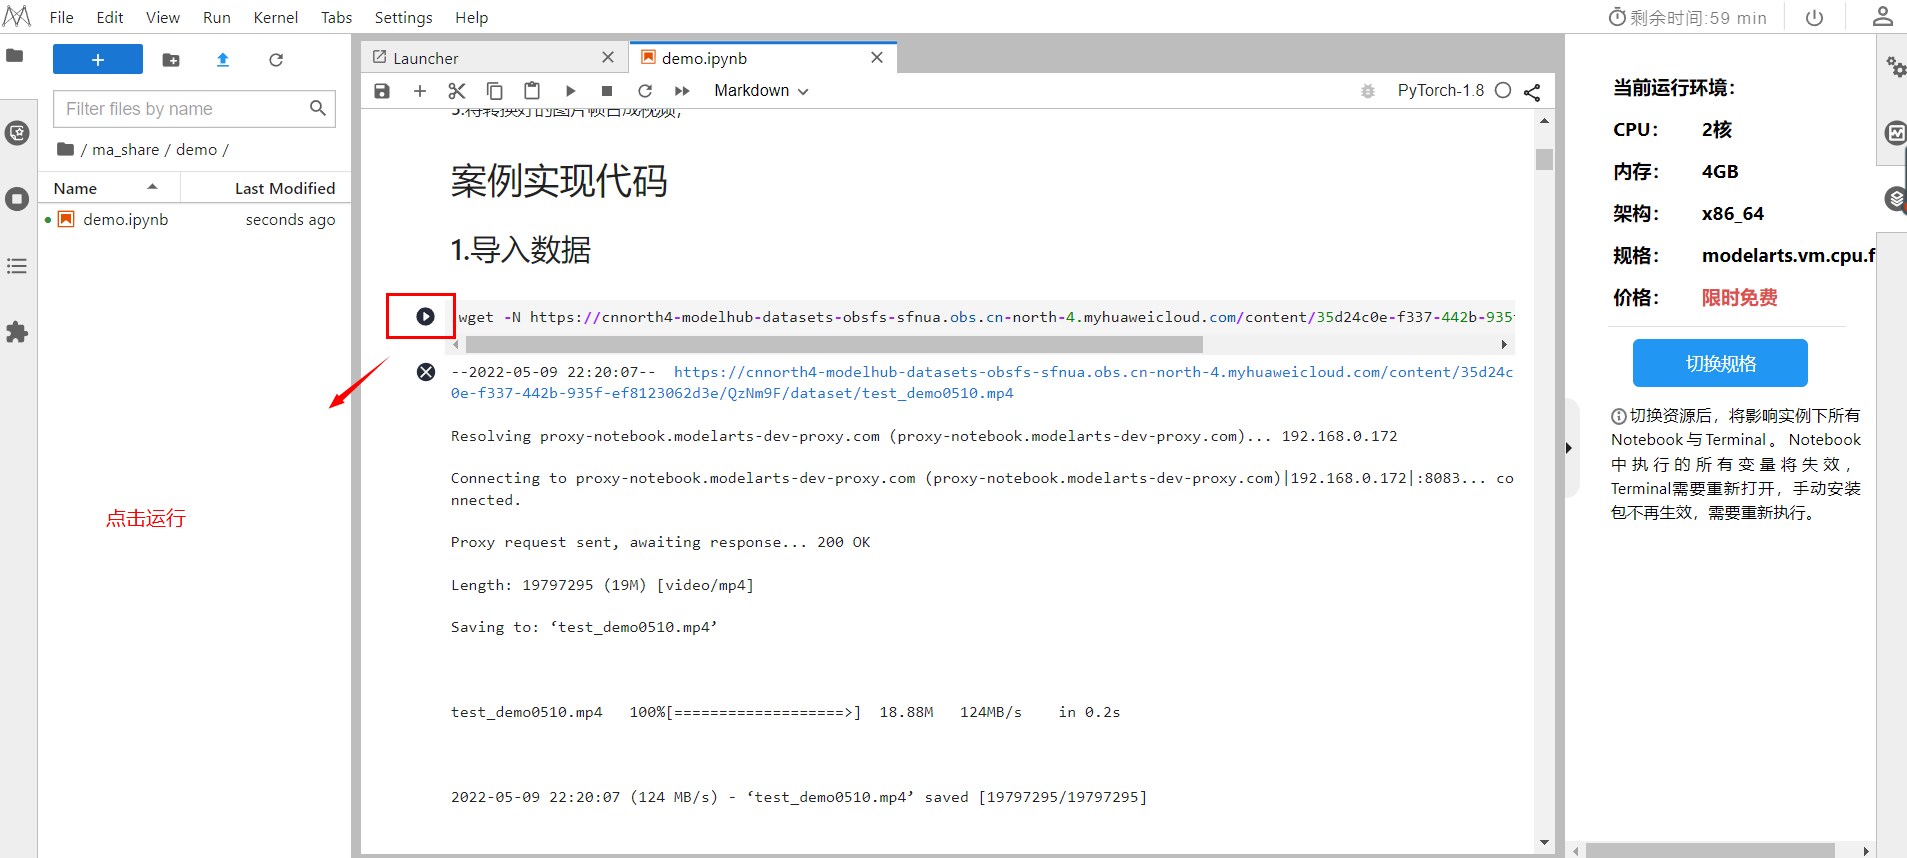
运行完成后如下:

3.安装相关依赖
选择下方代码,点击运行安装opencv包
pip install opencv_python
- 1
4.导入库函数
#导入Python库
import cv2
from PIL import Image,ImageFont,ImageDraw
import os
from cv2 import VideoWriter, VideoWriter_fourcc, imread, resize
- 1
- 2
- 3
- 4
- 5

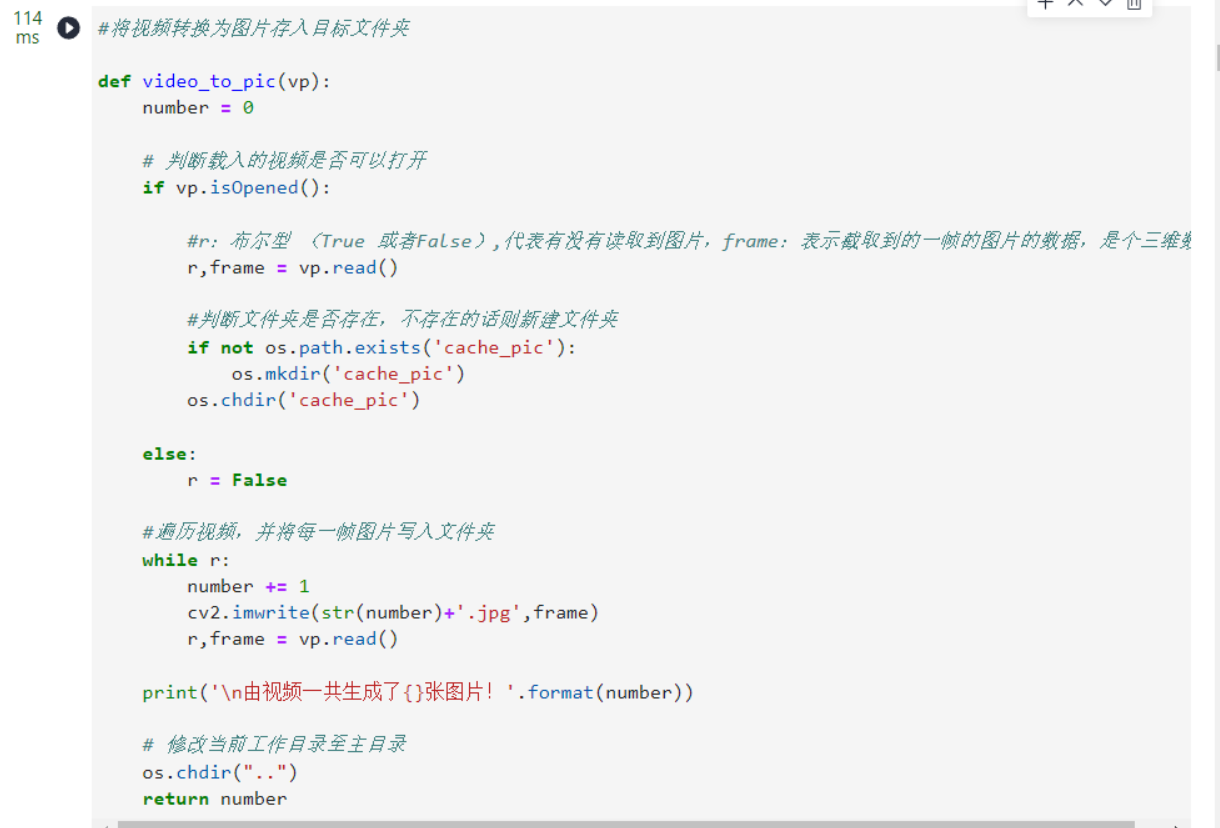
5.将视频转化为图像帧
#将视频转换为图片存入目标文件夹

def video_to_pic(vp):
    number = 0

    # 判断载入的视频是否可以打开
    if vp.isOpened():

        #r:布尔型 (True 或者False),代表有没有读取到图片,frame:表示截取到的一帧的图片的数据,是个三维数组
        r,frame = vp.read()

        #判断文件夹是否存在,不存在的话则新建文件夹
        if not os.path.exists('cache_pic'):
            os.mkdir('cache_pic')
        os.chdir('cache_pic')

    else:
        r = False

    #遍历视频,并将每一帧图片写入文件夹
    while r:
        number += 1
        cv2.imwrite(str(number)+'.jpg',frame)
        r,frame = vp.read()

    print('\n由视频一共生成了{}张图片!'.format(number))

    # 修改当前工作目录至主目录
    os.chdir("..")
    return number
- 1
- 2
- 3
- 4
- 5
- 6
- 7
- 8
- 9
- 10
- 11
- 12
- 13
- 14
- 15
- 16
- 17
- 18
- 19
- 20
- 21
- 22
- 23
- 24
- 25
- 26
- 27
- 28
- 29
- 30
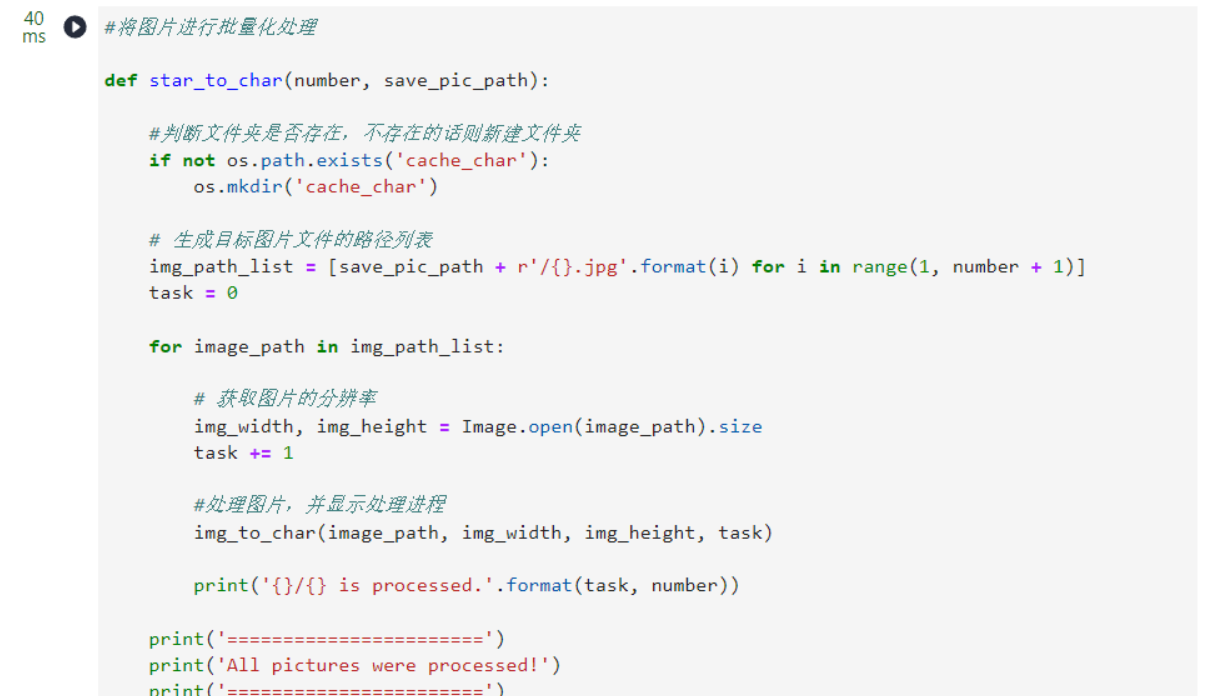
6.对图片帧进行ASCII码的转换
#将图片进行批量化处理

def star_to_char(number, save_pic_path):

    #判断文件夹是否存在,不存在的话则新建文件夹
    if not os.path.exists('cache_char'):
        os.mkdir('cache_char')

    # 生成目标图片文件的路径列表
    img_path_list = [save_pic_path + r'/{}.jpg'.format(i) for i in range(1, number + 1)]
    task = 0

    for image_path in img_path_list:

        # 获取图片的分辨率
        img_width, img_height = Image.open(image_path).size
        task += 1

        #处理图片,并显示处理进程
        img_to_char(image_path, img_width, img_height, task)

        print('{}/{} is processed.'.format(task, number))

    print('=======================')
    print('All pictures were processed!')
    print('=======================')
    return 0

# 将图片转换为灰度图像后进行ascii_char中的ASCII值输出
# 函数输入像素RGBA值,输出对应的字符码。其原理是将字符均匀地分布在整个灰度范围内,像素灰度值落在哪个区间就对应哪个字符码。

def get_char(r, g, b, alpha=256):

    #ascii_char就是字符列表,用来将不同灰度的像素进行不同字符体替换的参照。
    ascii_char = list("#RMNHQODBWGPZ*@$C&98?32I1>!:-;. ")

    #alpha在为0的时候便是完全透明的图片,所以返回空
    if alpha == 0:
        return ''

    length = len(ascii_char)

    #转为灰度图
    #RGBA是代表Red(红色)、Green(绿色)、Blue(蓝色)和Alpha的色彩空间,Alpha通道一般用作不透明度参数
    #如果一个像素的alpha通道数值为0%,那它就是完全透明的,而数值为100%则意味着一个完全不透明的像素

    gray = int(0.2126 * r + 0.7152 * g + 0.0722 * b)
    # unit = (256.0 + 1) / len(ascii_char)
    unit = 256 / len(ascii_char)
    return ascii_char[int(gray / unit)]


def img_to_char(image_path, raw_width, raw_height, task):
    width = int(raw_width / 6)
    height = int(raw_height / 15)

    # 以RGB模式打开
    im = Image.open(image_path).convert('RGB')
    im = im.resize((width, height), Image.NEAREST)

    txt = ''
    color = []

    #遍历图片的每个像素
    for i in range(height):
        for j in range(width):
            pixel = im.getpixel((j, i))

            # 将颜色加入进行索引
            color.append((pixel[0], pixel[1], pixel[2]))
            if len(pixel) == 4:
                txt += get_char(pixel[0], pixel[1], pixel[2], pixel[3])
            else:
                txt += get_char(pixel[0], pixel[1], pixel[2])
        txt += '\n'
        color.append((255, 255, 255))

    im_txt = Image.new("RGB", (raw_width, raw_height), (255, 255, 255))
    dr = ImageDraw.Draw(im_txt)
    font = ImageFont.load_default().font
    x, y = 0, 0
    font_w, font_h = font.getsize(txt[1])
    font_h *= 1.37  # 调整字体大小
    for i in range(len(txt)):
        if (txt[i] == '\n'):
            x += font_h
            y = -font_w
        dr.text((y, x), txt[i], fill=color[i])
        y += font_w

    #存储处理后的图片至文件夹
    os.chdir('cache_char')
    im_txt.save(str(task) + '.jpg')

    #直接进入新创建的文件夹将生成的图片直接存入文件夹中
    os.chdir("..")
    return 0
- 1
- 2
- 3
- 4
- 5
- 6
- 7
- 8
- 9
- 10
- 11
- 12
- 13
- 14
- 15
- 16
- 17
- 18
- 19
- 20
- 21
- 22
- 23
- 24
- 25
- 26
- 27
- 28
- 29
- 30
- 31
- 32
- 33
- 34
- 35
- 36
- 37
- 38
- 39
- 40
- 41
- 42
- 43
- 44
- 45
- 46
- 47
- 48
- 49
- 50
- 51
- 52
- 53
- 54
- 55
- 56
- 57
- 58
- 59
- 60
- 61
- 62
- 63
- 64
- 65
- 66
- 67
- 68
- 69
- 70
- 71
- 72
- 73
- 74
- 75
- 76
- 77
- 78
- 79
- 80
- 81
- 82
- 83
- 84
- 85
- 86
- 87
- 88
- 89
- 90
- 91
- 92
- 93
- 94
- 95
- 96
- 97
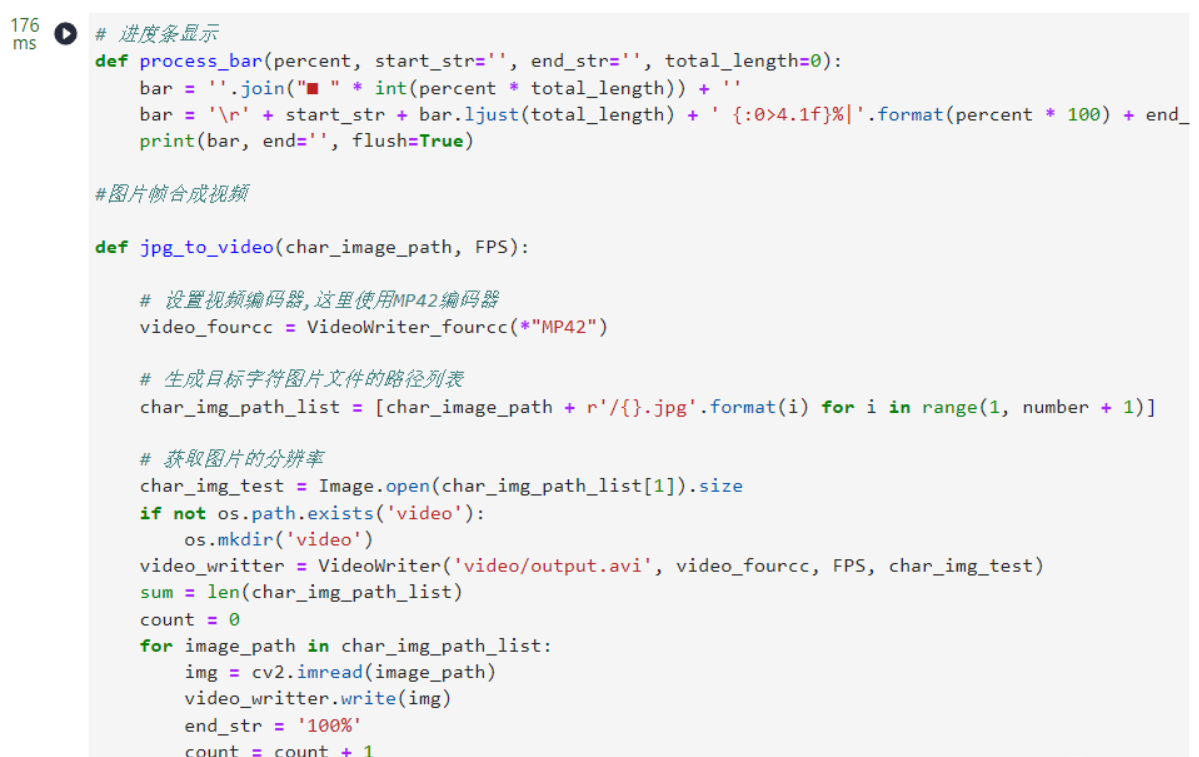
7.将转换好的图片帧合成视频
# 进度条显示
def process_bar(percent, start_str='', end_str='', total_length=0):
    bar = ''.join("■ " * int(percent * total_length)) + ''
    bar = '\r' + start_str + bar.ljust(total_length) + ' {:0>4.1f}%|'.format(percent * 100) + end_str
    print(bar, end='', flush=True)

#图片帧合成视频

def jpg_to_video(char_image_path, FPS):

    # 设置视频编码器,这里使用MP42编码器
    video_fourcc = VideoWriter_fourcc(*"MP42")

    # 生成目标字符图片文件的路径列表
    char_img_path_list = [char_image_path + r'/{}.jpg'.format(i) for i in range(1, number + 1)]

    # 获取图片的分辨率
    char_img_test = Image.open(char_img_path_list[1]).size
    if not os.path.exists('video'):
        os.mkdir('video')
    video_writter = VideoWriter('video/output.avi', video_fourcc, FPS, char_img_test)
    sum = len(char_img_path_list)
    count = 0
    for image_path in char_img_path_list:
        img = cv2.imread(image_path)
        video_writter.write(img)
        end_str = '100%'
        count = count + 1
        process_bar(count / sum, start_str='', end_str=end_str, total_length=15)

    video_writter.release()
    print('\n')
    print('=======================')
    print('The video is finished!')
    print('=======================')
- 1
- 2
- 3
- 4
- 5
- 6
- 7
- 8
- 9
- 10
- 11
- 12
- 13
- 14
- 15
- 16
- 17
- 18
- 19
- 20
- 21
- 22
- 23
- 24
- 25
- 26
- 27
- 28
- 29
- 30
- 31
- 32
- 33
- 34
- 35
8.运行主函数
if __name__ == "__main__":
    #初始视频路径
    video_path = 'test_demo0510.mp4'

    #原始视频转为图片的图片保存路径
    save_pic_path = 'cache_pic'

    #图片经处理后的图片保存路径
    save_charpic_path = 'cache_char'

    # 读取视频
    vp = cv2.VideoCapture(video_path)

    # 将视频转换为图片 并进行计数,返回总共生成了多少张图片
    number = video_to_pic(vp)

    # 计算视频帧数
    FPS = vp.get(cv2.CAP_PROP_FPS)

    # 将图像进行字符串处理后
    star_to_char(number, save_pic_path)

    vp.release()

    # 将图片合成为视频
    jpg_to_video(save_charpic_path, FPS)
- 1
- 2
- 3
- 4
- 5
- 6
- 7
- 8
- 9
- 10
- 11
- 12
- 13
- 14
- 15
- 16
- 17
- 18
- 19
- 20
- 21
- 22
- 23
- 24
- 25
- 26
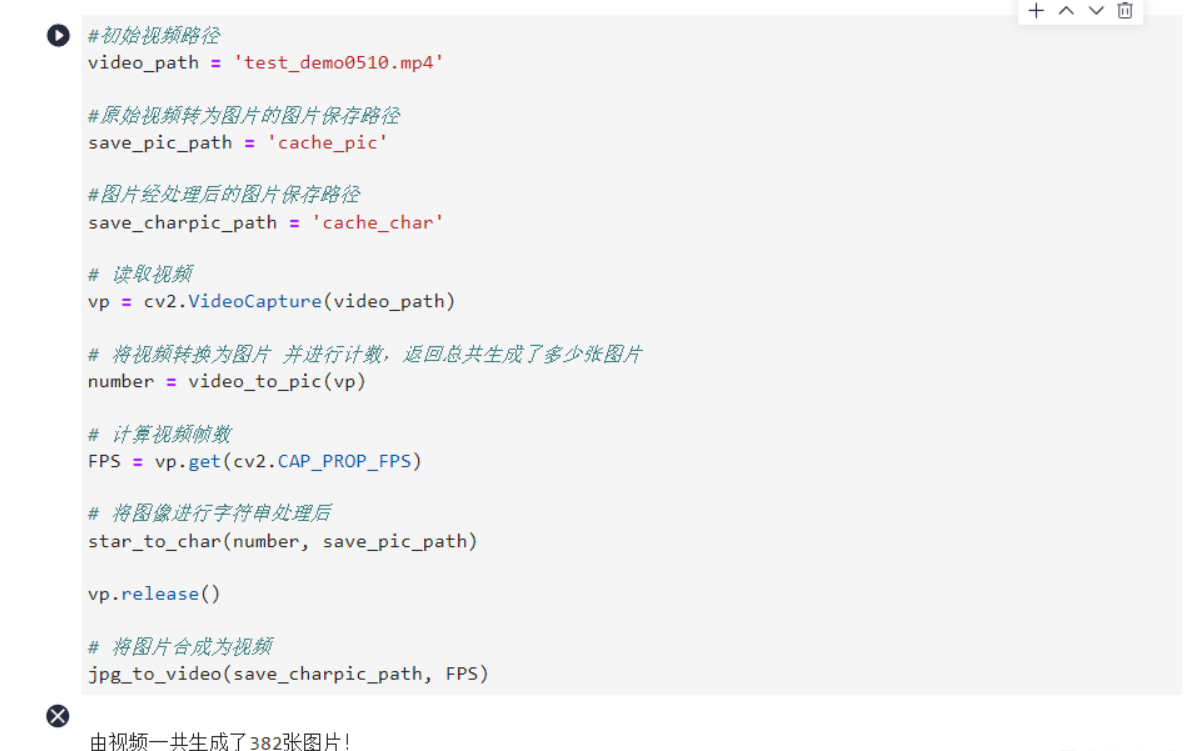
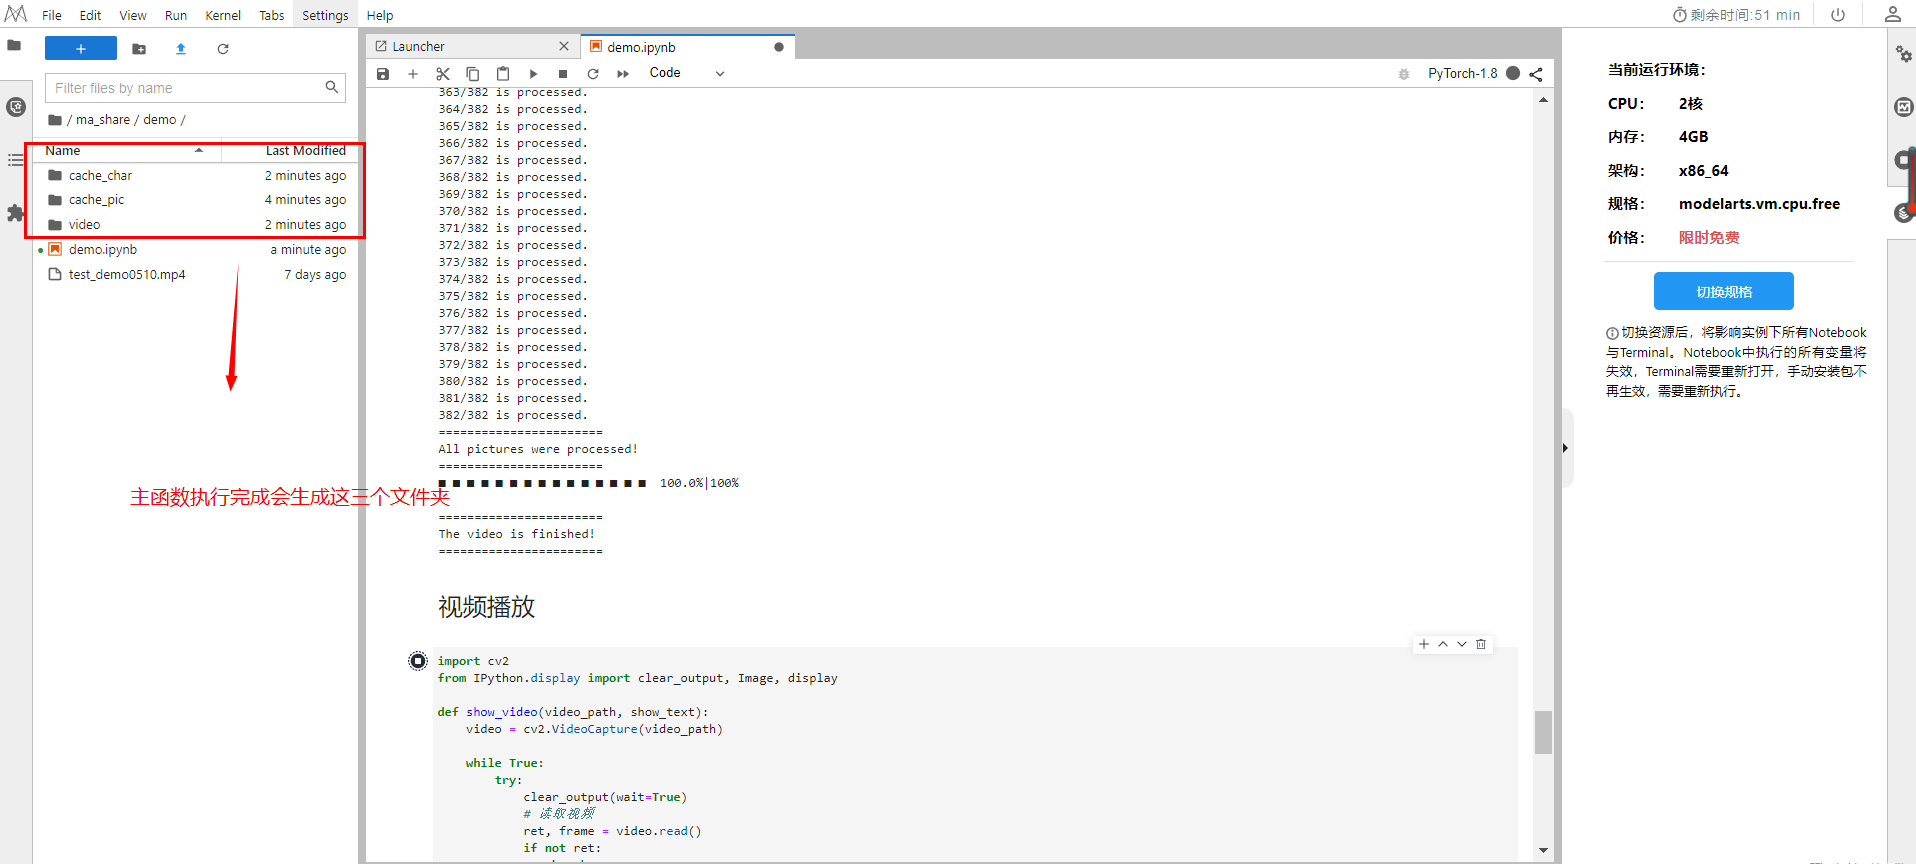
等待主函数执行完成,后会生成如下三个文件夹:
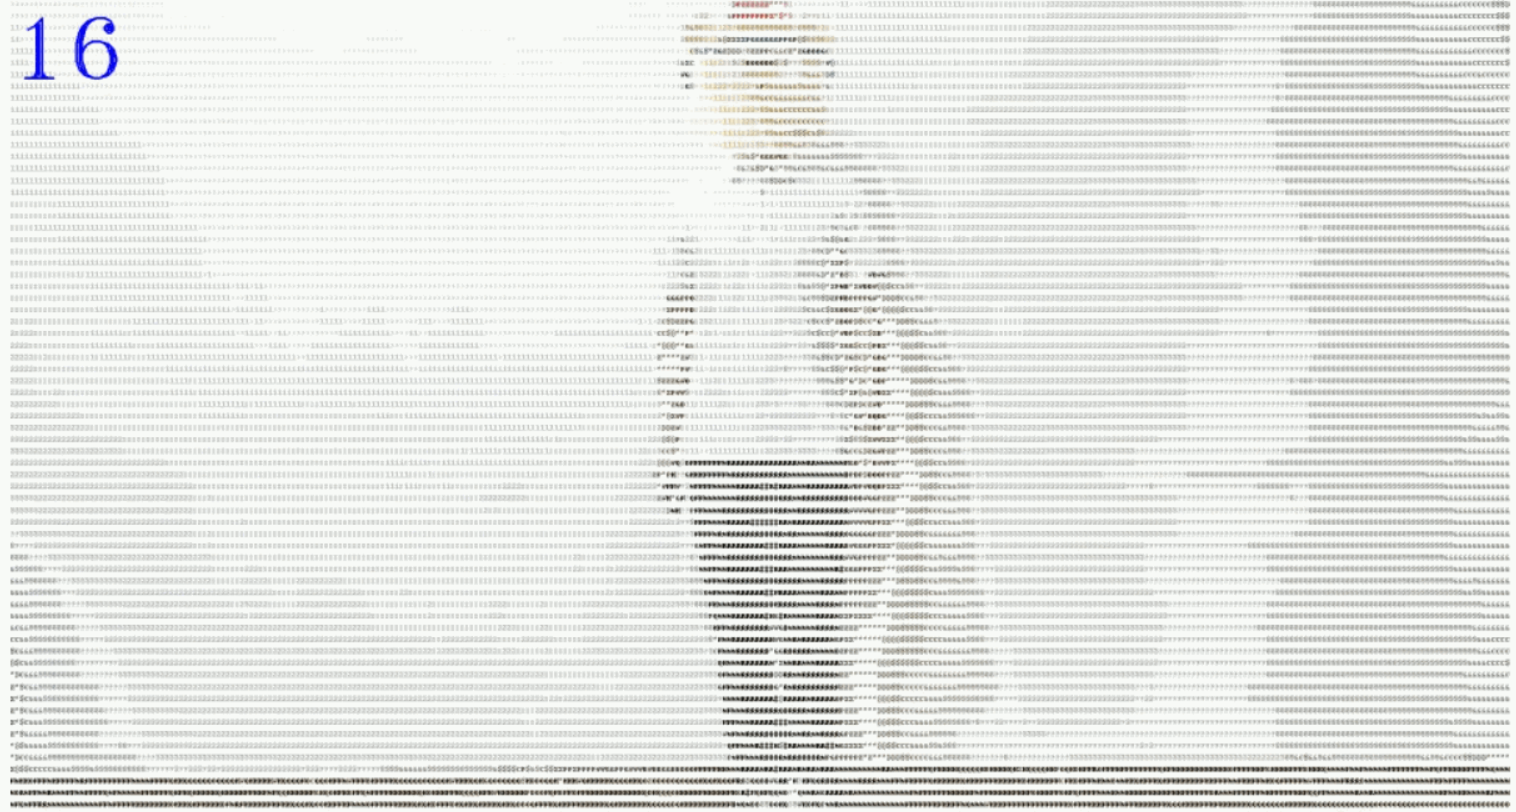
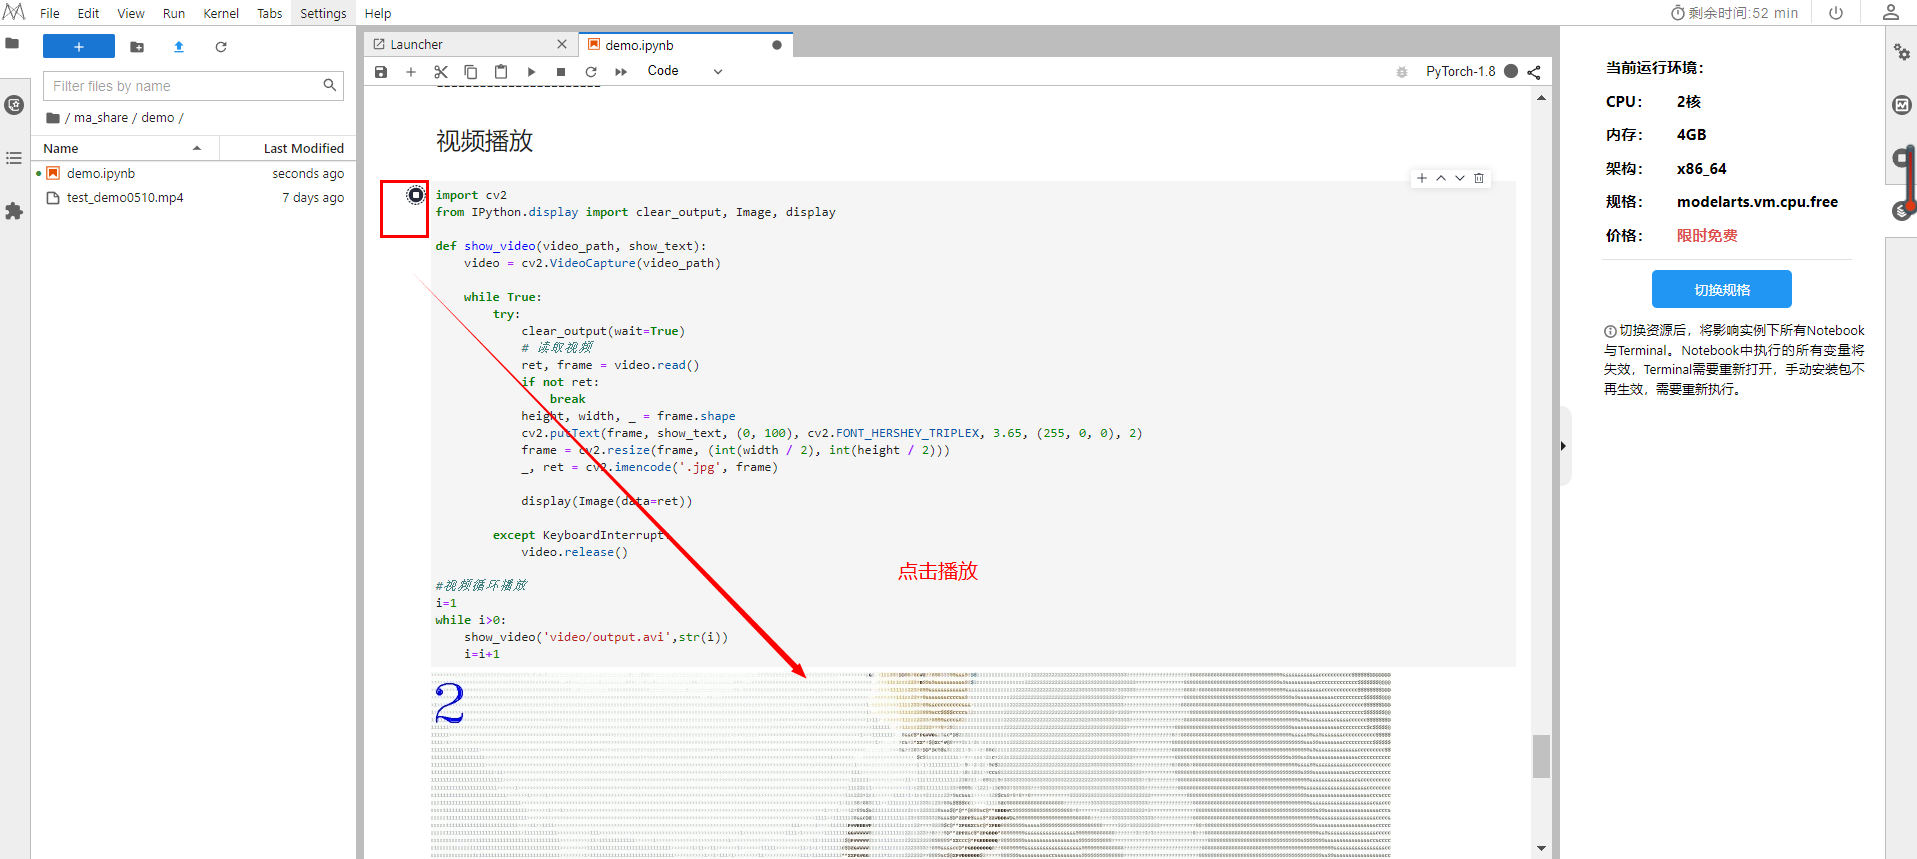
9.播放视频
总结
本文主要介绍了本地开发和华为云ModelArts开发两种形式,从开发流程中大家也明白那种形式开发更简单。
ModelArts是面向开发者的一站式AI开发平台,为机器学习与深度学习提供海量数据预处理及半自动化标注、大规模分布式Training、自动化模型生成,及端-边-云模型按需部署能力,帮助用户快速创建和部署模型,管理全周期AI工作流。
华为云ModelArts-Notebook云开发的优势不需要本地进行安装资源包,在ModelArts-Notebook环境就已经集成了这些环境,减少了人为部署压力,更易于上手、更高性能、一站式服务、支持多种主流框架。
本文整理自华为云社区【内容共创】活动第16期。
查看活动详情:https://bbs.huaweicloud.com/blogs/352652
相关任务详情:任务1.用Python定制我的“本草纲目女孩”

