- 1VSCode-更改系统默认路径
- 2HikariCP连接池
- 3zabbix自带触发器(键值参数说明)_vfs.fs.inode[fs,
] - 4大模型日报-20240111_stylar ai 融资
- 5VMWare16.2.4+CentOS-7-x86_64-DVD-2009镜像下载安装教程
- 6HTML+CSS项目案例_html项目
- 7《C++ Primer》第9章 9.6节习题答案_c++primer练习9.6
- 89.17作业
- 9实战系列(三)| Mybatis和MybatisPlus区别,包含详细代码_mybatis和mybatisplus的区别
- 10c++环境下qt+pcpp(winpcap)实现的网络抓包(sniff)程序_qt实现网络抓包原始数据怎么显示
Redhat8 安装 cuda11.8 + cudnn 8.6 + trt8.5.3 保姆级教程_redhat安装cudnn
赞
踩

详细记录 redhat 8 系统, 从 0 -1 安装 Cuda, Cudnn , Tensorrt 全部过程。
Driver
- 我安装的是
NVIDIA-Linux-x86_64-525.89.02.run - 安装步骤自行百度下,这个我大哥做系统时候给我安装完事了。
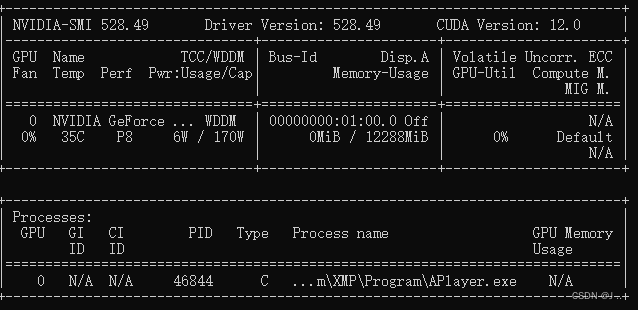
- 安装驱动时候 一定选支持11.8的驱动,使用
nividia-smi查询一下。

Cuda 11.8
- 下载地址: https://developer.nvidia.com/cuda-11.1.0-download-archive?target_os=Linux&target_arch=x86_64&target_distro=RHEL&target_version=7&target_type=rpmlocal
- install
# 不选 driver 和 nvidia-fs sudo sh ./cuda_11.8.0_520.61.05_linux.run- 1
- 2
- 配环境变量
sudo vim ~/.bashrc export PATH="/usr/local/cuda-11.8/bin:$PATH" export LD_LIBRARY_PATH="/usr/local/cuda-11.8/lib64:$LD_LIBRARY_PATH" source ~/.bashrc- 1
- 2
- 3
- 4
- 验证
nvcc -V cd /usr/local/cuda-11.8/samples/1_Utilities/deviceQuery sudo make ./deviceQuery cd ../bandwidthTest sudo make ./bandwidthTest # 如果这两个测试的最后结果都是Result = PASS,说明CUDA安装成功.- 1
- 2
- 3
- 4
- 5
- 6
- 7
- 8
- 9
- 10
- 后悔药
# uninstall cuda sudo /usr/local/cuda-11.8/bin/cuda-uninstaller # uninstall nvidia driver #sudo /usr/bin/nvidia-uninstall- 1
- 2
- 3
- 4
Cudnn 8.6
-
参考: https://docs.nvidia.com/deeplearning/cudnn/install-guide/index.html#installcuda
-
安装
sudo rpm -i cudnn-local-repo-rhel8-8.6.0.163-1.0-1.x86_64.rpm # Refresh the repository metadata. sudo yum clean all # Install the runtime library. sudo yum install libcudnn8-8.6.0.163-1.cuda11.8 -y sudo yum install libcudnn8-devel-8.6.0.163-1.cuda11.8 -y sudo yum install libcudnn8-samples-8.6.0.163-1.cuda11.8 -y- 1
- 2
- 3
- 4
- 5
- 6
- 7
-
不出意外会出现如下错误
Problem: conflicting requests - nothing provides libcublas.so.11()(64bit) needed by libcudnn8-8.6.0.163-1.cuda11.8.x86_64 - nothing provides libcublasLt.so.11()(64bit) needed by libcudnn8-8.6.0.163-1.cuda11.8.x86_64- 1
- 2
- 3
-
下载先关依赖rpm ,如果还出现什么依赖库问题,去下载相应rpm,应该都能解决.
1. https://rhel.pkgs.org/ , 搜索cuda-toolkit-config-common-11.8.89-1.noarch.rpmcuda-toolkit-11-config-common-11.8.89-1.noarch.rpmcuda-toolkit-11-8-config-common-11.8.89-1.noarch.rpmlibcublas-11-8-11.11.3.6-1.x86_64.rpmlibcublas-devel-11-8-11.11.3.6-1.x86_64.rpm
2. https://developer.download.nvidia.com/compute/cuda/repos/rhel8/x86_64/ , 搜索cuda-cudart-devel-11-8-11.8.89-1.x86_64.rpm# install sudo yum install cuda-toolkit-config-common-11.8.89-1.noarch.rpm -y sudo yum install cuda-toolkit-11-config-common-11.8.89-1.noarch.rpm -y sudo yum install cuda-toolkit-11-8-config-common-11.8.89-1.noarch.rpm -y sudo yum install libcublas-11-8-11.11.3.6-1.x86_64.rpm -y sudo yum install libcublas-devel-11-8-11.11.3.6-1.x86_64.rpm -y- 1
- 2
- 3
- 4
- 5
- 6
-
验证
cd /usr/src/cudnn_samples_v8/mnistCUDNN make clean && make ./mnistCUDNN Test passed!- 1
- 2
- 3
- 4
-
不出意外还会出现错误,
fatal error: FreeImage.h: No such file or directory.按照网上的办法都是安装freeimage和freeimage-devel, 但我安装会出现 not match… 错误, 所以还是老套路,本地下载包安装。wget https://download-ib01.fedoraproject.org/pub/epel/8/Everything/x86_64/Packages/j/jxrlib-1.1-1.el8.x86_64.rpm sudo yum install jxrlib-1.1-1.el8.x86_64.rpm wget https://download-ib01.fedoraproject.org/pub/epel/8/Everything/x86_64/Packages/f/freeimage-3.17.0-5.el8.x86_64.rpm sudo yum install freeimage wget https://download-ib01.fedoraproject.org/pub/epel/8/Everything/x86_64/Packages/f/freeimage-devel-3.17.0-5.el8.x86_64.rpm sudo yum install freeimage-devel- 1
- 2
- 3
- 4
- 5
- 6
-
后悔药
sudo yum erase "cudnn-local-repo*" -y sudo yum erase "libcudnn*"- 1
- 2
Tensorrt
-
安装 https://docs.nvidia.com/deeplearning/tensorrt/install-guide/index.html#installing
os="rhelx" tag="cudax.x-trt8.x.x.x-ga-yyyymmdd" sudo rpm -Uvh nv-tensorrt-repo-${os}-${tag}-1-1.x86_64.rpm sudo yum clean expire-cache sudo yum install tensorrt- 1
- 2
- 3
- 4
- 5
-
按照官方教程安装,还是会提示缺少依赖,也不知道那里有问题。有大佬知道,麻烦指导下,好人一生平安啊。 最后还是老套路,下载相应依赖。
wget https://developer.download.nvidia.com/compute/cuda/repos/rhel8/x86_64/cuda-cccl-11-8-11.8.89-1.x86_64.rpm sudo yum install cuda-cccl-11-8-11.8.89-1.x86_64.rpm -y wget https://developer.download.nvidia.com/compute/cuda/repos/rhel8/x86_64/cuda-nvcc-11-8-11.8.89-1.x86_64.rpm sudo yum install cuda-nvcc-11-8-11.8.89-1.x86_64.rpm -y wget https://developer.download.nvidia.com/compute/cuda/repos/rhel8/x86_64/cuda-cudart-11-8-11.8.89-1.x86_64.rpm sudo yum install cuda-cudart-11-8-11.8.89-1.x86_64.rpm -y wget https://developer.download.nvidia.com/compute/cuda/repos/rhel8/x86_64/cuda-cudart-devel-11-8-11.8.89-1.x86_64.rpm sudo yum install cuda-cudart-devel-11-8-11.8.89-1.x86_64.rpm -y sudo yum install tensorrt- 1
- 2
- 3
- 4
- 5
- 6
- 7
- 8
- 9
-
验证
rpm -qa | grep tensorrt # You should see something similar to the following: tensorrt-8.5.3.x-1.cuda11.8.x86_64- 1
- 2
- 3
-
后悔药
sudo yum erase "libnvinfer*" -y sudo yum erase "nv-tensorrt-repo*" -y sudo yum erase "nv-tensorrt-local-repo*" -y sudo yum erase graphsurgeon-tf onnx-graphsurgeon -y sudo yum erase uff-converter-tf -y sudo yum autoremove -y- 1
- 2
- 3
- 4
- 5
- 6
END
- 以上记录全部的安装过程,有需要的小伙伴可以参考一下。
- 码字不易,欢迎三连 。
愿你看尽繁华,归来仍是少年。


