- 1使用 Vue.js 和 Python 构建 DevOps 应用程序
- 2Docker安全最佳实践_docker安全端口配置
- 3数据库系统(二)数据库关系代数 | 选择 投影 笛卡尔积 自然连接 外连接等_投影选择笛卡尔积自然连接
- 4西蒙斯告诉你何为传奇人生 James Simons_吉姆 西蒙斯
- 5CSDN 博客等级获取及介绍_csdn等级升级
- 6csdn专用必杀技----谷歌浏览器插件_csdn谷歌插件
- 7导致Oracle裁员的原因有哪些?
- 8Java智能语音电销机器人 可私有化部署 自带小程序系统_java开发智能外呼机器人系统
- 9Hadoop 3.0磁盘均衡器(diskbalancer)新功能及使用介绍
- 10Mac电脑M1芯片Python环境搭建_mac m1 python 安装 依赖
【Linux Mint 深度学习开发环境搭建】多深度学习框架融合环境_linux 深度学习环境
赞
踩
系列文章目录
第一章 Linux mint 深度学习开发环境搭建之Nvidia显卡相关软件安装
第二章 Linux mint 深度学习开发环境搭建之开发软件安装
第三章 Linux mint 深度学习开发环境搭建之多深度学习框架融合环境
前言
前文已经介绍了进行深度学习所需要的显卡环境以及编码IDE的安装,本章节将搭建一个多深度学习框架环境,搭建此环境所要达到的目的是
- 多个项目所需训练环境不同,要将caffe,TensorFlow,pytorch
- 可以在别台电脑上轻易复现,免去重新搭建环境的时间。
基于这些前置要求,我初步打算,拉取一个ubuntu镜像,在镜像中安装anaconda,利用conda环境隔离多个深度学习框架。
一、搭建步骤
(1)拉取合适的基础镜像
要使所有的深度学习框架在镜像中都能用GPU训练加速,我们希望尽量在一个已经比较成型的镜像上再做操作。
所以我们先上dockerhub上寻找合适的镜像(image)。
点击下面链接进入dockerhub官网
dockerhub
-
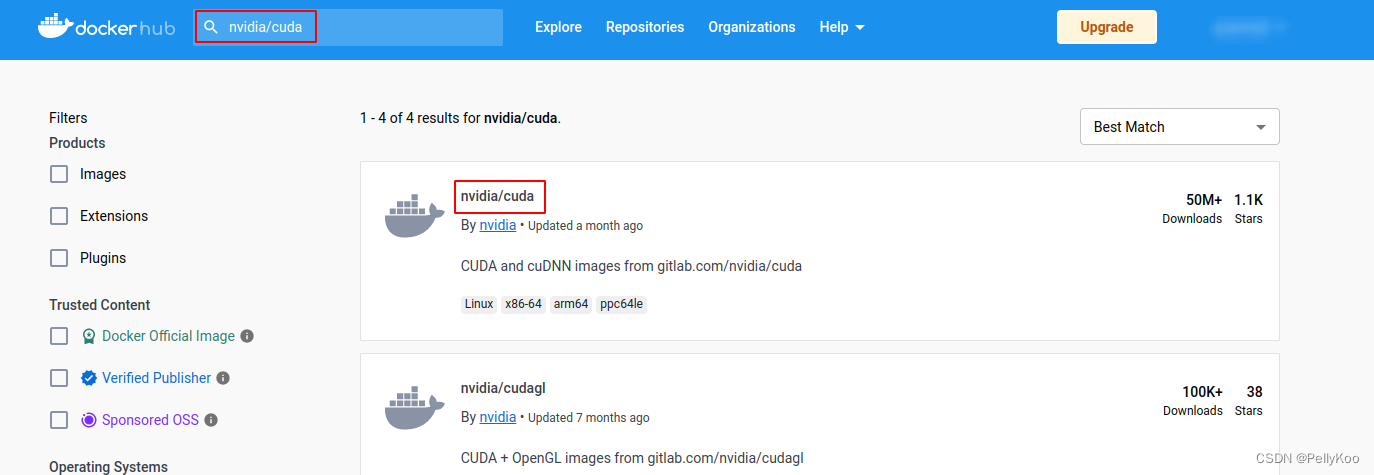
在上面的搜索框中输入
nvidia/cuda搜索
-
点击第一项进入,点击
Tags,输入ubuntu20.04,搜索

-
下拉,找到
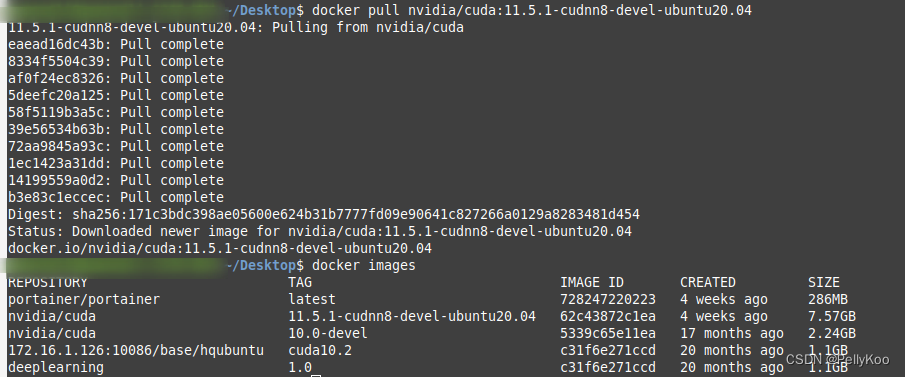
11.5.1-cudnn8-devel-ubuntu20.04,这个即为cuda11.5.1+cudnn8的ubuntu20.04环境。点击右方的复制图标,可将拉取命令复制到剪切板

-
在终端下右击鼠标,粘贴命令,回车执行,如果网速好的话,很快就拉取成功了。当然你也可以在portainer中的image中拉取。
-
进入portainer,点击
+ Add container,创建一个container。

-
输入相关的配置需求,如下方红框所示
点击+publish a new network port,来增加映射的端口,最好多映射几个,22端口是ssh用来远程连接的端口。3389端口则是远程桌面,其他端口有时候可以用tensorboard进行监控训练状况。

-
补充交互功能等

-
添加挂载目录,第一行填容器中的路径,第二行填物理机中的路径

-
点击
Deploy the container生成容器
-
点击红框处进入

-
点击
Connect进入终端

- 可以输入命令测试,结果如图所示,cuda版本11.5,cudnn版本8.3.3,可看到挂载的物理机上的目录
nvcc -V
- 1
cat /usr/include/cudnn_version.h |grep CUDNN_MAJOR -A 2
- 1

(2)安装anaconda
- 更新源
apt update && apt upgrade
- 1
- 安装vim
apt install vim
- 1
- 下载anaconda并安装
./Anaconda3-2022.10-Linux-x86_64.sh
- 1
- 替换conda源
vim ~/.condarc
- 1
channels:
  - defaults
show_channel_urls: true
default_channels:
  - https://mirrors.tuna.tsinghua.edu.cn/anaconda/pkgs/main
  - https://mirrors.tuna.tsinghua.edu.cn/anaconda/pkgs/r
  - https://mirrors.tuna.tsinghua.edu.cn/anaconda/pkgs/msys2
custom_channels:
  conda-forge: https://mirrors.tuna.tsinghua.edu.cn/anaconda/cloud
  msys2: https://mirrors.tuna.tsinghua.edu.cn/anaconda/cloud
  bioconda: https://mirrors.tuna.tsinghua.edu.cn/anaconda/cloud
  menpo: https://mirrors.tuna.tsinghua.edu.cn/anaconda/cloud
  pytorch: https://mirrors.tuna.tsinghua.edu.cn/anaconda/cloud
  pytorch-lts: https://mirrors.tuna.tsinghua.edu.cn/anaconda/cloud
  simpleitk: https://mirrors.tuna.tsinghua.edu.cn/anaconda/cloud
- 1
- 2
- 3
- 4
- 5
- 6
- 7
- 8
- 9
- 10
- 11
- 12
- 13
- 14
- 15
(3)安装pytorch环境
- 创建名为pytorch1.6.0的conda环境,提示要安装相关依赖,回车
conda create -n pytorch1.6.0 python=3.8
- 1

- 启动环境
source activate pytorch1.6.0
- 1
- 安装pytorch1.6.0版本,提示安装,回车
conda install pytorch==1.6.0 torchvision==0.7.0 torchaudio==0.6.0 cudatoolkit=10.2 -c pytorch
- 1
(4)安装tensorFlow
- 创建名为tensorflow1.14.0的环境
conda create -n tensorflow1.14.0 python=3.7
- 1
- 启动环境
source activate tensorflow1.14.0
- 1
- 安装tensorflow
conda install tensorflow-gpu==1.14.0 cudatoolkit=10.1
- 1
(5)安装caffe
- 创建caffe环境,caffe对python3兼容不好,还是选择python2.7环境
注意:caffe-gpu安装版本是1.0,但是实测这个caffe版本似乎是有问题的,caffe1.0版本是带有depthwiseconvolution层,即深度分离卷积层。但这个版本的caffe不能识别,建议还是从官网下载,当然了顺便说一句,2020年caffe就已经停止了维护更新
conda create -n caffe -c defaults python=2.7 caffe-gpu
- 1
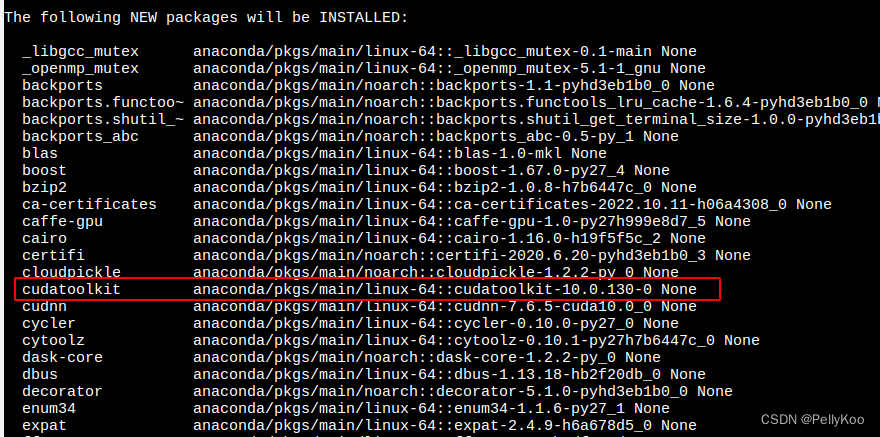
- 默认安装的是cuda10.0
- 启动环境
source activate caffe
- 1
(7)安装mxnet
- 创建mxnet1.7.0版本的环境
conda create -n mxnet1.7.0 python=3.7
- 1
- 启动环境
source activate mxnet1.7.0
- 1
- 安装mxnet1.7.0
pip install mxnet-cu102==1.7.0
- 1

- 安装cudatoolkit10.2
conda install cudatoolkit=10.2
- 1
(8)安装ssh、xrdp
- 在终端下输入以下命令,根据提示修改root的密码,此处修改为root
passwd
- 1
- 在终端下输入命令,安装ssh、xrdp、netstat,注意:xfce4安装过程中会让你选择默认的显示管理器。gdm和lightdm二选一,我们选择lightdm
apt install openssh-server xrdp net-tools xfce4 xfce4-terminal
- 1
- 配置xfce4,将xfce4-session写入
echo "xfce4-session" >~/.xsession
- 1
- 配置ssh
vim /etc/ssh/sshd_config
- 1
- 确认下面红框内的相关项打开


- 将ssh、xrdp默认容器开机启动,进入/etc/profile.d下,创建一个脚本文件
vim /etc/profile.d/start_ssh_xrdp.sh
- 1
- 按下i键,进入
vim的输入模式,将下面文本粘贴进去,粘贴完后保存退出
res=$(netstat -tunlp | grep 22)
if [ "$res" == "" ]; then
    service ssh start
fi
res=$(netstat -tunlp | grep 3389)
if [ "$res" == "" ]; then
  if [ -f /var/run/xrdp/xrdp.pid ]; then
      rm /var/run/xrdp/xrdp.pid
  fi
  service xrdp restart
fi
- 1
- 2
- 3
- 4
- 5
- 6
- 7
- 8
- 9
- 10
- 11
- 打开bashrc,将这个脚本设置为容器启动。
vim ~/.bashrc
- 1
将下面语句加到bashrc的最后一行
bash /etc/profile.d/start_ssh_xrdp.sh
- 1
- 重启容器
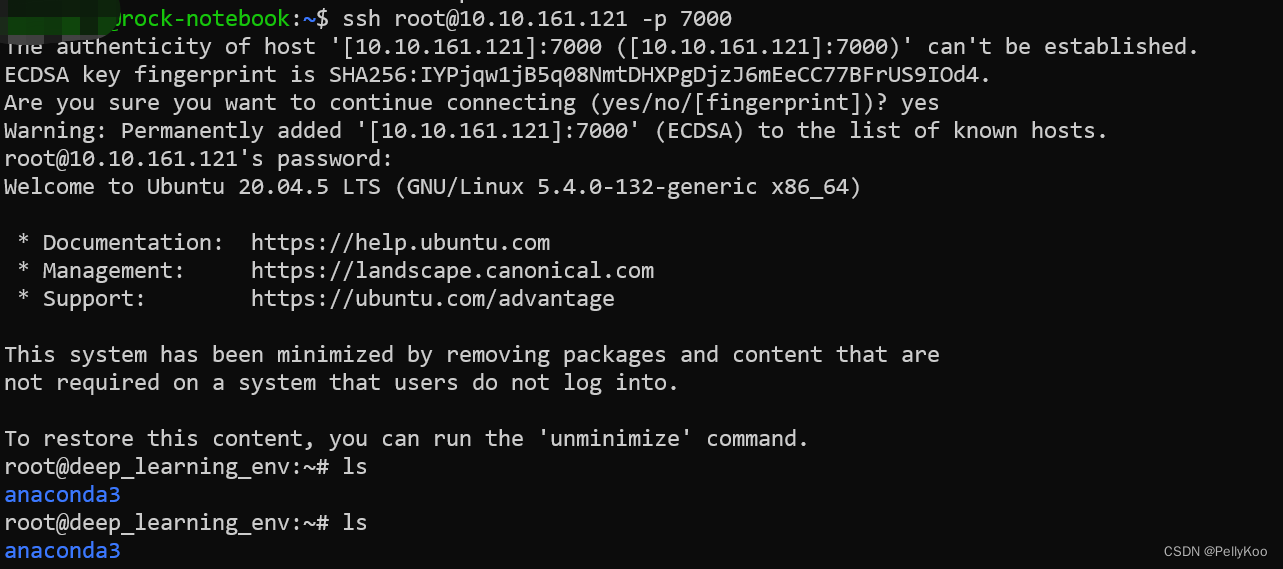
- 在其他linux主机的终端下输入以下命令,可以测试远程端口是否配置成功。此处10.10.161.121为所配置容器的ip地址。7000是预先映射的与端口号22相通的端口号
ssh root@10.10.161.121 -p 7000
- 1
- 成功连接,如图所示
-
在其他windowspc上搜索并打开
远程桌面连接。 -
在
计算机(C):栏中输入IP地址:端口号。ip地址可以通过在mint终端下输入ipconfig查到。端口号为之前开启容器时3389所映射的端口号。

-
点击
连接,username和password均为root。输入后点击OK

-
进入界面,在桌面右击选择
Applications→Settings→Settings Manager→Preferred Applications。


- 设置后在桌面右击选择
Open Terminal Here,即可打开终端


