
- 1java 获取excel 中的数字签名_Excel VBA使用数字签名,让你代码开启执行无忧之路...
- 2es基本语句详解 查询语句详解_es查询语句
- 3西安交通大学915考研--编程题Java代码踩坑(2016年真题)_考研编程题
- 4“互联网+工业”下的大数据应用场景分析_工业互联网+大数据应用的判断是什么
- 58 个适用于电脑的顶级免费分区恢复软件_奇客分区大师
- 6给你一个项目,你会如何开展性能测试工作_项目管理系统如何进行性能测试
- 7项目管理 | 什么是项目管理计划?_项目管理计划管理
- 8pycharm社区版、专业版和教育版区别是什么 _pycharm教育版(1)_pycharm教育版和专业版区别
- 9C#实现Json序列化-反射与特性_c# jsonconvert.serializeobject
- 10GIT的使用方法(安装,远程仓库的绑定,文件删除以及更新操作)_git lfs 如何更新远端的文件
思科模拟器基础实验完整流程-初级_思科模拟器实验
赞
踩
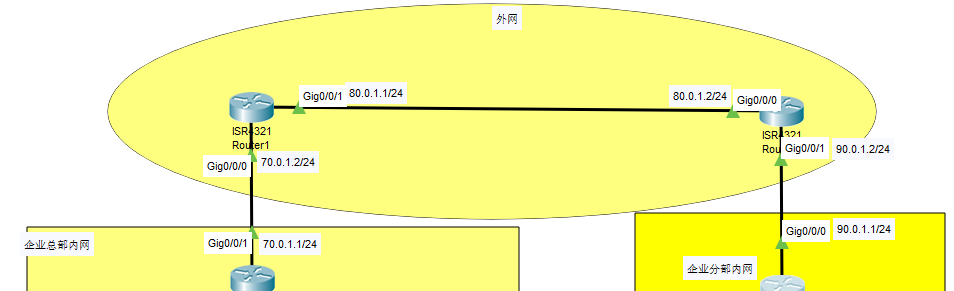
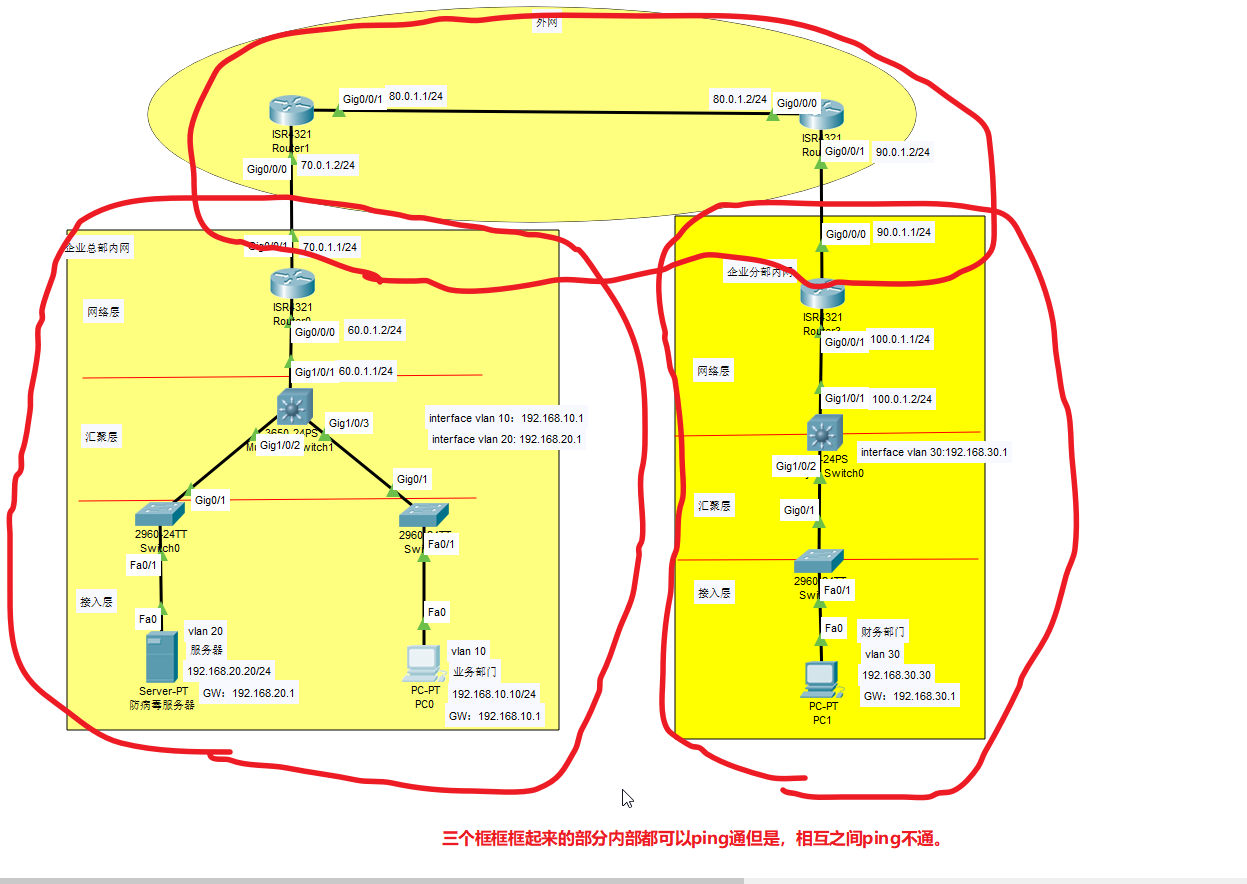
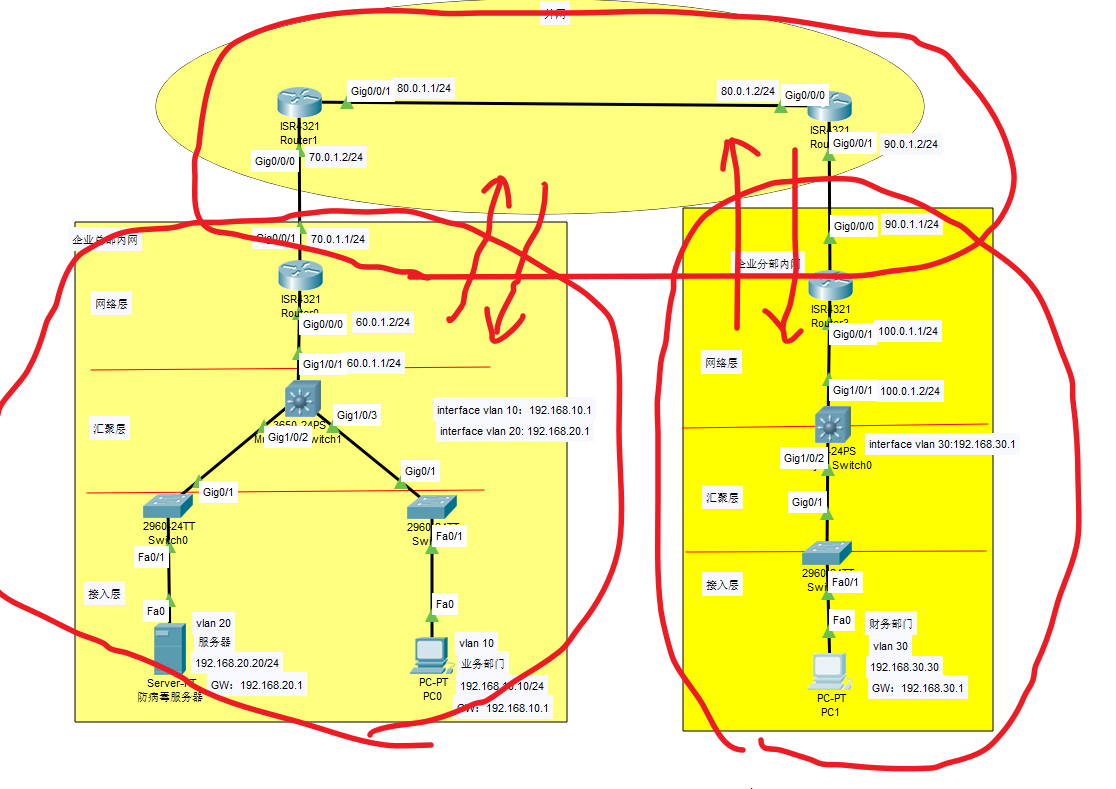
实验拓扑
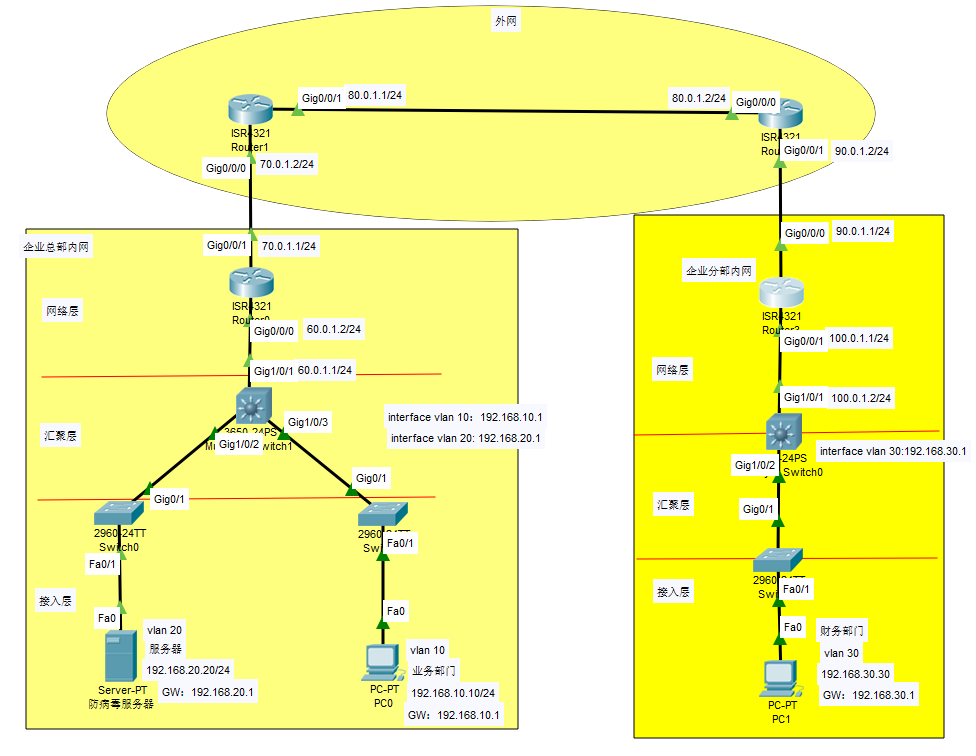
由图我们可以看到这张拓扑由三部分组成:企业总部内网、外网、企业分部内网
第一部分:企业总部内网
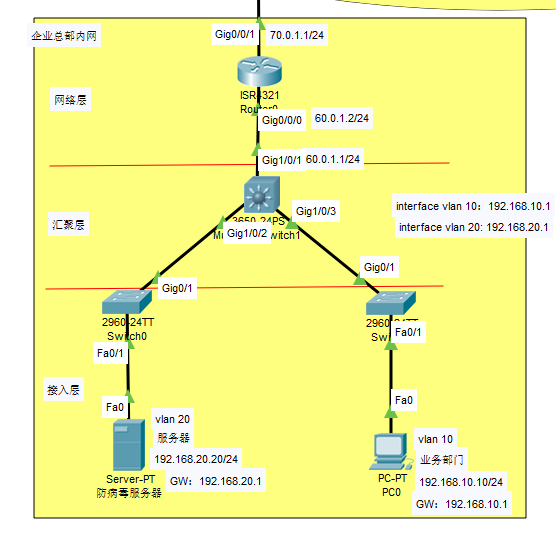
内网的网络结构分为三层:接入层、汇聚层、网络层。由下之上我们分开解释
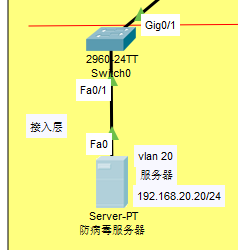
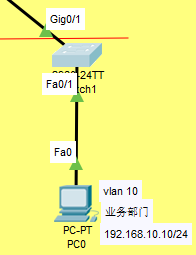
第一层:接入层
这一层主要为接入层交换机(连接各个终端设备)和终端设备。我们这里的终端设备为防病毒服务器和业务部门。
两个规划VLAN。
| 部门 | vlan | 网段 |
|---|---|---|
| 业务部门 | 10 | 192.168.10.10 |
| 防病毒服务器 | 20 | 192.168.20.10 |
接入层交换机连接三层交换机,这样两边的部门之间可以进行访问,这就需要配置vlan
第二层:汇聚层
这是之前我们没有添加的,但是我想了一下,这样加一台三层交换机有好处,方便我们的配置,其实这样也更加符合企业内部网络的结构。
三层交换机主要用于连接核心网络层和就如层。
解决:VLAN间通信
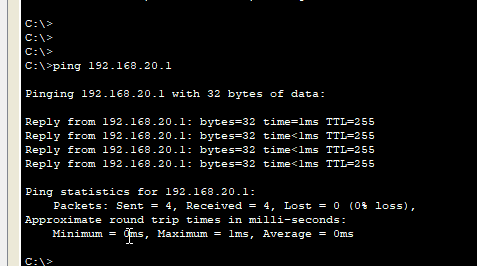
**目标:**防病毒服务器可以ping通业务部门的PC0
问题:VLAN间通信
不用担心,我已经解决了,昨天因为还少了点配置,这次一定没问题,如果还有问题的话,那就是模拟器的问题(点头)
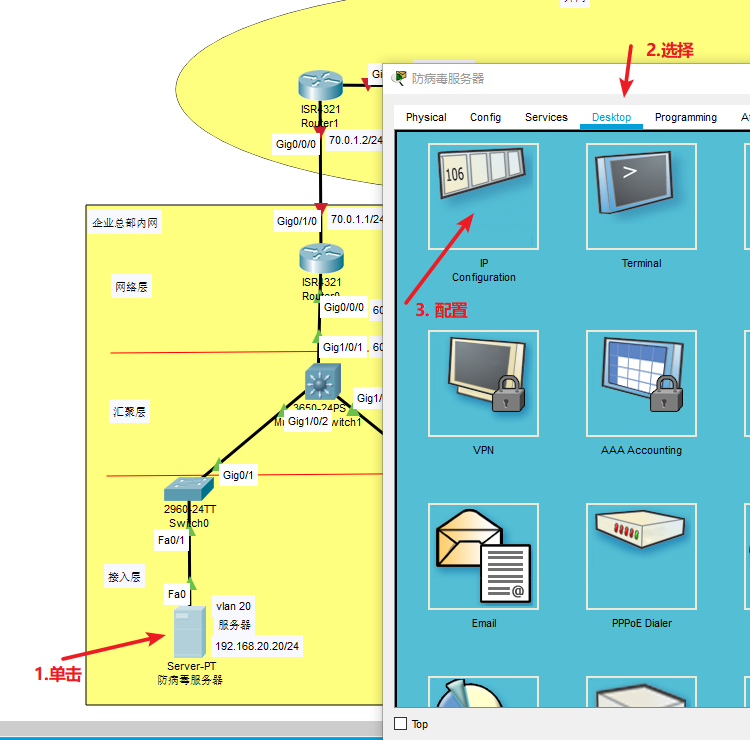
- 配置
IP地址:给防病毒服务器和PC0配置ip地址
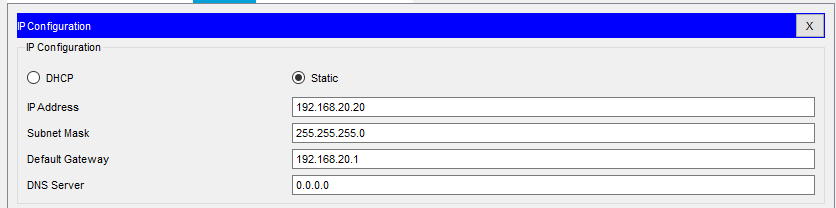
PC0也一样

- 配置
Switch 0
en
conf ter
vlan 20
name fuwuqi
exit
interface FastEthernet0/1
 switchport access vlan 20
 switchport mode access
exit
interface GigabitEthernet0/1
 switchport trunk native vlan 99
 switchport trunk allowed vlan all
 switchport mode trunk
- 1
- 2
- 3
- 4
- 5
- 6
- 7
- 8
- 9
- 10
- 11
- 12
- 13
- 配置
Switch 1
en
conf ter
vlan 10
name yewubumen
exit
interface FastEthernet0/1
 switchport access vlan 10
 switchport mode access
exit
interface GigabitEthernet0/1
 switchport trunk native vlan 99
 switchport trunk allowed vlan all
 switchport mode trunk
- 1
- 2
- 3
- 4
- 5
- 6
- 7
- 8
- 9
- 10
- 11
- 12
- 13
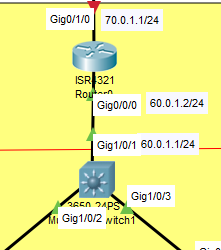
- 配置
三层交换机
注意三层交换机上要实现路由功能,开启路由功能ip routing。接口需要配置no switchport
vlan 10
name yeuwbumen
exit
vlan 20
name fuwuqi
exit
interface Vlan10
 ip address 192.168.10.1 255.255.255.0

interface Vlan20
 ip address 192.168.20.1 255.255.255.0

interface GigabitEthernet1/0/1
 no switchport
 ip address 60.0.1.1 255.255.255.0

interface GigabitEthernet1/0/2
 switchport trunk native vlan 99
 switchport trunk encapsulation dot1q
 switchport mode trunk

interface GigabitEthernet1/0/3
 switchport trunk native vlan 99
 switchport trunk encapsulation dot1q
 switchport mode trunk

- 1
- 2
- 3
- 4
- 5
- 6
- 7
- 8
- 9
- 10
- 11
- 12
- 13
- 14
- 15
- 16
- 17
- 18
- 19
- 20
- 21
- 22
- 23
- 24
- 25
完成了上面的四步,vlan之间就可以通信了。
测试:
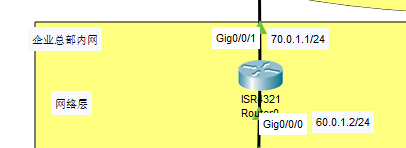
第三层:网络层
现在上面的配置,已经可以实现
vlan间的互通了,但还是没有办法访问路由器。那是因为路由器上没有下面192.168.10.0网段和192.168.20.0网段的路由。
查看路由器的路由表:show ip route

查看三层交换机的路由:show ip route
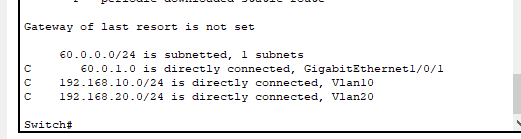
那就觉的办法就是在在三层交换机上配置默认路由(不管目的地址是哪里,都传给路由器),路由器上配置去往10和20网段的静态路由。
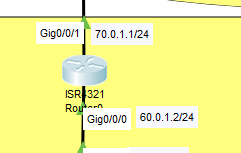
- 路由器
interface g0/0/0
ip address 60.0.1.2 255.255.255.0
(不要忘了接口配置IP地址)

Router(config)#ip route 192.168.10.0 255.255.255.0 60.0.1.1
Router(config)#ip route 192.168.20.0 255.255.255.0 60.0.1.1
- 1
- 2
- 3
- 4
- 5
- 6

- 三层交换机
Switch(config)#ip route 0.0.0.0 0.0.0.0 60.0.1.2
- 1

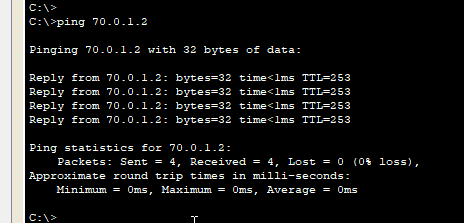
- 测试:
PC端ping路由器接口地址
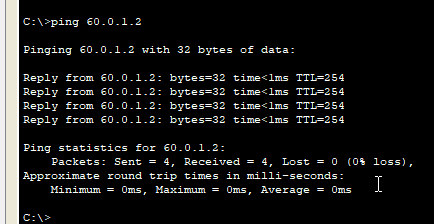
现在整个内网已经全部打通了!
nice

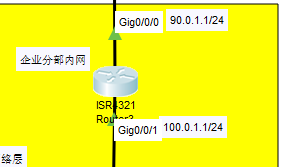
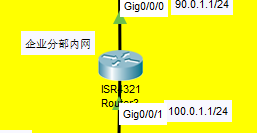
第二部分:企业分部内网
这一部分就比较简单了,为什么它比较简单,因为结构比较简单,所以它比较简单。
其实跟总部的一样,如下:
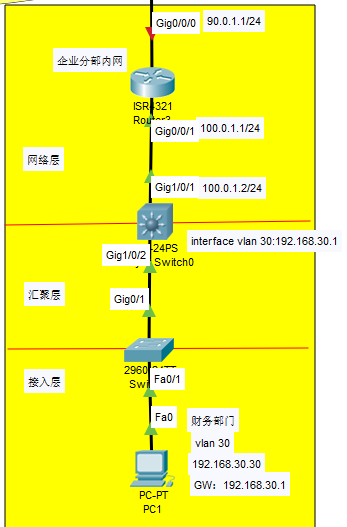
PC的IP地址
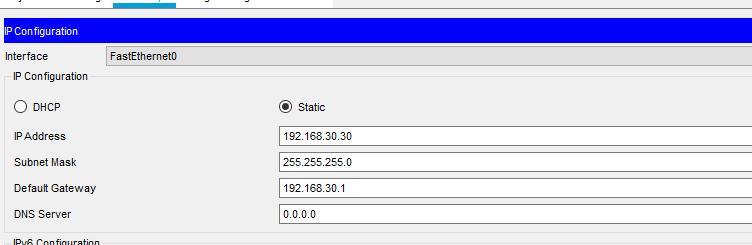
- 交换机划分接口和配置接口模式
en
conf ter
vlan 30
name Caiwu
exit
interface FastEthernet0/1
 switchport access vlan 30
 switchport mode access
interface GigabitEthernet0/1
 switchport trunk native vlan 99
 switchport mode trunk
 switchport trunk allow vlan all
- 1
- 2
- 3
- 4
- 5
- 6
- 7
- 8
- 9
- 10
- 11
- 12
- 三层交换机上配置网关和上连接口
en
conf ter
vlan 30
name Caiwu
exit
interface vlan 30
ip address 192.168.30.1 255.255.255.0
exit

ip routing
interface GigabitEthernet1/0/1
 no switchport
 ip address 100.0.1.2 255.255.255.0
exit
interface GigabitEthernet1/0/2
 switchport trunk encapsulation dot1q
 switchport trunk native vlan 99
 switchport mode trunk
 switchport trunk allow vlan all
- 1
- 2
- 3
- 4
- 5
- 6
- 7
- 8
- 9
- 10
- 11
- 12
- 13
- 14
- 15
- 16
- 17
- 18
- 19
做完上面PC已经可以和三层交换机ping通了,但是还不能ping通路由器。所以和上面总部一样,需要添加路由。
- 路由器上配置接口IP和添加路由
interface GigabitEthernet0/0/1
 ip address 100.0.1.1 255.255.255.0

Router(config)#ip route 192.168.30.0 255.255.255.0 100.0.1.2
- 1
- 2
- 3
- 4
- 三层交换机上配置默认路由
ip route 0.0.0.0 0.0.0.0 100.0.1.1
- 1
- 测试
这样分部的内网也全部打通了。
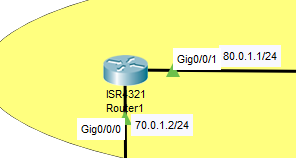
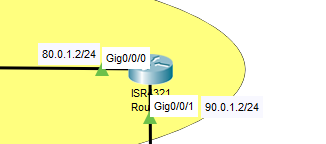
第三部分:外部网络路由
为了方便,后面的配置,我们先把IP地址全部配置好,如下图:
具体不写了,很简单。
注意:接口需要no shutdown
如:
interface g0/0/1
ip address 70.0.1.1 255.255.255.0
no shutdown
- 1
- 2
- 3
路由器之间需要运行动态路由协议,让他们相互学习到对方的路由。这里我们选择简单的EIGRP,宣告网络的时候是不宣告内网路由的。
- 企业总部出口路由器
原本的路由表:
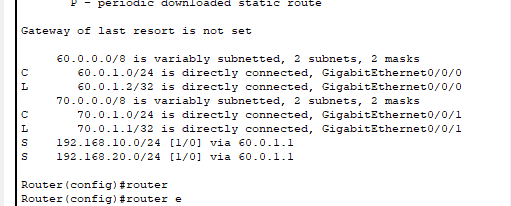
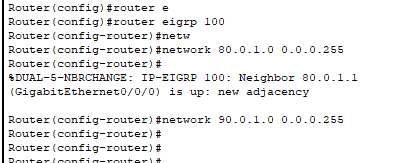
做完EIGRP的路由表:
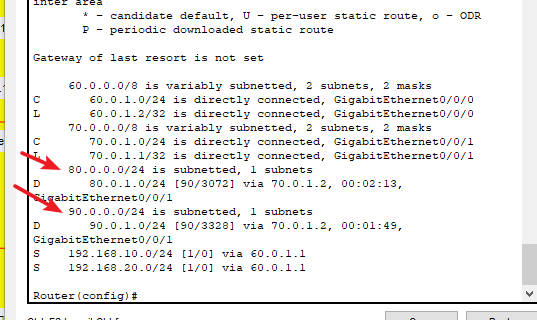
学习到了两条路由,80和90的
具体配置:
router eigrp 100
 network 70.0.1.0 0.0.0.255
- 1
- 2
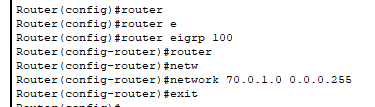
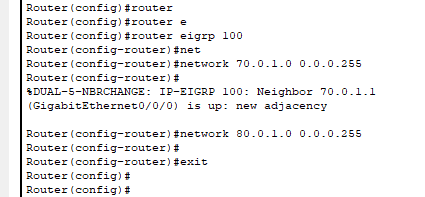
- R1路由器
router eigrp 100
 network 70.0.1.0 0.0.0.255
 network 80.0.1.0 0.0.0.255
- 1
- 2
- 3
- R2路由器
router eigrp 100
 network 80.0.1.0 0.0.0.255
 network 90.0.1.0 0.0.0.255
- 1
- 2
- 3
- R3路由器
router eigrp 100
 network 90.0.1.0 0.0.0.255
- 1
- 2
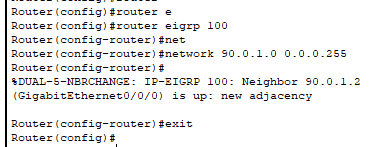
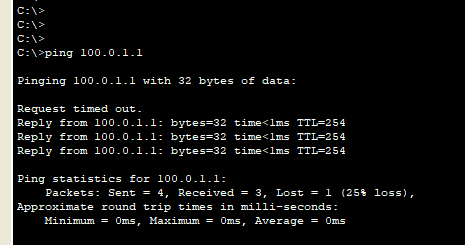
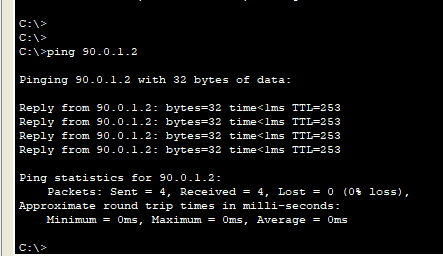
- 测试:总部出口路由器(R0)
ping分部出口路由器(R1)
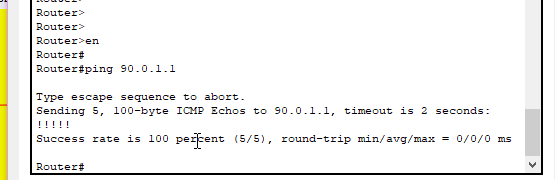
可以ping通;
现在我们来看一下,整个网络。如图
局域网要想和外部网络进行通信,还要做NAT(地址转换)。目的是为保护内部网络和节约IP地址。
第四部分:NAT地址转换
如果对地址转换不理解:请看思科:NAT基础笔记
NAT地址转换需要在总部和分部的出口路由器上做。
-
确保外网没有私网的网段通信
- 在R1和R2上都配置:

access-list 1 deny 10.0.0.0 0.255.255.255
access-list 1 deny 172.16.0.0 0.15.255.255
access-list 1 deny 192.168.0.0 0.0.255.255
access-list 1 permit any
interface gigabitEthernet 0/0/1
ip access-group 1 in
interface g0/0/0
ip access-group 1 in
- 1
- 2
- 3
- 4
- 5
- 6
- 7
- 8
- 总部出口路由器配置
NAT
access-list 1 permit 192.168.10.0 0.0.0.255
access-list 1 permit 192.168.20.0 0.0.0.255
ip nat inside source list 1 interface GigabitEthernet0/0/1 overload
interface GigabitEthernet0/0/0
 ip nat inside
interface GigabitEthernet0/0/1
 ip nat outside
- 1
- 2
- 3
- 4
- 5
- 6
- 7
现在测试PC pingR1
内网可以ping通外网了。
- 分部出口路由器配置
NAT
access-list 1 permit 192.168.30.0 0.0.0.255
ip nat inside source list 1 interface GigabitEthernet0/0/0 overload
interface GigabitEthernet0/0/1
 ip nat inside
interface GigabitEthernet0/0/0
 ip nat outside
- 1
- 2
- 3
- 4
- 5
- 6
同样进行测试:
恭喜你到这里你已经完成了大部分的工作了

现在我们看一下网络
内网可以与外网进行通信,但是两个内网之间还是不能通信。
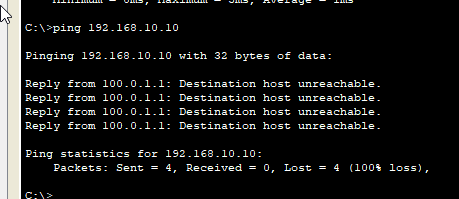
所以还是不能高兴太早,还有最后一步没有做。那就是VPN
[外链图片转存失败,源站可能有防盗链机制,建议将图片保存下来直接上传(img-MPQ9WJTm-1651375222121)(https://c.tenor.com/TzHS92eeI1sAAAAC/discouraged-down.gif)]
第五步:VPN
VPN是整个配置中比较复杂的,但是不用担心,一切问题都是可以解决的,船到桥头自然直。参考笔记:网络信息安全:五、GRE和IPSEC
哭死,做了一遍,正在排错,结果程序崩溃了,我还没保存配置,全没了。哭泣泣。


