- 1docker可视化工具Shipyard_shipyard使用
- 2人工智能--深度学习两层全连接神经网络搭建_深度学习两层神经网络
- 3【KITTI可视化】kitti三维目标标注可视化
- 4(项目笔记)opencv人脸识别_opencv人脸识别csdn
- 5Unity之UGUI的学习(一):Canvas和EventSystem(画布和事件系统)_unity canvas event
- 6Vue项目用百度地图定位_vue 百度地图定位当前
- 7unity赛车游戏_unity塞车游戏
- 8Unity2d开发总结——(Texture2d)Import Setting_unity texture2d
- 9python可视化-plot()函数_plot函数lw是什么
- 10重新配置vue项目时出现的:连接已断开问题_-1 :cli: 服务没找到 -1 :cli: 连接已断开
stable diffusion webui 安装部署(linux系统)_error: this script must not be launched as root, a
赞
踩
文中部署stable diffusion webui所使用的机器是腾讯云服务器linux系统,centos7
一 环境准备
在这里使用anaconda安装,优势就是可以方便地安装和管理软件包,同一系统上可以同时使用不同版本的 Python 和第三方软件包。如果你需要安装多个系统,而且依赖软件版本不同,那就安装anaconda吧。
1、下载Anaconda
wget https://repo.anaconda.com/archive/Anaconda3-2023.03-1-Linux-x86_64.sh
如果没有wget则可以通过以下命令安装yum install wget -y
2、安装Anaconda
增加执行权限: chmod +x Anaconda3-2023.03-1-Linux-x86_64.sh
开始执行:./Anaconda3-2023.03-1-Linux-x86_64.sh
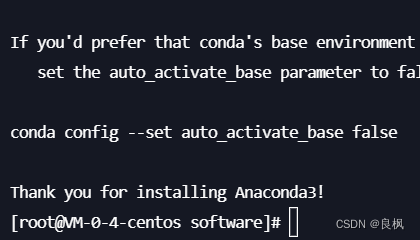
跟着提示来做,让回车就回车,让yes就yes,安装成功后会显示如下提示

3、创建Stable Diffusion虚拟环境
在使用 Conda 管理 Python 环境时,默认情况下会创建一个名为 base 的虚拟环境,该环境是全局共享的,即在该环境下安装的 Python 包和库都会对系统上的其他所有虚拟环境和全局环境可见。
如果不进行设置,重新启动就变成下面这个样子
(base) [root@VM-0-4-centos ~]#
为了清晰,也为了后面再部署其他的AI应用,我们给Stable Diffusion创建单独的虚拟环境。
创建虚拟环境:conda create -n sd python=3.10.6
、

查看环境列表:conda evn list

安装git
conda install git
查看git版本号

二: stable-diffusion-webui 安装部署
1、下载代码stable-diffusion-webui
git clone https://github.com/AUTOMATIC1111/stable-diffusion-webui
2、启动webu.sh
切换到 stable-diffusion-webui目录
方法一: 运行 bash webui.sh如果是root用户,需要注释掉webui.sh中关于root权限的判断。
方法二:root用户还可以直接运行 bash webui.sh -f
三:常见报错信息
接下来就是解决报错信息了。
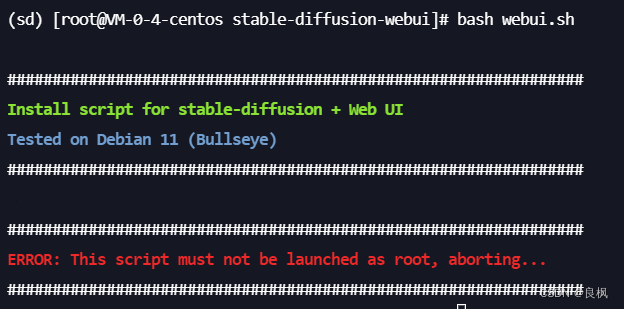
1、ERROR: This script must not be launched as root, aborting...

启动时候加个参数: bash webui.sh -f 这样就可以以root启动了。
如果嫌麻烦可以修改 webui.sh脚本代码

2、No matching distribution found for torch==2.0.1
Collecting torch==2.0.1
Could not find a version that satisfies the requirement torch==2.0.1 (from versions: 1.0.0, 1.0.1, 1.0.1.post2, 1.1.0, 1.2.0, 1.3.0, 1.3.1, 1.4.0, 1.5.0, 1.5.1, 1.6.0, 1.7.0, 1.7.1, 1.8.0, 1.8.1, 1.9.0, 1.9.1, 1.10.0, 1.10.1, 1.10.2)
No matching distribution found for torch==2.0.1
You are using pip version 9.0.3, however version 23.1.2 is available.
You should consider upgrading via the 'pip install --upgrade pip' command.
Traceback (most recent call last):
File "launch.py", line 38, in <module>
main()
File "launch.py", line 29, in main
prepare_environment()
File "/home/sdui/stable-diffusion-webui/modules/launch_utils.py", line 254, in prepare_environment
run(f'"{python}" -m {torch_command}', "Installing torch and torchvision", "Couldn't install torch", live=True)
File "/home/sdui/stable-diffusion-webui/modules/launch_utils.py", line 101, in run
raise RuntimeError("\n".join(error_bits))
RuntimeError: Couldn't install torch.
Command: "/home/sdui/stable-diffusion-webui/venv/bin/python3" -m pip install torch==2.0.1 torchvision==0.15.2 --extra-index-url https://download.pytorch.org/whl/cu118
Error code: 1
问题排查:
1、pip版本不对,导致下载文件报错
conda中默认带的旧版本pip,更换为pip3
卸载:conda uninstall pip
安装:conda install -c anaconda pip
然后运行:bash webui.sh
2、如果无法自动完成下载安装,可以手动进行安装
查看下CUDA版本版本
nvidia-smi
cat /usr/local/cuda/version.txt
手动选择版本 https://pytorch.org/get-started/locally/
选择好对应的版本,conda install pytorch torchvision torchaudio pytorch-cuda=11.7 -c pytorch -c nvidia
运行之后,就开始进入各种依赖的下载
3、git版本太低
解决方案:conda install git
[notice] To update, run: pip install --upgrade pip
Installing gfpgan
Installing clip
Installing open_clip
Cloning Stable Diffusion into /app/stable-diffusion-webui/repositories/stable-diffusion-stability-ai...
Traceback (most recent call last):
File "/app/stable-diffusion-webui/launch.py", line 38, in <module>
main()
File "/app/stable-diffusion-webui/launch.py", line 29, in main
prepare_environment()
File "/app/stable-diffusion-webui/modules/launch_utils.py", line 288, in prepare_environment
git_clone(stable_diffusion_repo, repo_dir('stable-diffusion-stability-ai'), "Stable Diffusion", stable_diffusion_commit_hash)
File "/app/stable-diffusion-webui/modules/launch_utils.py", line 150, in git_clone
run(f'"{git}" -C "{dir}" checkout {commithash}', None, "Couldn't checkout {name}'s hash: {commithash}")
File "/app/stable-diffusion-webui/modules/launch_utils.py", line 101, in run
raise RuntimeError("\n".join(error_bits))
RuntimeError: Couldn't checkout {name}'s hash: {commithash}.
Command: "git" -C "/app/stable-diffusion-webui/repositories/stable-diffusion-stability-ai" checkout cf1d67a6fd5ea1aa600c4df58e5b47da45f6bdbf
Error code: 129
stderr: Unknown option: -C
usage: git [--version] [--help] [-c name=value]
[--exec-path[=<path>]] [--html-path] [--man-path] [--info-path]
[-p|--paginate|--no-pager] [--no-replace-objects] [--bare]
[--git-dir=<path>] [--work-tree=<path>] [--namespace=<name>]
<command> [<args>]
4、报错:libGL.so.1: cannot open shared object file: No such file or directory
解决方案:yum install mesa-libGL
Python 3.10.9 (main, Jan 11 2023, 15:21:40) [GCC 11.2.0] Version: v1.3.2 Commit hash: baf6946e06249c5af9851c60171692c44ef633e0 Cloning Taming Transformers into /app/stable-diffusion-webui/repositories/taming-transformers... Cloning K-diffusion into /app/stable-diffusion-webui/repositories/k-diffusion... Cloning CodeFormer into /app/stable-diffusion-webui/repositories/CodeFormer... Cloning BLIP into /app/stable-diffusion-webui/repositories/BLIP... Installing requirements for CodeFormer Installing requirements Launching Web UI with arguments: -f No module 'xformers'. Proceeding without it. Traceback (most recent call last): File "/app/stable-diffusion-webui/launch.py", line 38, in <module> main() File "/app/stable-diffusion-webui/launch.py", line 34, in main start() File "/app/stable-diffusion-webui/modules/launch_utils.py", line 330, in start import webui File "/app/stable-diffusion-webui/webui.py", line 49, in <module> from modules import shared, sd_samplers, upscaler, extensions, localization, ui_tempdir, ui_extra_networks, config_states File "/app/stable-diffusion-webui/modules/sd_samplers.py", line 1, in <module> from modules import sd_samplers_compvis, sd_samplers_kdiffusion, shared File "/app/stable-diffusion-webui/modules/sd_samplers_compvis.py", line 9, in <module> from modules import sd_samplers_common, prompt_parser, shared File "/app/stable-diffusion-webui/modules/sd_samplers_common.py", line 5, in <module> from modules import devices, processing, images, sd_vae_approx, sd_samplers, sd_vae_taesd File "/app/stable-diffusion-webui/modules/processing.py", line 11, in <module> import cv2 File "/app/stable-diffusion-webui/venv/lib/python3.10/site-packages/cv2/__init__.py", line 181, in <module> bootstrap() File "/app/stable-diffusion-webui/venv/lib/python3.10/site-packages/cv2/__init__.py", line 153, in bootstrap native_module = importlib.import_module("cv2") File "/root/anaconda3/envs/sd/lib/python3.10/importlib/__init__.py", line 126, in import_module return _bootstrap._gcd_import(name[level:], package, level) ImportError: libGL.so.1: cannot open shared object file: No such file or directory
四: conda 常用的命令
1、创建环境:
conda create --name 环境名称用途:用于创建一个新的Conda环境,可以指定环境的名称。
2、激活环境:
conda activate 环境名称用途:用于激活指定名称的Conda环境。
3、停用环境:
conda deactivate用途:用于停用当前激活的Conda环境。
4、删除环境:
conda remove --name 环境名称 --all用途:用于删除指定名称的Conda环境,
--all参数表示删除环境及其所有安装的包。5、安装包:
conda install 包名称用途:用于在当前环境中安装指定的包。
6、升级包:
conda update 包名称用途:用于更新已安装包的版本。
7、卸载包:
conda remove 包名称用途:用于从当前环境中卸载指定的包。
8、查看已安装的包:
conda list用途:用于列出当前环境中已安装的包。
9、搜索包:
conda search 包名称用途:用于在Conda仓库中搜索指定的包。
10、创建环境配置文件:
conda env export > environment.yaml用途:用于将当前环境的配置导出到一个YAML文件中,以便在其他地方进行复制或重建环境。
11、查看配置信息:
conda config --show显示当前的Conda配置信息,包括通用配置、环境配置和用户配置。
12、查看某个配置项的值:
conda config --show 配置项显示特定配置项的当前值,例如:
conda config --show channels用于显示当前配置的通道列表。13、设置配置项的值:
conda config --set 配置项=值例如:
conda config --set channels conda-forge用于将通道设置为conda-forge。14、添加通道:
conda config --add channels 通道名称向配置中添加一个新的通道,使Conda在包搜索和安装时优先考虑该通道。
15、移除通道:
conda config --remove channels 通道名称从配置中移除指定的通道,使Conda不再使用该通道。
16、列出所有通道:
conda config --get channels列出当前配置中所有配置的通道。
17、重置配置项:
conda config --remove-key 配置项重置指定配置项的值为默认值。
18、编辑配置文件:
conda config --edit打开配置文件以进行手动编辑,可以修改各种配置选项。
19、创建具有指定版本的环境:
conda create --name myenv python=3.10.6
20、从环境中导出和导入环境配置
导出环境配置
conda env export --name myenv --file environment.yaml
导入环境配置
conda env create --file environment.yaml
21、创建一个虚拟环境的克隆:
conda create --name myclone --clone myenv


