
- 1Redis核心技术与实战【学习笔记】 - 14.Redis 旁路缓存的工作原理及如何选择应用系统的缓存类型
- 2HTML学生个人网站作业设计:电影网站设计——电影资讯博客(5页) HTML+CSS+JavaScript 简单DIV布局个人介绍网页模板代码 DW学生个人网站制作成品下载
- 3【3D激光SLAM(二)】Velodyne激光SLAM学习之Velodyne-16线激光雷达在Jetson Nano上的配置使用_jetson 使用雷达
- 4数学的基本运算可分为三个等级。第一级为加、减运算,“连加”或“连减”时发明了第二级运算——乘法和除法,“连乘”和“连除”,即“乘方”。乘方有两种逆运算分别是“开方”和“对数”。这是第三级运算特殊之处_一共有几级运算
- 5树莓派4B部署Intel Realsense T265相机
- 6一个完整个springboot项目开发流程(毕设,源码暂不开放)_springboot项目流程
- 7jdk8新特性(Lambda、Steam、函数式接口)_jdk steam
- 8Jmeter使用技巧(三) : Jmeter调优日志查看方法_jmeter怎么查看日志
- 9CodeForces - 1081D Maximum Distance (最小生成树)_最小生成树可以有重边吗
- 10作为开发人员,这四类Code Review方法你都知道吗?
使用videojs+vue2+elementui自定义播放器控件_vue videojs
赞
踩
一、安装项目所需依赖
videojs依赖:
npm install --save-dev video.js
elementui依赖(这个图方便就不按需引入了):
npm i element-ui -S
二、main.js修改
增加以下几行:
- import videojs from 'video.js'
- import elemenui from 'element-ui'
- import 'element-ui/lib/theme-chalk/index.css';
- Vue.prototype.$videoJS = videojs;
- Vue.use(elemenui)
三、准备html结构
1、准备两个组件
在components文件夹下创建两个组件videoComponent和videoPlayer——
videoComponent挂载到App组件上
videoPlayer挂载到videoComponent上
2、各组件中的html结构
先把两个组件最基本的结构搭好
videoComponent:
- <template>
- <div class="container">
- <video-player :options="videoOptions" class="video-css"></video-player>
- </div>
- </template>
-
- <script>
- import videoPlayer from './videoPlayer.vue'
- export default {
- name: 'videoComponent',
- components:{videoPlayer},
- data(){
- return{
- videoOptions:{
- //一些视频的配置项,见下面补充...
- }
- }
-
- }
- </script>
-
- <style scoped>
- .container{
- width: 100%;
- height: 100vh;
- display: flex;
- justify-content: center;
- align-items: center;
- }
- /* 视频宽高将由此样式调整 */
- .video-css{
- width: 800px;
- height: auto;
- }
- </style>

videoPlayer:
- <template>
- <div class="videoBox">
- <video ref="videoPlayer" class="video-js"></video>
- </div>
- </template>
-
- <script>
- import 'video.js/dist/video-js.css';
- export default {
- name:'videoPlayer',
- }
- </script>
-
- <style scoped>
- .videoBox{
- box-sizing: border-box;
- position: relative;
- width: 800px;
- height:500px;
- }
- </style>
App:
- <template>
- <div id="app">
- <video-component></video-component>
- </div>
- </template>
-
- <script>
- import videoComponent from './components/videoComponent.vue'
- export default {
- name: 'App',
- components: {
- videoComponent
- }
- }
- </script>
- <style>
- *{
- padding: 0;
- margin: 0;
- }
- </style>
3、在videoPlayer组件里实例化播放器
- <script>
- import 'video.js/dist/video-js.css';
- export default {
- name:'videoPlayer',
- //接收外部组件来的参数,可实现videoPlayer组件的复用
- props:{
- options: {
- type: Object
- }
- },
- data(){
- return{
- player:null
- }
- },
- methods:{
- //定义好一个实例化播放器的方法
- createVideoPlayer(){
- this.player = this.$videoJS(this.$refs.videoPlayer,this.options)
- }
- },
- //在组件挂载时调用播放器实例化方法
- mounted(){
- this.createVideoPlayer()
- },
- //组件销毁前销毁播放器
- beforeDestroy(){
- if(this.player){
- this.player.dispose()
- }
- }
- }
- </script>
4、videoComponent传递视频参数
还有很多配置项,有需要自己查
- <script>
- import videoPlayer from './videoPlayer.vue'
- export default {
- name: 'videoComponent',
- components:{videoPlayer},
- data(){
- return{
- videoOptions:{
- //controls配置项决定是否显示默认控件
- controls:true,
- //fluid配置项根据外层css样式大小,自动填充宽高
- fluid:true,
- //sources配置项配置视频播放源
- sources:[
- {
- //播放源
- src:require('@/assets/kp.mp4'),
- //视频类型
- type:"video/mp4"
- }
- ]
-
- }
- }
- },
-
- }
- </script>
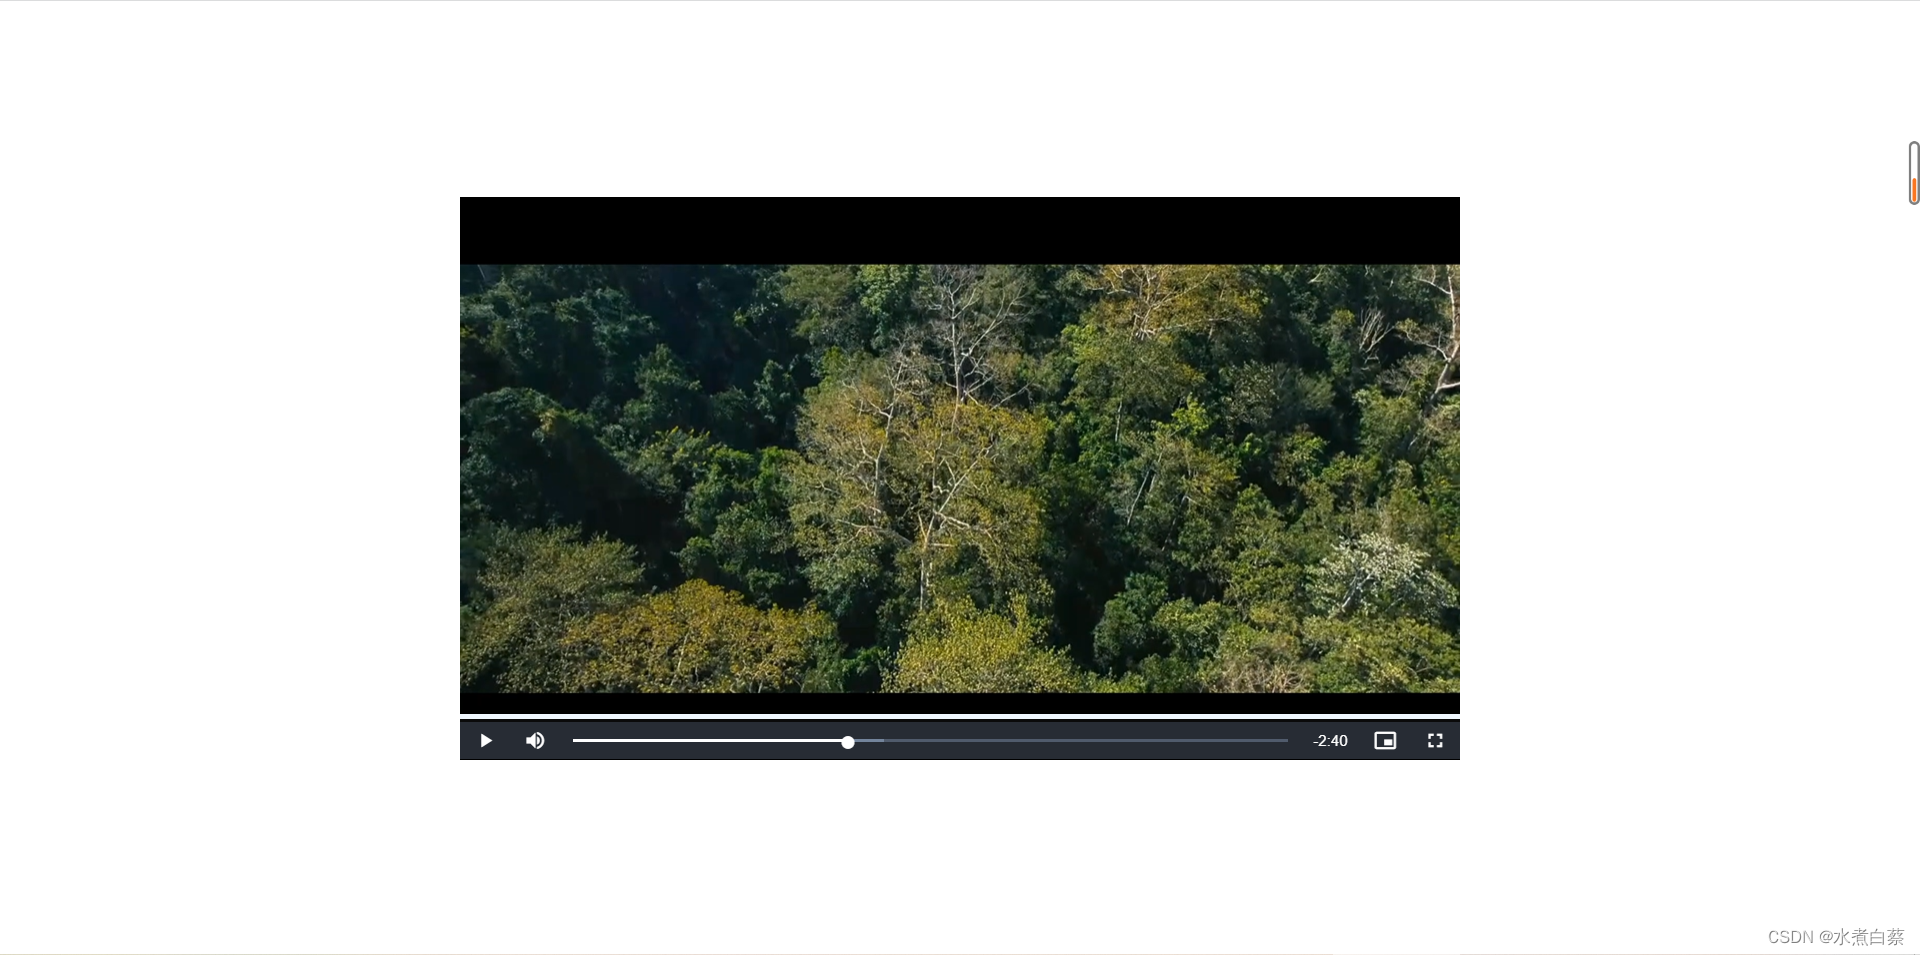
在assets文件夹下事先放好一个视频,在配置项sources里面改一下视频路径。
走到这一步,运行项目一般可以正常播放视频了:
接下来就可以实现播放器自定义控件
5、自定义控件的html结构
确定视频可以正常播放后就可以着手自定义控件了,控件写在videoPlayer这个组件里。先上结构,这里图标用的都是elementui的icon,音量没找到合适的就凑合着用了其他图标:
- <template>
- <div class="videoBox">
- <video
- ref="videoPlayer"
- class="video-js"
- >
- </video>
- <!-- 自定义控件 -->
- <div class="controlBar">
- <div class="progressBar" @mousedown="isDraging = true" @mouseup="isDraging = false">
- <el-slider
- v-model="currentTimeVal"
- :max="totalTimeVal"
- :format-tooltip="timeFormat"
- @change="progressUpdate"
- >
- </el-slider>
- </div>
- <div class="controlBtnBox">
- <div class="left">
- <i class="el-icon-video-play icon-size"></i>
- <span>00:00:00 / 00:00:00</span>
- </div>
- <div class="right">
- <i class="el-icon-d-arrow-left icon-size" @click="back(player.currentTime())"></i>
- <i class="el-icon-d-arrow-right icon-size" @click="forward(player.currentTime())"></i>
- <i class="el-icon-bell icon-size" @click="toShowVolumeBar"></i>
- <div id="volumeBar">
- <el-slider
- v-model="volume"
- vertical
- height="100px">
- </el-slider>
- </div>
- </div>
- <div class="rateBox">
- <span @click="toShowOptions">{{ratedisplay}}</span>
- <div class="rateOptions" v-show="isShowRateOptions">
- <span
- v-for="r,index in rateOptions"
- :key="index"
- @click="setPlayRate(r)"
- >
- {{r}}x
- </span>
- </div>
- </div>
- </div>
- </div>
- </div>
- </template>
结构效果图最终长这样,这里样式不多废话,跟完整代码放在文章最后面。

6、准备数据
结构搞定之后,在data里准备好后续需要用到的数据
- data(){
- return{
- player:null,
- //当前播放速率
- rate:1.0,
- //播放速率
- rateOptions:[2.0,1.75,1.5,1.0,0.75,0.5],
- //显示速率选项
- isShowRateOptions:false,
- //音量
- volume:30,
- //是否暂停
- isPaused:true,
- //当前播放时间点和视频总时长
- currentTime:'00:00:00',
- totalTime:'00:00:00',
- //进度条的当前值,必须为number类型
- currentTimeVal:0,
- //进度条最大值,必须为number类型
- totalTimeVal:0,
- //是否在拖到进度条
- isDraging:false
- }
- },
rate和rateOptions用在哪上面的代码已经写了,isShowRateOptions后面用来隐藏倍速选项那个框的这里不重要先不去理。主要是volume,它绑定在el-slider上是该滑块的默认值,后面改音量会用到;currentTime和 totalTime用于动态显示当前视频播放的具体时间,以及视频的总时长; currentTimeVal和totalTimeVal是改变进度条、实现时长跳转的主要数据;isPaused用来决定自定义控件的图标是暂停还是播放。
7、播放暂停、进度条实时跟进,拉到进度条实现跳转
首先从简单的暂停和播放做起。在html结构中,我们应该根据isPaused来决定显示哪个图标,同时将前面显示时长的假数据换成data里的currentTime和totalTime:
- <i :class="[isPaused ? 'el-icon-video-play' : 'el-icon-video-pause']" class=" icon-size" v-show="isPaused"></i>
- <span>{{currentTime}} / {{totalTime}}</span>
然后给图标绑定上一个togglePlay的函数,来响应点击后实现播放或暂停:
- //控制视频的播放与暂停
- togglePlay(){
- this.isPaused = !this.isPaused
- if(!this.isPaused){
- this.player.play()
- }else{
- this.player.pause()
- }
- },
时间格式化:
- //视频时长格式化
- timeFormat(time){
- let hour = Math.floor(time / 3600),
- minute = Math.floor((time % 3600) / 60),
- second = Math.floor(time % 60);
- hour = hour < 10 ? "0" + hour : hour;
- minute = minute < 10 ? "0" + minute : minute;
- second = second < 10 ? "0" + second : second;
- return `${hour}:${minute}:${second}`;
- },
获取视频总时长:
- //获取视频的总时长和进度条最大值
- getTotalTime(){
- this.totalTime = this.timeFormat(this.player.duration())
- this.totalTimeVal = Math.floor(this.player.duration())
- },
更新视频当前播放时间、进度条实时跟进:
进度条的实现原理其实就是video的timeUpdate事件可以监测到视频的播放进度,在这个事件中可以一直获取到视频当前的播放时间,然后将这个值赋给滑块绑定的currentTimeVal,这样就能在播放过程中跟着改变滑块的位置了。
- //更新视频当前播放时间
- timeUpdate(){
- //如果当前正在拉到进度条,先停止更新当前播放时间,直接return结束这个函数
- //没有这一句会出现拉动进度条跳转失败的bug
- if(this.isDraging) return
-
- this.currentTime = this.timeFormat(this.player.currentTime())
- this.currentTimeVal = this.player.currentTime()
- //当前时间更新到等于总时长时,要改变视频的播放状态按钮
- if(this.currentTime === this.totalTime){
- this.isPaused = true
- }
- },
拉到进度条跳转到指定位置播放:
这一功能的实现就是el-slider有一个change事件,在拖拽滑块松开鼠标后触发,这时只要在鼠标松开后,改变播放器的currentTime属性的值,
这里要稍微注意一下:因为我们在拉动进度条的时候,视频还处于播放状态,那么意味着上一步我们更新进度条时长的那个函数获取到的currentTime值也会改变el-slider的值,所以在上一步的函数中,我们需要监测进度条是否在拉动,如果是,我们应该停止执行那个函数。监听只需要在进度条外层的div上绑定一个mouseon和mousedown事件,鼠标按住时让isDragging等于false,然后在timeUpdate函数中通过isDragging来判断进度条是否处于拖拽的状态。
- //进度条拉动时更新进度条值并从拉到的位置播放
- progressUpdate(val){
- this.player.currentTime(val)
- // 虽然mouseup已经可以改变isDraging的值,但下面这句不能少,不然视频播放结束再点击播放时,进度条不会回到最开始位置
- this.isDraging = false
- },
8、更新速率、改变音量
- //改变速率
- setPlayRate(rate){
- this.rate = rate;
- this.player.playbackRate(rate);
- this.isShowRateOptions = false;
- },
- //改变音量
- changeVolume(val){
- this.volume = val
- //由于h5规定volum的值在0-1之间,所以这里要对获取到的val做一个处理(滑块的val是从0-100)
- this.player.volume(val / 100)
- },
- //快进
- forward(ct){
- this.progressUpdate(ct + 10)
- },
- //后退
- back(ct){
- this.progressUpdate(ct - 10)
- }
9、完整代码
VideoComponent:
- <template>
- <div class="container">
- <video-player
- :options="videoOptions"
- class="video-css"
- >
- </video-player>
- </div>
- </template>
- <script>
- import videoPlayer from './videoPlayer.vue'
- export default {
- name: 'videoComponent',
- components:{videoPlayer},
- data(){
- return{
- videoOptions:{
- //controls配置项决定是否显示默认控件,因为这里要做自定义的控件,就不显示了
- controls:false,
- //fluid配置项根据外层css样式大小,自动填充宽高
- fluid:true,
- //sources配置项配置视频播放源
- sources:[
- {
- //播放源
- src:require('@/assets/kp.mp4'),
- //视频类型
- type:"video/mp4"
- }
- ],
-
- }
- }
- },
-
- }
- </script>
-
- <style scoped>
- .container{
- width: 800px;
- height: 100vh;
- display: flex;
- justify-content: center;
- align-items: center;
- }
- /* 视频宽高由此样式调整 */
- .video-css{
- width: 800px;
- height:auto;
- }
- </style>
VideoPlayer:
- <template>
- <div class="videoBox">
- <video
- ref="videoPlayer"
- class="video-js"
- @canplay="getTotalTime"
- @timeupdate="timeUpdate"
- >
- </video>
- <!-- 自定义控件 -->
- <div class="controlBar">
- <div class="progressBar" @mousedown="isDraging = true" @mouseup="isDraging = false">
- <el-slider
- v-model="currentTimeVal"
- :max="totalTimeVal"
- :format-tooltip="timeFormat"
- @change="progressUpdate"
- >
- </el-slider>
- </div>
- <div class="controlBtnBox">
- <div class="left">
- <i
- :class="[isPaused ? 'el-icon-video-play' : 'el-icon-video-pause']"
- class=" icon-size"
- @click="togglePlay()"
- >
- </i>
- <span>{{currentTime}}/{{totalTime}}</span>
- </div>
- <div class="right">
- <i class="el-icon-d-arrow-left icon-size" @click="back(player.currentTime())></i>
- <i class="el-icon-d-arrow-right icon-size" @click="forward(player.currentTime())></i>
- <i class="el-icon-bell icon-size" @click="toShowVolumeBar"></i>
- <div id="volumeBar" v-show="isShowVolumeBar">
- <el-slider
- v-model="volume"
- vertical
- height="100px"
- @input="changeVolume"
- >
- </el-slider>
- </div>
- </div>
- <div class="rateBox">
- <span @click="toShowOptions">{{ratedisplay}}</span>
- <div class="rateOptions" v-show="isShowRateOptions">
- <span
- v-for="r,index in rateOptions"
- :key="index"
- @click="setPlayRate(r)"
- >
- {{r}}x
- </span>
- </div>
- </div>
- </div>
- </div>
- </div>
- </template>
-
- <script>
- import 'video.js/dist/video-js.css';
- export default {
- name:'videoPlayer',
- //接收来自父组件videoComponent的video的具体配置信息,这样可以实现对VideoPlayer组件的复用
- props:{
- options: {
- type: Object
- }
- },
- //用计算属性来实现当速率为1时,显示“倍速”
- computed:{
- ratedisplay(){
- if(this.rate == 1){
- return '倍速'
- }else{
- return this.rate + 'x'
- }
- }
- },
- data(){
- return{
-
- player:null,
- //当前播放速率
- rate:1.0,
- //播放速率
- rateOptions:[2.0,1.75,1.5,1.0,0.75,0.5],
- //显示速率选项和音量选项
- isShowRateOptions:false,
- isShowVolumeBar:false,
- //音量
- volume:30,
- //是否暂停
- isPaused:true,
- //当前播放时间点和视频总时长
- currentTime:'00:00:00',
- totalTime:'00:00:00',
- //进度条的当前值,必须为number类型
- currentTimeVal:0,
- //进度条最大值,必须为number类型
- totalTimeVal:0,
- //是否在拖到进度条
- isDraging:false
- }
- },
- methods:{
- createVideoPlayer(){
- this.player = this.$videoJS(this.$refs.videoPlayer,this.options)
- },
- //显示速率选项
- toShowOptions(){
- this.isShowRateOptions = !this.isShowRateOptions
- },
- toShowVolumeBar(){
- this.isShowVolumeBar = !this.isShowVolumeBar
- },
- //视频时长格式化
- timeFormat(time){
- let hour = Math.floor(time / 3600),
- minute = Math.floor((time % 3600) / 60),
- second = Math.floor(time % 60);
- hour = hour < 10 ? "0" + hour : hour;
- minute = minute < 10 ? "0" + minute : minute;
- second = second < 10 ? "0" + second : second;
- return `${hour}:${minute}:${second}`;
- },
- //获取视频的总时长和进度条最大值
- getTotalTime(){
- this.totalTime = this.timeFormat(this.player.duration())
- this.totalTimeVal = Math.floor(this.player.duration())
- },
- //改变速率
- setPlayRate(rate){
- this.rate = rate;
- this.player.playbackRate(rate);
- this.isShowRateOptions = false;
- },
- //控制视频的播放与暂停
- togglePlay(){
- console.log()
- this.isPaused = !this.isPaused
- if(!this.isPaused){
- this.player.play()
- }else{
- this.player.pause()
- }
- },
- //更新视频当前播放时间
- timeUpdate(){
- //如果当前正在拉到进度条,先停止更新当前播放时间,直接return结束这个函数
- //没有这一句会出现拉动进度条跳转失败的bug
- if(this.isDraging) return
-
- this.currentTime = this.timeFormat(this.player.currentTime())
- this.currentTimeVal = this.player.currentTime()
- //当前时间更新到等于总时长时,要改变视频的播放状态按钮
- if(this.currentTime === this.totalTime){
-
- this.isPaused = true
- }
- },
- //进度条拉动时更新进度条值并从拉到的位置播放
- progressUpdate(val){
- this.player.currentTime(val)
- // 虽然mouseup已经可以改变isDraging的值,但下面这句不能少,不然视频播放结束再点击播放时,进度条不会回到最开始位置
- this.isDraging = false
- },
- //改变音量
- changeVolume(val){
- this.volume = val
- //由于h5规定volum的值在0-1之间,所以这里要对获取到的val做一个处理(滑块的val是从0-100)
- this.player.volume(val / 100)
- },
- //快进
- forward(ct){
- this.progressUpdate(ct + 10)
- },
- //后退
- back(ct){
- this.progressUpdate(ct - 10)
- }
-
- },
- mounted(){
- this.createVideoPlayer()
- },
- beforeDestroy(){
- if(this.player){
- this.player.dispose()
- }
- }
- }
- </script>
-
- <style scoped>
- .videoBox{
- box-sizing: border-box;
- position: relative;
- width: 800px;
- height:500px;
- background-color: rgb(73, 156, 128);
- }
- .controlBar{
- width: 90%;
- height: 55px;
- position:absolute;
- bottom: 20px;
- left: 5%;
- background-color:#817f7f5a;
- box-sizing: border-box;
- color: rgb(233, 231, 231);
- }
- .progressBar{
- box-sizing: border-box;
- position: relative;
- width: 100%;
- padding: 10px;
- height: 10%;
- /* background-color: aliceblue; */
- }
- .controlBtnBox{
- box-sizing: border-box;
- width: 100%;
- height:60%;
- display: flex;
- justify-content: space-between;
- align-items: center;
-
- }
- /* 以下强行修改了el-slider样式 */
- .progressBar /deep/ .el-slider__bar{
- height: 3px;
- background-color: #409EFF;
- border-top-left-radius: 3px;
- border-bottom-left-radius: 3px;
- position: absolute;
- }
- .progressBar /deep/ .el-slider__button{
- height: 8px;
- width: 8px;
- }
- .progressBar /deep/ .el-slider__runway{
- margin-top:1px;
- margin-bottom: 1px;
- height: 3px;
- }
- .progressBar /deep/.el-slider__button-wrapper{
- width: 28px;
- height: 33px;
- }
- .icon-size{
- font-size: 25px;
- cursor: pointer;
- }
- .left{
- padding-left:10px ;
- width: 50%;
- display: flex;
- align-items: center;
- }
- .left span{
- margin-left: 20px;
- }
- .right{
- width: 15%;
- display: flex;
- justify-content: space-around;
- position: relative;
- }
- .right i{
- display: block;
- }
- #volumeBar{
- width: 30px;
- height: 120px;
- background-color: #817f7f5a;
- position: absolute;
- top:-150px;
- right: 4px;
- display: flex;
- justify-content: center;
- align-items: center;
- }
- .rateBox{
- width: 15%;
- cursor: pointer;
- }
- .rateOptions{
- width: 80px;
- height: 180px;
- background-color: #817f7f5a;
- position: absolute;
- top:-185px;
- right: 50px;
- display: flex;
- flex-wrap: wrap;
- align-content: center;
- }
- .rateOptions span{
- display: block;
- width: 100%;
- height: 30px;
- text-align: center;
- line-height: 30px;
- }
- .rateOptions span:hover{
- background-color: #cec9c95a;
- color: #409EFF;
- }
- </style>
App:
- <template>
- <div id="app">
- <video-component></video-component>
- </div>
- </template>
-
- <script>
- import videoComponent from './components/videoComponent.vue'
- export default {
- name: 'App',
- components: {
- videoComponent
- }
- }
- </script>
- <style>
- *{
- padding: 0;
- margin: 0;
- }
- #app{
- display: flex;
- justify-content: center;
- width: 100%;
- }
- </style>
结束,暂时还没发现什么bug。
但测试用的是的视频是放在本地的,没有涉及到资源加载,如果视频资源是走网络请求的话还得再改。。
参考链接:
以下是实现的时候参考的几篇文章
vue中自定义视频:
vue 中 自定义视频video_粥粥_的博客-CSDN博客
video.js使用教程:

