
热门标签
当前位置: article > 正文
python实现一键换脸+源码+教程_换脸api
作者:不正经 | 2024-02-21 12:10:10
赞
踩
换脸api
开篇,先看一下效果图,如果觉得效果不够,那就看本文末尾的效果图:
源代码
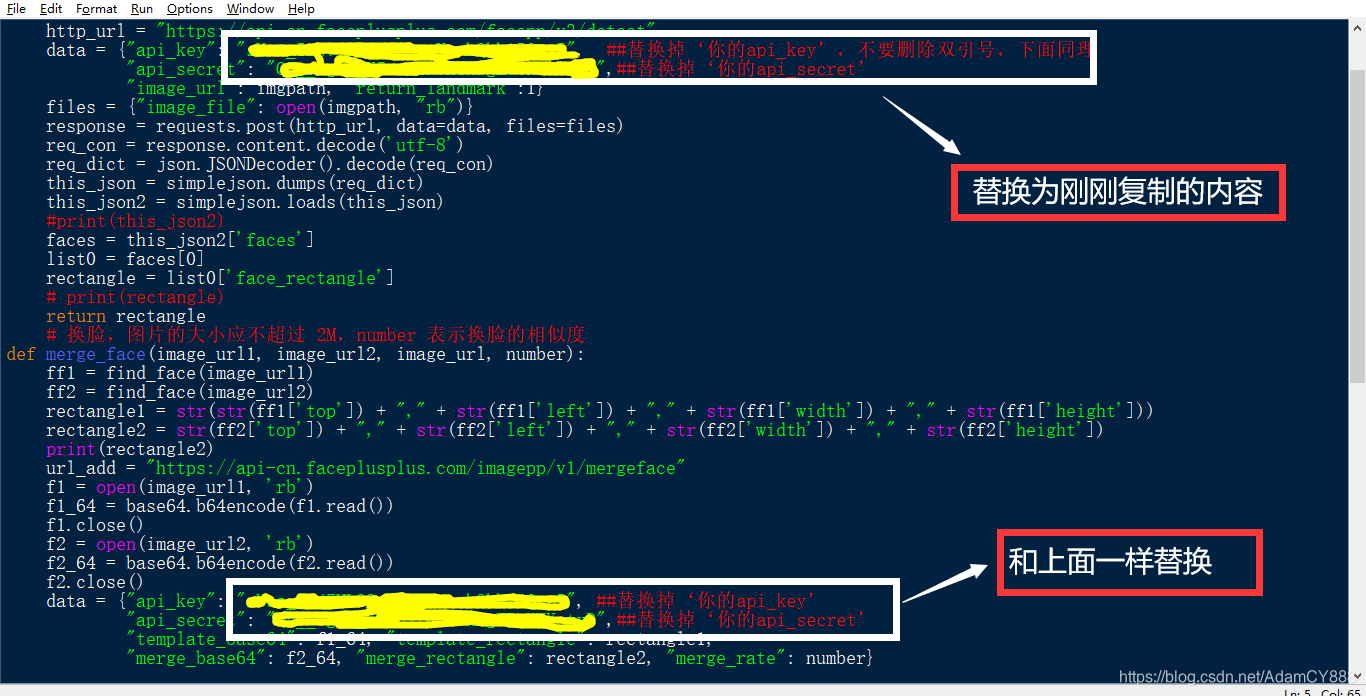
## author:VX公众号[python小二]
import requests, simplejson, json, base64
    # 获取人脸关键点
def find_face(imgpath):
    print("正在查找……")
    http_url = "https://api-cn.faceplusplus.com/facepp/v3/detect"

    data = {"api_key": "你的api_key",  ##替换掉‘你的api_key’,不要删除双引号,下面同理
            "api_secret": "你的api_secret",##替换掉‘你的api_secret’
            "image_url": imgpath, "return_landmark":1}

    files = {"image_file": open(imgpath, "rb")}
    response = requests.post(http_url, data=data, files=files)
    req_con = response.content.decode('utf-8')
    req_dict = json.JSONDecoder().decode(req_con)
    this_json = simplejson.dumps(req_dict)

    this_json2 = simplejson.loads(this_json)
    #print(this_json2)
    faces = this_json2['faces']
    list0 = faces[0]
    rectangle = list0['face_rectangle']
    # print(rectangle)
    return rectangle
    # 换脸,图片的大小应不超过 2M,number 表示换脸的相似度
def merge_face(image_url1, image_url2, image_url, number):
    ff1 = find_face(image_url1)
    ff2 = find_face(image_url2)
    rectangle1 = str(str(ff1['top']) + "," + str(ff1['left']) + "," + str(ff1['width']) + "," + str(ff1['height']))
    rectangle2 = str(ff2['top']) + "," + str(ff2['left']) + "," + str(ff2['width']) + "," + str(ff2['height'])
    print(rectangle2)
    url_add = "https://api-cn.faceplusplus.com/imagepp/v1/mergeface"
    f1 = open(image_url1, 'rb')
    f1_64 = base64.b64encode(f1.read())
    f1.close()
    f2 = open(image_url2, 'rb')
    f2_64 = base64.b64encode(f2.read())
    f2.close()

    data = {"api_key": "你的api_key", ##替换掉‘你的api_key’
            "api_secret": "你的api_secret",##替换掉‘你的api_secret’
            "template_base64": f1_64, "template_rectangle": rectangle1,
            "merge_base64": f2_64, "merge_rectangle": rectangle2, "merge_rate": number}

    response = requests.post(url_add, data=data)
    req_con1 = response.content.decode('utf-8')
    req_dict = json.JSONDecoder().decode(req_con1)
    result = req_dict['result']
    imgdata = base64.b64decode(result)
    file = open(image_url, 'wb')
    file.write(imgdata)
    file.close()

image1 = r"原始图片1.jpg"  ##原始照片1的路径,若为/.png格式则将‘jpg’改为‘png’,下面同理
image2 = r"原始图片2.jpg"   ##原始照片2的路径;→将照片1 的五官加在照片2上;
image = r"新生成图片3.jpg"  ##生成的新照片

merge_face(image2, image1, image, 90)

- 1
- 2
- 3
- 4
- 5
- 6
- 7
- 8
- 9
- 10
- 11
- 12
- 13
- 14
- 15
- 16
- 17
- 18
- 19
- 20
- 21
- 22
- 23
- 24
- 25
- 26
- 27
- 28
- 29
- 30
- 31
- 32
- 33
- 34
- 35
- 36
- 37
- 38
- 39
- 40
- 41
- 42
- 43
- 44
- 45
- 46
- 47
- 48
- 49
- 50
- 51
- 52
- 53
- 54
- 55
- 56
- 57
- 58
教程
在源代码中,需要添加自己的api_key和api_secret信息;
1.访问网址-注册信息-获取api_key和api_secret信息;
2.将api_key和api_secret信息复制,添加到源代码中;
3.自行寻找两张人物图片后,更改源代码中图片名,运行代码即可!
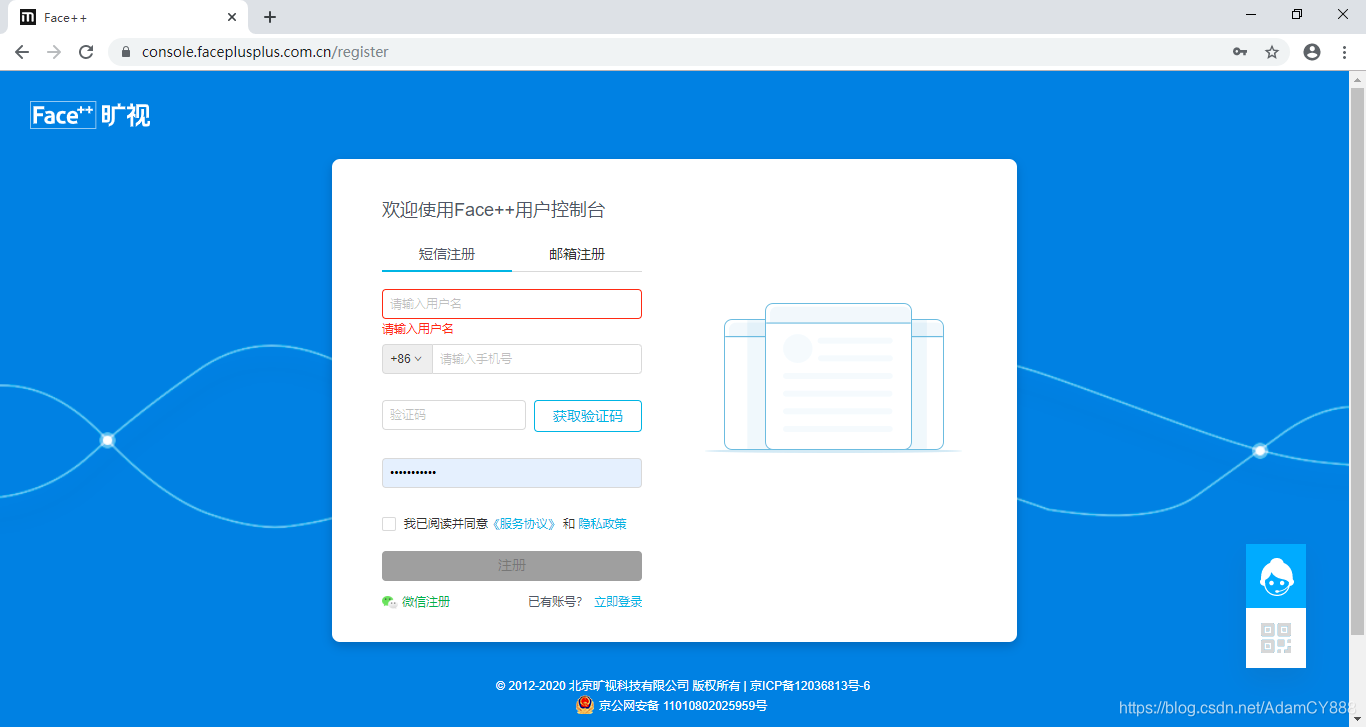
首先访问网址并注册个人信息:https://console.faceplusplus.com.cn/register
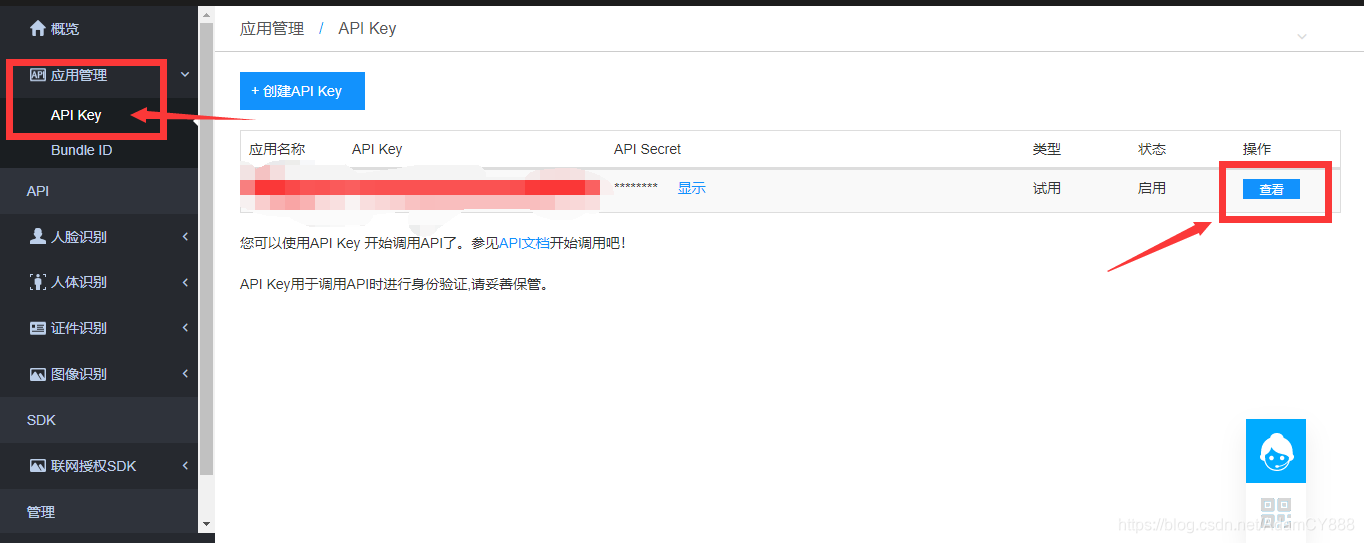
注册个人信息后登陆进入网站,在菜单栏中选择“API_Key”再在页面中选择“查看”:
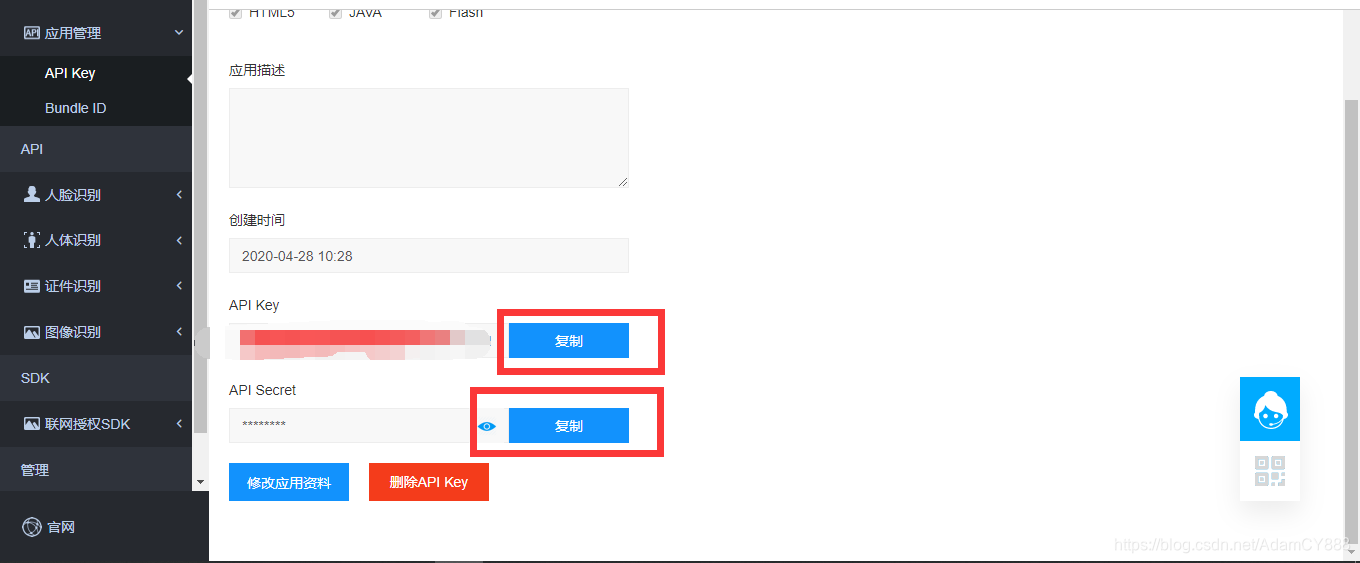
复制api_key和api_secret信息:
将复制的信息,在源代码中进行替换:
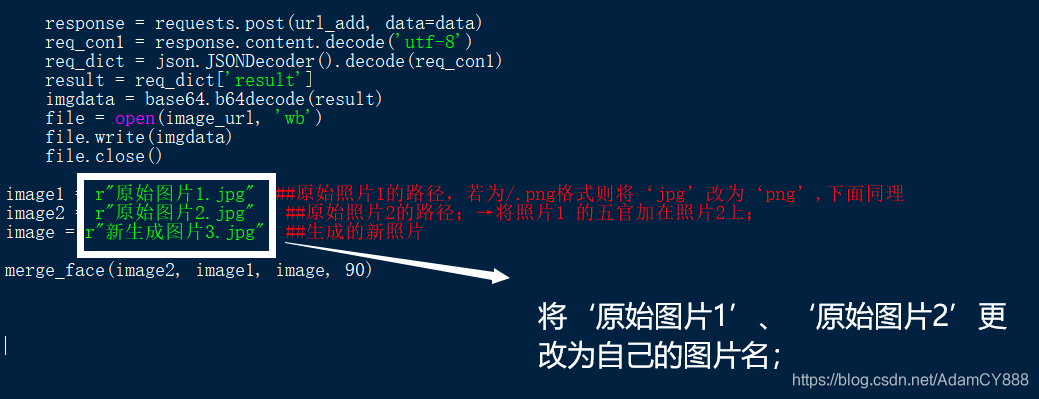
下载两张人物图片,并在源代码中添加图片名称:
最后,运行:


声明:本文内容由网友自发贡献,不代表【wpsshop博客】立场,版权归原作者所有,本站不承担相应法律责任。如您发现有侵权的内容,请联系我们。转载请注明出处:https://www.wpsshop.cn/w/不正经/article/detail/123648
推荐阅读
相关标签

