- 1Redis入门详解(一)—Redis数据类型及命令、SpringBoot整合Redis_redis关系型数据库
- 2XSS-Labs靶场“6-10”关通关教程_xss闯关第十关
- 3运维工程师必备技能:特别是想月薪20K以上的_20k运维技术
- 4python社招面试_5000字干货总结,python社招面试经验分享
- 5【云计算基础知识3】存储虚拟化
- 6算法复习(经典问题整理)_设a[1:n]是由不同实数组成的数组,如果 i
- 7使用 Scapy 库编写 ICMP 重定向攻击脚本_scapy 伪造mac地址icmp攻击
- 8字典树(trie)题库+详解_trie 树 suffix树考题
- 9VS Code一秒生成80%代码?鹅厂人真实感受_vscode 1.80
- 10SQL server之SQL身份认证失败添加账号密码_数据库选择sql server身份验证没有账号密码
❤ uniapp 开发小程序环境搭建和使用零(0 开篇-介绍和运行)_uniapp开发小程序
赞
踩
♥ uniapp 环境搭建
1、工具
拿HbuildX写代码开发,然后把程序运行到微信开发者工具
开发uniapp小程序需要用到的两个工具
HbuildX [开发小程序使用]
https://www.dcloud.io/hbuilderx.html
微信开发者工具
HbuildX开发的小程序运行到微信开发者工具
https://developers.weixin.qq.com/miniprogram/dev/devtools/download.html
2、地址:
开发小程序官网:
(1)微信公众平台
https://mp.weixin.qq.com/
(2)微信开发文档
https://developers.weixin.qq.com/miniprogram/dev/devtools/devtools.html
(3)uniapp开发文档
https://uniapp.dcloud.net.cn/
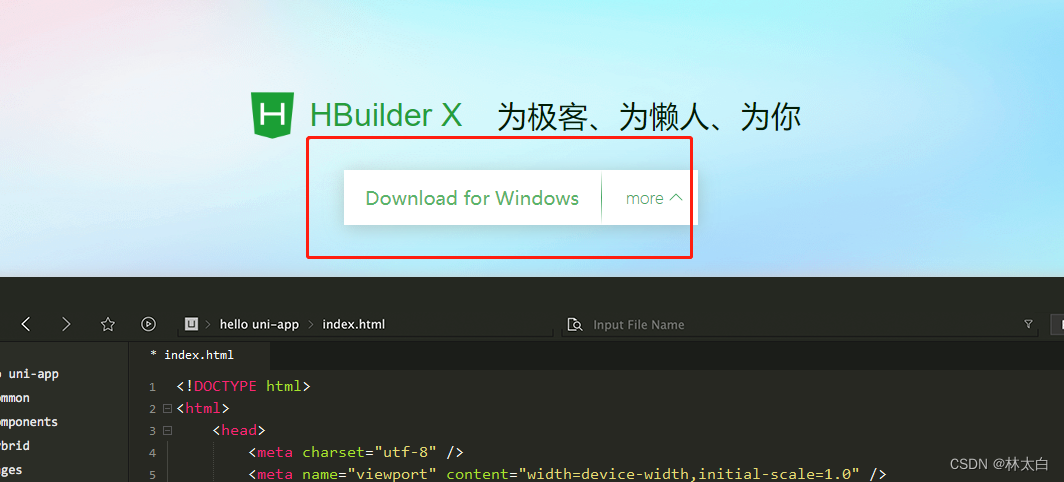
3、HbuilderX (开发工具)
官网地址是:
https://www.dcloud.io/
下载地址
https://www.dcloud.io/hbuilderx.html
windows系统选择对应的版本,建议下载到D盘
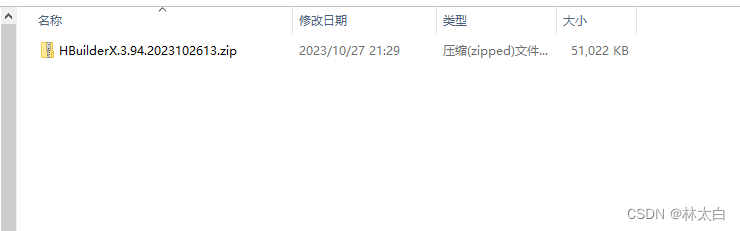
下载好的压缩包直接解压
解压成功以后双击进行运行
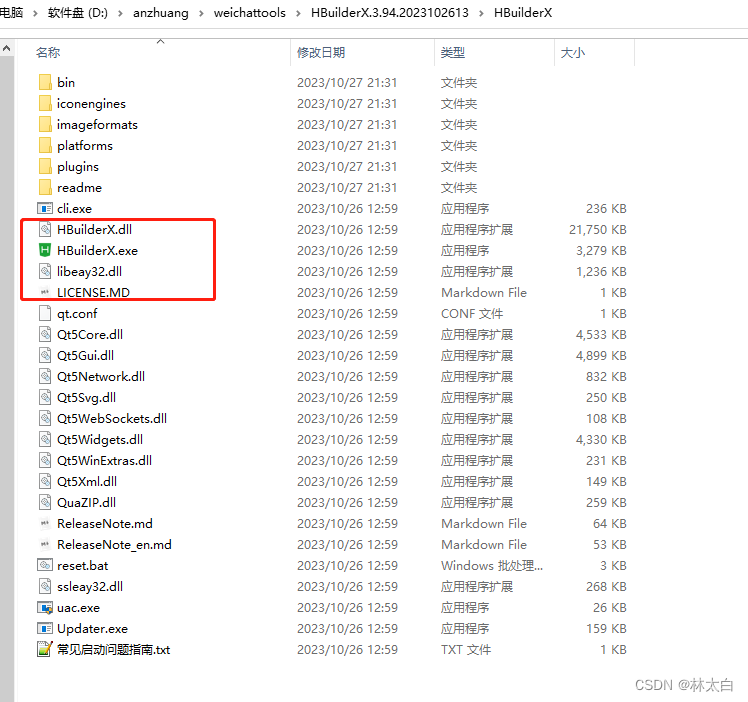
运行成功
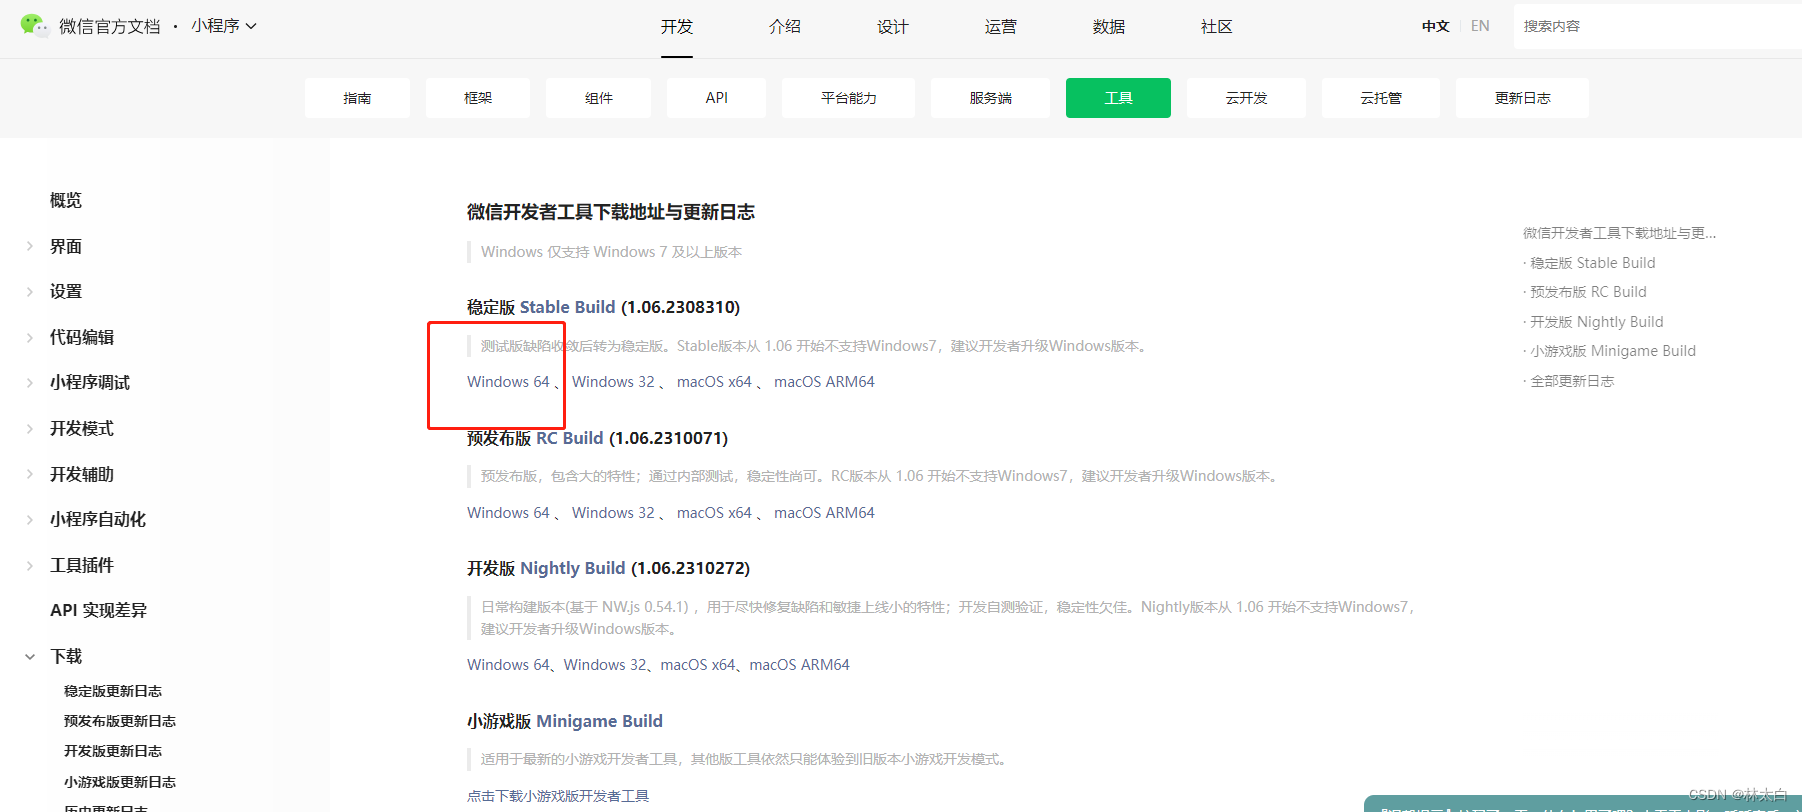
4、微信开发者工具(运行环境)
微信开发者工具是微信运行小程序和uniapp的工具
下载的地址:
https://developers.weixin.qq.com/miniprogram/dev/devtools/download.html
选择自己对应的版本下载即可:
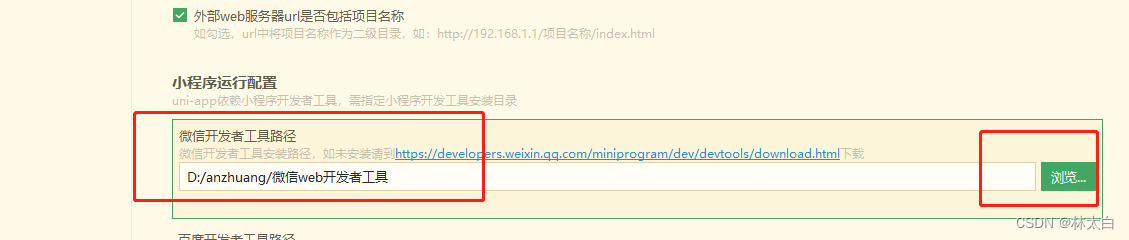
记住自己的安装地址: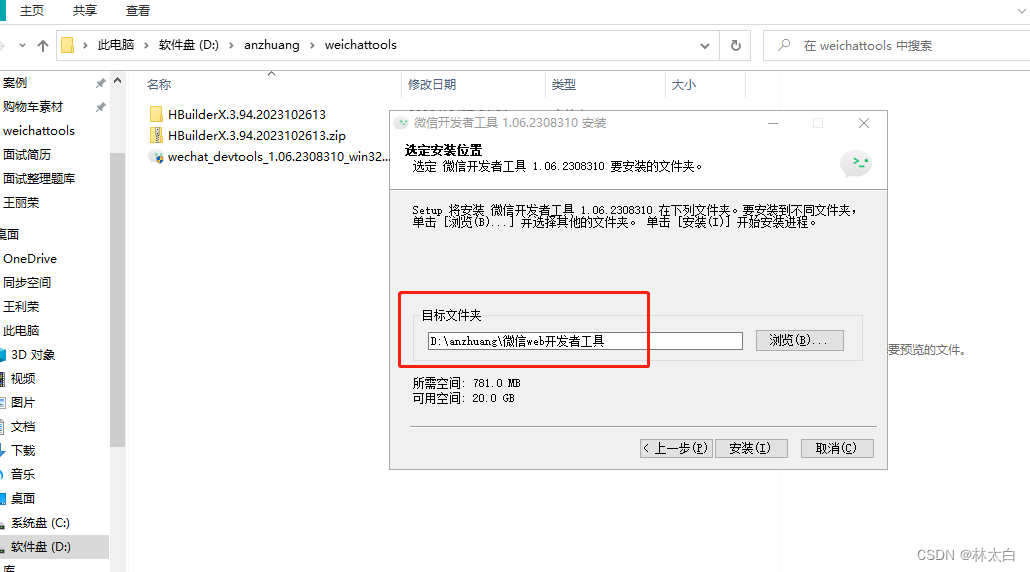
记住这个地址:
D:\anzhuang\微信web开发者工具
- 1
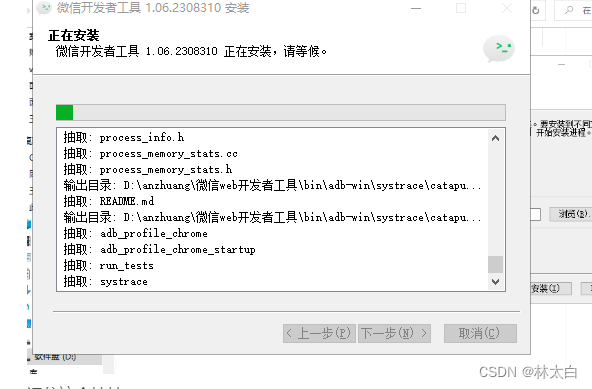
等待安装完毕!
至此,uniapp的运行环境咱们已经搭建好了!
5-1、开发属于我们的第一个uniapp(不存在项目 1 )
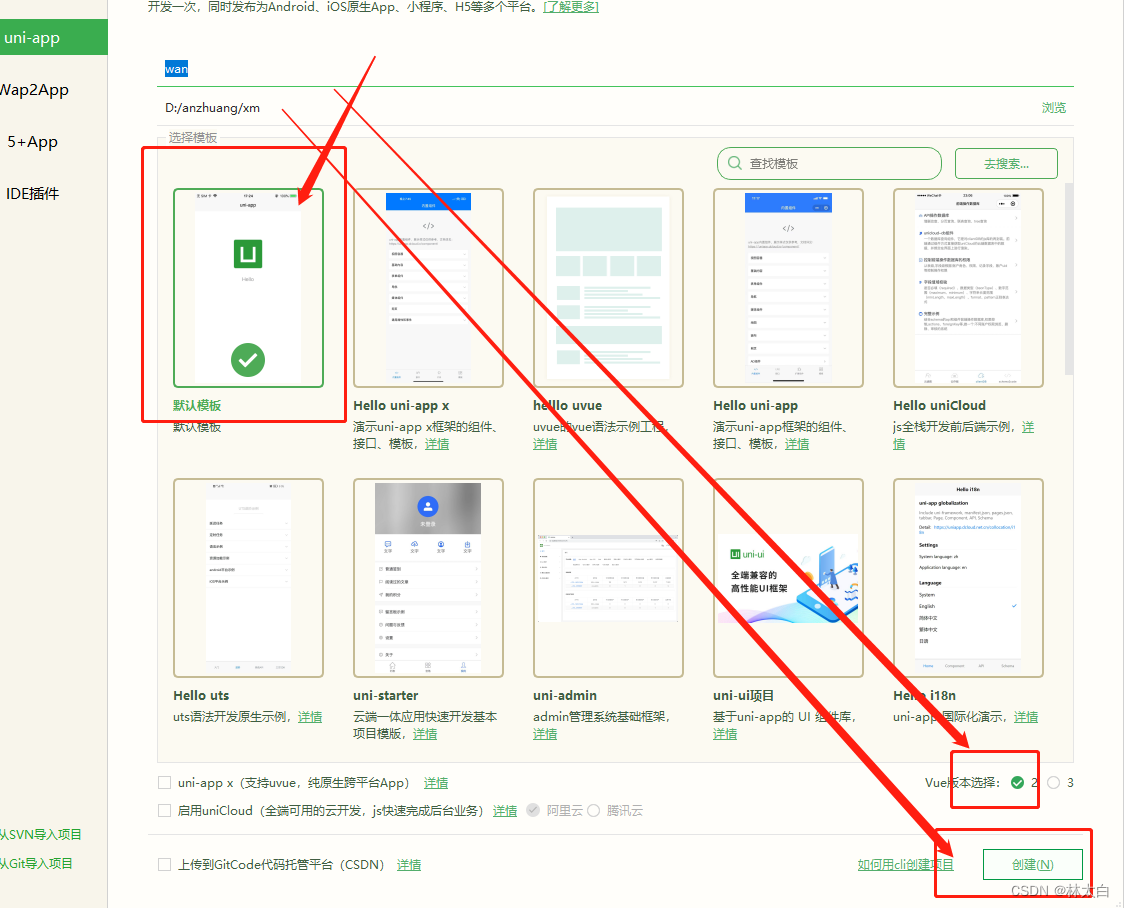
Hbuildx中文件 =》 新建=》项目
选择可以搭建属于我们的vue2或者vue3项目,这里我们以vue2版本为例,选择最简单的空白模板
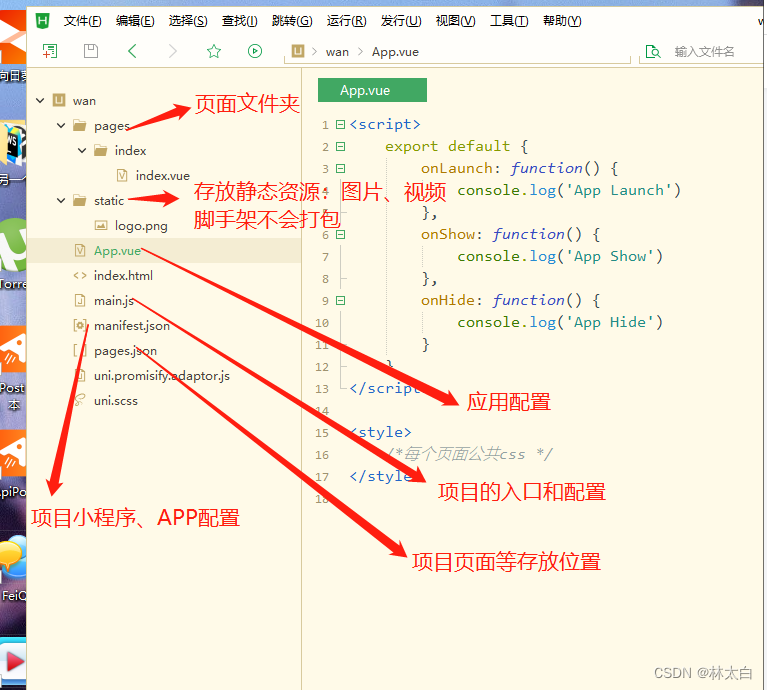
新建立的项目目录如下
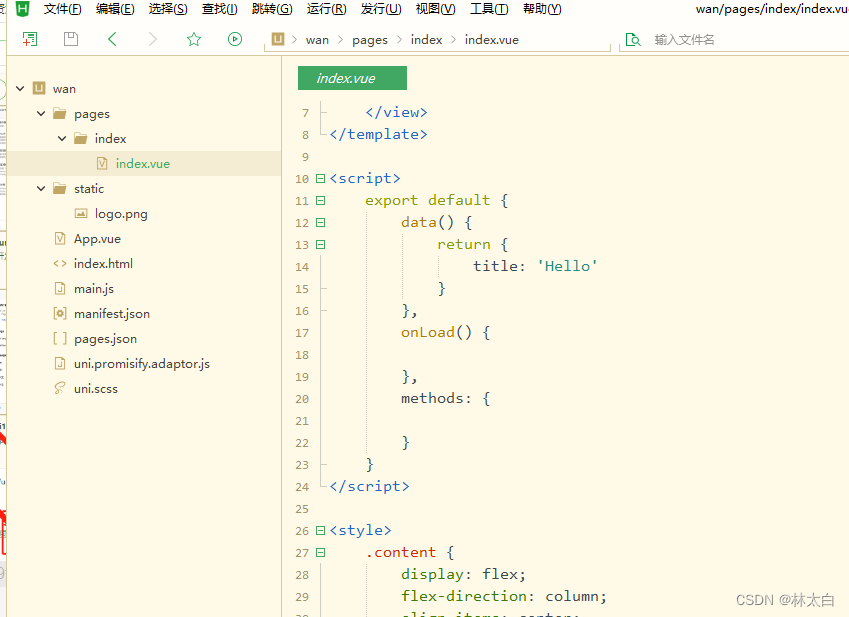
目录文件夹以及供能如下:
点击工具=》设置=》运行配置=> 微信开发者工具路径
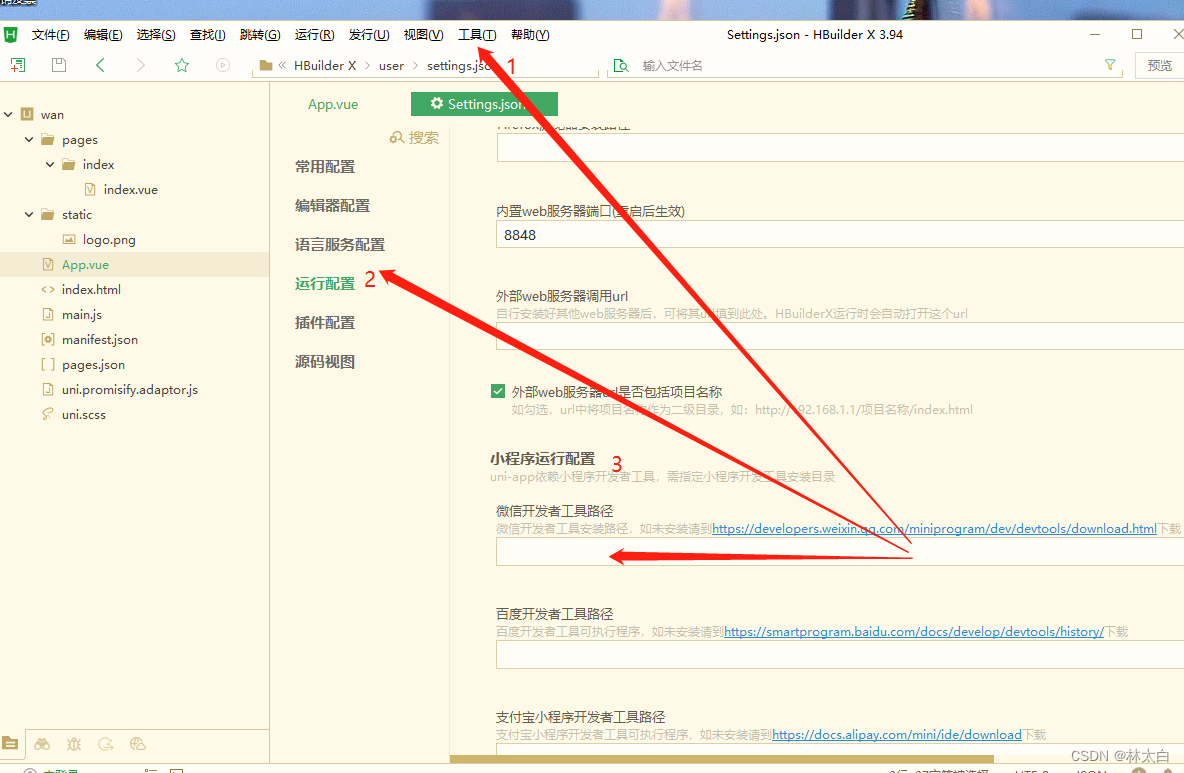
选中我们的微信开发者工具,方便我们在运行的时候自动打开工具
点击运行,运行我们的第一个项目


安装成功以后会提示我们:

这个时候重新运行即可!
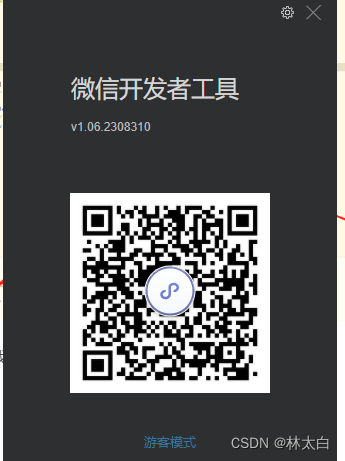
运行以后自动打开我们的微信开发者工具,提示扫码登陆:
登录账号
这个时候会提示我们打开服务端口

点击设置=》安全=》服务端口开启,去Huildx重新启动项目

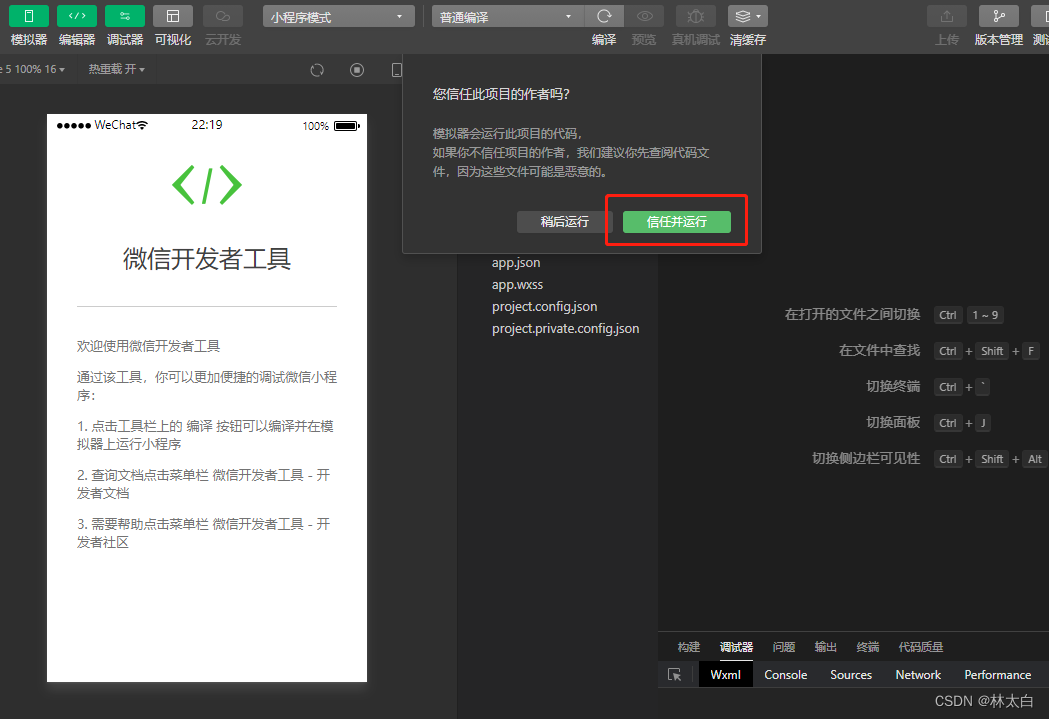
信任项目并且运行
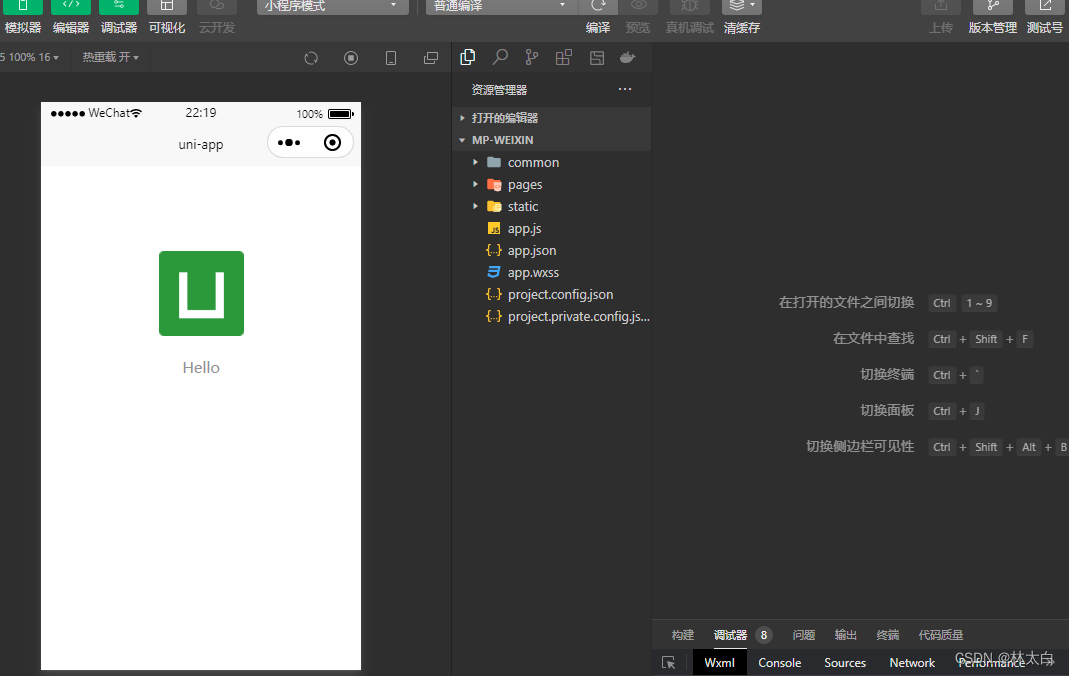
至此,我们的项目就完成啦!快去开发属于自己的项目吧!
6、搭建基础的四个菜单页面
先放图片,开发属于底部界面tab栏目
配置启动页面和四个底部tab切换栏目
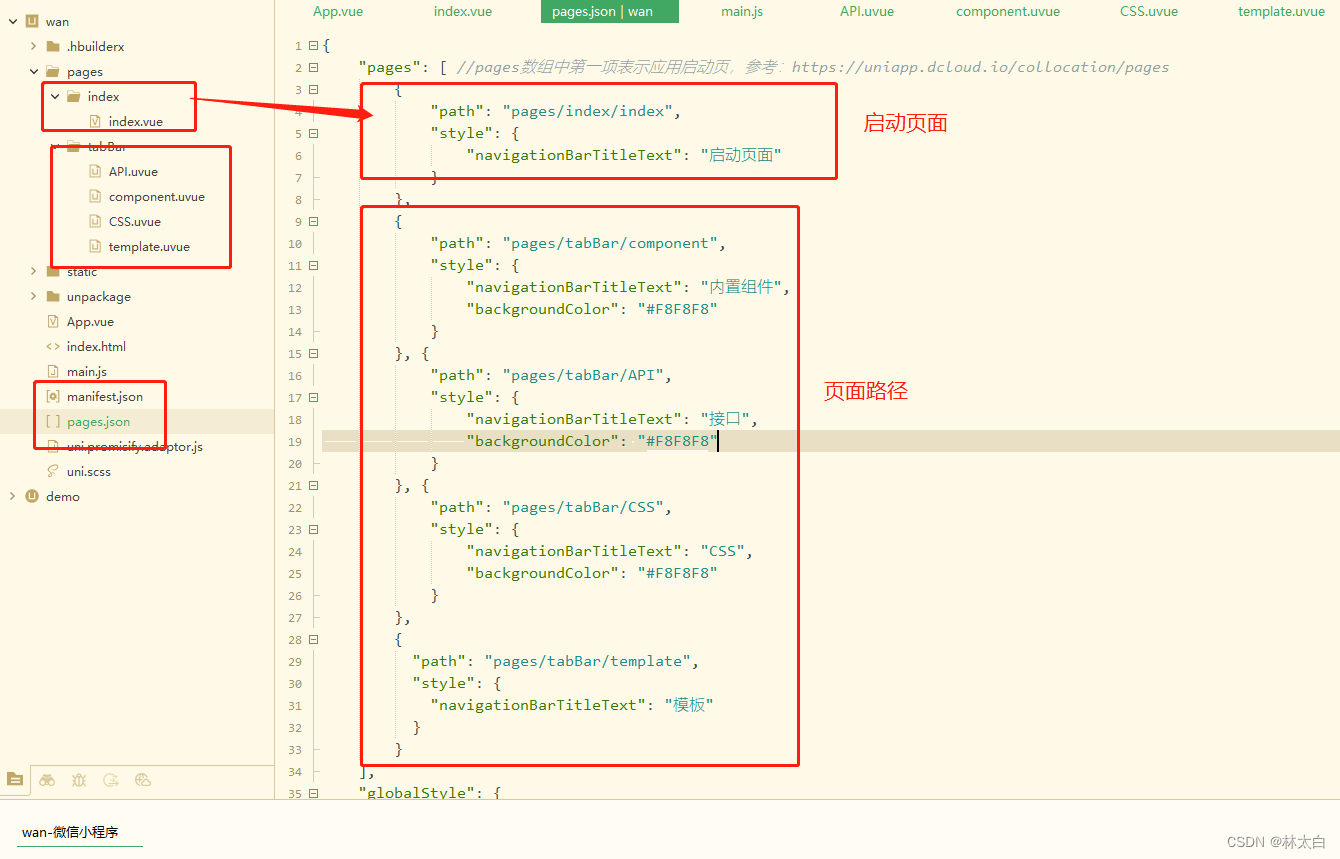
底部tab栏切换进行配置对应的界面
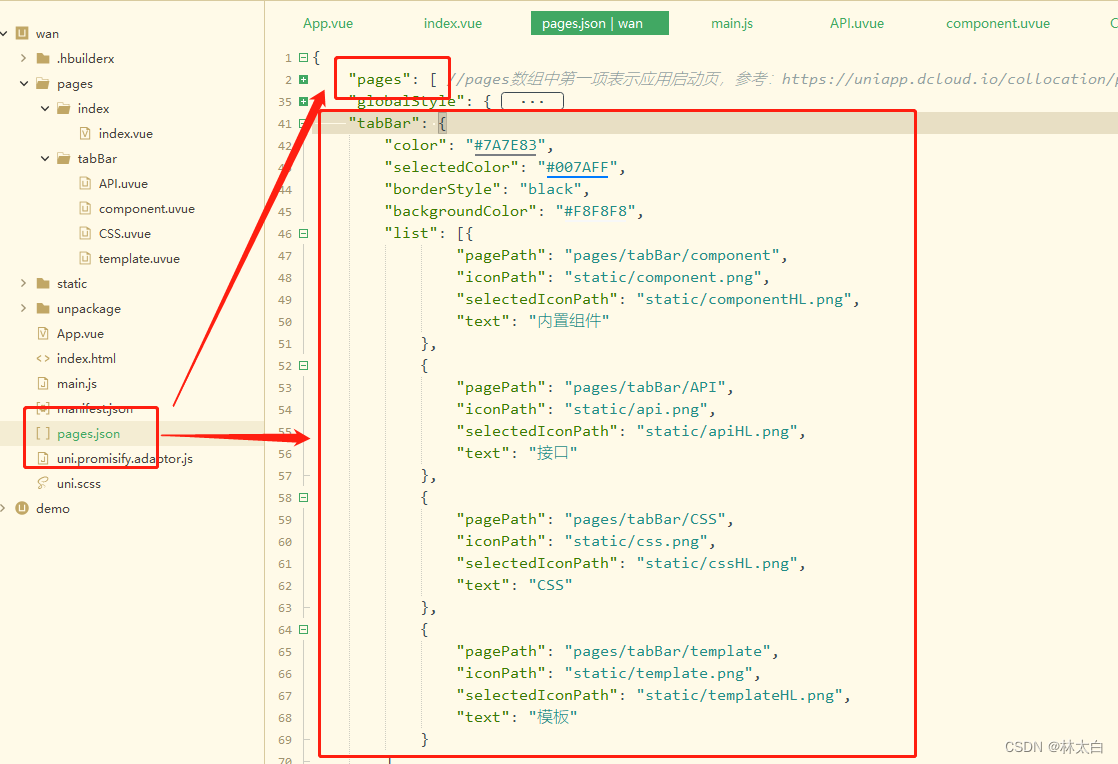
{
	"pages": [ //pages数组中第一项表示应用启动页,参考:https://uniapp.dcloud.io/collocation/pages
		{
			"path": "pages/index/index",
			"style": {
				"navigationBarTitleText": "启动页面"
			}
		},
		{
			"path": "pages/tabBar/component",
			"style": {
				"navigationBarTitleText": "内置组件",
				"backgroundColor": "#F8F8F8"
			}
		}, {
			"path": "pages/tabBar/API",
			"style": {
				"navigationBarTitleText": "接口",
				"backgroundColor": "#F8F8F8"
			}
		}, {
			"path": "pages/tabBar/CSS",
			"style": {
				"navigationBarTitleText": "CSS",
				"backgroundColor": "#F8F8F8"
			}
		},
		{
		  "path": "pages/tabBar/template",
		  "style": {
		    "navigationBarTitleText": "模板"
		  }
		}
	],
	"globalStyle": {
		"navigationBarTextStyle": "black",
		"navigationBarTitleText": "uni-app",
		"navigationBarBackgroundColor": "#F8F8F8",
		"backgroundColor": "#F8F8F8"
	},
	"tabBar": {
		"color": "#7A7E83",
		"selectedColor": "#007AFF",
		"borderStyle": "black",
		"backgroundColor": "#F8F8F8",
		"list": [{
				"pagePath": "pages/tabBar/component",
				"iconPath": "static/component.png",
				"selectedIconPath": "static/componentHL.png",
				"text": "内置组件"
			},
			{
				"pagePath": "pages/tabBar/API",
				"iconPath": "static/api.png",
				"selectedIconPath": "static/apiHL.png",
				"text": "接口"
			},
			{
				"pagePath": "pages/tabBar/CSS",
				"iconPath": "static/css.png",
				"selectedIconPath": "static/cssHL.png",
				"text": "CSS"
			},
			{
				"pagePath": "pages/tabBar/template",
				"iconPath": "static/template.png",
				"selectedIconPath": "static/templateHL.png",
				"text": "模板"
			}
		]
	},
	"uniIdRouter": {}
}

- 1
- 2
- 3
- 4
- 5
- 6
- 7
- 8
- 9
- 10
- 11
- 12
- 13
- 14
- 15
- 16
- 17
- 18
- 19
- 20
- 21
- 22
- 23
- 24
- 25
- 26
- 27
- 28
- 29
- 30
- 31
- 32
- 33
- 34
- 35
- 36
- 37
- 38
- 39
- 40
- 41
- 42
- 43
- 44
- 45
- 46
- 47
- 48
- 49
- 50
- 51
- 52
- 53
- 54
- 55
- 56
- 57
- 58
- 59
- 60
- 61
- 62
- 63
- 64
- 65
- 66
- 67
- 68
- 69
- 70
- 71
- 72
- 73
搭建完成!
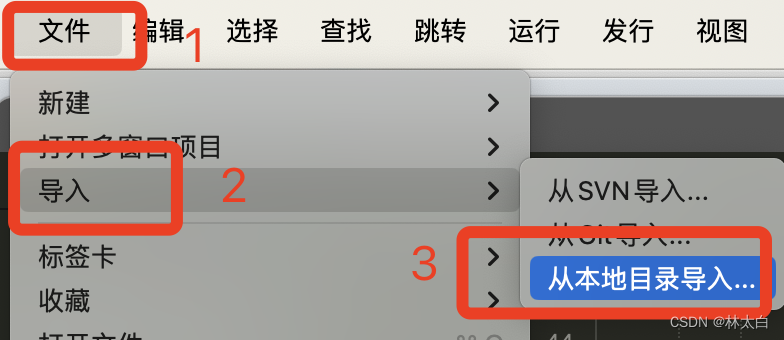
5-2、项目导入(存在项目:如何导入 )
从文件根目录导入即可