
热门标签
热门文章
- 1SQL Server语法基础:入门到精通
- 2Elasticsearch:从写入原理谈写入优化
- 3【玩转 EdgeOne】- 腾讯云下一代边缘加速CDN EdgeOne 是安全加速界的未来吗?
- 4【文末送书】一文讲透Java线程
- 5BERT、BART、T5 等LLM大语言模型的比较分析_bart模型和t5
- 6AndroidAES加密适配9.0_securerandom.getinstance("sha1prng")
- 7NodeJS常见报错_the node.js path can contain
- 8OpenHarmony开发实战:弹性布局(ArkTS)_arkts布局自动换行
- 9Opencv读取写入视频_opencv: ffmpeg: tag 0x47504a4d/'mjpg' is not suppo
- 10【由chatgpt3.5写的swagger入门教程】
当前位置: article > 正文
CentOS-Stream-9升级openssh9.7p
作者:从前慢现在也慢 | 2024-04-22 14:20:40
赞
踩
CentOS-Stream-9升级openssh9.7p
CentOS Stream 9
ssh -V
- 1

需要的RPM包
openssh-9.7p1-1.el9.x86_64.rpm
openssh-clients-9.7p1-1.el9.x86_64.rpm
openssh-server-9.7p1-1.el9.x86_64.rpm
编译openssh
openssh官方只提供源码包,我们选择自己将源码编译为rpm包来升级环境的openssh,需要安装的环境为 CentOS Stream release 9
https://www.openssl.org/source/
wget https://github.com/boypt/openssh-rpms/archive/refs/heads/main.zip
unzip main.zip
cd openssh-rpms-main/
- 1
- 2
- 3
compile.sh:编译脚本el5、el6、el7:对应CentOS5、6、7三个系统,编译相关的参数由SPECS目录下的openssh.spec控制。
编译好的rpm包放在RPMS目录下。
pullsrc.sh:openssh相关源码下载脚本
version.env:定义了openssh及openssl源码的版本信息
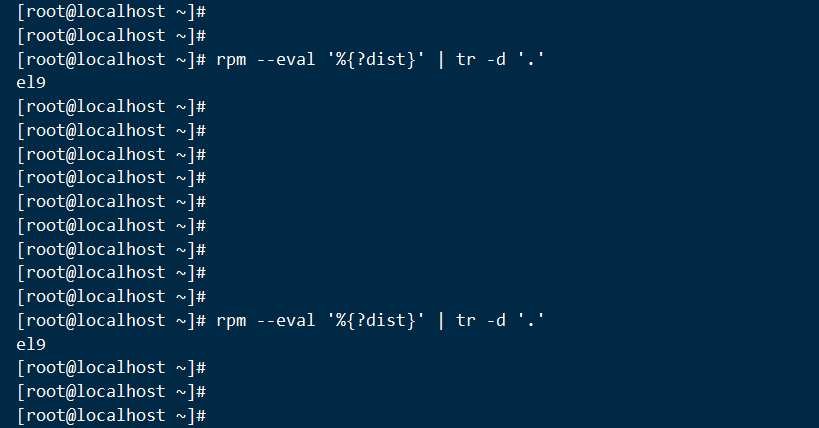
CentOS Stream release 9 可以使用 el7 的版本编译
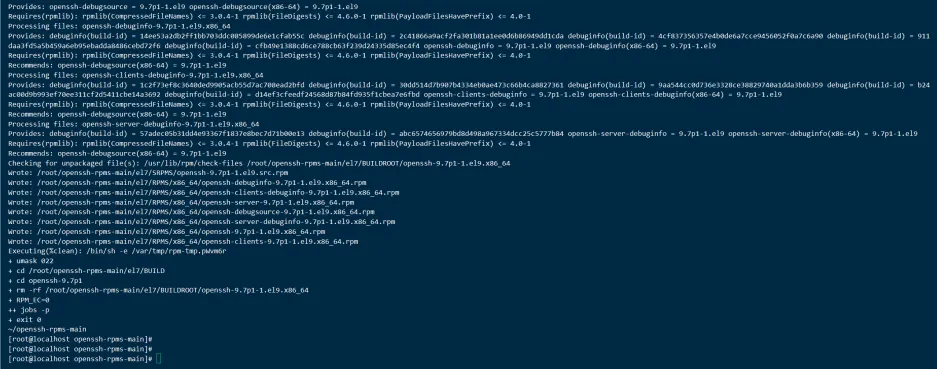
编译成功
Wrote: /root/openssh-rpms-main/el7/SRPMS/openssh-9.7p1-1.el9.src.rpm
Wrote: /root/openssh-rpms-main/el7/RPMS/x86_64/openssh-debuginfo-9.7p1-1.el9.x86_64.rpm
Wrote: /root/openssh-rpms-main/el7/RPMS/x86_64/openssh-clients-debuginfo-9.7p1-1.el9.x86_64.rpm
Wrote: /root/openssh-rpms-main/el7/RPMS/x86_64/openssh-server-9.7p1-1.el9.x86_64.rpm
Wrote: /root/openssh-rpms-main/el7/RPMS/x86_64/openssh-debugsource-9.7p1-1.el9.x86_64.rpm
Wrote: /root/openssh-rpms-main/el7/RPMS/x86_64/openssh-server-debuginfo-9.7p1-1.el9.x86_64.rpm
Wrote: /root/openssh-rpms-main/el7/RPMS/x86_64/openssh-9.7p1-1.el9.x86_64.rpm
Wrote: /root/openssh-rpms-main/el7/RPMS/x86_64/openssh-clients-9.7p1-1.el9.x86_64.rpm
Executing(%clean): /bin/sh -e /var/tmp/rpm-tmp.pWvm6r
+ umask 022
+ cd /root/openssh-rpms-main/el7/BUILD
+ cd openssh-9.7p1
+ rm -rf /root/openssh-rpms-main/el7/BUILDROOT/openssh-9.7p1-1.el9.x86_64
+ RPM_EC=0
++ jobs -p
+ exit 0
~/openssh-rpms-main

- 1
- 2
- 3
- 4
- 5
- 6
- 7
- 8
- 9
- 10
- 11
- 12
- 13
- 14
- 15
- 16
- 17
修改openssl版本
# cat version.env
#OPENSSLSRC=openssl-3.0.11.tar.gz    # 注释此版本
OPENSSLSRC=openssl-1.1.1v.tar.gz     # 修改为1.1.1
OPENSSHSRC=openssh-9.7p1.tar.gz
ASKPASSSRC=x11-ssh-askpass-1.2.4.1.tar.gz
PKGREL=4

OPENSSHVER=${OPENSSHSRC%%.tar.gz}
OPENSSHVER=${OPENSSHVER##openssh-}
OPENSSLVER=${OPENSSLSRC%%.tar.gz}
OPENSSLVER=${OPENSSLVER##openssl-}
- 1
- 2
- 3
- 4
- 5
- 6
- 7
- 8
- 9
- 10
- 11
修改openssh.spec文件
openssh源码中是没有ssh-copy-id相关参数的,如果直接编译安装,会发现安装后没有ssh-copy-id命令,因此如果需要用到该命令,需要修改编译参数控制文件openssh.spec
vim el7/SPECS/openssh.spec
- 1
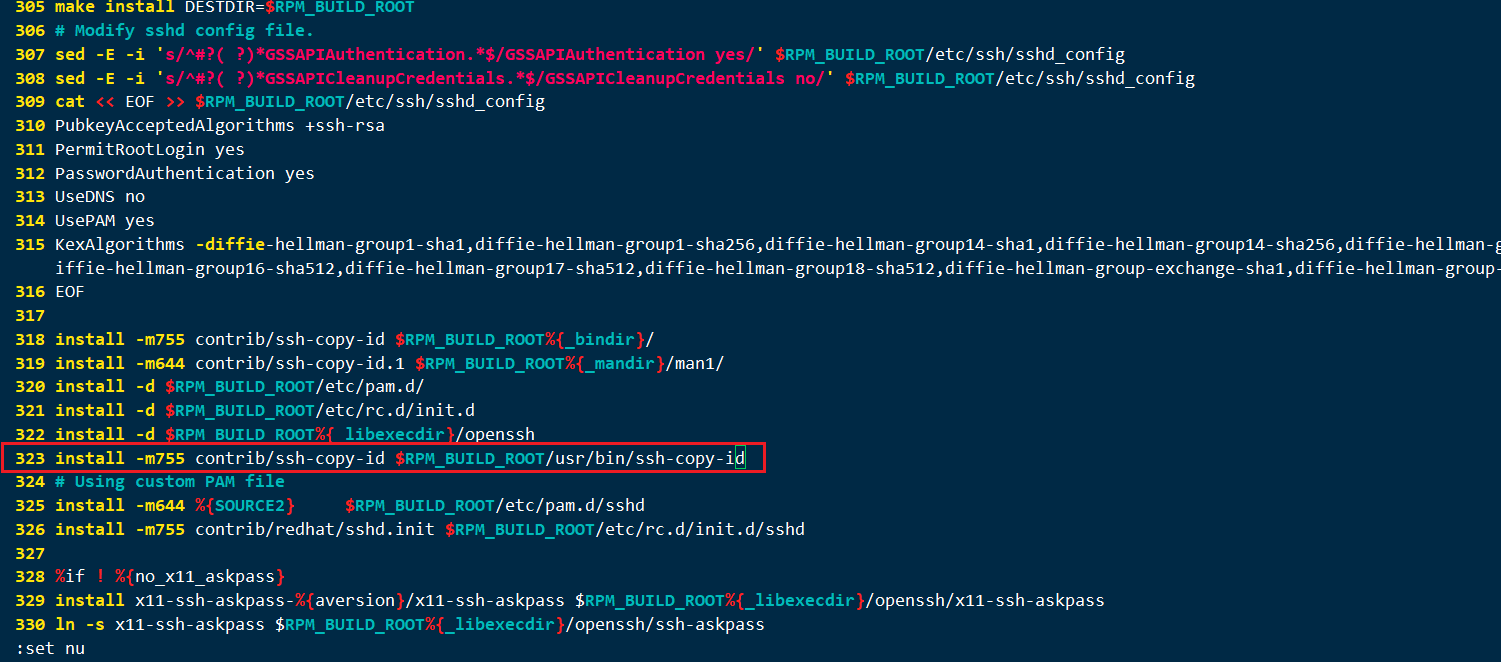
install -m755 contrib/ssh-copy-id $RPM_BUILD_ROOT/usr/bin/ssh-copy-id
- 1
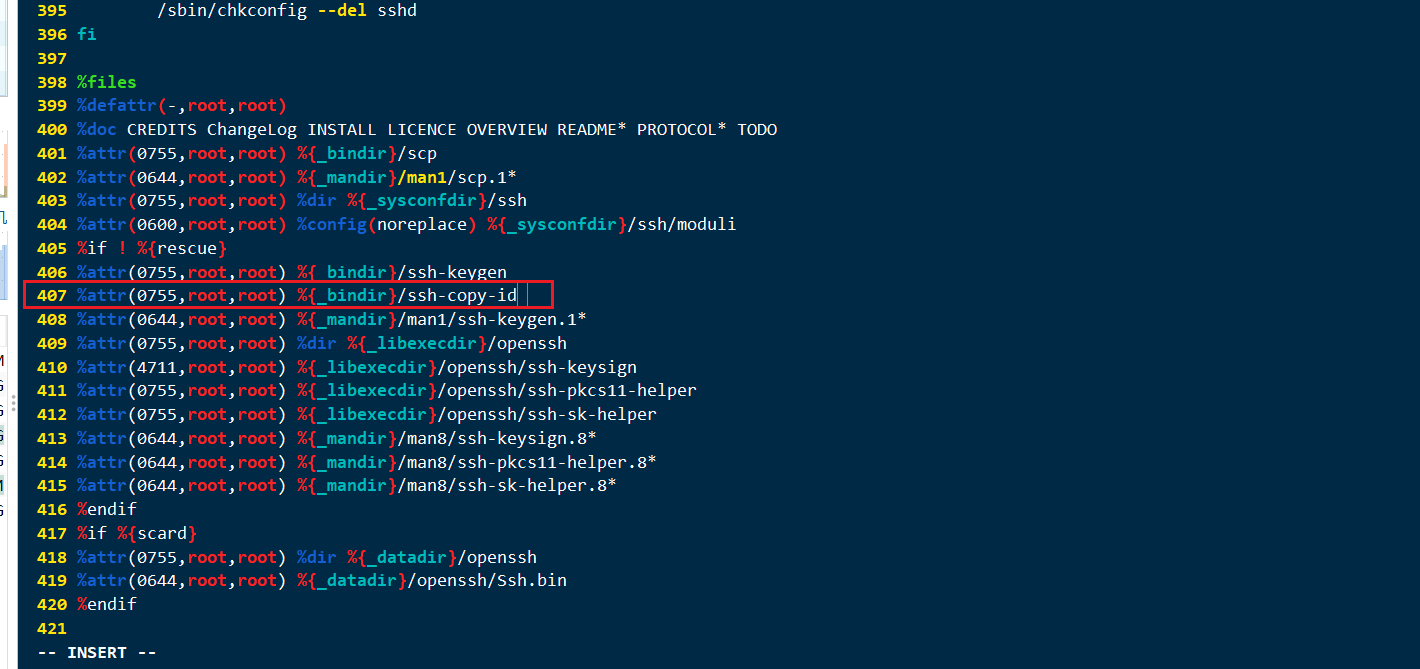
%attr(0755,root,root) %{_bindir}/ssh-copy-id
- 1
下载编译包gcc等
yum groupinstall -y "Development Tools"
yum install -y make rpm-build pam-devel krb5-devel zlib-devel libXt-devel libX11-devel gtk2-devel
- 1
- 2
yum install -y perl
- 1
编辑compile.sh,把el9版本的打包输出到el7的文件夹中
vim compile.sh
- 1
拉取源码
./pullsrc.sh
- 1
打包
./compile.sh
- 1
RPM包文件路径
ll el7/RPMS/x86_64/

openssh-debuginfo-9.7p1-1.el9.x86_64.rpm
openssh-clients-debuginfo-9.7p1-1.el9.x86_64.rpm
openssh-server-9.7p1-1.el9.x86_64.rpm
openssh-debugsource-9.7p1-1.el9.x86_64.rpm
openssh-server-debuginfo-9.7p1-1.el9.x86_64.rpm
openssh-9.7p1-1.el9.x86_64.rpm
openssh-clients-9.7p1-1.el9.x86_64.rpm
- 1
- 2
- 3
- 4
- 5
- 6
- 7
- 8
- 9
升级openssh
##注释掉的根据实际情况处理
#查询原openssh8.9p1是否有安装openssh-askpass,若有需先删除
rpm -qa | grep  openssh
rpm -e openssh-askpass-gnome-8.9p1

#原有openssh配置文件备份
cp /etc/ssh/sshd_config /etc/ssh/sshd_config.backup
cp /etc/pam.d/sshd /etc/pam.d/sshd.backup
cp /etc/pam.d/system-auth  /etc/pam.d/system-auth.backup


#安装依赖文件(如果需要)
#yum install -y  libICE
#yum install -y  libSM
#yum install -y  libX11
#yum install -y  libXt
#yum install -y  atk
#yum install -y  cairo
#yum install -y  gdk-pixbuf2
#yum install -y  gtk2


#openssh9.7p1 RPM包文件目录执行安装
yum localinstall -y openssh-*.rpm

#检查相应配置文件后,还原备份文件(可选)
#cp /etc/ssh/sshd_config.backup /etc/ssh/sshd_config
#cp /etc/pam.d/sshd.backup  /etc/pam.d/sshd
#cp /etc/pam.d/system-auth.backup  /etc/pam.d/system-auth

#可能出现的报错 :Permissions 0640 for '/etc/ssh/ssh_host_ed25519_key' are too open.
解决办法:权限变成600

chmod 0600 /etc/ssh/ssh_host_rsa_key
chmod 0600 /etc/ssh/ssh_host_ecdsa_key
chmod 0600 /etc/ssh/ssh_host_ed25519_key


#重启sshd服务
#systemctl enable sshd
systemctl restart sshd

#检查SSH版本
ssh -V
- 1
- 2
- 3
- 4
- 5
- 6
- 7
- 8
- 9
- 10
- 11
- 12
- 13
- 14
- 15
- 16
- 17
- 18
- 19
- 20
- 21
- 22
- 23
- 24
- 25
- 26
- 27
- 28
- 29
- 30
- 31
- 32
- 33
- 34
- 35
- 36
- 37
- 38
- 39
- 40
- 41
- 42
- 43
- 44
声明:本文内容由网友自发贡献,不代表【wpsshop博客】立场,版权归原作者所有,本站不承担相应法律责任。如您发现有侵权的内容,请联系我们。转载请注明出处:https://www.wpsshop.cn/w/从前慢现在也慢/article/detail/468953
推荐阅读

相关标签

