
- 1ShuiZe(水泽)详细使用教程“Docker和Kali安装水泽”_水泽安装
- 2鸿蒙OS应用开发之函数_鸿蒙开放 函数方法
- 3VMwave虚拟机安装、Ubuntu20.04LTS安装教程_vm wave
- 4Python 集合06 discard()方法—删除集合中的指定元素_python 集合discard
- 5R: R package安装的几种方式_r语言安装package
- 6torchtext安装_torchtext安装什么版本对pytorch1.12
- 7solidity踩坑日记之java通过web3j调用智能合约传递数组参数的坑_java 调用 solidity合约接口
- 8PCA降维和对结果的简单解释_pca中pc3
- 9外包被裁,备战两月阿里P8的全套Java手写笔记,成功上岸字节_杭州计算机外包裁员
- 10常用点云处理软件_点云软件
YOLOv9配置与运行_yolov9,如何使用cpu/gpu运行——安装环境及依赖(详细,简单易懂)
赞
踩
可以多多关注我吗???
1、官网下载代码与权重.(权重放在根目录下)
2、conda create -n yolov9 python=3.8
后激活 activate yolov9
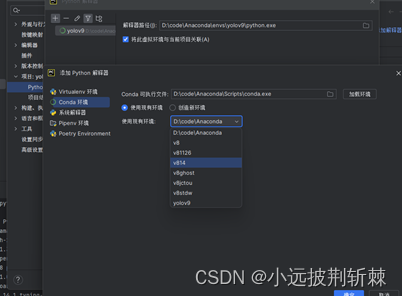
3、使用该虚拟环境并点击“与该虚拟环境绑定”
4、虚拟环境中,pip install -r requirements.txt,安装库
5、卸载依赖中torch的CPU环境,pip uninstall torch
安装pytorch官网的pytorch命令,以下为11.8版本(注意版本不可小于cuda),下载时间比较长,别用清华源。
conda install pytorch torchvision torchaudio pytorch-cuda=11.8 -c pytorch -c nvidia,到此GPU环境搭建结束。一切均结束。
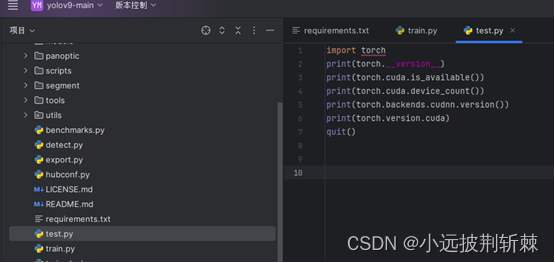
6、增加这个test.py,验证GPU环境。直接运行,看是否为GPU环境。
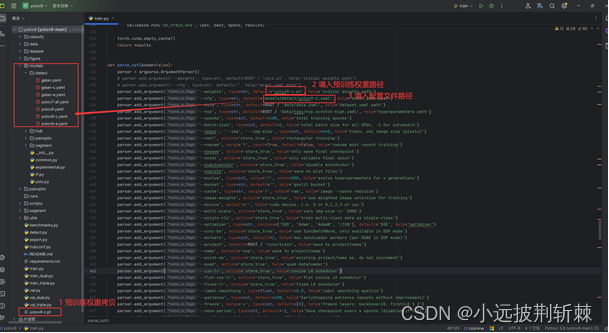
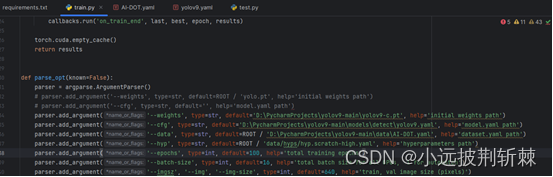
7、将权重文件路径和配置文件路径依次填入train脚本中,如下:

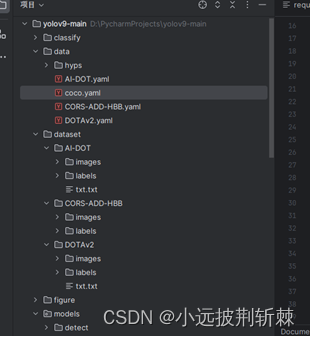
8、创建一个数据集配置文件并修改AI-DOT.yaml中的数据集路径,如下:(以AI-DOT数据集为例)
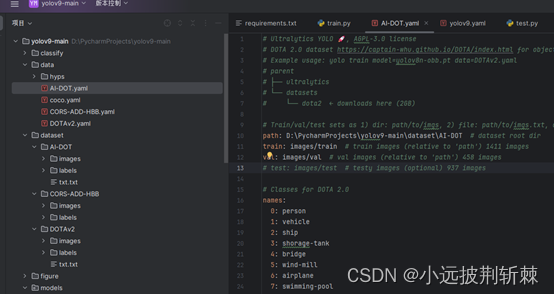
9、复制刚才创建的yaml文件的路径,粘贴到train脚本的data参数中。并将hyp参数的值改为data/hyps/hyp.scratch-high.yaml

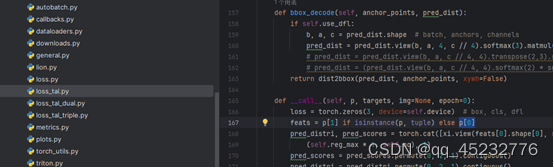
10、2024.2.22日官网发布的代码存在bug,将utils工程下loss_tal脚本中的第167行中的p改为p[0]或p[1],改完能运行。
11、运行train.py
v9运行中,出现attributeerror: ‘FreeTypeFont‘ object has no attribute ‘getsize‘,因为安装了新版本的 Pillow 删除了getsize 功能
,降级到 Pillow 9.5 ,即可。
运行pip install Pillow==9.5

