
基于安路FPGA的Cortex M0移植【FPGA】_安路软核移植
赞
踩
基于安路FPGA的Cortex M0移植
这其实是今年上半年参加集创赛安路科技杯时候做的内容,当时忙着考研复习大概做了个框架参赛,没想到还混到一个分赛区二等奖加一次公费旅游,现在保研后闲着写点博客记录下当时碰上的问题。
软硬件介绍
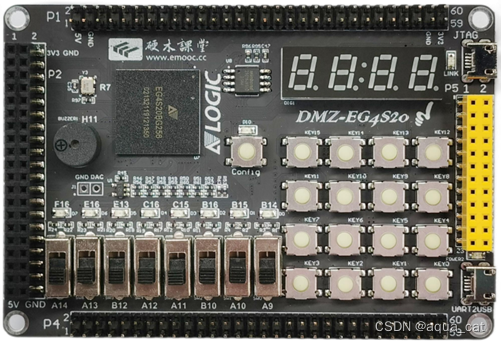
硬件平台是硬木课堂的安路EG4S20BG256核心板,资源一般够用,在这次赛题里面移植M0加上其他外设绰绰有余;
软件平台使用安路公司的TD软件开发FPGA部分,Keil软件对M0进行编程;
具体移植过程
具体移植过程强烈建议直接看官方教程,十分详细。配合ARM Cortex-M0 权威指南这本书,能更深入理解M0内核架构和各个部分工作原理,后面自己要添加其他外设也不至于不知道怎么去写代码。
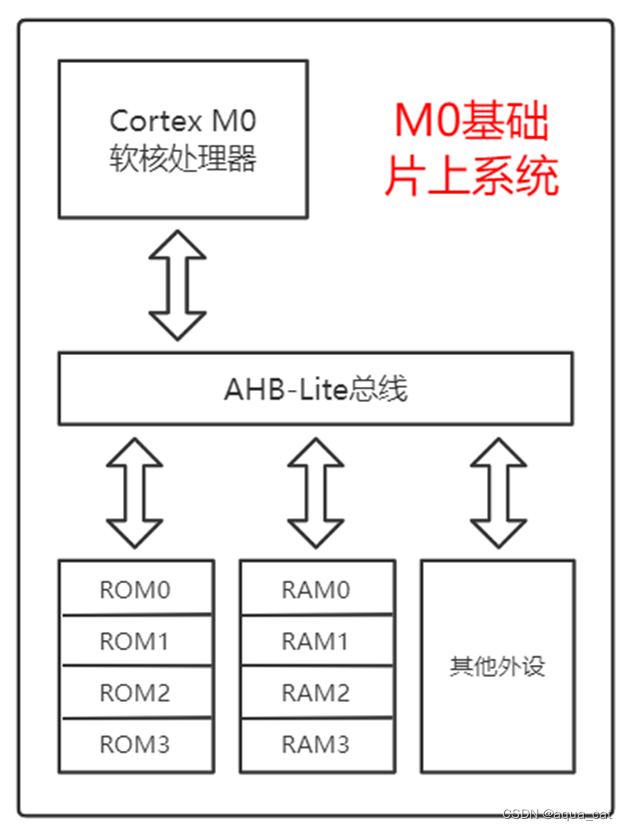
Arm Cortex-M0的SoC实现

移植过程中碰上的问题
RAM和ROM资源不足
在 Anlogic 的 EG4S20 系列 FPGA 中,总共有两类 Memory 资源,分别是 Block Memory 与 Distributed Memory。EG4S20BG256芯
片的存储部分包含了:
- 156 Kbits 分布存储器(Distribute RAM)
- 1 Mbits 嵌入块存储器(Block RAM 简称 BRAM)包括:
• 64 个 9 Kbits BRAM,可配置为真双口,8Kx1 到 512x18 模式
• 16 个 32 Kbits BRAM,可配置为真双口,可设置为 2Kx16 或 4Kx8
按照官方教程进行移植的时候,分配的RAM、ROM空间都较小(4096*32bit)。但是如果直接在Block_RAM.v代码中对空间大小进行修改, TD软件可能会在综合编译时会报错。这是因为由于此次使用的 FPGA 内部存储器的单个空间较小,TD软件无法自动生成这么大的BRAM资源块。
解决方法大致有:
- 在TD软件中使用IP核生成大小合适的整块BRAM资源;
- 先生成小块BRAM块,再使用数据线扩展或者地址线扩展的方法进行扩展。
FPGA 内部 BRAM 资源分为 9Kbits、32Kbits 两种,其中 32Kbits 可具体设置为 2K * 16 或 4K * 8 两种模式。由于 M0 内核使用的数据位宽最长为 32bits,且需要支持 8bits、16bits、24bits、32bits 四种变长数据宽度传输(可以看上面那本书),所以设定的具体 ROM、RAM 扩展方案如下:
- 使用 32Kbits BRAM 资源块分别生成 4 个 8K*8 配置模式的内存资源模块,每个模块将使用两个 32Kbits BRAM 资源块;
- 以上 4 个模块进行数据位扩展,组成一个 8K*32 的内存资源模块,即 32KB 的内存空间;
- 该内存空间深度为 8192,数据位宽为 8K,因为是由 4 个分别的小模块组合而来,还可以支持变长数据宽度传输;
使用以上方案分别构建 ROM、RAM 模块,共使用了 16 个 32Kbits BRAM 资源块,得到的 ROM、RAM 空间大小都为 32KB。
启动文件编写
启动文件这一部分,一开始我是直接抄的教程的代码,能用,但是不是很理解。等到后面引入了中断后,就更加不理解了,感觉写起来很乱。于是突发奇想,去找到STM32某个同样也是M0内核的型号单片机,抄了一份启动文件,按照自己的硬件进行修改后,验证同样能用。
代码如下:
;/**************************************************************************//**
; * @file     startup_CMSDK_CM0.s
; * @brief    CMSIS Cortex-M0 Core Device Startup File for
; *           Device CMSDK_CM0
; * @version  V3.01
; * @date     06. March 2012
; *
; * @note
; * Copyright (C) 2012 ARM Limited. All rights reserved.
; *
; * @par
; * ARM Limited (ARM) is supplying this software for use with Cortex-M
; * processor based microcontrollers.  This file can be freely distributed
; * within development tools that are supporting such ARM based processors.
; *
; * @par
; * THIS SOFTWARE IS PROVIDED "AS IS".  NO WARRANTIES, WHETHER EXPRESS, IMPLIED
; * OR STATUTORY, INCLUDING, BUT NOT LIMITED TO, IMPLIED WARRANTIES OF
; * MERCHANTABILITY AND FITNESS FOR A PARTICULAR PURPOSE APPLY TO THIS SOFTWARE.
; * ARM SHALL NOT, IN ANY CIRCUMSTANCES, BE LIABLE FOR SPECIAL, INCIDENTAL, OR
; * CONSEQUENTIAL DAMAGES, FOR ANY REASON WHATSOEVER.
; *
; ******************************************************************************/
;/*
;//-------- <<< Use Configuration Wizard in Context Menu >>> ------------------
;*/


; <h> Stack Configuration
;   <o> Stack Size (in Bytes) <0x0-0xFFFFFFFF:8>
; </h>

Stack_Size      EQU     0x00000400

                AREA    STACK, NOINIT, READWRITE, ALIGN=4
Stack_Mem       SPACE   Stack_Size
__initial_sp


; <h> Heap Configuration
;   <o>  Heap Size (in Bytes) <0x0-0xFFFFFFFF:8>
; </h>

Heap_Size       EQU     0x00000400

                AREA    HEAP, NOINIT, READWRITE, ALIGN=4
__heap_base
Heap_Mem        SPACE   Heap_Size
__heap_limit


                PRESERVE8
                THUMB


; Vector Table Mapped to Address 0 at Reset

                AREA    RESET, DATA, READONLY
                EXPORT  __Vectors
                EXPORT  __Vectors_End
                EXPORT  __Vectors_Size

__Vectors       DCD     __initial_sp              ; Top of Stack
                DCD     Reset_Handler             ; Reset Handler
                DCD     NMI_Handler			      ; NMI Handler
                DCD     HardFault_Handler         ; Hard Fault Handler
                DCD     0                         ; Reserved
                DCD     0                         ; Reserved
                DCD     0                         ; Reserved
                DCD     0                         ; Reserved
                DCD     0                         ; Reserved
                DCD     0                         ; Reserved
                DCD     0                         ; Reserved
                DCD     SVC_Handler	              ; SVCall Handler
                DCD     0                         ; Reserved
                DCD     0                         ; Reserved
                DCD     PendSV_Handler       	  ; PendSV Handler
                DCD     SysTick_Handler        	  ; SysTick Handler
                DCD     UART0_Handler             ; UART_Handler
                DCD     SW_Handler                ; SW_Handler
				DCD     KEY_Handler               ; KEY_Handler
                DCD     ESP_Handler               ; ESP_Handler
__Vectors_End

__Vectors_Size  EQU     __Vectors_End - __Vectors

                AREA    |.text|, CODE, READONLY


; Reset Handler

Reset_Handler   PROC
                GLOBAL  Reset_Handler
				ENTRY
                IMPORT  __main
                LDR     R0, =__main
				MOV     R8, R0
                MOV     R9, R8
                BX      R0
                ENDP

; Dummy Exception Handlers (infinite loops which can be modified)
NMI_Handler     PROC
                EXPORT  NMI_Handler               [WEAK]
                B       .
                ENDP
HardFault_Handler\
                PROC
                EXPORT  HardFault_Handler         [WEAK]
                B       .
                ENDP
SVC_Handler     PROC
                EXPORT  SVC_Handler               [WEAK]
                B       .
                ENDP
PendSV_Handler  PROC
                EXPORT  PendSV_Handler            [WEAK]
                B       .
                ENDP
SysTick_Handler PROC
                EXPORT  SysTick_Handler           [WEAK]
                B       .
                ENDP

Default_Handler PROC
				EXPORT  UART0_Handler             [WEAK]
				EXPORT  SW_Handler                [WEAK]
				EXPORT  KEY_Handler               [WEAK]
				EXPORT  ESP_Handler               [WEAK]
UART0_Handler
SW_Handler
KEY_Handler
ESP_Handler
                B       .
                ENDP


                ALIGN


; User Initial Stack & Heap

				IF      :DEF:__MICROLIB

                EXPORT  __initial_sp
                EXPORT  __heap_base
                EXPORT  __heap_limit

                ELSE

                IMPORT  __use_two_region_memory
                EXPORT  __user_initial_stackheap

__user_initial_stackheap

                LDR     R0, =  Heap_Mem
                LDR     R1, =(Stack_Mem + Stack_Size)
                LDR     R2, = (Heap_Mem +  Heap_Size)
                LDR     R3, = Stack_Mem
                BX      LR

                ALIGN

				ENDIF

                END

- 1
- 2
- 3
- 4
- 5
- 6
- 7
- 8
- 9
- 10
- 11
- 12
- 13
- 14
- 15
- 16
- 17
- 18
- 19
- 20
- 21
- 22
- 23
- 24
- 25
- 26
- 27
- 28
- 29
- 30
- 31
- 32
- 33
- 34
- 35
- 36
- 37
- 38
- 39
- 40
- 41
- 42
- 43
- 44
- 45
- 46
- 47
- 48
- 49
- 50
- 51
- 52
- 53
- 54
- 55
- 56
- 57
- 58
- 59
- 60
- 61
- 62
- 63
- 64
- 65
- 66
- 67
- 68
- 69
- 70
- 71
- 72
- 73
- 74
- 75
- 76
- 77
- 78
- 79
- 80
- 81
- 82
- 83
- 84
- 85
- 86
- 87
- 88
- 89
- 90
- 91
- 92
- 93
- 94
- 95
- 96
- 97
- 98
- 99
- 100
- 101
- 102
- 103
- 104
- 105
- 106
- 107
- 108
- 109
- 110
- 111
- 112
- 113
- 114
- 115
- 116
- 117
- 118
- 119
- 120
- 121
- 122
- 123
- 124
- 125
- 126
- 127
- 128
- 129
- 130
- 131
- 132
- 133
- 134
- 135
- 136
- 137
- 138
- 139
- 140
- 141
- 142
- 143
- 144
- 145
- 146
- 147
- 148
- 149
- 150
- 151
- 152
- 153
- 154
- 155
- 156
- 157
- 158
- 159
- 160
- 161
- 162
- 163
- 164
- 165
- 166
- 167
- 168
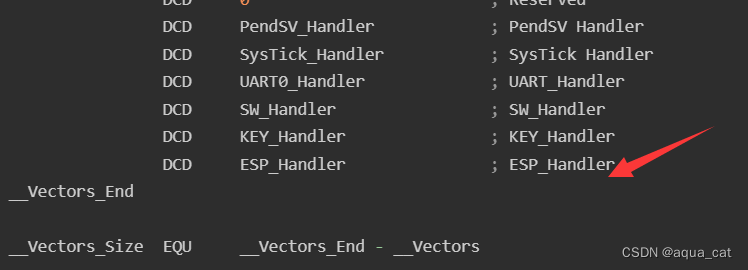
如果需要新增中断,只需要更改完FPGA硬件后,在下图的地方依葫芦画瓢添加自己的中断名称即可:

KEIL下载算法编写
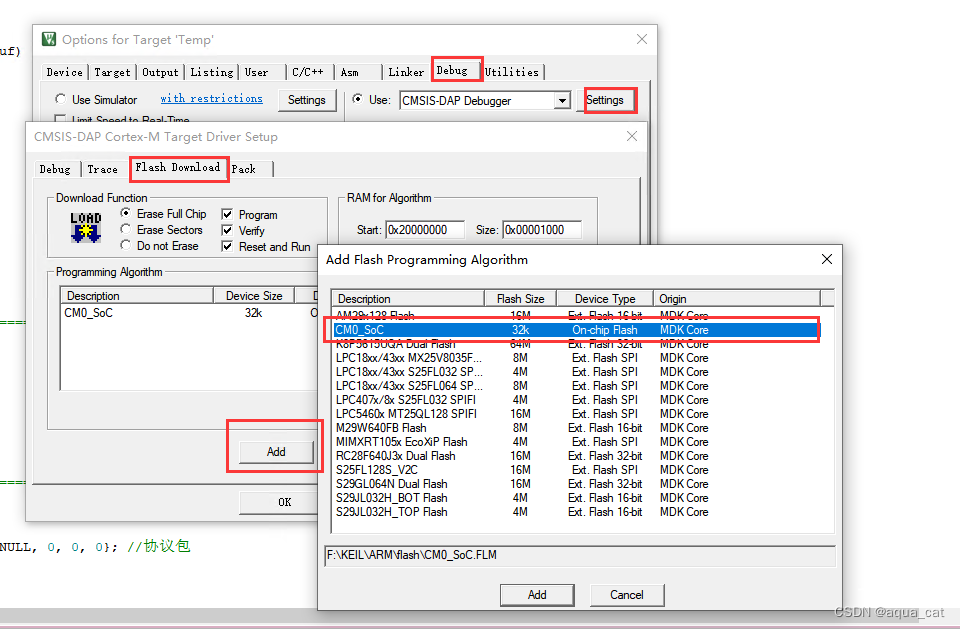
软硬件都经过仿真验证没问题后,先通过TD软件将FPGA比特流下载到FPGA芯片内,再使用KEIL软件将软核代码下载到M0内核内,整个系统才能正常运作。这个过程中需要一个KEIL下载算法,路径:\KEIL\ARM\Flash\。
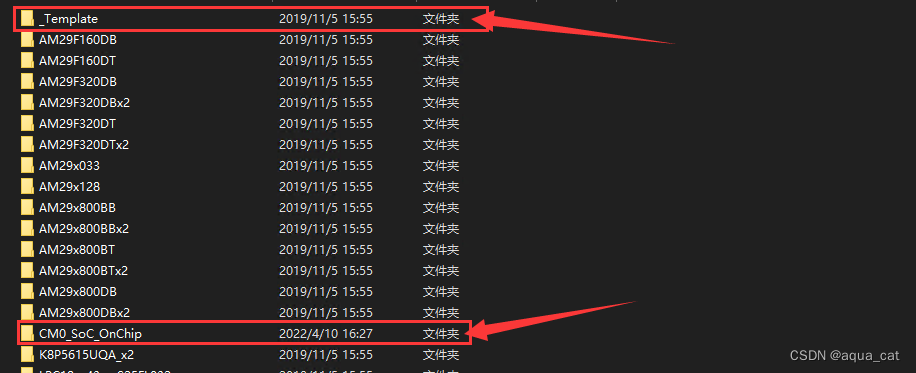
1、首先将该文件夹下的例程文件夹复制一份,改成需要的名称;
2、根据自己的硬件flash大小,更改FlashDev.c文件;
struct FlashDevice const FlashDevice  =  {
   FLASH_DRV_VERS,             // Driver Version, do not modify!
   "CM0_SoC",                  // Device Name
   ONCHIP,                     // Device Type
   0x00000000,                 // Device Start Address
   0x00008000,                 // Device Size in Bytes (32kB)
   1024,                       // Programming Page Size
   0,                          // Reserved, must be 0
   0xFF,                       // Initial Content of Erased Memory
   100,                        // Program Page Timeout 100 mSec
   3000,                       // Erase Sector Timeout 3000 mSec

// Specify Size and Address of Sectors
   0x008000, 0x000000,         // Sector Size  32kB (1 Sectors)
   SECTOR_END
};
- 1
- 2
- 3
- 4
- 5
- 6
- 7
- 8
- 9
- 10
- 11
- 12
- 13
- 14
- 15
- 16
3、编写FlashPrg.c文件中的几个函数;
/**************************************************************************//**
 * @file     FlashPrg.c
 * @brief    Flash Programming Functions adapted for New Device Flash
 * @version  V1.0.0
 * @date     10. January 2018
 ******************************************************************************/
/*
 * Copyright (c) 2010-2018 Arm Limited. All rights reserved.
 *
 * SPDX-License-Identifier: Apache-2.0
 *
 * Licensed under the Apache License, Version 2.0 (the License); you may
 * not use this file except in compliance with the License.
 * You may obtain a copy of the License at
 *
 * www.apache.org/licenses/LICENSE-2.0
 *
 * Unless required by applicable law or agreed to in writing, software
 * distributed under the License is distributed on an AS IS BASIS, WITHOUT
 * WARRANTIES OR CONDITIONS OF ANY KIND, either express or implied.
 * See the License for the specific language governing permissions and
 * limitations under the License.
 */

#include "..\FlashOS.H"        // FlashOS Structures
#include "string.h"

/*
   Mandatory Flash Programming Functions (Called by FlashOS):
                int Init        (unsigned long adr,   // Initialize Flash
                                 unsigned long clk,
                                 unsigned long fnc);
                int UnInit      (unsigned long fnc);  // De-initialize Flash
                int EraseSector (unsigned long adr);  // Erase Sector Function
                int ProgramPage (unsigned long adr,   // Program Page Function
                                 unsigned long sz,
                                 unsigned char *buf);

   Optional  Flash Programming Functions (Called by FlashOS):
                int BlankCheck  (unsigned long adr,   // Blank Check
                                 unsigned long sz,
                                 unsigned char pat);
                int EraseChip   (void);               // Erase complete Device
      unsigned long Verify      (unsigned long adr,   // Verify Function
                                 unsigned long sz,
                                 unsigned char *buf);

       - BlanckCheck  is necessary if Flash space is not mapped into CPU memory space
       - Verify       is necessary if Flash space is not mapped into CPU memory space
       - if EraseChip is not provided than EraseSector for all sectors is called
*/


/*
 *  Initialize Flash Programming Functions
 *    Parameter:      adr:  Device Base Address
 *                    clk:  Clock Frequency (Hz)
 *                    fnc:  Function Code (1 - Erase, 2 - Program, 3 - Verify)
 *    Return Value:   0 - OK,  1 - Failed
 */

int Init (unsigned long adr, unsigned long clk, unsigned long fnc) {

  /* Add your Code */
  return (0);                                  // Finished without Errors
}


/*
 *  De-Initialize Flash Programming Functions
 *    Parameter:      fnc:  Function Code (1 - Erase, 2 - Program, 3 - Verify)
 *    Return Value:   0 - OK,  1 - Failed
 */

int UnInit (unsigned long fnc) {

  /* Add your Code */
  return (0);                                  // Finished without Errors
}


/*
 *  Erase complete Flash Memory
 *    Return Value:   0 - OK,  1 - Failed
 */

int EraseChip (void) {

  /* Add your Code */
	memset((unsigned char *)0, 0, 0x8000);
  return (0);                                  // Finished without Errors
}


/*
 *  Erase Sector in Flash Memory
 *    Parameter:      adr:  Sector Address
 *    Return Value:   0 - OK,  1 - Failed
 */

int EraseSector (unsigned long adr) {

  /* Add your Code */
	memset((unsigned char *)adr, 0, 1024);
  return (0);                                  // Finished without Errors
}


/*
 *  Program Page in Flash Memory
 *    Parameter:      adr:  Page Start Address
 *                    sz:   Page Size
 *                    buf:  Page Data
 *    Return Value:   0 - OK,  1 - Failed
 */

int ProgramPage (unsigned long adr, unsigned long sz, unsigned char *buf) {

  /* Add your Code */
	memcpy((unsigned char *)adr, buf, sz);
  return (0);                                  // Finished without Errors
}
- 1
- 2
- 3
- 4
- 5
- 6
- 7
- 8
- 9
- 10
- 11
- 12
- 13
- 14
- 15
- 16
- 17
- 18
- 19
- 20
- 21
- 22
- 23
- 24
- 25
- 26
- 27
- 28
- 29
- 30
- 31
- 32
- 33
- 34
- 35
- 36
- 37
- 38
- 39
- 40
- 41
- 42
- 43
- 44
- 45
- 46
- 47
- 48
- 49
- 50
- 51
- 52
- 53
- 54
- 55
- 56
- 57
- 58
- 59
- 60
- 61
- 62
- 63
- 64
- 65
- 66
- 67
- 68
- 69
- 70
- 71
- 72
- 73
- 74
- 75
- 76
- 77
- 78
- 79
- 80
- 81
- 82
- 83
- 84
- 85
- 86
- 87
- 88
- 89
- 90
- 91
- 92
- 93
- 94
- 95
- 96
- 97
- 98
- 99
- 100
- 101
- 102
- 103
- 104
- 105
- 106
- 107
- 108
- 109
- 110
- 111
- 112
- 113
- 114
- 115
- 116
- 117
- 118
- 119
- 120
- 121
- 122
- 123
4、然后执行编译,会在文件夹下生成一个.FLM文件;
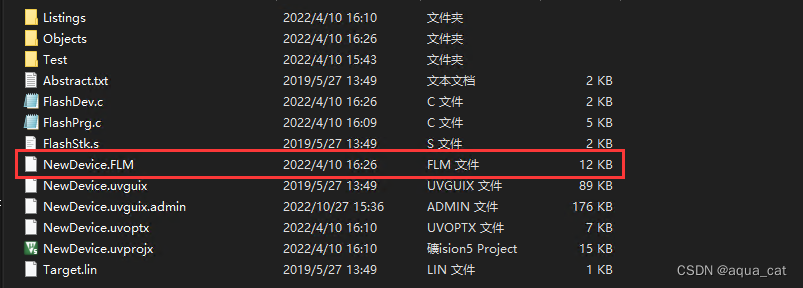
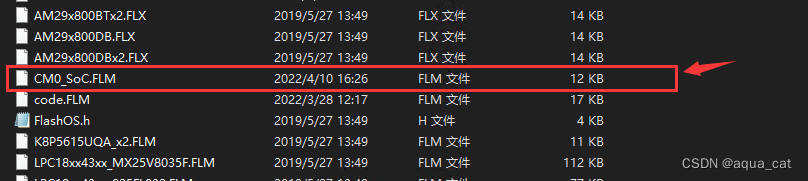
改一个名字,然后复制到\KEIL\ARM\Flash\路径下;
5、然后在工程下载器设置中,添加相应的FLM文件即可;
其他
还有啥问题暂时想不起来了,想起来再写。

