- 1如何学习ClickHouse:糙快猛的大数据之路(技术要点概览)_clickhouse 深入学习
- 2如何卸载已安装的 Python_删除python3.12
- 3你敢信?一行python代码能下载全网的视频,音乐_puthon全网搜索视频
- 4CAP理论详解
- 5NLTK学习笔记(四):自然语言处理的一些算法研究
- 6Android报错:Failed resolution of: Landroidx/appcompat/R$drawable; Didn‘t find class “androidx.appcom
- 7近期京东零售技术最受欢迎的 10 篇文章,内附大量热门岗位招聘_京东秒送售后系统退款业务重构心得
- 8已经30岁了,想转行从头开始现实吗?
- 9微积分(二) 导数与微分_圆柱随半径和长度变化的微积分
- 10推荐一款前沿的国际化解决方案:Next-International
unity入门学习笔记_unity fanlogic是什么意思
赞
踩
文章目录
unity学习笔记
熟悉界面

重置界面布局:Windows --> layout --> default
窗口页面快捷键
alt + 鼠标左键:绕中心点旋转视图
alt + 鼠标右键:绕中心点缩放视图
alt + 鼠标中键:平移视图
鼠标滑轮:缩放视图
(选中物体后) + f : 使选中的物体变成视图中心
视图特点
透视视图(perspective):近大远小
作用与优点:发生透视畸变
正交视图(orthographic):等距视图
作用与优点:容易使物体对齐

移动、旋转、缩放快捷键
W、E、R — > 移动、旋转、缩放
聚焦和隐藏
聚焦:之前有提到过;快捷键就是f,也可以在层级窗口中双击实现
隐藏:

一些基本概念
模型
网格Mesh,存储了形状的数据
模型的形状由若干个小面围成的
模型是中空的
Mesh中包含了面、顶点坐标、法向等数据
另外unity中的模型都是由多个三角面围成的
模型的导入
unity支持的模型文件类型为:.fbx
unity支持的贴图文件类型为:.psd
一些补充
平面特点:正面可见(法向),背面透明,没有厚度
所有unity自带的模型也都具有这样的特点,这是因为unity中的模型只渲染了外面
unity自带的模型都自带了一个材质
资源文件
Asset目录下的文件,称为资源文件
常见的类型:
模型文件Model(*.fbx)
图片文件Texture(*.jpg/png/psd/tif)
音频文件AudioClip(*.mp3/wav/aiff)
脚本文件Script(*.cs)
材质文件(*.mat)
场景文件(*.unity)
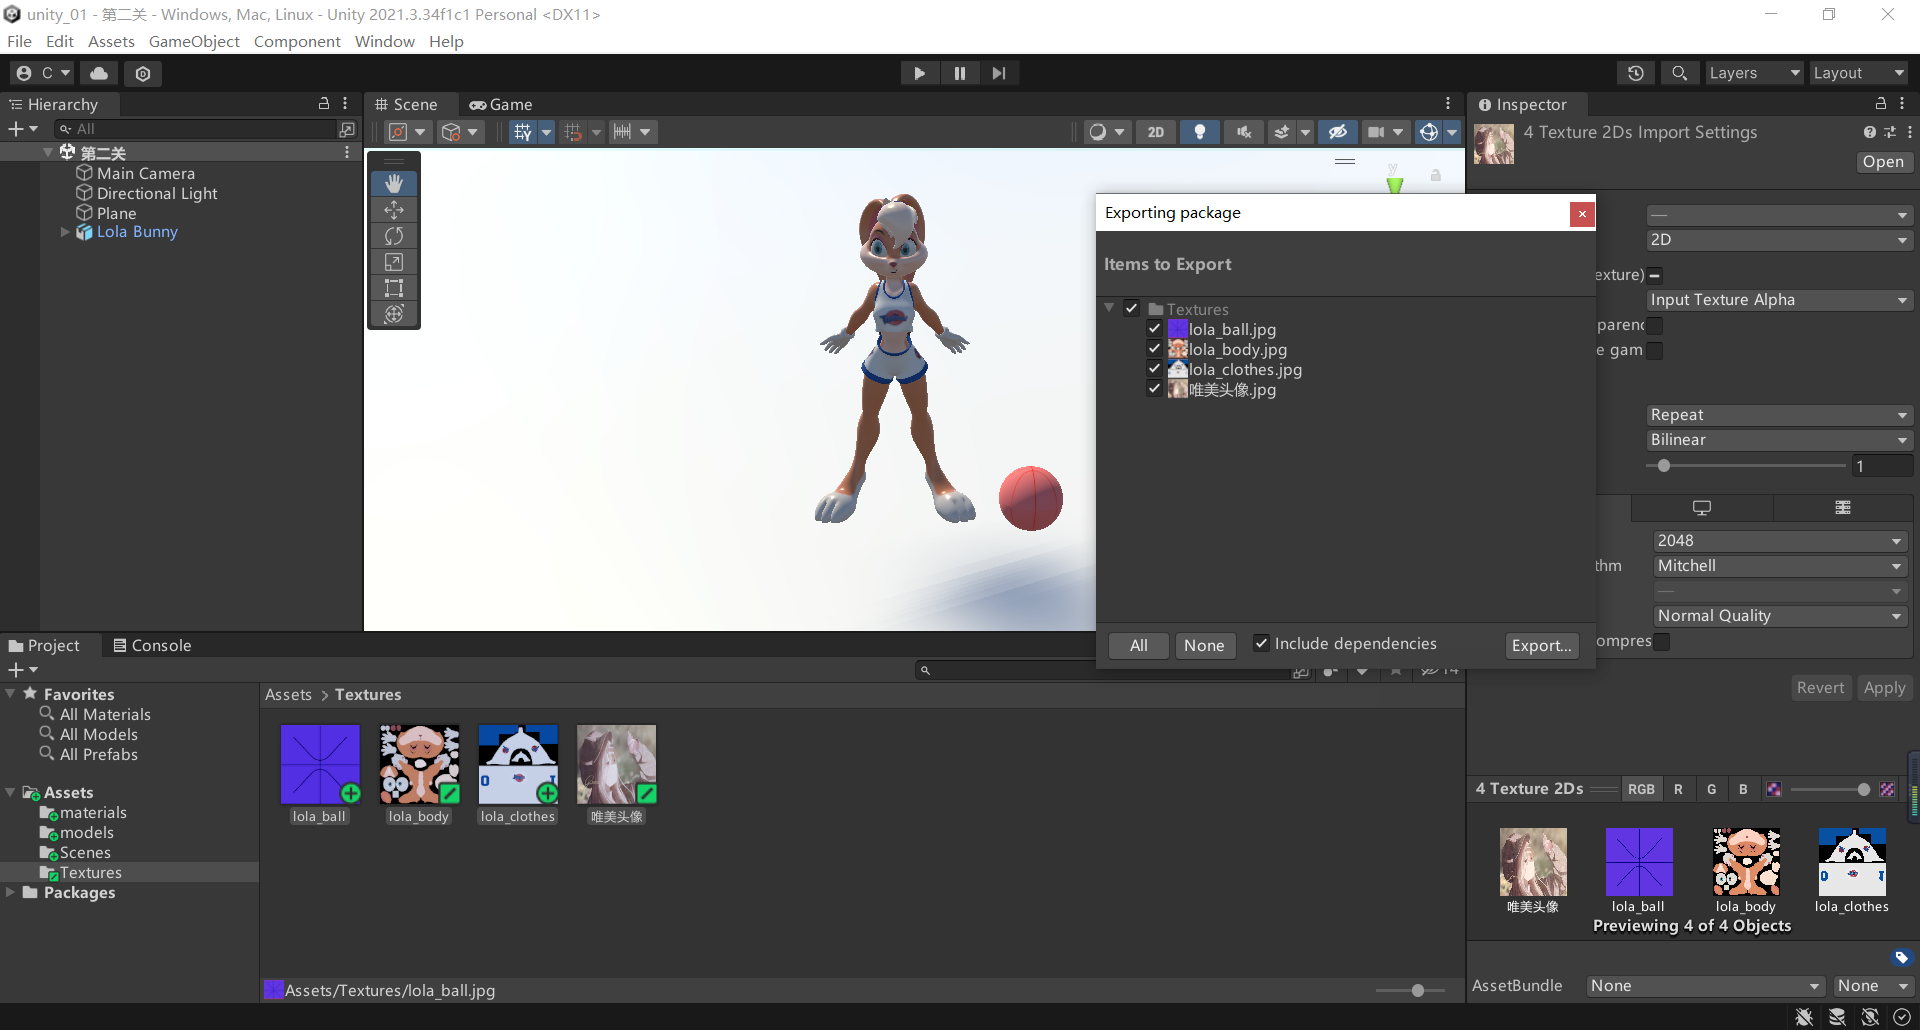
资源包的导出

unity会自动将所有的依赖资源一起导出成一个你自己命名的资源包
资源包的导入
拖过来就好
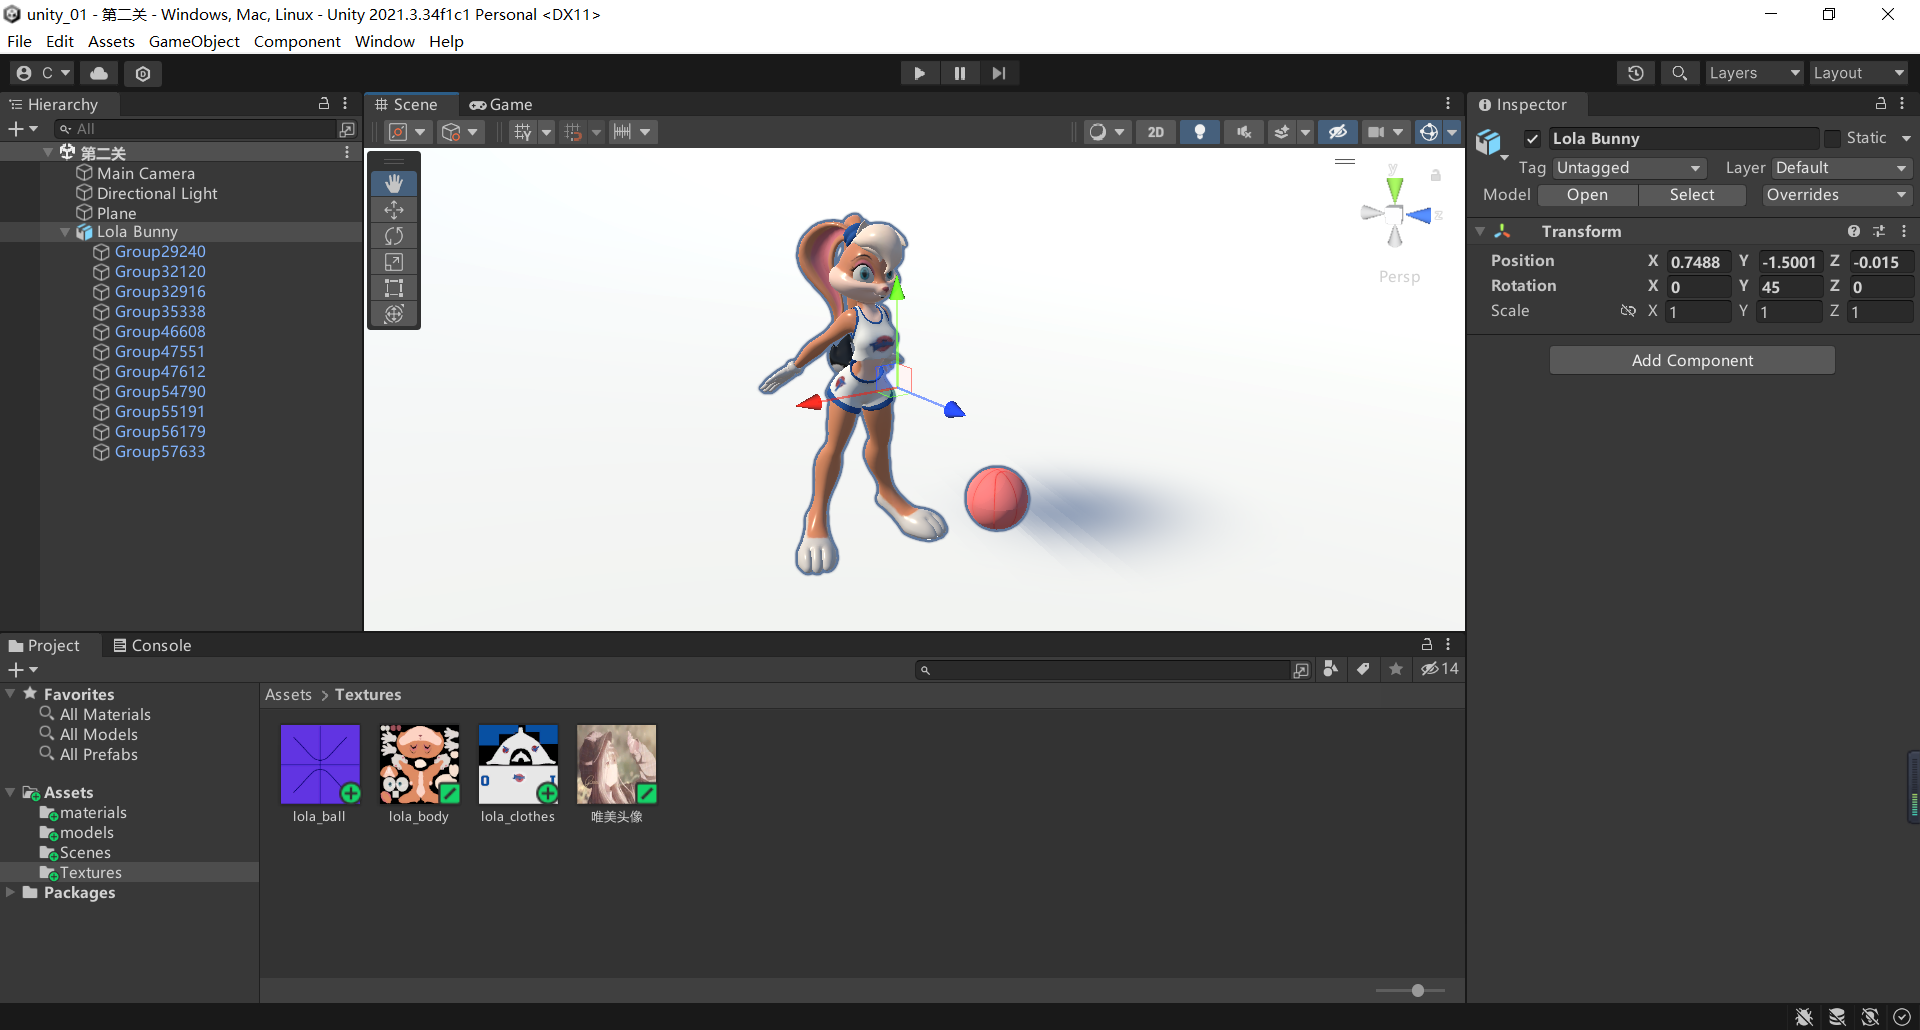
轴心
轴心(pivot):对模型进行平移、旋转、缩放的时候都是围绕着轴心点进行的。几何图形的轴心点就是它的几何中心
注意:建模软件可以自己定义轴心点。所以轴心点不一定是自己生成的
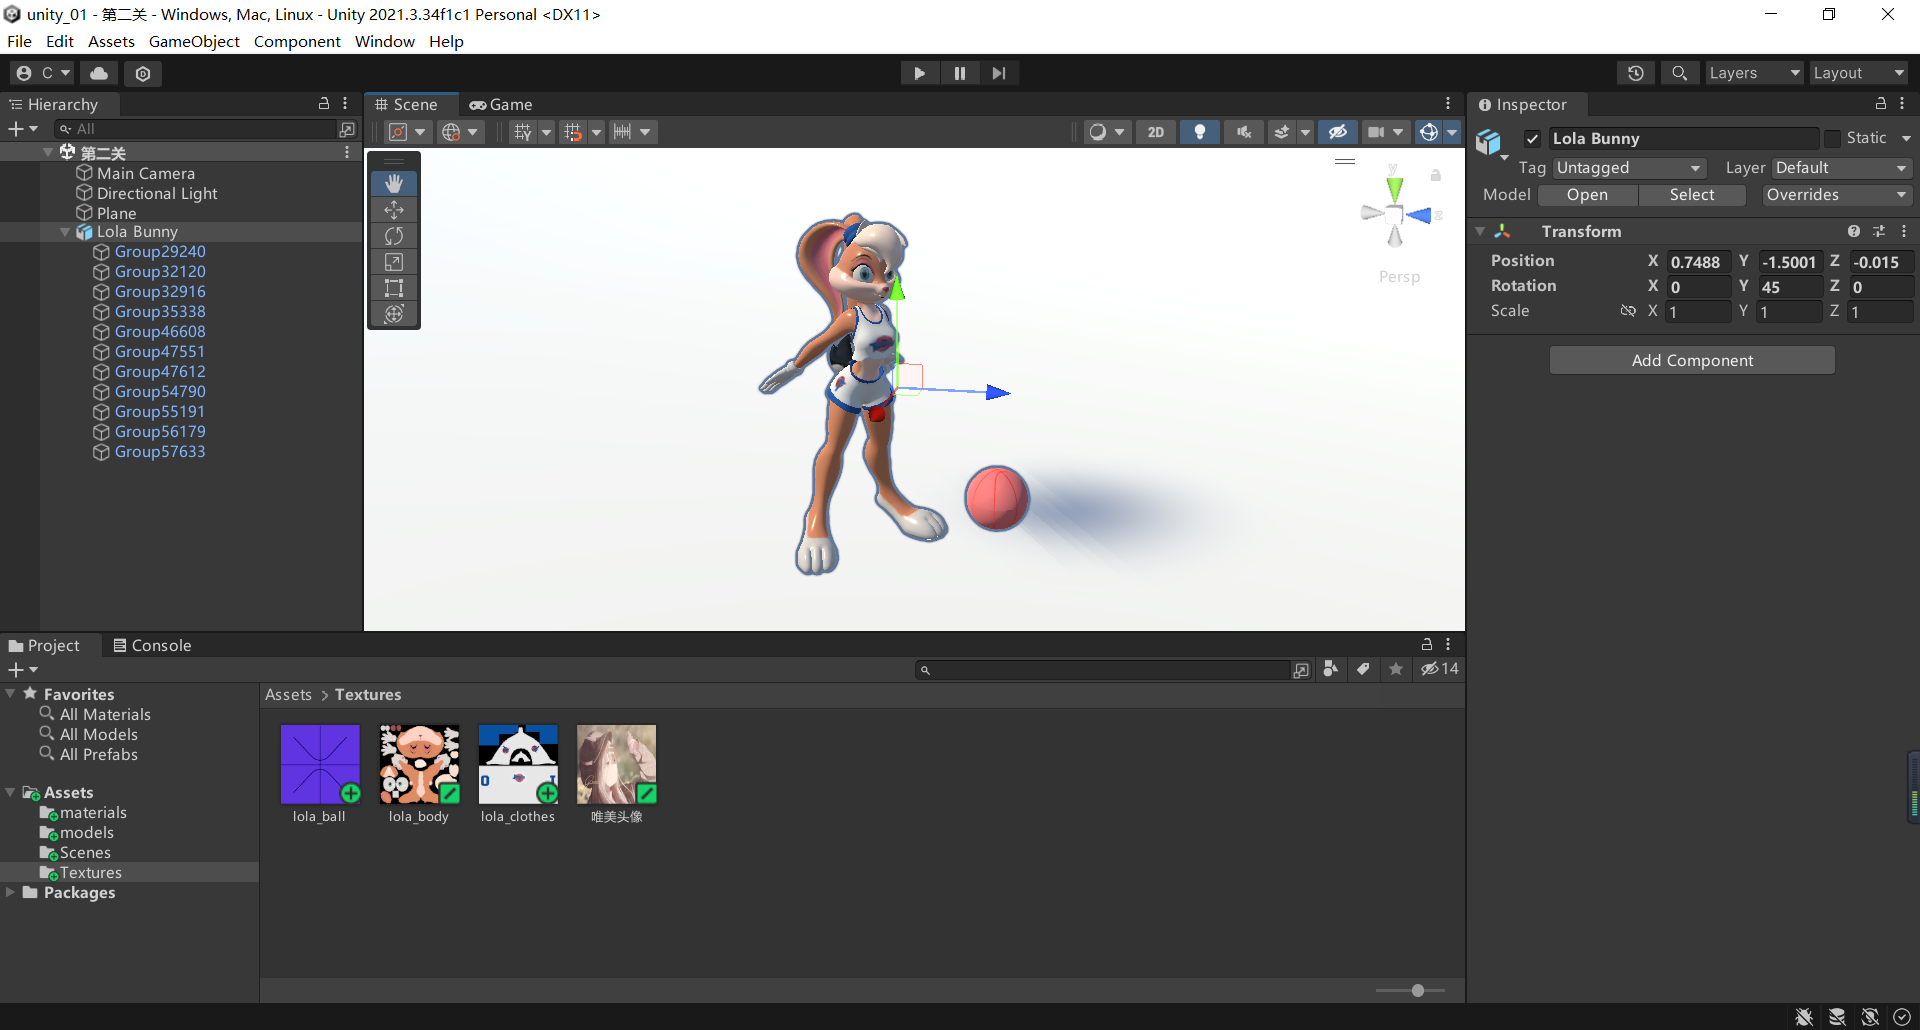
物体的父子关系
解释:物体的父节点和子节点的关系
拖动3D模型(子 – > 父)
特点:
- 移动父节点(模型),子节点也会跟随移动
- 删除父节点(模型),子节点也会被删除
理解:
相对坐标:当模型成为某个模型的子节点的时候,子节点坐标从绝对坐标变成了相对坐标
空物体
主要用于两个不好确定父子关系的模型。可以将空物体作为两个模型的父节点,两个模型便可以无损地相对移动
Global与local


坐标轴称谓:
y轴称为up,z轴称为forward,x轴称为right;一般来说:物体正面需要和z轴方向一致
pivot与center
操作基准点:前者以轴心点作为基准点,后者为几何中心点
默认为pivot
组件
基本的组件
Mesh Renderer:网格渲染器
Light:光照显示
Mesh Filter:网格过滤器
组件映射了模型的功能,你需要一个节点具有什么样的功能,你就可以给组件挂载相对应的组件。
AudioSource:播放音乐,直接将对应音乐拖入AudioClip属性
Transform:变换组件
- Position,位置(相对坐标)
- Rotation,旋转(欧拉角)
- Scale,缩放
特点:
- 所有物品都有
- 不能被删除
Camera:负责拍摄游戏画面
PS:修改布局 layout -> 2by3 可以将编辑窗口和游戏窗口放在同一界面显示
摆放摄像机:选中你想要移动的摄像机 GameObject -> Align With View
快捷键: ctrl + shift + F
脚本基础
右键在Asset目录下面创建Scripts文件夹然后新建脚本
我的第一个脚本
using System.Collections;
using System.Collections.Generic;
using UnityEngine;

public class SimpleLogic : MonoBehaviour
{
    // Start is called before the first frame update
    void Start()
    {
        Debug.Log(" ** 我的第一个脚本");
    }

    // Update is called once per frame
    void Update()
    {

    }
}
- 1
- 2
- 3
- 4
- 5
- 6
- 7
- 8
- 9
- 10
- 11
- 12
- 13
- 14
- 15
- 16
- 17
- 18
前一个方法表示组件在加载的时候运行,后面一个方法在组件更新的时候运行
获取脚本组件
using System.Collections;
using System.Collections.Generic;
using UnityEngine;

public class SimpleLogic : MonoBehaviour
{
    // Start is called before the first frame update
    void Start()
    {
        Debug.Log(" ** 我的第一个脚本");
        // 获取当前脚本所在物体本身
        GameObject obj = this.gameObject;
        // 获取物体的名字
        string name = obj.name;

        Debug.Log(" ** 物体名字" + name);

        // 获取当前物体的transform组件
        Transform transform = this.gameObject.transform;

        // 获取物体当前位置信息
        Vector3 position = transform.position;

        Debug.Log(" ** 物体的位置" + position.x + ' ' + position.y + ' ' + position.z);
    }

    // Update is called once per frame
    void Update()
    {

    }
}
- 1
- 2
- 3
- 4
- 5
- 6
- 7
- 8
- 9
- 10
- 11
- 12
- 13
- 14
- 15
- 16
- 17
- 18
- 19
- 20
- 21
- 22
- 23
- 24
- 25
- 26
- 27
- 28
- 29
- 30
- 31
- 32
本地坐标
    void Start()
    {
        // 获取当前物体的transform组件
        Transform transform = this.gameObject.transform;

        // 获取物体当前位置信息
        Vector3 position = transform.localPosition;

        Debug.Log(" ** 本地物体的位置" + position.ToString("F4"));

    }
- 1
- 2
- 3
- 4
- 5
- 6
- 7
- 8
- 9
- 10
- 11
注意:本地坐标在移动父节点时,子节点的本地坐标是不变的!
播放模式
播放模式所有窗口中的操作不会影响调试模式
帧更新
基本概念:
Frame:一个游戏帧
FrameRate:帧率、刷新率
FPS(Frames per seconds):每秒钟刷新多少帧
帧观察的方法
Time.time,游戏时间
Time.deltaTime,距离上次更新的时间差
unity中更新帧的速度特别快,而且不固定
// Update is called once per frame
    void Update()
    {
        // Time.time 获取当前游戏的时间
//        Debug.Log(" ** update methoed has going, time = " + Time.time);
        Debug.Log(" ** update methoed has going, time = " + Time.deltaTime);
    }
- 1
- 2
- 3
- 4
- 5
- 6
- 7
解释:为什么帧的更新是不固定的
游戏引擎属于一个程序,一个程序运行在一个操作系统上面,由于不是独占式地调用,所以游戏引擎无法持续地运行。CPU的资源是一定的。
unity设置近似帧率 (在开始的时候设置)
Application.targetFrameRate = 60;
物体运动
让gameObject动起来
using System.Collections;
using System.Collections.Generic;
using UnityEngine;

public class moveByx : MonoBehaviour
{
    // Start is called before the first frame update
    void Start()
    {
        Application.targetFrameRate = 60;
    }

    // Update is called once per frame
    void Update()
    {
        Debug.Log(" ** 更新时间差 = " + Time.deltaTime);

        Vector3 position = this.transform.localPosition;

        position.x += 0.001f;
        this.gameObject.transform.position = position;
    }
}
- 1
- 2
- 3
- 4
- 5
- 6
- 7
- 8
- 9
- 10
- 11
- 12
- 13
- 14
- 15
- 16
- 17
- 18
- 19
- 20
- 21
- 22
- 23
这显示的效果是变速运动,只是每次运动的间隔是0.01米。
让gameObject匀速运动
using System.Collections;
using System.Collections.Generic;
using UnityEngine;

public class moveByx : MonoBehaviour
{
    // Start is called before the first frame update
    void Start()
    {
        Application.targetFrameRate = 60;
    }

    // Update is called once per frame
    void Update()
    {
        Debug.Log(" ** 更新时间差 = " + Time.deltaTime);

        Vector3 position = this.transform.localPosition;

        float speed = 3;
        // 算匀速距离 = 速度 * 过去的时间
        float distance = speed * Time.deltaTime;

        position.x += distance;
        this.gameObject.transform.position = position;
    }
}
- 1
- 2
- 3
- 4
- 5
- 6
- 7
- 8
- 9
- 10
- 11
- 12
- 13
- 14
- 15
- 16
- 17
- 18
- 19
- 20
- 21
- 22
- 23
- 24
- 25
- 26
- 27
物体运动优化
void Update()
    {
        float speed = 1;
        float distance = speed * Time.deltaTime;
        /*Vector3 positiion = this.transform.localPosition;
        positiion.z += distance;
        this.transform.localPosition = positiion;*/

        this.transform.Translate(0, 0, -distance);
    }
- 1
- 2
- 3
- 4
- 5
- 6
- 7
- 8
- 9
- 10
坐标系运动(重要)
void Update()
    {
        float speed = 1;
        float distance = speed * Time.deltaTime;

        // 相对于世界坐标系运动
        this.transform.Translate(distance, 0, distance, Space.World);
        // 相对于物体自身坐标系运动
        this.transform.Translate(distance, 0, distance, Space.Self);

    }
- 1
- 2
- 3
- 4
- 5
- 6
- 7
- 8
- 9
- 10
- 11
转向并移动
public class Logic : MonoBehaviour
{
    // Start is called before the first frame update
    void Start()
    {
        GameObject flag = GameObject.Find("红旗");
        this.transform.LookAt(flag.transform);
    }

    // Update is called once per frame
    void Update()
    {
        float speed = 1;
        float distance = speed * Time.deltaTime;

        /*// 相对于世界坐标系运动
        this.transform.Translate(distance, 0, distance, Space.World);*/
        // 相对于物体自身坐标系运动
        this.transform.Translate(distance, 0, distance, Space.Self);

    }
}
- 1
- 2
- 3
- 4
- 5
- 6
- 7
- 8
- 9
- 10
- 11
- 12
- 13
- 14
- 15
- 16
- 17
- 18
- 19
- 20
- 21
- 22
物体旋转
注意:旋转不使用rotation实现,rotation主要是在unity内部调用,开发人员实现旋转主要是由欧拉角实现。
设置物体转动
void Start()
{
    // 欧拉角 在y轴方向上旋转45度
    transform.localEulerAngles = new Vector3(0, 45, 0);
}
- 1
- 2
- 3
- 4
- 5
实现动态旋转
void Update()
{
    // 设置角速度
    float rotateSpeed = 30;
    // 设置帧率为60
    Application.targetFrameRate = 60;

    // 获取当前转动角度
    Vector3 angles = this.transform.localEulerAngles;
    // 设置角度增量
    angles.y += rotateSpeed * Time.deltaTime;
    // 为物体赋值新角度
    this.transform.localEulerAngles = angles;
}
- 1
- 2
- 3
- 4
- 5
- 6
- 7
- 8
- 9
- 10
- 11
- 12
- 13
- 14
相对旋转(重要)
void Update()
{
    // 简化上面的代码为一行代码
    this.transform.Rotate(0, rotateSpeed * Time.deltaTime, 0, Space.Self);
}
- 1
- 2
- 3
- 4
- 5
自转与公转
自转:前面的旋转实现的就是自转
公转:当父物体转动时,带着子物体一起转动
void Update()
{
    Transform parent = this.transform.parent;
    float rotateSpeed = 30;
    Application.targetFrameRate = 60;

    parent.Rotate(0, rotateSpeed * Time.deltaTime, 0, Space.Self);
}
- 1
- 2
- 3
- 4
- 5
- 6
- 7
- 8
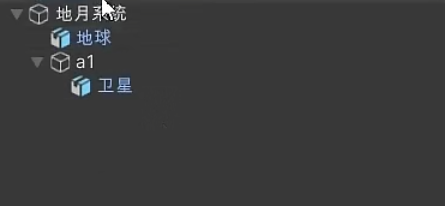
分析公转模型关系

地月系统:空物体
地球:和空物体重合
卫星:和a1物体重合
所以两个物体都可以通过设置物体公转实现,而且设置公转的时候可以设置不同的角速度。
脚本的运行
- 创建结点
- GameObject node = new GameObject()
- 实例化组件
- MeshRender comp = new MeshRender()
- 实例化脚本组件
- SimpleLogic script1 = new SimpleLogic()
- 调用事件函数
- 初始化函数
- 帧更新函数
消息函数
所有的脚本一般都继承于MonoBehaviour
消息函数:事件函数,一些回调函数
常见的消息函数
| 函数名称 | 函数描述 |
|---|---|
| Awake | 第一阶段初始化,仅执行一次 |
| Start | 第二阶段初始化,仅执行一次 |
| Update | 帧更新,每帧调用一次 |
| OnEnable | 每当组件启用时调用 |
| Ondisable | 每当组件禁用时调用 |
Awake()与Start()的区别与联系
-
Awake()在Start()之后运行
-
取消脚本的调用之后Awake()依然会被调用
-
只会执行一次
OnEnable()与OnDisable()的区别与联系
- OnEnable()在脚本调用时使用
- OnDisable()在脚本取消调用时使用
- 可执行多次
消息函数的顺序
Awake() --> OnEnable() --> Start()
脚本执行顺序
第一阶段:所有脚本的Awake()函数
第二阶段:所有脚本的Start()函数
第三阶段:所有脚本的Update()函数
脚本执行顺序(脚本的优先级)可以在Unity中设置,但是其实没有必要
主控脚本
设置游戏的全局设置
using System.Collections;
using System.Collections.Generic;
using UnityEngine;

public class MainLogic : MonoBehaviour
{
    public void Awake()
    {
        Application.targetFrameRate = 60;
    }

    // Start is called before the first frame update
    void Start()
    {

    }

    // Update is called once per frame
    void Update()
    {

    }
}
- 1
- 2
- 3
- 4
- 5
- 6
- 7
- 8
- 9
- 10
- 11
- 12
- 13
- 14
- 15
- 16
- 17
- 18
- 19
- 20
- 21
- 22
- 23
这个脚本可以适当地调高优先级
脚本参数
脚本参数用法
- 参数必须为public,才可以在检查器中显示
- 参数的名称,即变量名
- rotateSpeed --> Rotate Speed
- 参数的默认值,即变量的默认值
- 可以Reset菜单重置
- 参数的工具提示,可以用[Tooltip()]指定
示例代码
using System.Collections;
using System.Collections.Generic;
using UnityEngine;

public class RotateY : MonoBehaviour
{
    // 注解
    [ Tooltip("这个是y轴向的角速度")]
    public float rotateSpeed = 30f;
    // Start is called before the first frame update
    void Start()
    {}

    // Update is called once per frame
    void Update()
    {
        //float speed = 30f;
        this.transform.Rotate(0, rotateSpeed * Time.deltaTime, 0, Space.Self);
    }
}
- 1
- 2
- 3
- 4
- 5
- 6
- 7
- 8
- 9
- 10
- 11
- 12
- 13
- 14
- 15
- 16
- 17
- 18
- 19
- 20
作用:可以在unity中对参数重新进行赋值
脚本参数的赋值与最终取值示例
定义时:RotateY script = new RotateY()
unity参数赋值:script.rotateSpeed = 180f
脚本消息函数:script.Awake()
脚本消息函数:script.Start()
从上到下逐级覆盖
脚本参数类型
值类型与引用类型
public int intValue = 0;

public float floatValue = 0.5f;

public bool boolValue = true;

public string stringValue = "我叫icyler";

public Vector3 rotateSpeed2 = new Vector3(1,1,1);

public Color color;
- 1
- 2
- 3
- 4
- 5
- 6
- 7
- 8
- 9
- 10
- 11
值类型的特点:
- 本身是一个值,可直接赋值
- 若未赋值,则默认为0
- 不能为null
public GameObject target;
- 1
引用类型特点:
- 可以成为引用数据类型的数据:结点、组件、资源、数组类型
- 需要对其进行赋值,无论是unity还是在C#代码中,否则会显示空指针异常
AudioSource组件
脚本中使用API播放音乐
- 获取AudioSource组件
AudioSource audio = this.GetComponent<AoudioSource>();
- 播放
audio.Play();
代码实现
void Update()
{
    // 设置鼠标点击事件
    if(Input.GetMouseButtonDown( 0))
    {
        playMusic();
    }
}

void playMusic()
{
    // 获取AudioSource组件
    AudioSource audio = this.GetComponent<AudioSource>();

    if ( audio.isPlaying)
    {
        audio.Stop();
    }
    else
    {
        audio.Play();
    }
}
- 1
- 2
- 3
- 4
- 5
- 6
- 7
- 8
- 9
- 10
- 11
- 12
- 13
- 14
- 15
- 16
- 17
- 18
- 19
- 20
- 21
- 22
- 23
事物逻辑:
在刷新的时候判断是否有鼠标点击事件,如果有执行鼠标点击之后的逻辑(播放音乐 ;播放音乐需要调用相关的组件,这里顺便回顾组件的调用方式)。
介绍AudioSource插件上面的组件
| 属性 | 描述 |
|---|---|
| Mute | 静音 |
| Loop | 是否循环播放 |
| volume | 0~1 音量大小 |
代码实现
// 获取AudioSource组件
AudioSource audio = this.GetComponent<AudioSource>();
// 设置静音
audio.mute = true;
// 设置循环播放
audio.loop = true;
- 1
- 2
- 3
- 4
- 5
- 6
引用别的物体的组件
可以选择直接引用模型的结点或者引用墨香
示例(不常用)
// 游戏主控节点引用背景音乐结点
public GameObject bgmNode;

// Start is called before the first frame update
void Start()
{
    AudioSource audio = bgmNode.GetComponent<AudioSource>();
    audio.Play();
}
- 1
- 2
- 3
- 4
- 5
- 6
- 7
- 8
- 9
示例(常用)
// 引用模型下的组件
public AudioSource bgm;
- 1
- 2
获取脚本组件
通过游戏主控节点引用脚本组件
public GameObject gameNode;

// Update is called once per frame
void Update()
{
    if(Input.GetMouseButtonDown(0))
    {

    }
}

void DoWork()
{
    FanLogic fan = gameNode.GetComponent<FanLogic>();
    fan.rotateSpeed = 180;
}
- 1
- 2
- 3
- 4
- 5
- 6
- 7
- 8
- 9
- 10
- 11
- 12
- 13
- 14
- 15
- 16
记得最后在unity中修改GameObject模型引用
通过游戏组件引用脚本组件
public FanLogic fanLogic;

// Update is called once per frame
void Update()
{
    if(Input.GetMouseButtonDown(0))
    {
        DoWork();
    }
}

void DoWork()
{
    fanLogic.rotateSpeed = 180;
}
- 1
- 2
- 3
- 4
- 5
- 6
- 7
- 8
- 9
- 10
- 11
- 12
- 13
- 14
- 15
记得最后在unity中修改fanLogic组件引用
获取游戏物体
回顾之前的方法:
- 按名称、路径获取(效率低,而且不能自适应组件名的改变)(不推荐)
- GameObject node = GameObject.Find(“种子”);
- 引用获取游戏节点(需要拖动获取节点,不容易出错)(推荐)
- public GameObject wingNode;
获取父级和子级节点
获取父级方法:使用Transform。
void Start()
{
    Transform parent = this.transform.parent;

    GameObject parentNode = this.transform.parent.gameObject;

    Debug.Log(" * 父级:" + parent.name);
}
- 1
- 2
- 3
- 4
- 5
- 6
- 7
- 8
获取子级方法:
- foreach遍历
// 获取每一个子节点的名字
void Start()
{
    Transform parent = this.transform.parent;

    GameObject parentNode = this.transform.parent.gameObject;

    Debug.Log(" * 父级:" + parent.name);
}
- 1
- 2
- 3
- 4
- 5
- 6
- 7
- 8
- 9
- GetChild(),按索引获取子节点
void Start()
{
    Transform aa = this.transform.GetChild(0);

    Debug.Log(" * 子物体" + aa.name);
}
- 1
- 2
- 3
- 4
- 5
- 6
- Find(),按节点名字获取子节点
Transform cube = this.transform.Find("2.0");
if (cube != null)
{
    Debug.Log(" * 找到子物体" + cube.name);
}
else
{
    Debug.Log("没有找到");
}
- 1
- 2
- 3
- 4
- 5
- 6
- 7
- 8
- 9
注意:也可以获取二级子节点,需要用/分开
通过脚本设置音频(不通过组件)
public AudioClip audioTest;

void Update()
{
    // 获取播放音乐的组件
    AudioSource audioSource = GetComponent<AudioSource>();
    // 点击A键并且组件没有播放音乐时播放音乐
    if (Input.GetKeyDown(KeyCode.A) && !audioSource.isPlaying)
    {
        ;
        // 播放音乐
        audioSource.PlayOneShot(audioTest);
    }

    if (Input.GetKeyDown(KeyCode.S) && audioSource.isPlaying)
    {
        // 停止播放音乐
        audioSource.Stop();
    }
}
- 1
- 2
- 3
- 4
- 5
- 6
- 7
- 8
- 9
- 10
- 11
- 12
- 13
- 14
- 15
- 16
- 17
- 18
- 19
- 20
定时器调用
简单延时——Invoke和InvokeRepeat用法
void start()
{
    // 延时1s后执行
    this.Invoke("DoSomething", 1);

    // 之后延迟2s执行一次
    // 参数:1. 函数名   2. 开始时静止时间   3. 间隔时间
    this.InvokeRepeating("DoSomething", 1, 2);
}

private void DoSomething()
{
    Debug.Log(" * doing something ...");
}
- 1
- 2
- 3
- 4
- 5
- 6
- 7
- 8
- 9
- 10
- 11
- 12
- 13
- 14
取消定时器
CancelInvoke("reverseSpeed");
- 1
向量
获取向量长度
// 创建一个分量分别位3 0 4 的向量
Vector3 v = new Vector3(3, 0, 4);
// 获取变量长度 (开根了,float类型)
float len = v.magnitude;
// 打印输出
Debug.Log("magnitude值为:" + len);
- 1
- 2
- 3
- 4
- 5
- 6
单位向量
向量长度为1的向量
标准化向量
Vector3 v1 = new Vector3(2, 2, 0);
Vector3 v2 = v1.normalized;

Debug.Log("标准化的值为:" + v2.ToString("f6"));
- 1
- 2
- 3
- 4
向量相关的常量unity定义
Vector3.zero;   // (0,0,0)
Vector3.up;     // (0,1,0)
Vector3.right;  // (1,0,0)
Vector3.forward;// (0,0,1)
- 1
- 2
- 3
- 4
向量的运算
向量的加法
Vector3 a = new Vector3(1, 3, 0);
Vector3 b = new Vector3(4, 1, 3);

Vector3 c = a + b;

Debug.Log("标准化的值为:" + c.ToString("f6"));
- 1
- 2
- 3
- 4
- 5
- 6
向量的减法
Vector3 a = new Vector3(1, 3, 0);
Vector3 b = new Vector3(4, 1, 3);

Vector3 c = a - b;

Debug.Log("标准化的值为:" + c.ToString("f6"));
- 1
- 2
- 3
- 4
- 5
- 6
向量的乘法
Vector3 a = new Vector3(1, 3, 0);
Vector3 b = new Vector3(4, 1, 3);
// 标量 * 向量
b = a * 2
// 点积
Vector3 c = Vector3.Dot(a,b);
// 差积
Vector3 c = Vector3.Cross(a,b);
- 1
- 2
- 3
- 4
- 5
- 6
- 7
- 8
向量的赋值
因为Vetor类型为值类型,所有不能将其值赋值为null
public Vector3 a = new Vector3(1, 3, 0);
public Vector3 b;
b = a;
- 1
- 2
- 3
向量测距
- 求两个节点方向向量
- 用Vector.magnitude求距离
// 示例
void Start()
{
	GameObject target = GameObject.Find("your gameobject name");
    Vector3 p1 = this.transform.position;
    Vector3 p2 = this.transform.position;

    Vector3 direction = p2 - p1;
    flat distance = direction.magnitude;
}

// 简化写法 Distance
void Start()
{
	GameObject target = GameObject.Find("your gameobject name");
    Vector3 p1 = this.transform.position;
    Vector3 p2 = this.transform.position;

    float distance = Vector3.Distance(p2,p1);
}
- 1
- 2
- 3
- 4
- 5
- 6
- 7
- 8
- 9
- 10
- 11
- 12
- 13
- 14
- 15
- 16
- 17
- 18
- 19
- 20
细节处理:仔细观察两物体之间的距离需要两个物体的中心点都在底面中心或者是两个物体的中心点都在轴心上面,否则不好求中心点的坐标。
* 示例:用向量指定物体移动
这样写的好处:可以控制物体移动的方向而不需要重新修改脚本。这样可以有效减少测试时间。
public Vector3 speed;
void Update()
{
    Vector3 delta = speed * Time.deltaTime;
    this.transform.Translate(delta, Space.Self);
}
- 1
- 2
- 3
- 4
- 5
- 6
预制体(Prefabs)
概念:预先制作的模型物体,就是3D模型
预制体的创建
- 先制作好一个样本节点
- 做好以后,直接拖到Assets窗口(可以新建一个
Prefabs文件夹,方便管理) - 原始的节点不需要可以删除
预制体的作用
预制体相当于一个框架(模板),可以批量制作多个相同物体。
预制体的编辑
- 方式一
- 双击Prefeb实例,进入单独编辑模式
- 编辑节点和组件
- 退出,完成编辑(发现所有通过预制体生成的实例都发生了相对应的改变)
- 方式二
- 与上面的编辑方式的区别,可以看见其他的物体但是无法对其进行编辑
- 方式三
- 对实例进行修改然后在实例中点击
Overrides
- 对实例进行修改然后在实例中点击
动态创建节点
动态创建实例
通过点击在固定位置创建实例
// 获取预制体模型
public GameObject bulletPrefab;

void Update()
{
    if(Input.GetMouseButtonDown)
    {
        TestFire();
    }

    private void TestFire()
    {
        GameObject node = object.Instantiate(bulletPrefab ,null);
        node.transform.position = Vector3.zero;
        node.transform.localEulerAngles = Vector3.zero;
    }
}
- 1
- 2
- 3
- 4
- 5
- 6
- 7
- 8
- 9
- 10
- 11
- 12
- 13
- 14
- 15
- 16
- 17
动态初始化实例
// 获取预制体模型
public GameObject bulletPrefab;
// 子弹目录
public Transform bulletFolder;
// 弹药出生点位置
public Transform firePoint;
// 弹药出生点方向
public Transform cannon;
void Update()
{
    if(Input.GetMouseButtonDown)
    {
        TestFire();
    }

    private void TestFire()
    {
        // 将新创建的节点放在一个目录下,统一管理
        GameObject node = object.Instantiate(bulletPrefab ,bulletFolder);
        node.transform.position = this.firePoint.position;  // Vector3.zero;
        // node.transform.localEulerAngles = Vector3.zero;
    	node.transform.eulerAngles = this.cannon.eulerAngles;
    }
}
- 1
- 2
- 3
- 4
- 5
- 6
- 7
- 8
- 9
- 10
- 11
- 12
- 13
- 14
- 15
- 16
- 17
- 18
- 19
- 20
- 21
- 22
- 23
- 24
动态销毁实例(在预制体内定义)
注意:使用的时候需要再在脚本中为maxDistance赋值
public float speed;
public float maxDistance;

void Start()
{
    float lifeTime = 1;
    if(speed > 0)
    {
        lifeTime = maxDistance / speed;
    }

    Invoke("SelfDestroy",lifeTime);
}

void Update()
{
    this.transform.Translate(0,0,Space.Self);
}

private void SelfDestroy()
{
	Object.Destroy(this.GameObject);
}
- 1
- 2
- 3
- 4
- 5
- 6
- 7
- 8
- 9
- 10
- 11
- 12
- 13
- 14
- 15
- 16
- 17
- 18
- 19
- 20
- 21
- 22
- 23
实例的销毁
运行时调试
运行时可以对游戏场景中运行的组件进行调整
例如:
- 拖动组件的x、y、z坐标轴
- 修改组件的坐标值
注意:
调试完成的操作不能被保存
调试时参数的保存
在play Mode下,组件 Copy Component
在edit Mode下,组件 Plaste Component Values
unity的运作方式:单线程
除非添加了一些网络逻辑,否则都不需要添加线程,故而也不需要考虑线程的并发、互斥等概念
练习项目
练习1:自定义音乐盒
- Assets目录下music目录下放入多首歌曲
- 在一个场景中创建一个空节点(create empty)重命名为音乐盒
- 为其添加AudioSource组件并取消勾取里面的(Play on Awake)
- 为其添加脚本(自命名)
using System.Collections;
using System.Collections.Generic;
using UnityEngine;

public class MusicBox : MonoBehaviour
{
    // 定义一个数组存放音乐
    public AudioClip[] songs;

    // Start is called before the first frame update
    void Start()
    {
        // 友好的判断音乐盒是否能够使用
        if (songs == null || songs.Length == 0)
        {
            Debug.Log("* 请检查音乐盒内歌曲");
        }
    }

    public void NextSong()
    {
        // 随机函数
        int index = Random.Range(0, songs.Length);
        // 获取歌曲名字
        AudioClip clip = this.songs[index];
        // 获取AudioSource组件
        AudioSource audio = GetComponent<AudioSource>();
        // 将对应数组值传给音乐播放组件
        audio.clip = this.songs[index];
        // 最后要播放音乐
        audio.Play();
        // 顺便可以打印一下音乐播放信息
        Debug.Log("播放第" + (index + 1) + "首歌曲,歌曲名叫:" + clip.name);
    }
}
- 1
- 2
- 3
- 4
- 5
- 6
- 7
- 8
- 9
- 10
- 11
- 12
- 13
- 14
- 15
- 16
- 17
- 18
- 19
- 20
- 21
- 22
- 23
- 24
- 25
- 26
- 27
- 28
- 29
- 30
- 31
- 32
- 33
- 34
- 35
练习2:变色小球
- 同上Assets目录下material目录下放入多个材质
- 在一个场景中创建小球
- 为其添加脚本(自命名)
public class color : MonoBehaviour
{
    // 材料盒
    public Material []colors;
    // Update is called once per frame
    void Update()
    {
        // 鼠标点击事件
        if(Input.GetMouseButton(0))
        {
            // 调用变换颜色方法
            ChangeColor();
        }
    }

    // 定义变换颜色方法
    public void ChangeColor()
    {
        // 生成随机数
        int index = Random.Range(0, colors.Length);
        // 获取随机颜色
        Material selected = this.colors[index];
        // 获取当前组件
        MeshRenderer rd = GetComponent<MeshRenderer>();
		// 为当前组件设置材质
        rd.material = selected;
    }
}
- 1
- 2
- 3
- 4
- 5
- 6
- 7
- 8
- 9
- 10
- 11
- 12
- 13
- 14
- 15
- 16
- 17
- 18
- 19
- 20
- 21
- 22
- 23
- 24
- 25
- 26
- 27
- 28
练习3:往复运动的小球
using System.Collections;
using System.Collections.Generic;
using UnityEngine;

public class timer : MonoBehaviour
{
    float speed = 1.5f;

    // Start is called before the first frame update
    void Start()
    {
        // 之后延迟2s执行一次
        // 参数:1. 函数名   2. 开始时静止时间   3. 间隔时间
        this.InvokeRepeating("reverseSpeed", 2, 2);
    }

    // Update is called once per frame
    void Update()
    {
        this.transform.Translate(0, speed * Time.deltaTime, 0, Space.Self);
    }

    public void reverseSpeed()
    {
        this.speed = -this.speed;
    }
}
- 1
- 2
- 3
- 4
- 5
- 6
- 7
- 8
- 9
- 10
- 11
- 12
- 13
- 14
- 15
- 16
- 17
- 18
- 19
- 20
- 21
- 22
- 23
- 24
- 25
- 26
- 27
练习4:闪烁灯
using System.Collections;
using System.Collections.Generic;
using UnityEngine;

public class lamp : MonoBehaviour
{
    public Material[] colors;

    int index = 0;
    // Start is called before the first frame update
    void Start()
    {
        changeColor();
    }

    // Update is called once per frame
    void Update()
    {

    }

    public void changeColor()
    {
        // 设置材质
        Material color = this.colors[index];
        MeshRenderer renderer = GetComponent<MeshRenderer>();
        renderer.material = color;
        Debug.Log("* change ->" + index + ",time = " + Time.time);
        if(index == 0)
        {
            Invoke("changeColor", 4);
        }
        else if(index == 1)
        {
            Invoke("changeColor", 4);
        }
        else if (index == 2)
        {
            Invoke("changeColor", 4);
        }

        index++;
        if (index >= 3) index = 0;
    }
}
- 1
- 2
- 3
- 4
- 5
- 6
- 7
- 8
- 9
- 10
- 11
- 12
- 13
- 14
- 15
- 16
- 17
- 18
- 19
- 20
- 21
- 22
- 23
- 24
- 25
- 26
- 27
- 28
- 29
- 30
- 31
- 32
- 33
- 34
- 35
- 36
- 37
- 38
- 39
- 40
- 41
- 42
- 43
- 44
- 45
- 46


