- 1【配置环境】VS Code中C#环境搭建_vscode c#
- 2“AI+视频”新模式下城市安全的探索与落实
- 3单点登录实现的几种方式及原理【单点登录】_单点登录实现方案
- 4顺序表的实现(迈入数据结构的大门)(2)
- 5无源蜂鸣器 verilog FPGA 基础练习9_如何让fpga的verilog试验箱蜂鸣器发出不同音调
- 6MySQL中information_schema详解_information schema表
- 7sqlcoder_defog sqlcoder
- 8软考(软件设计师)考点总结 -- 数据结构与算法基础,2024年最新高级java软件工程师面试题库
- 9FAST-LIO2代码解析_fast lio2 lasermapping
- 102024上半年软考中级《系统集成项目管理工程师》报名考试全攻略_系统集成项目管理中项考试时间2024
鸿蒙应用开发-学习-第一章-CSS基础(三)_鸿蒙backgroundimage怎么用
赞
踩
Tips:这个只是作者的学习笔记,仅作参考
目录
1. 背景相关属性
1.1 背景颜色
属性名:background-color
属性值:颜色取值:关键字,rgb表示法,rgba表示法,十六进制....
CSS代码格式:
- .box{
- background-color: aquamarine;
- }
Tips:背景颜色默认值透明:rgba(0,0,0,0)0-255,transparent
背景颜色不会影响盒子大小,能看清盒子的大小和位置,一般在布局中会习惯先给盒子设置背景颜色
1.2 背景图片
属性名:background-image
属性值:url('图片的路径'),例如下:
- .box{
- /* background-color: aquamarine; */
- background-image: url(../Day03/car.png);
- }
Tips:URL可以省略引号
图片默认在水平和垂直方向平铺,且背景图片仅仅给盒子起到装饰效果,类似于背景颜色,并不能撑开盒子
1.3 背景平铺
属性名:background-repeat
属性值:
| 取值 | 效果 |
| repeat | 水平和垂直方向都平铺(默认) |
| no-repeat | 不平铺 |
| repeat-x | 沿着水平方线(x轴)平铺 |
| repeat-y | 沿着垂直方向(y轴)平铺 |
CSS代码格式:
- .box{
- /* 水平和垂直方向都平铺 */
- background-repeat: repeat;
- /* 不平铺 */
- background-repeat: no-repeat;
- /* 沿着x轴 */
- background-repeat: repeat-x;
- /* 沿着y轴 */
- background-repeat: repeat-y;
- }
1.4 背景位置
属性名:background-position
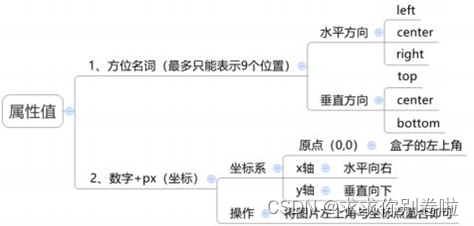
- /* 调整x方向距离 */
- background-position-x:200px;
- /* 调整y方向距离 */
- background-position-y:200px;
- /* 同时调整x,y两个方向距离 */
- background-position: 300px;
Tips:方位名词取值和坐标取值可混用, 第一个取值表示水平,第二个取值表示垂直
1.5 背景图片大小
属性名:background-size:宽度 高度;
取值:
| 取值 | 场景 |
| 数字+px | 简单,方便,常用 |
| 百分比 | 相当于当前盒子自身的宽高百分比 |
| contain | 包含,将背景图片等比缩放,直到不会超出盒子的最大 |
| cover | 覆盖,将背景图片等比缩放,直到刚好填满整个盒子没有空白 |
CSS代码格式:
- .box{
- /* 数字+px 先宽后高 如果同时设置了两个数值图片比例则会改变*/
- background-size: 15px 40px;
- /* 百分比 会调成盒子的比例*/
- background-size: 30%;
- /* 包含 */
- background-size: contain;
- /* 覆盖 */
- background-size: cover;
- }
1.6 背景图片固定
属性名:background-attachment
| 值 | 描述 |
| scroll | 背景图片随着页面的滚动而滚动,这是默认 |
| fixed | 不会随着页面滚动而滚动 |
| local | 背景图片会随着元素内容滚动而滚动 |
CSS代码格式:
- .box{
- /* 随着页面滚动而滚动 */
- background-attachment: scroll;
- /* 不会随着滚动而滚动 */
- background-attachment: fixed;
- /* 随着元素滚动 */
- background-attachment: local;
- }
1.7 背景相关属性的连写形式
属性名:background color image repeat position / size attachment
颜色 图片 平铺方式 定位/大小 滚动固定
CSS代码格式:
- .box{
- /* 背景: 颜色 图片路径 不平铺 位置 / 大小 位置不固定*/
- background:red url(./car.png) no-repeat 250px /25px fixed ;
- height: 500px;
- }
Tips:连写时定位position与size之间要用/隔开,因为position和size都是数字+px,不用/隔开识别不出来
1.8 (拓展)img标签和背景图片的区别
提问:在网页中如何展示一张图片的效果:
方法一:直接写上img标签即可(img是一个标签,如果不设置宽高则会以标签一行的尺寸显示)
<img src="./car.png" alt="" height="500px">方法二:div+背景图片(要设置div的宽高,因为背景图片只是装饰CSS撑不开div标签)
<div class="box">背景123</div>- .box{
- background-image: url(./car.png);
- height: 500px;
- }
2. 精灵图的使用
2.1 精灵图是什么?
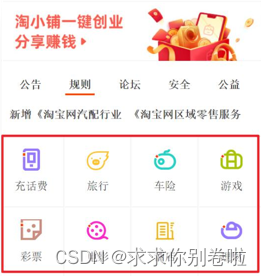
多张图片组成的一张大图片即为精灵图,一般用于减少服务器发送次数,减轻服务器压力,提高页面加载速度.例如:正常八张图片发送=发送八次,但如果合成一张发送=发送一次
常见精灵图如:八个小图片组在一起
.
2.2 精灵图怎么做?
1. 创建一个div盒子
CSS:
- .box{
- height: 500px;
- width: 500px;
- }
HTML部分:
- <head>
- <meta charset="UTF-8">
- <meta name="viewport" content="width=device-width, initial-scale=1.0">
- <title>精灵图</title>
- <link rel="stylesheet" href="test01.css">
- </head>
- <body>
- <div class="box">
-
- </div>
- </body>
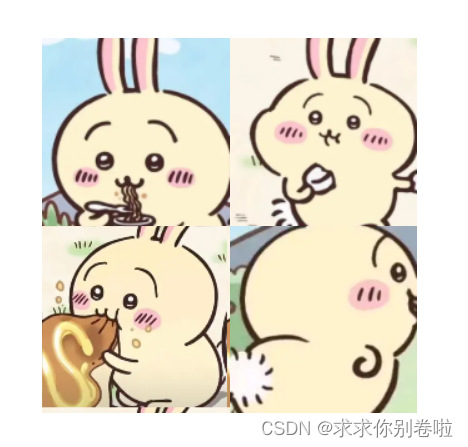
2. 找好四张小图片,并创建四个小盒子,并把盒子大小调成小图片大小
HTML:
- <div class="box1"></div>
- <div class="box2"></div>
- <div class="box3"></div>
- <div class="box4"></div>
3. 不断调试CSS代码内margin(也可以通过background-position:x y)调整图片之间的距离:
- .box1{
- height: 150px;
- width: 150px;
- background-image: url(./01.png);
- background-repeat: no-repeat;
- }
- .box2{
- height: 150px;
- width: 150px;
- margin : -170px 170px;
- background-image: url(./02.png);
- }
- .box3{
- height: 150px;
- width: 150px;
- margin: 170px 20px;
- background-image: url(./03.png);
- }
- .box4{
- margin: -320px 170px;
- height: 150px;
- width: 150px;
- background-image: url(./04.png);
- }

效果如下:
3. CSS样式列表规则
3.1 修改列表项类型
属性值:list-style-type
| 值 | 描述 |
| none | 无标记 |
| disc | 默认标记实心圆 |
| circle | 标记空心圆 |
| square | 标记实心方块 |
| decimal | 标记数字 |
| decimal-leading-zero | 0开头的数字标记(01,02,03...) |
| lower-roman | 小写罗马数字(i,ii,iii,iv,v...) |
| upper-roman | 大写罗马数字(I,II,III,IV,V...) |
| lower-alpha | 小写英文字母(a,b,c,d...) |
| upper-alpha | 大写英文字母(A,B,C,D...) |
- li{
- /* 无修饰列表项 */
- list-style-type: none;
- /*默认标准实心圆点*/
- list-style-type: disc;
- /* 空心原点 */
- list-style-type: circle;
- /* 方形列表项 */
- list-style-type: square;
- /* 数字序号 */
- list-style-type: decimal;
- /* 从0开始的数字序号 */
- list-style-type: decimal-leading-zero;
- /* 小写罗马序号 */
- list-style-type: lower-roman;
- /* 大写罗马序号 */
- list-style-type: upper-roman;
- /* 小写英文字母 */
- list-style-type: lower-alpha;
- /* 大写英文字母 */
- list-style-type: upper-alpha;
- }

3.2 修改列表项图片
属性名:list-style-image
属性值
| 值 | 描述 |
| URL | 图片路径 |
| none | 无图片显示 |
- li{
- /* 莫得图片显示 */
- list-style-image: none;
- /* 图片路径 */
- list-style-image: url(./01.png);
- }
3.3 修改列表项位置
属性名:list-style-position
属性值:
| 值 | 描述 |
| inside | 列表项标记放在文本内且围绕文本根据标记对齐 |
| outside | 默认值,标记在文本左侧.列表项目标记放置在文本以外,且环绕文本不根据对齐 |
- li{
- /* 标记在文本内环绕文本 */
- list-style-position: inside;
- /* 标记在文本外环绕但不对齐 */
- list-style-position: outside;
- }
3.4 复合属性取值
属性名:list-style
属性名:list - style:type image position
- li{
- /*类型:默认实心圆 图片路径 放置文本内*/
- list-style: disc url() inside;
- }
4. 浮动
4.1 浮动的作用
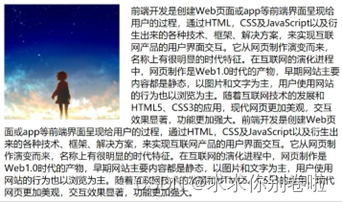
早期:图文环绕,如下:
现在:网页布局(让垂直布局的盒子变成水平布局:一左一右)

4.2 浮动的用法
属性名:float
| 属性值 | 效果 |
| left | 左浮动 |
| right | 右浮动 |
用法(例):1.先写两个盒子,并为其附上内容,免得空盒子浮动也看不了
2.直接float:right/left,一左一右好做对比
CSS部分:
- .boxleft{
- width: 150px;
- height: 150px;
- background-image: url(./03.png);
- float: left;
- }
- .boxright{
- width: 150px;
- height: 150px;
- background-image: url(./04.png);
- float: right;
- }
HTML部分:
- <head>
- <meta charset="UTF-8">
- <meta name="viewport" content="width=device-width, initial-scale=1.0">
- <title>浮动练习</title>
- <link rel="stylesheet" href="float.css">
- </head>
- <body>
- <div class="boxleft"></div>
- <div class="boxright"></div>
- </body>
看看效果:

4.3 浮动的特点
1. 浮动元素会脱标(脱离标准),在标准流中不占位置(相当于飘在空中)
2. 浮动元素优先级比标准流高半级,可以覆盖标准流中元素
3. 浮动找浮动,下一个浮动元素会在上一个浮动元素后面左右浮动
4. 浮动元素有特殊显示效果
4.1 一行可以显示多个
4.2 可以设置宽高
Tips:text-align:center和margin:0 auto不能对浮动元素生效
5. 练习案例
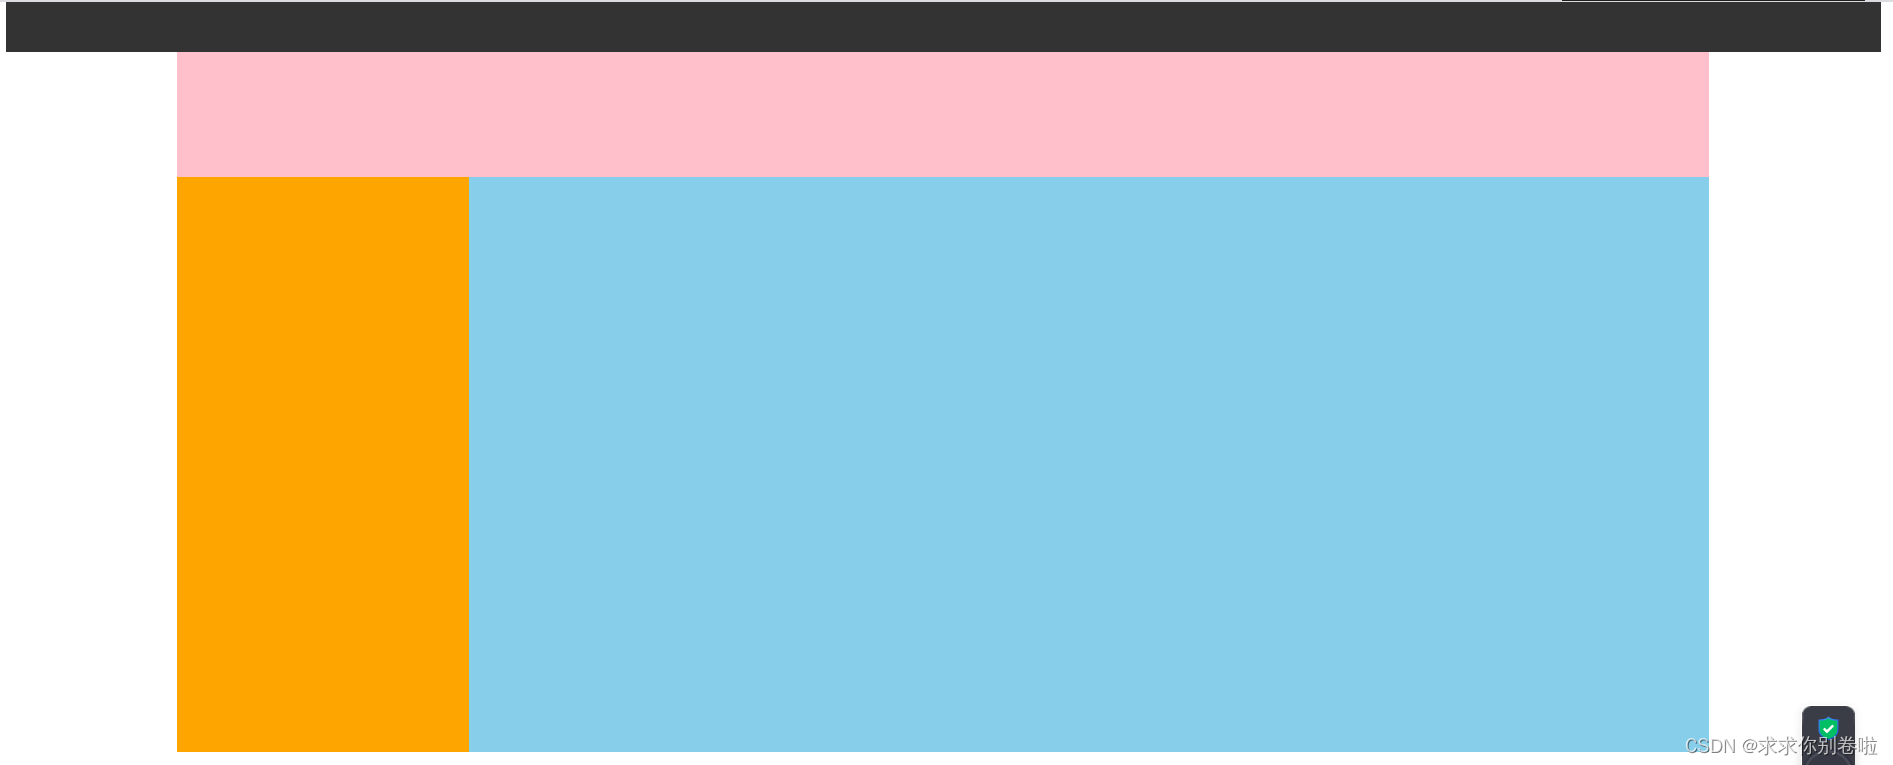
(案例一)网页布局案例
需求:使用浮动,完成设计图中布局效果

做法(个人做法仅供参考)
1.先看例图,一个黑条,一个长方形包裹三个小长方形,那么要写五个box,四个颜色各一,还有一个盒子用于包裹下面三个色装起来做成精灵图.
2.css写盒子:
Tips:大盒子的长宽设置要刚好能把三个色块装进去
- .boxblack{
- background-color:#333333;
- height: 40px;
- width: 1500px;
- /* float: left;
- background-position: center; */
- }
- .boxpink{
- width: 1226px;
- height: 100px;
- background-color: #ffc0cb;
- float: left;
- }
- .boxorange{
- height: 460px;
- width: 234px;
- background-color: #ffa500;
- float: left;
- }
- .boxblue{
- background-color: #87ceeb;
- width: 992px;
- height: 460px;
- float: right;
- }
- .bigbox{
- height: 560px;
- width: 1226px;
- }

HTML代码部分:
- <body>
- <div class="boxblack"></div>
- <div class="bigbox">
- <div class="boxpink"></div>
- <div class="boxorange"></div>
- <div class="boxblue"></div>
- </div>
- </body>
3.大盒子调整居中即可
- div{
- margin: 0 auto;
- }
效果如下:
(案例二)网页导航nav案例
需求:使用浮动,完成设计图中布局效果
1.在CSS设定两个盒子,一粉一绿(我嫌丑改蓝色了),float统一靠左
- .boxpink{
- color: white;
- background-color: #ffc0cb;
- font-size: 16px;
- height: 50px;
- width: 80px;
- float: left;
- }
- .boxblue{
- color: white;
- background-color: skyblue;
- font-size: 16px;
- height: 50px;
- width: 80px;
- float: left;
- }

2.在HTML处依照顺序排列
- <body>
- <div class="boxpink">新闻1</div>
- <div class="boxpink">新闻2</div>
- <div class="boxpink">新闻3</div>
- <div class="boxpink">新闻4</div>
- <div class="boxpink">新闻5</div>
- <div class="boxpink">新闻6</div>
- <div class="boxblue">新闻7</div>
- <div class="boxpink">新闻8</div>
- </body>
3.CSS修饰他们的父级div(因为浮动不能直接text-align,通过设置line-height=行高使其垂直居中)
- div{
- text-align: center;
- line-height: 50px
- }
4.实现效果后觉得有点简单,那我能不能实现鼠标悬停(:hover)相应色块进行变色?
- .boxpink:hover{
- background-color: #008000;
- }
- .boxblue:hover{
- background-color: #008000;
- }
效果如下:(此时将鼠标放在色块二)搞定下班:


