热门标签
热门文章
- 1使用idea 把一个git分支的部分提交记录合并到另一个git分支上_idea 将一部分提交同步到其他项目
- 2【OpenCV】给图像添加噪声_翻转,切割,增加噪声
- 3python批量命名教程_《自拍教程69》Python 批量重命名音频文件,AV专家必备!
- 4四年背的单词 笔记目录_119.23.244.79:8081/topic/frame/race/login.html
- 5pip安装pandas
- 6Kafka:什么是kafka? ①_kafka kafka
- 7Linux如何创建文件在指定的目录?_在指定目录下创建文件
- 8Unity_VRTK 3.2.1_UI手柄射线检测点击事件的问题_unity htc vrtk 射线 点击ui
- 9YOLOV5源码的详细解读_yolov5代码详解
- 10资深SRE带你看阿里云香港故障_sre故障复盘需要关注的问题
当前位置: article > 正文
YOLOv5分割训练,从数据集标注到训练一条龙解决_yolov5 分割标注
作者:花生_TL007 | 2024-02-21 09:14:51
赞
踩
yolov5 分割标注
最近进行了分割标注,感觉非常好玩,也遇到了很多坑,来跟大家分享一下,老样子有问题评论区留言,我会的就会回答你。
第一步:准备数据集
1、安装标注软件labelme
 如果要在计算机视觉领域深入的同学,最好先下载好conda,主要作用是可以创建虚拟环境,在虚拟环境中配置python运行的包,避免不同软件运行所需环境相互影响出现未知bug。具体安装congda过程可以在CSDN搜索。
 conda安装完成后,打开conda创建虚拟环境,name为虚拟环境名称,3.8为要安装的python版本,这里推荐对各个包适配更好的3.8版本。
- 1
- 2
- 3
conda create --name=labelme python=3.8
- 1
安装完成后,使用conda activate labelme 进入创建好的虚拟环境,在安装labelme之前先切换pip下载源到国内下载源,我这里使用的清华源。
pip config set global.index-url https://pypi.tuna.tsinghua.edu.cn/simple
- 1
安装labelme
pip install labelme
- 1
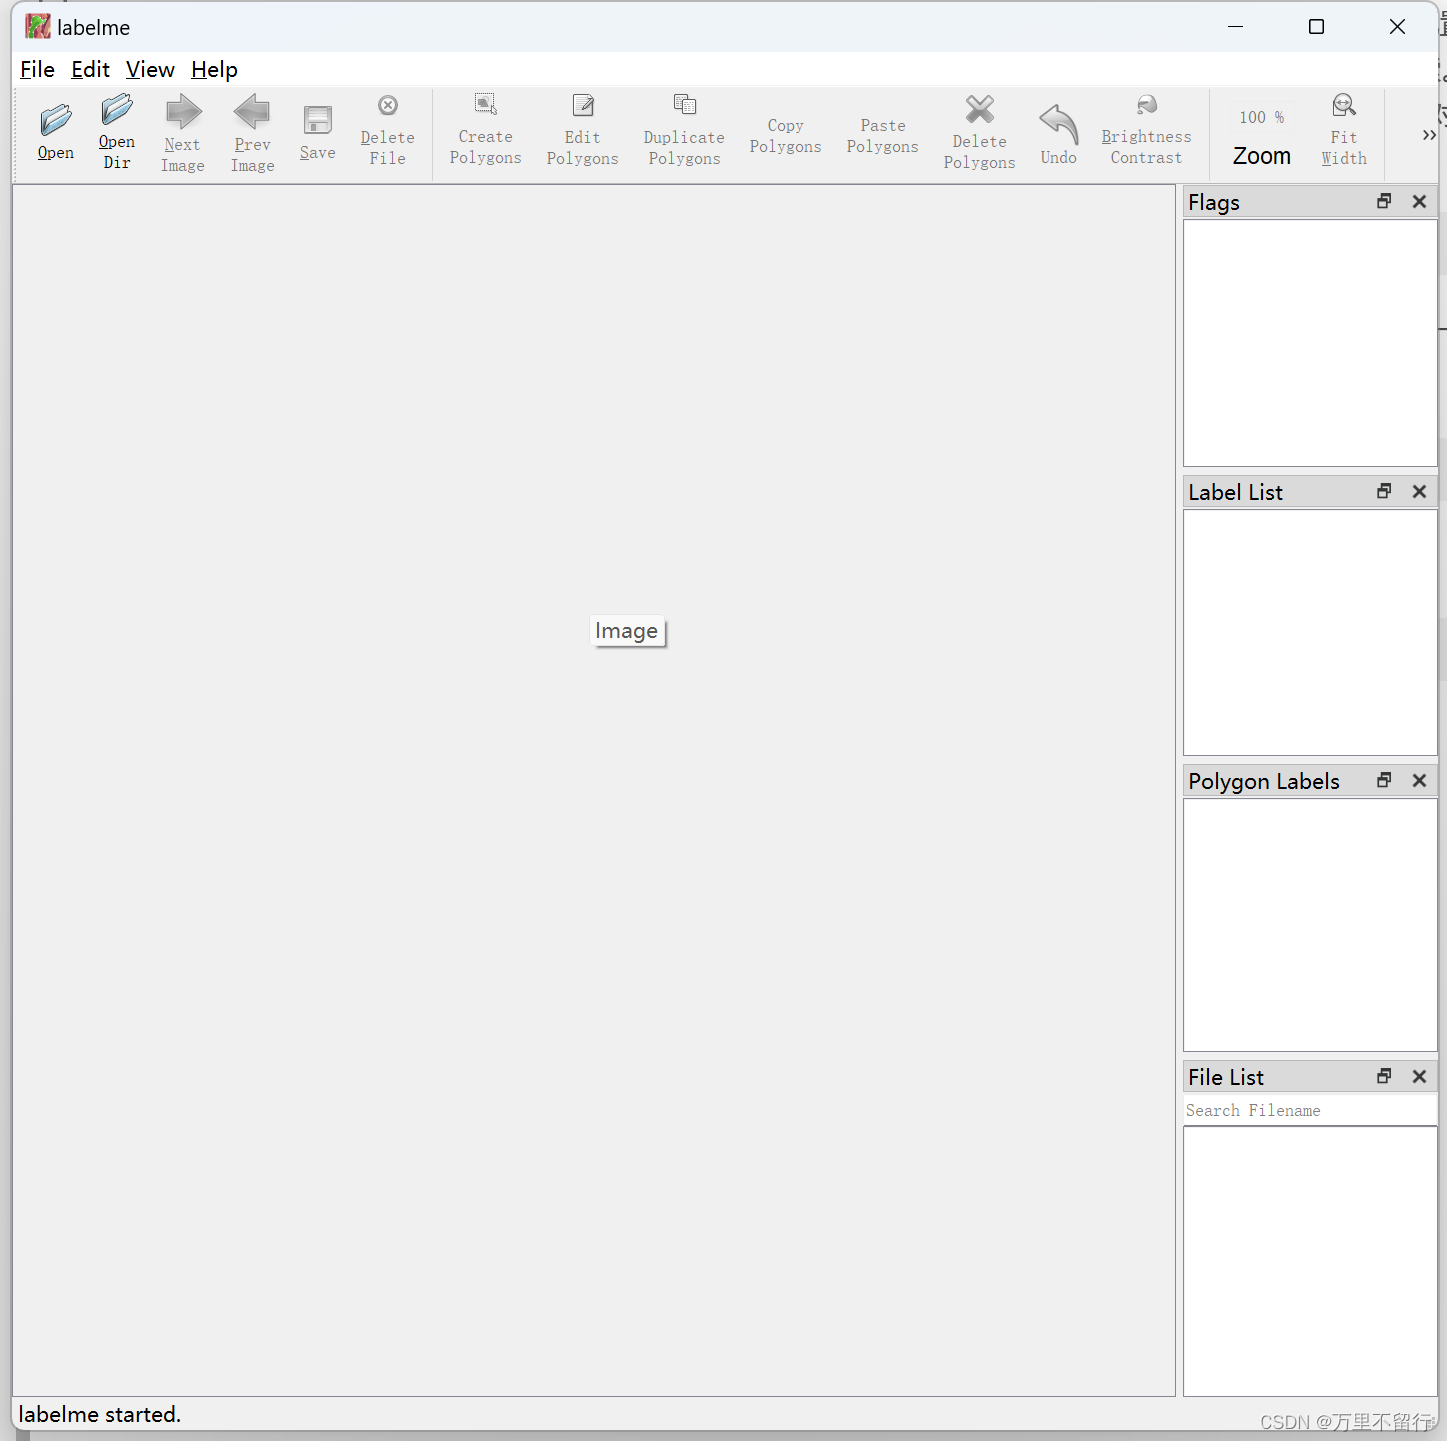
安装完成后,输入labelme即可打开程序,如下图即为成功

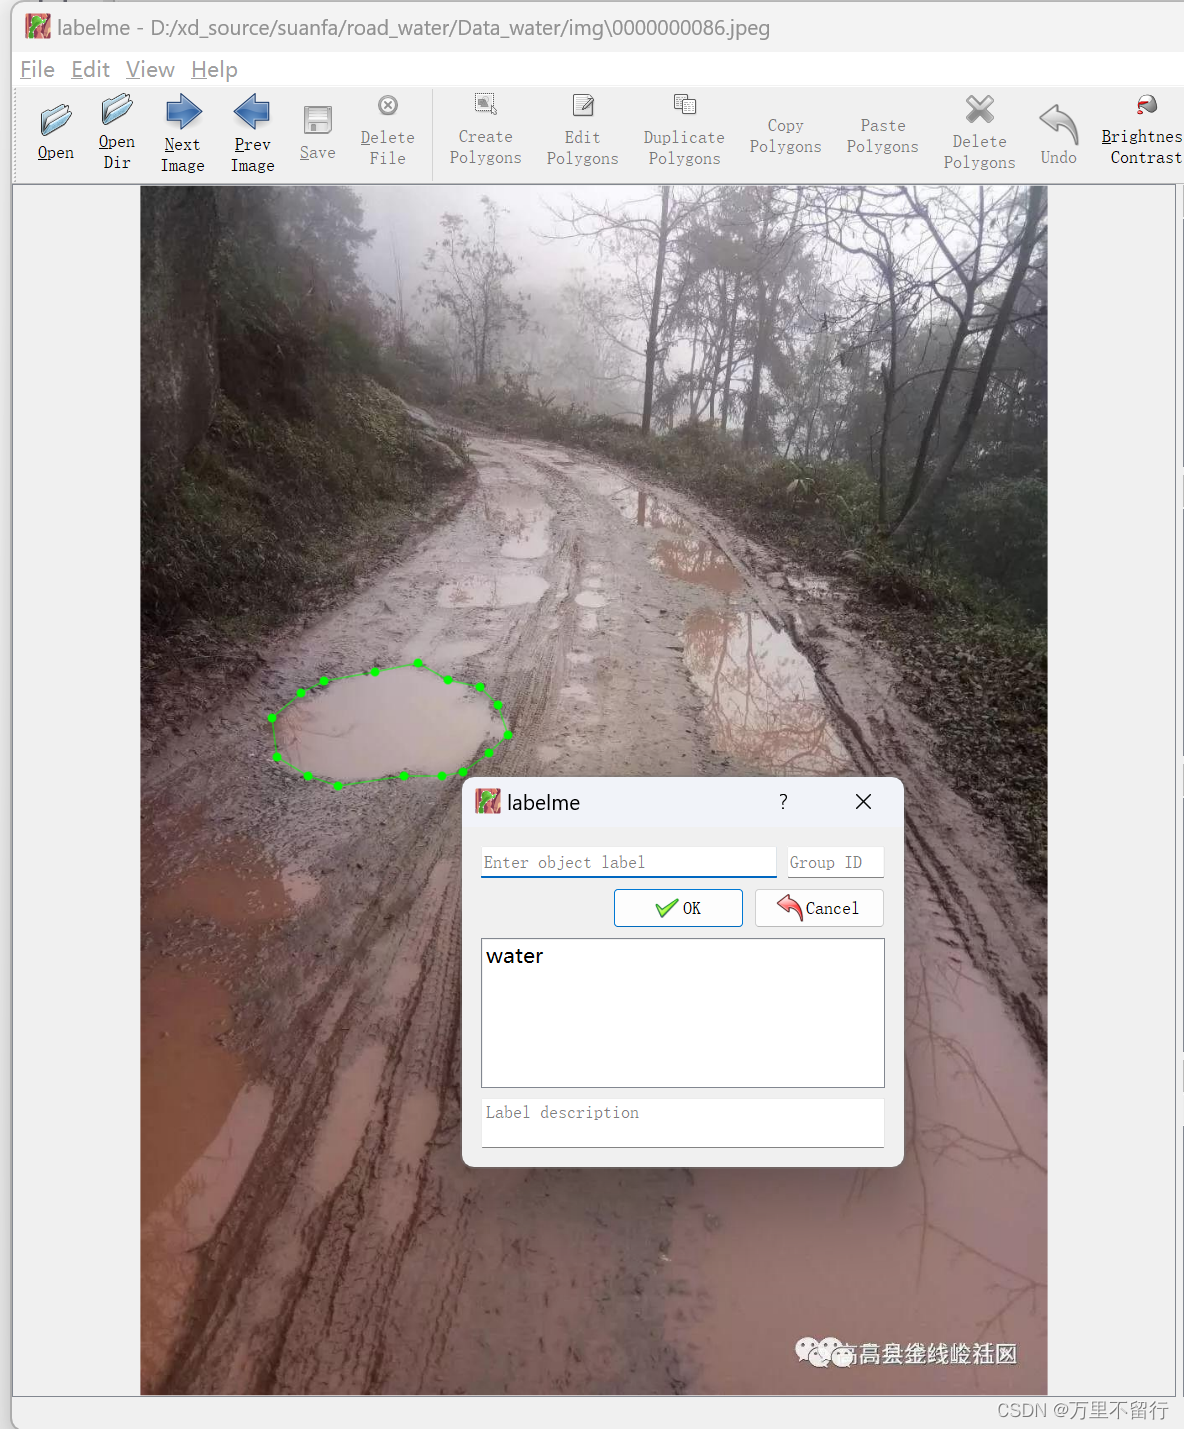
点击上面OpenDir打开存放要标注的图片的文件夹,点击上面CreatePolygons即可进入标注,点击一下便是一个点,把你要进行分割的东西圈起来,就会弹出下面的框,输入你标注的名称。

标注完成后,将json文件和图片保存在一个文件夹内,使用下面脚本。
import json
import glob
import os

import cv2
import numpy as np

json_path = r"D:"; #此处填写存放json文件的地址
labels = ['1','2']#此处填写你标注的标签名称
json_files = glob.glob(json_path + "/*.json")

for json_file in json_files:
    print(json_file)
    f = open(json_file)
    json_info = json.load(f)
    # print(json_info.keys())
    img = cv2.imread(os.path.join(json_path, json_info["imagePath"]))
    height, width, _ = img.shape

    np_w_h = np.array([[width, height]], np.int32)
    txt_file = json_file.replace(".json", ".txt")
    f = open(txt_file, "a")
    for point_json in json_info["shapes"]:
        txt_content = ""
        np_points = np.array(point_json["points"], np.int32)
        norm_points = np_points / np_w_h
        norm_points_list = norm_points.tolist()
        print()
        if point_json['label'] == labels[0]:
            txt_content += "0 " + " ".join([" ".join([str(cell[0]), str(cell[1])]) for cell in norm_points_list]) + "\n"
        elif point_json['label'] == labels[1]:
            txt_content += "1 " + " ".join([" ".join([str(cell[0]), str(cell[1])]) for cell in norm_points_list]) + "\n"

        f.write(txt_content)
- 1
- 2
- 3
- 4
- 5
- 6
- 7
- 8
- 9
- 10
- 11
- 12
- 13
- 14
- 15
- 16
- 17
- 18
- 19
- 20
- 21
- 22
- 23
- 24
- 25
- 26
- 27
- 28
- 29
- 30
- 31
- 32
- 33
- 34
- 35
使用上面脚本即可将json文件格式转为YOLO训练的txt格式,将图片和txt文件分别放入img文件夹和txt文件夹,使用以下脚本进行划分训练、测试集。
import os
import random
import shutil

rootpath = r'D:\a/'#此处为img和txt文件夹存放位置,地址后面要有/结尾

set1 = ['images','labels']
set2 = ['train','val']
for s1 in set1:
    if not os.path.exists(rootpath+s1):
        os.mkdir(rootpath+s1)
    for s2 in set2:
        if not os.path.exists(rootpath+s1+'/'+s2):
            os.mkdir(rootpath+s1+'/'+s2)


# 这是原始图片路径
img_path = rootpath+'img'
# 这是生成的txt路径
txt_path = rootpath+'txt'
file_names = os.listdir(img_path)
l = 0.8
n = len(file_names)
train_files = random.sample(file_names, int(n*l))
for file in file_names:
    print(file)
    if not os.path.exists(txt_path+'/'+file[:-3]+'txt'):
        os.remove(img_path+'/'+file)
        print(file[:-3]+'txt,不存在')
        continue
    if file in train_files:
        shutil.copy(img_path+'/'+file,rootpath+'images/train/'+file)
        shutil.copy(txt_path+'/'+file[:-3]+'txt',rootpath+'labels/train/'+file[:-3]+'txt')
    else:
        shutil.copy(img_path+'/'+file,rootpath+'images/val/'+file)
        shutil.copy(txt_path+'/'+file[:-3]+'txt',rootpath+'labels/val/'+file[:-3]+'txt')
print('ok!!')
print(len(train_files))
- 1
- 2
- 3
- 4
- 5
- 6
- 7
- 8
- 9
- 10
- 11
- 12
- 13
- 14
- 15
- 16
- 17
- 18
- 19
- 20
- 21
- 22
- 23
- 24
- 25
- 26
- 27
- 28
- 29
- 30
- 31
- 32
- 33
- 34
- 35
- 36
- 37
- 38
- 39
- 40
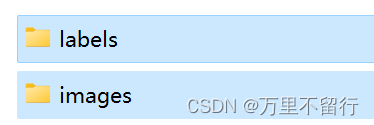
划分好数据集后会出现下面两个文件夹。

在YOLOv5文件夹的data文件夹内创建s-seg.yaml文件,将下面内容复制进去。
# Train/val/test sets as 1) dir: path/to/imgs, 2) file: path/to/imgs.txt, or 3) list: [path/to/imgs1, path/to/imgs2, ..]
path: D:\a  # dataset root dir
train : D:\a\images\train #此处填写上面划分好数据集的images文件夹下train
val: D:\a\images\val #此处填写上面划分好数据集的images文件夹下val


# Classes
names : #此处为标签序号和标签名
  0: 1
  1: 2
- 1
- 2
- 3
- 4
- 5
- 6
- 7
- 8
- 9
- 10
完成以上步骤即可进行第二步训练。
第二步:训练模型
打开YOLOv5文件夹内的segment文件夹中的train.py文件,从网上下载yolov5s-seg.pt文件放入该文件夹内,–data改为:
parser.add_argument('--data', type=str, default=ROOT / 'data/s-seg.yaml', help='dataset.yaml path')
- 1
运行即可,训练出的模型在runs文件夹下train-seg文件夹下。
第三步:测试模型
打开YOLOv5文件夹内的segment文件夹中的predict.py文件,更改第243行附近的以下内容。
–weights是刚训练好的模型位置,是绝对路径
–source是要进行测试的图片位置,是绝对路径
    parser.add_argument('--weights', nargs='+', type=str, default=ROOT / r'd:\yolov5-master\runs\train-seg\exp\weights\best.pt', help='model path(s)')
    parser.add_argument('--source', type=str, default=ROOT / r'D:\test\tudi', help='file/dir/URL/glob/screen/0(webcam)')
- 1
- 2
测试完成的结果保存在runs文件夹内的predict-seg文件夹内,打开可以查看。
声明:本文内容由网友自发贡献,不代表【wpsshop博客】立场,版权归原作者所有,本站不承担相应法律责任。如您发现有侵权的内容,请联系我们。转载请注明出处:https://www.wpsshop.cn/w/花生_TL007/article/detail/122414
推荐阅读
相关标签


