- 1python多进程多线程介绍,优缺点对比,以及使用场景实例代码_multiprocessing.cpu_count()
- 2追梦之旅【数据结构篇】——C语言手撕八大经典排序
- 3基于微信天津某停车场车位预约小程序系统设计与实现 研究背景和意义、国内外现状
- 4国家信息安全水平考试(NISP一级)考试题库3_对每个信息系统的建设来说,信息安全控制在哪个阶段考虑是最合适也是成本最低的()
- 5Flutter Boost 混合开发框架初探_flutterbooste oc
- 6界面控件DevExpress WPF流程图组件,完美复制Visio UI!(一)_devexpress 流程图 保存成图片
- 7全网多种方法解决Invalid Host header(无效的主机头)服务器域名访问出现的错误
- 8vue项目实现主题切换_vue项目前端切换主题
- 9写爬虫遇到验证码识别问题的解决方案_@xvz,qca,zc, ccdc,,张mnnnnmjiuub -.f..b'.天 d
- 10python培训第三课(多线程)_th=threading.thread(target=os_systemd,kwargs={"mac
Android集成CocosCreator项目----详细记录_cocos creator android
赞
踩
总共可分为三步
- 新建Android空项目
- 打开AndroidStudio

- 选择空项目 ------- 》》next

- 自定义包名、路径,--------- 》》finish
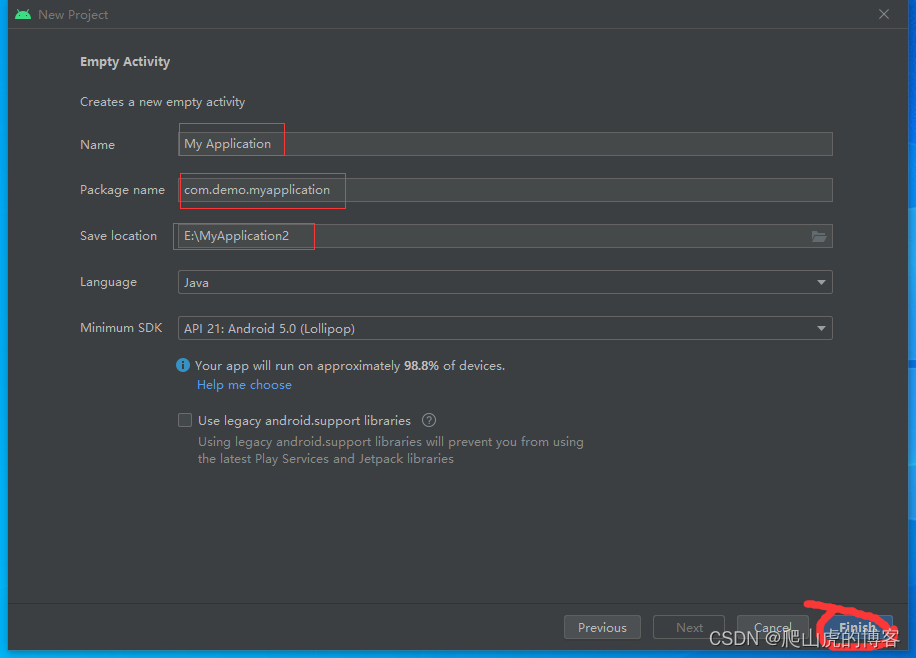
- finish之后
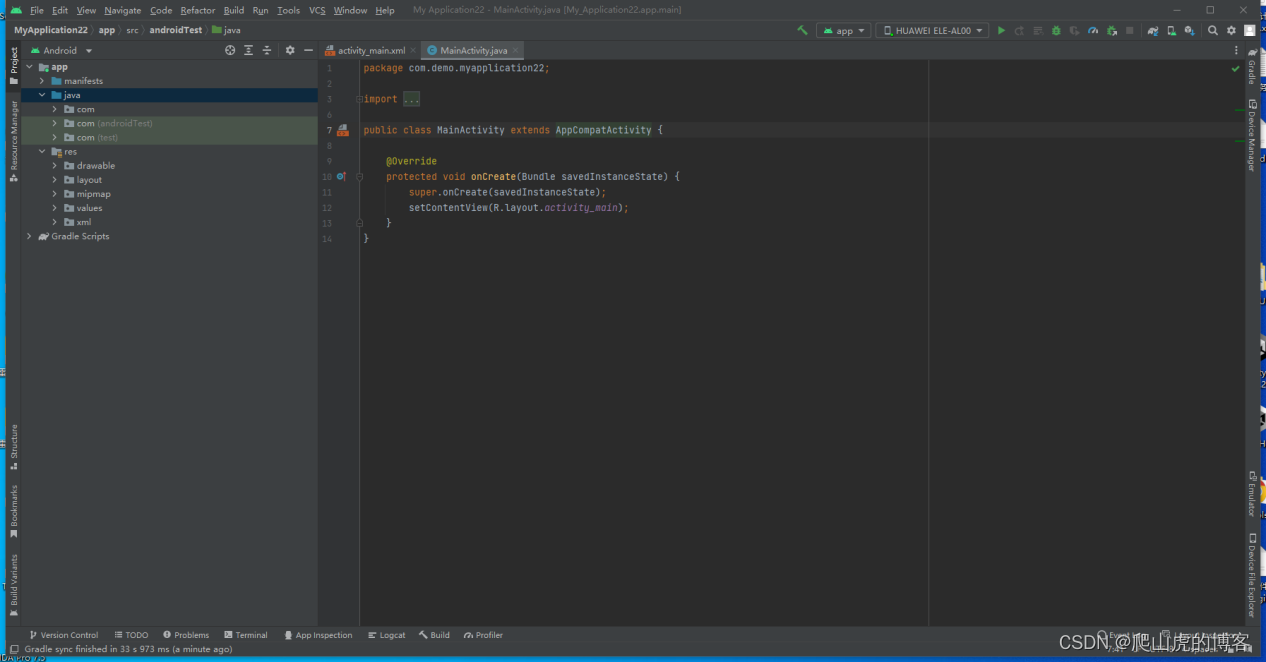
- 项目目录结构

- 新建CocosCreator项目
- 使用CocosCreator 创建项目并构建
- 使用AndroidStudio将构建的项目打成realease包
- 把CocosCreator项目导入Android项目
- 解压realease包,提取.so文件(在lib目录下)和assets文件
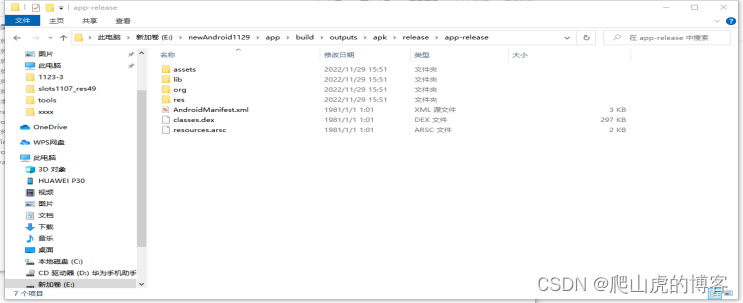
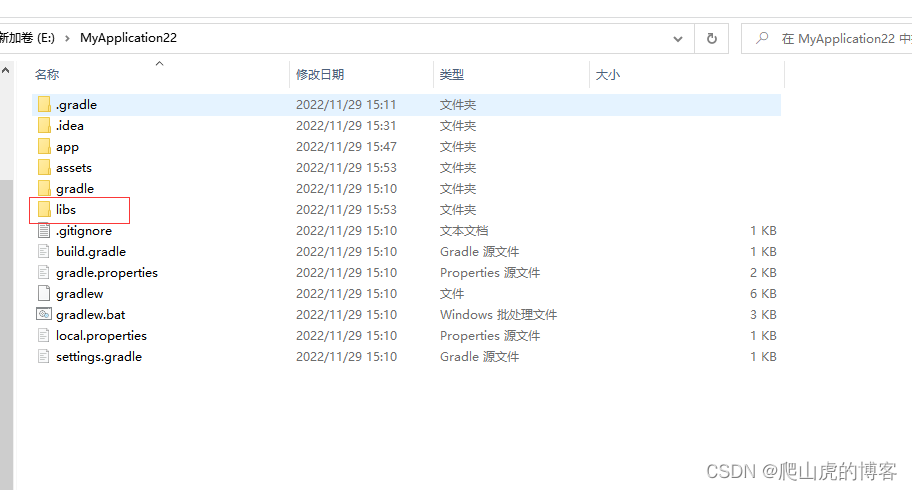
- 拷贝lib、assets两个文件夹到安卓项目根目录,并将lib文件夹改成libs

- 拷贝CocosCreator 项目\native\engine\android 目录下的res文件夹到项目Android项目根目录

- 复制cocos文件,可以在CocosCreator项目gradle.properties中获取路径
COCOS_ENGINE_PATH=E:/CocosDashboard_1.2.2/resources/.editors/Creator/3.6.1/resources/resources/3d/engine/native
即 复制路径 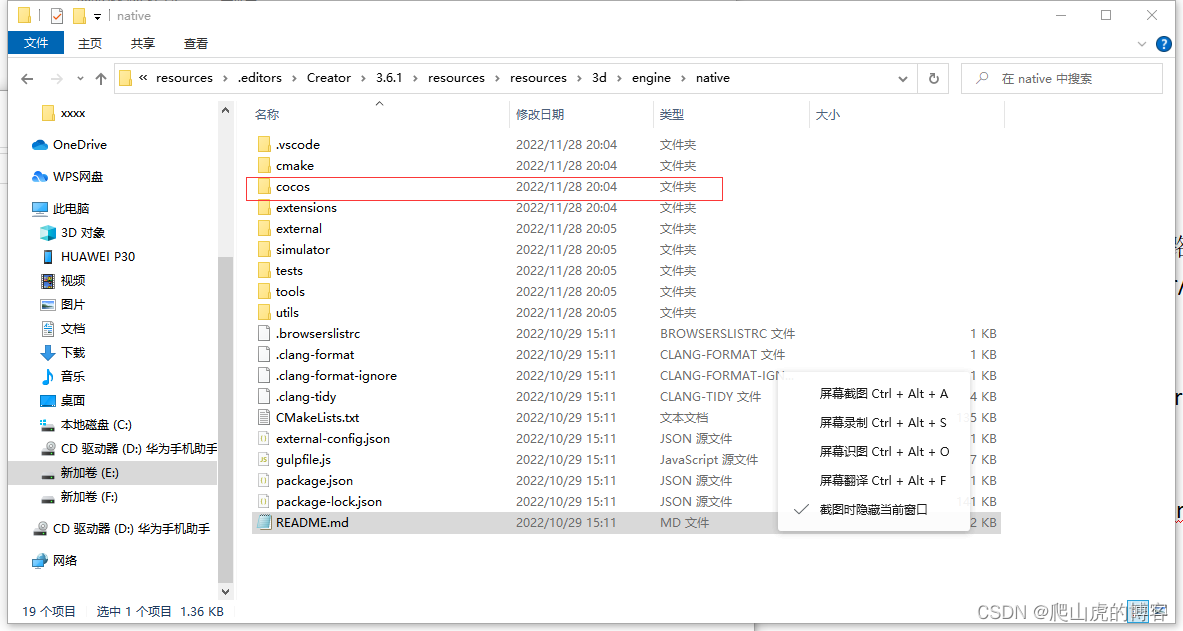
E:/CocosDashboard_1.2.2/resources/.editors/Creator/3.6.1/resources/resources/3d/engine/native 下的cocos文件夹到安卓项目根目录下
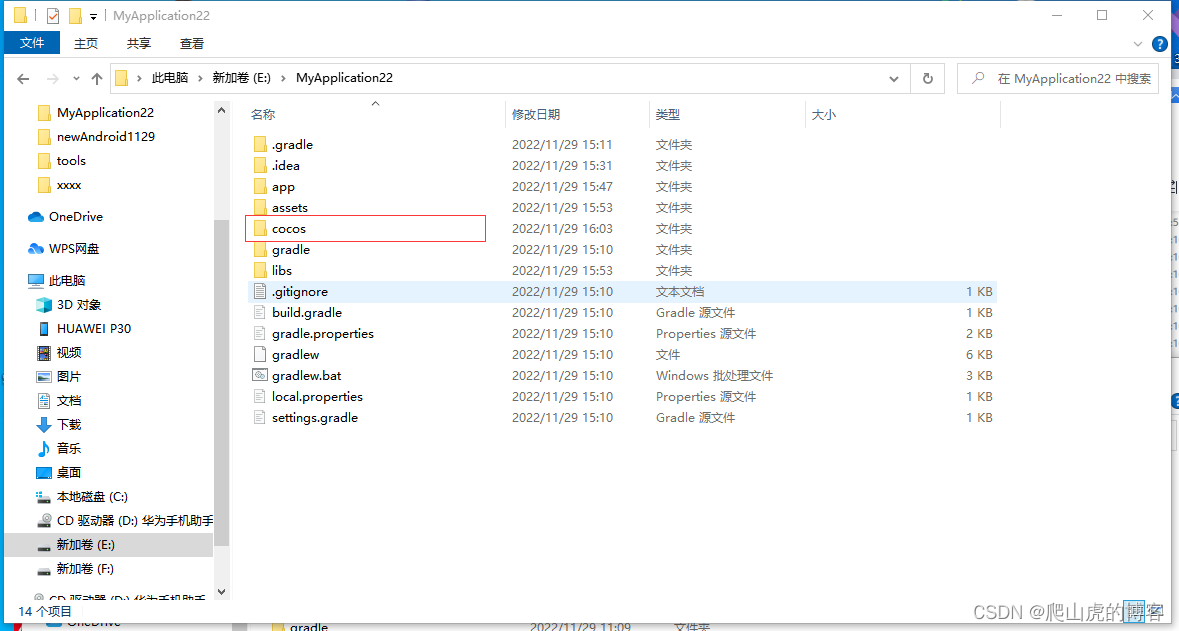
- 同步文件 manifest文件(声明)、build.gradle(依赖)、proguard-rules.pro(混淆)、local.properties、settings.gradle、gradle.properties(配置)
- 修改local.gradle,设置sdk路径
- 修改settings.gradle,去掉蓝色框选内容,加上下面的内容
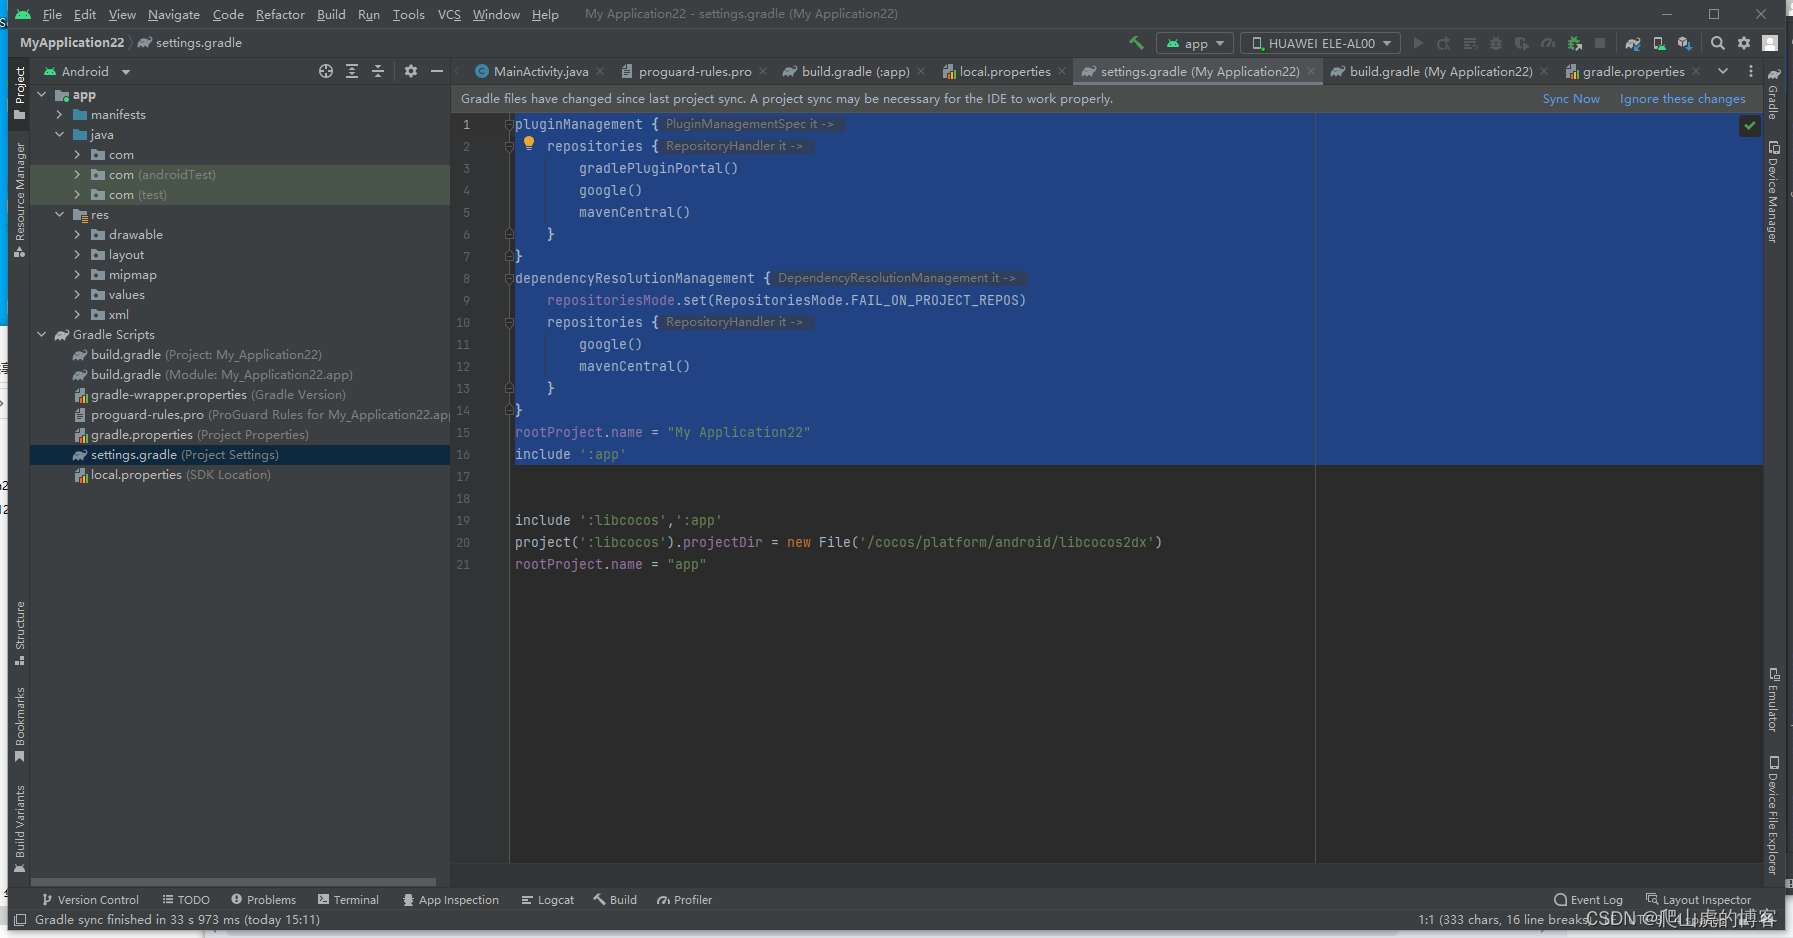
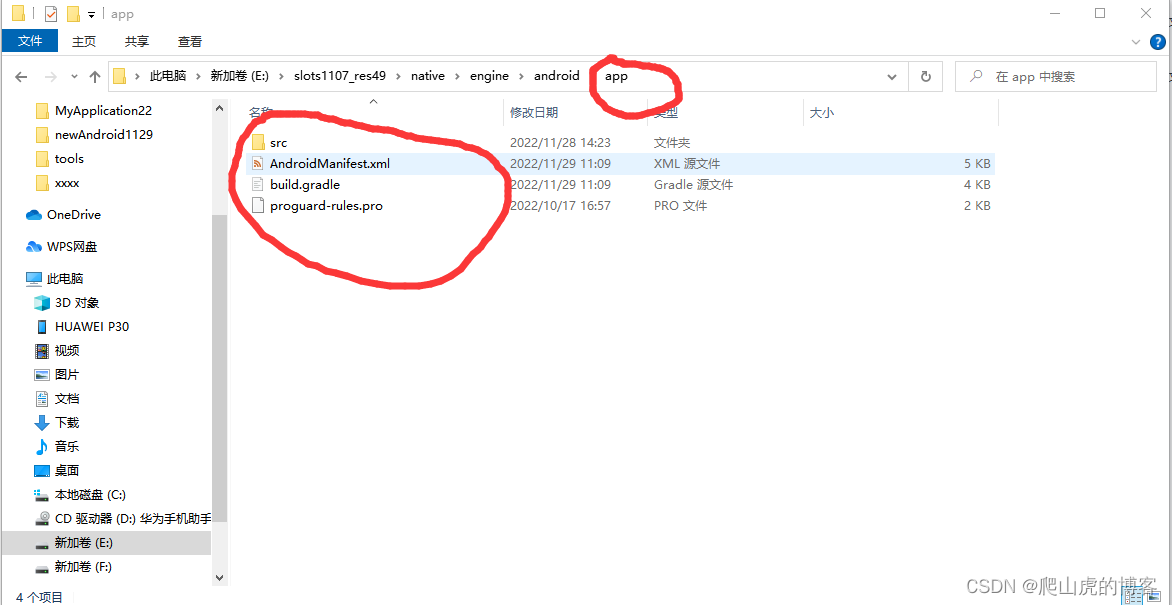
删除安卓项目app目录下的所有文件,从CocosCreator项目下拷贝app目录下的内容到安卓项目app目录下
- 修改manifest文件
- 修改proguard-rules.pro(混淆)

- 修改gradle.properties修改为以下内容
# Project-wide Gradle settings.
# IDE (e.g. Android Studio) users:
# Gradle settings configured through the IDE *will override*
# any settings specified in this file.
# For more details on how to configure your build environment visit
# http://www.gradle.org/docs/current/userguide/build_environment.html
# Specifies the JVM arguments used for the daemon process.
# The setting is particularly useful for tweaking memory settings.
org.gradle.jvmargs=-Xmx2048m -Dfile.encoding=UTF-8
# When configured, Gradle will run in incubating parallel mode.
# This option should only be used with decoupled projects. More details, visit
# http://www.gradle.org/docs/current/userguide/multi_project_builds.html#sec:decoupled_projects
# org.gradle.parallel=true
# AndroidX package structure to make it clearer which packages are bundled with the
# Android operating system, and which are packaged with your app's APK
# https://developer.android.com/topic/libraries/support-library/androidx-rn
android.useAndroidX=true
# Enables namespacing of each library's R class so that its R class includes only the
# resources declared in the library itself and none from the library's dependencies,
# thereby reducing the size of the R class for that library
android.nonTransitiveRClass=true
# Android SDK version that will be used as the compile project
PROP_COMPILE_SDK_VERSION=32
# Android SDK version that will be used as the earliest version of android this application can run on
PROP_MIN_SDK_VERSION=21
# Android SDK version that will be used as the latest version of android this application has been tested on
PROP_TARGET_SDK_VERSION=32
# Android Build Tools version that will be used as the compile project
PROP_BUILD_TOOLS_VERSION=30.0.2
# Application ID
APPLICATION_ID=com.aduoliebaowjh.sqrkk
# List of CPU Archtexture to build that application with
# Available architextures (armeabi-v7a | arm64-v8a | x86 | x86_64)
# To build for multiple architexture, use the `:` between them
# Example - PROP_APP_ABI=arm64-v8a:armeabi-v7a
PROP_APP_ABI=arm64-v8a:armeabi-v7a
PROP_NDK_PATH=E:\\Sdk\\ndk\\25.0.8775105
# fill in sign information for release mode
RELEASE_STORE_FILE=E:/CocosDashboard_1.2.2/resources/.editors/Creator/3.3.2/resources/tools/keystore/debug.keystore
RELEASE_STORE_PASSWORD=123456
RELEASE_KEY_ALIAS=debug_keystore
RELEASE_KEY_PASSWORD=123456
有个别路径需自行匹配,对应的sdk工具版本可能也需要调整
- 修改build.gradle(依赖),安卓项目根目录下为以下内容
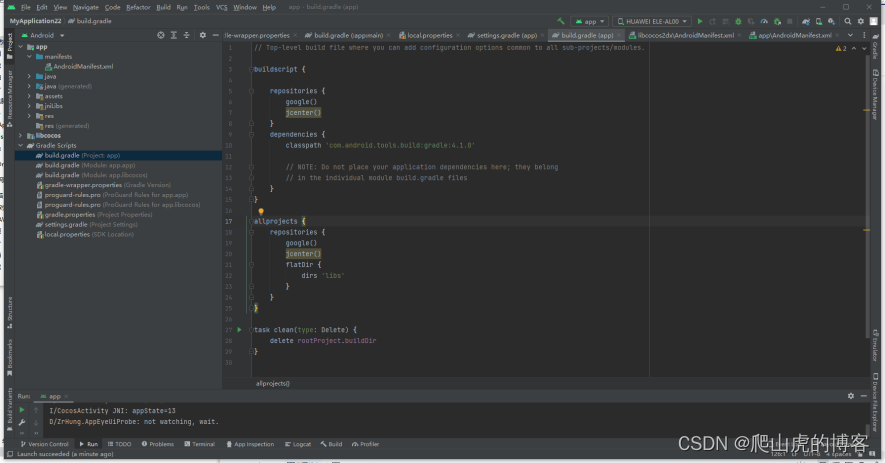
然后就可以愉快的进行下一步打包运行了!!!
还有不了解的老铁,请点击链接获取demo


