- 1sass(scss)的安装_安装sass
- 2MySQL二进制安装_mysqld.service is not a native service, redirectin
- 3【Android】线程池缓存简介_安卓单线程缓存池
- 4二叉树的建立_一文带你读懂二叉树
- 5HarmonyOS之 组件的使用_在column和row容器组件中,justifycontent
- 6怎么解决 申请获取你的手机号,但该功能使用次数已达当前小程序上限,暂时无法使用。_申请获取你的手机号,但该功能已达到上限
- 7鸿蒙开发 拍照功能,详细解析(Js篇)_鸿蒙系统 浏览器使用摄像头的js代码
- 8vue项目使用oidc-client实现单点登陆
- 9Android官方文档中文版_android 官方文档
- 10典型的数据仓库模型实施过程详解_数据仓库实施步骤
Unity 轮转图, 惯性, 自动回正, 点击选择
赞
踩
简单的实现 2D 以及 3D 的轮转图, 类似于 Web 中无限循环的轮播图那样.

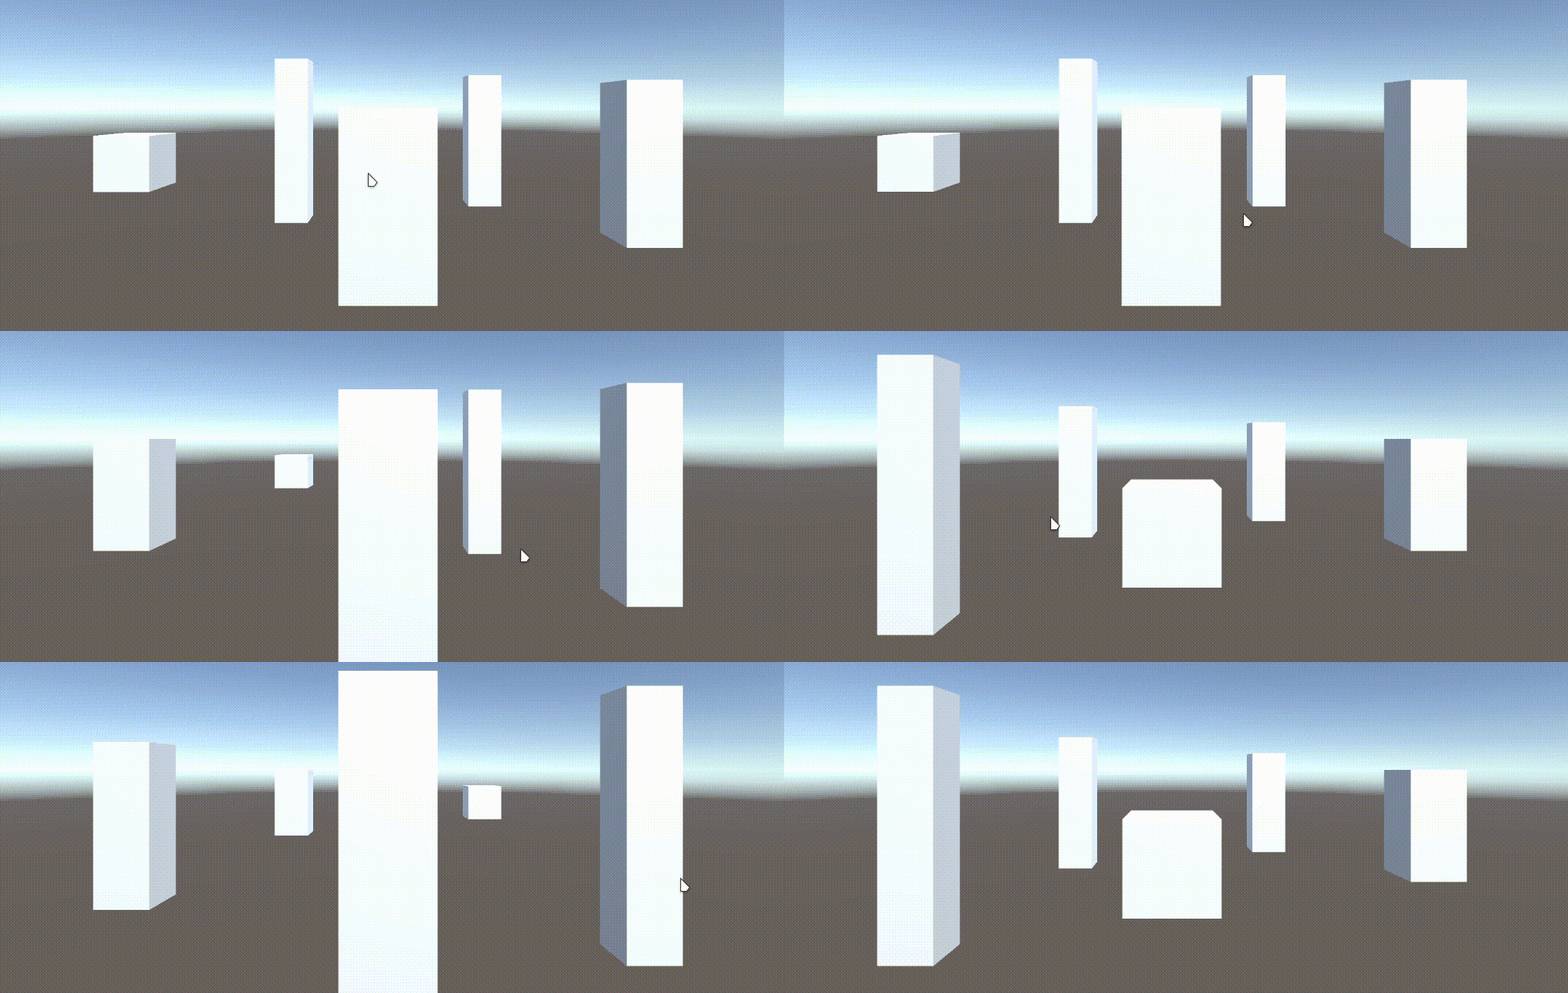
文中所有代码均已同步至 github.com/SlimeNull/UnityTests
主要逻辑
根据我们想要的效果可知, 主要原理就是, 当鼠标拖拽时, 更新对象的位置. 我们可以通过在脚本中保存一个 “当前旋转量” 的变量, 当鼠标拖拽时, 更改它. 而每次拖拽, 都根据旋转量, 计算每一个对象的位置. 接下来以 3D 轮转图为例, 讲述编写思路.
基础旋转
设计对象层级关系:
- 父对象 (脚本挂载到这里)
  |- 子对象
  |- 子对象
  |- 子对象
  |- ...
  |- 子对象
- 1
- 2
- 3
- 4
- 5
- 6
轮转图的大概逻辑框架:
public class Carousel : MonoBehavior, IDragHandler
{
    // 当前旋转偏移量
    float _radianOffset;

    void Start()
    {
        // 在开始时, 更新物体状态
        UpdateObjectStatus();
    }

    private void UpdateObjectStatus()
    {
        // 更新子物体状态, 计算旋转, 设置位置等
    }

    void IDragHandler.OnDrag(PointerEventData eventData)
    {
        var mouseOffset = 获取鼠标拖拽偏移量的逻辑;
	    var radianChange = 将鼠标偏移量转换为旋转量的逻辑;

        _radianOffset += radianChange;
        UpdateObjectStatus();
    }
}
- 1
- 2
- 3
- 4
- 5
- 6
- 7
- 8
- 9
- 10
- 11
- 12
- 13
- 14
- 15
- 16
- 17
- 18
- 19
- 20
- 21
- 22
- 23
- 24
- 25
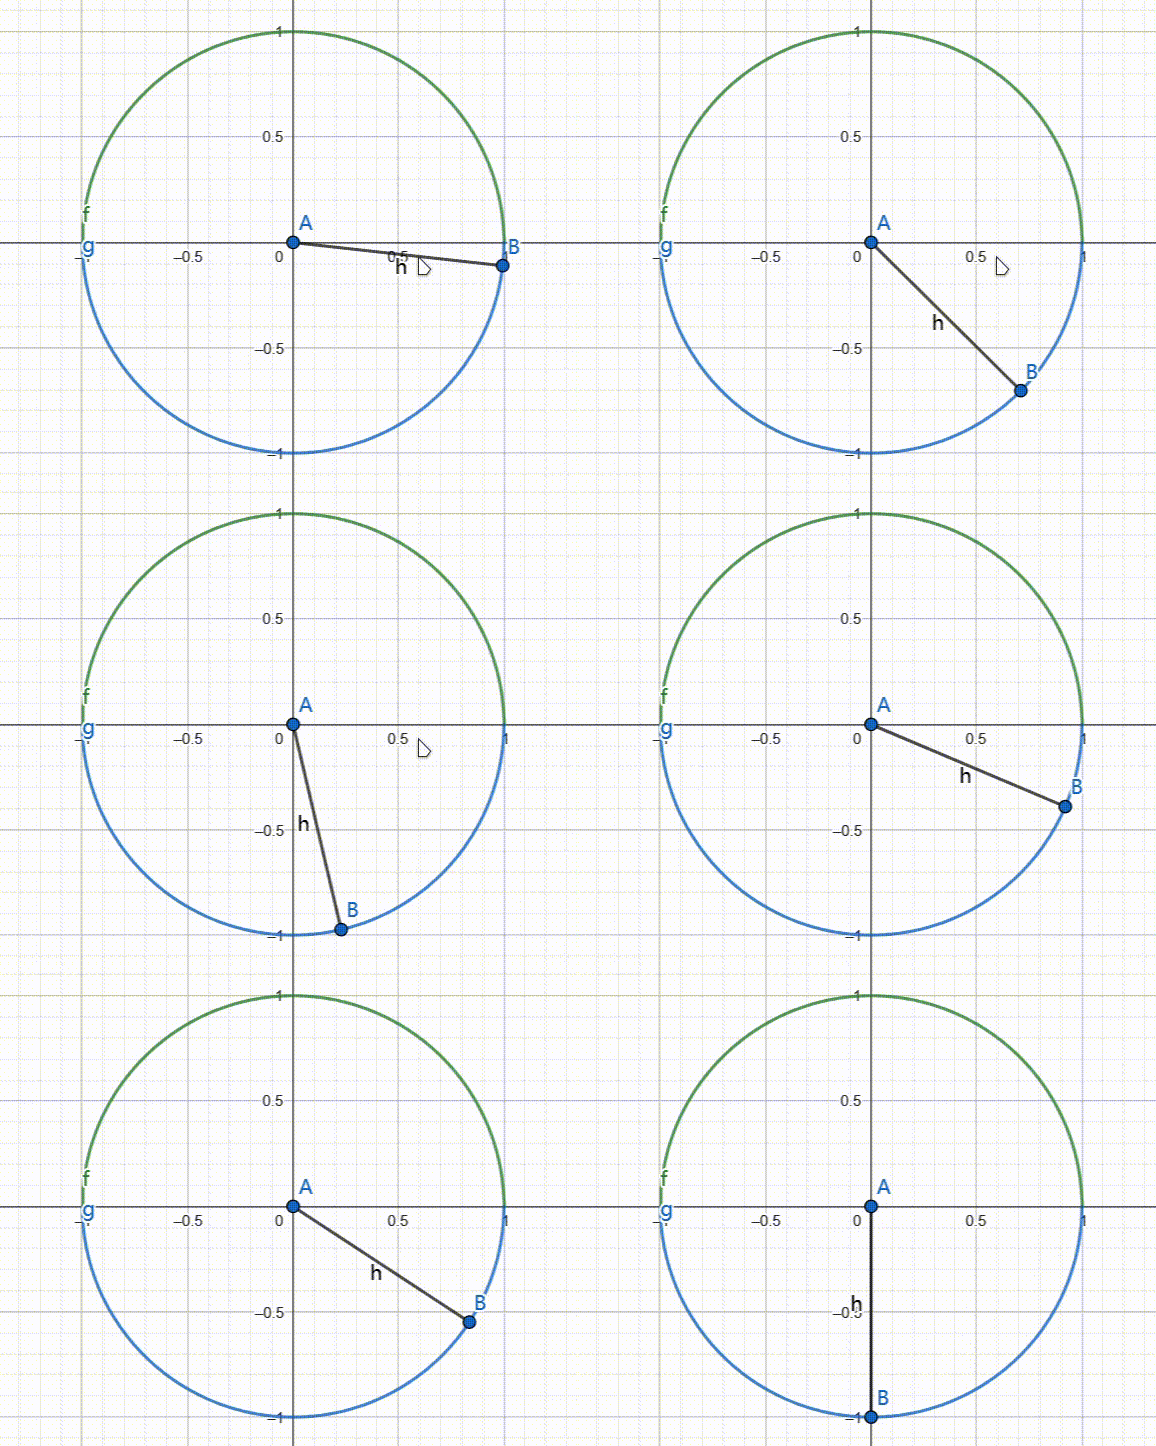
编写从旋转角度, 更新物体状态的逻辑. 这里, 我们将一整个圆平均分为成员数量份, 并让它们平均分布. 半径的话, 我们允许用户在检视器中自定义, 所以在这里向外暴露字段即可.
需要注意的是, 在数学习惯三角函数中, 角的起始为 x 正方向, 也就是 “右方”, 为了使第一个子物体, 也就是旋转量为 0 的子物体在最前方, 我们在实际计算角度时, 需要整体减去半个 PI, 也就是 90 度.
public class Carousel : MonoBehavior, IDragHandler
{
    float _radianOffset;

	/// <summary>
	/// 大小
	/// </summary>
	[field: SerializeField]
	public float Size { get; set; } = 5;

    void Start()
    {
        UpdateObjectStatus();
    }

    // 更新物体状态
    private void UpdateObjectStatus()
    {
		var radius = Size / 2;                        // 半径
		var childCount = transform.childCount;        // 成员数量
		var radianGap = Mathf.PI * 2 / childCount;    // 旋转弧度间隔

		for (int i = 0; i < childCount; i++)
		{
		    // 获取当前角度, 以及当前游戏对象
			var radian = radianGap * i + _radianOffset - Mathf.PI / 2;
			var child = transform.GetChild(i);

            // 计算余弦正弦值
			var cos = Mathf.Cos(radian);
			var sin = Mathf.Sin(radian);

            // 计算坐标
			var x = cos * radius;
			var z = sin * radius;

            // 设置位置
			child.localPosition = new Vector3(x, 0, z);
		}
    }

    void IDragHandler.OnDrag(PointerEventData eventData)
    {
        // 拖拽逻辑
    }
}
- 1
- 2
- 3
- 4
- 5
- 6
- 7
- 8
- 9
- 10
- 11
- 12
- 13
- 14
- 15
- 16
- 17
- 18
- 19
- 20
- 21
- 22
- 23
- 24
- 25
- 26
- 27
- 28
- 29
- 30
- 31
- 32
- 33
- 34
- 35
- 36
- 37
- 38
- 39
- 40
- 41
- 42
- 43
- 44
- 45
- 46
接下来实现获取鼠标拖拽偏移量, 由于 3D 空间中的对象, 距离相机远近不确定, 所以最终的鼠标偏移量我们以鼠标位置转换为世界坐标的结果为准. 在开始拖拽的时候, 记录下当前距离相机的位置与鼠标的世界坐标, 并在接下来的每一次拖拽触发时都重新计算鼠标的世界坐标, 并得出鼠标在世界中的偏移量.
public class Carousel : MonoBehavior, IDragHandler, IBeginDragHandler
{
    float _radianOffset;

    float _cameraDistance;              // 相机距离
    Vector3 _lastMouseWorldPosition;    // 上次的鼠标世界坐标

	/// <summary>
	/// 大小
	/// </summary>
	[field: SerializeField]
	public float Size { get; set; } = 5;

    void Start()
    {
        UpdateObjectStatus();
    }

    // 更新物体状态
    private void UpdateObjectStatus()
    {
        // 位置更新逻辑
    }

    void IDragHandler.OnDrag(PointerEventData eventData)
    {
        var radius = Size / 2;

        // 求当前鼠标坐标, 计算鼠标的偏移量
        var mousePosition = Input.mousePosition;
        mousePosition.z = _cameraDistance;
        var newMouseWorldPosition = Camera.main.ScreenToWorldPoint(mousePosition);
        var mouseWorldOffset = newMouseWorldPosition - _lastMouseWorldPosition;

        // 保存新的鼠标位置
        _lastMouseWorldPosition = newMouseWorldPosition;

        // 将鼠标偏移量转换为旋转量
        var radianChange = mouseWorldOffset.x / radius;

        // 增加旋转
        _radianOffset += radianChange;

        // 更新物体状态
        UpdateObjectStatus();
    }

    void IBeginDragHandler.OnBeginDrag(PointerEventData eventData)
    {
        // 通过自己的屏幕坐标, 取 z 值得到相机距离
        // 当然, 这里你也可以使用向量投影来直接获取当前对象与相机的距离
        var selfScreenPosition = Camera.main.WorldToScreenPoint(transform.position);
        _cameraDistance = selfScreenPosition.z;

        // 求鼠标的世界坐标
        var mousePosition = Input.mousePosition;
        mousePosition.z = _cameraDistance;
        _lastMouseWorldPosition = Camera.main.ScreenToWorldPoint(mousePosition);
    }
}
- 1
- 2
- 3
- 4
- 5
- 6
- 7
- 8
- 9
- 10
- 11
- 12
- 13
- 14
- 15
- 16
- 17
- 18
- 19
- 20
- 21
- 22
- 23
- 24
- 25
- 26
- 27
- 28
- 29
- 30
- 31
- 32
- 33
- 34
- 35
- 36
- 37
- 38
- 39
- 40
- 41
- 42
- 43
- 44
- 45
- 46
- 47
- 48
- 49
- 50
- 51
- 52
- 53
- 54
- 55
- 56
- 57
- 58
- 59
- 60
在上面的代码中, 我们的旋转量是直接将鼠标偏移量除以半径得来的. 因为圆的周长等于弧乘半径, 反之, 如果想要根据圆上长度求角大小, 直接拿这个长度除以半径即可. 而我们这里的思路, 正是将鼠标的偏移量, 视作圆上一点的旋转距离.
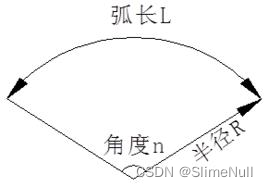
当然, 你也可以直接通过别的算法来将鼠标偏移量转换为旋转量, 这取决于你的需求. 甚至你也可以直接暴力的将鼠标的坐标偏移乘或除以一个固定的数来作为旋转量使用.
最后, 检查一下你的代码, 它们大概是这样的:
public class Carousel : MonoBehavior, IDragHandler, IBeginDragHandler
{
    float _radianOffset;

    float _cameraDistance;
    Vector3 _lastMouseWorldPosition;

    public float Size { get; set; } = 5;

    void Start() { ... }

    private void UpdateObjectStatus() { ... }

    void IDragHandler.OnDrag(PointerEventData eventData) { .. }
    void IBeginDragHandler.OnBeginDrag(PointerEventData eventData) { ... }
}
- 1
- 2
- 3
- 4
- 5
- 6
- 7
- 8
- 9
- 10
- 11
- 12
- 13
- 14
- 15
- 16
在编写完基础代码之后, 我们的效果大概如下:
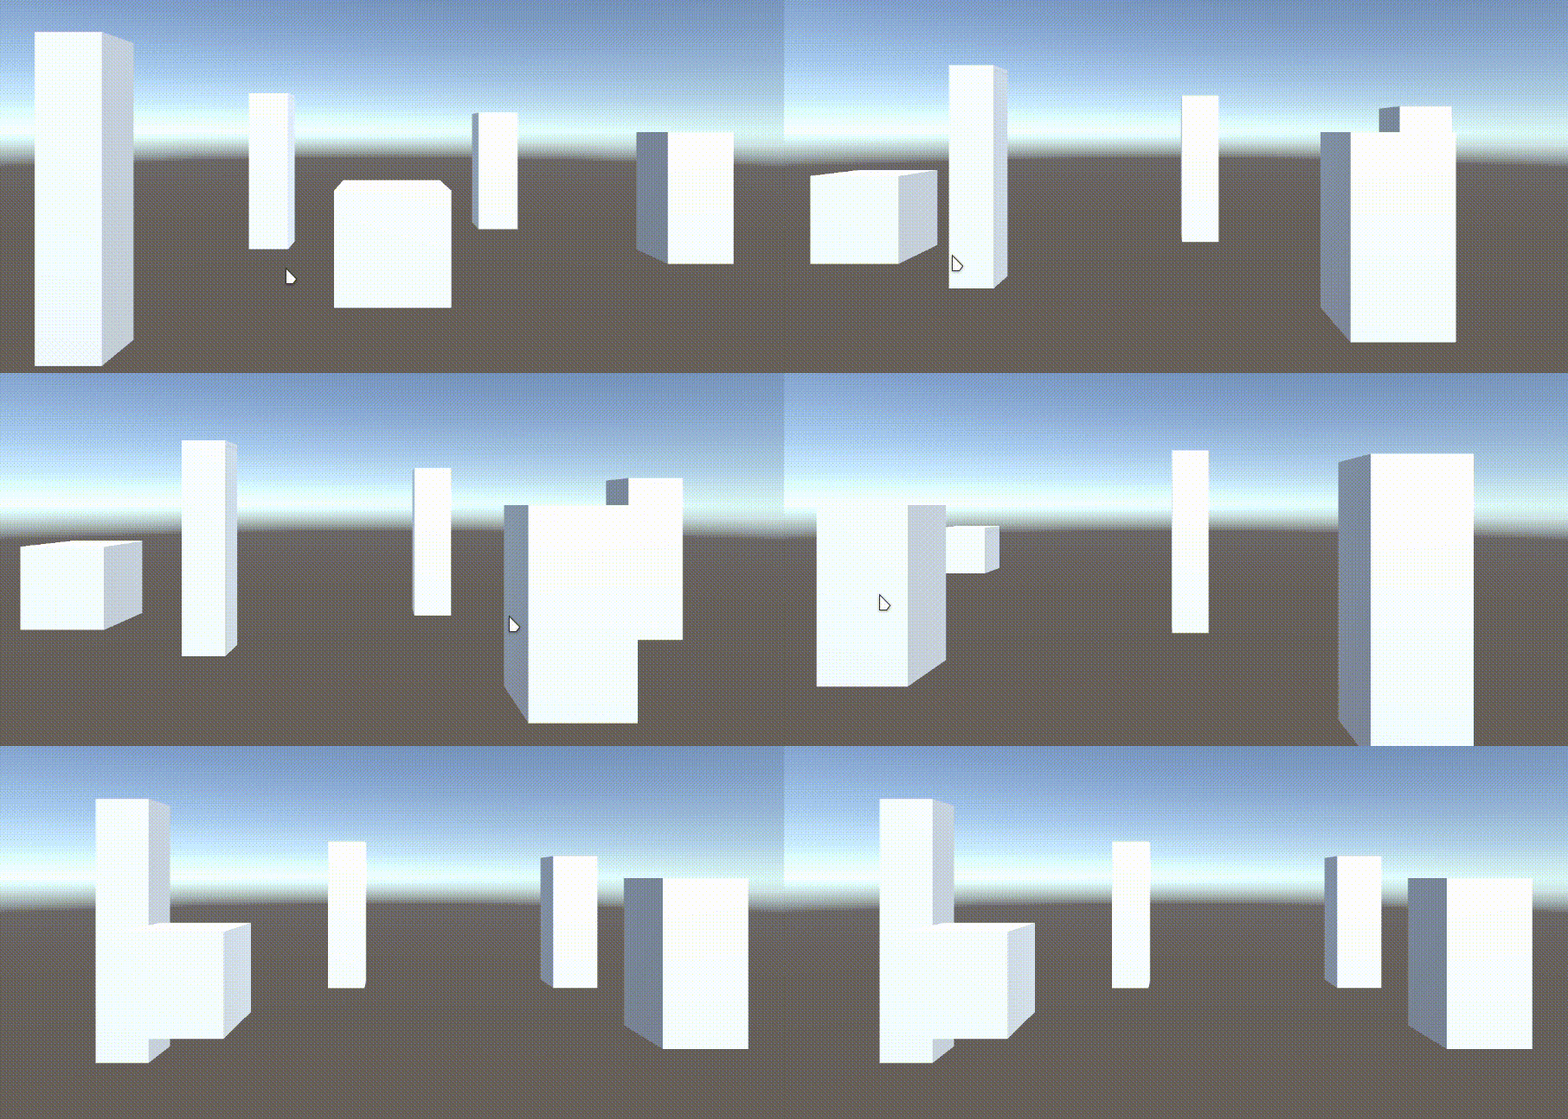
注意, 为了让 3D 场景中的物体能够接收指针拖拽的事件, 你的场景中需要有一个 “EventSystem” 组件, 并且主相机需要挂载 “GraphicsRaycaster” 组件.
自动回正
接下来我们还需要继续编写自动回正的功能, 使最近的物体旋转到前方. 大概思路就是, 保存当前最靠近前方的物体索引, 并计算其在最前方的旋转偏移量, 最后使用 DOTween 执行缓动.
因为我们使用正弦值乘半径作为物体的 z 坐标, 所以对于获取当前最前方的物体, 我们只需要看哪个物体旋转量正弦值最小即可.
public class Carousel : MonoBehavior, IDragHandler, IBeginDragHandler
{
    // 其他字段和属性

    /// <summary>
    /// 已选择的索引
    /// </summary>
    public SelectedIndex { get; private set; }

    // 更新物体状态
    private void UpdateObjectStatus()
    {
		var radius = Size / 2;
		var childCount = transform.childCount;
		var radianGap = Mathf.PI * 2 / childCount;

        var minSin = 2f;
        var selectedIndex = -1;

		for (int i = 0; i < childCount; i++)
		{
			var radian = radianGap * i + _radianOffset - Mathf.PI / 2;
			var child = transform.GetChild(i);

			var cos = Mathf.Cos(radian);
			var sin = Mathf.Sin(radian);

			var x = cos * radius;
			var z = sin * radius;

			child.localPosition = new Vector3(x, 0, z);

            // 如果当前正弦值小于已保存的最小正弦值
            // 则更新最小正弦值以及已选中索引
            if (sin <= minSin)
            {
                minSin = sin;
                selectedIndex = i;
            }
		}

        // 更新属性
        SelectedIndex = selectedIndex;
    }

    // 其他逻辑
}
- 1
- 2
- 3
- 4
- 5
- 6
- 7
- 8
- 9
- 10
- 11
- 12
- 13
- 14
- 15
- 16
- 17
- 18
- 19
- 20
- 21
- 22
- 23
- 24
- 25
- 26
- 27
- 28
- 29
- 30
- 31
- 32
- 33
- 34
- 35
- 36
- 37
- 38
- 39
- 40
- 41
- 42
- 43
- 44
- 45
- 46
- 47
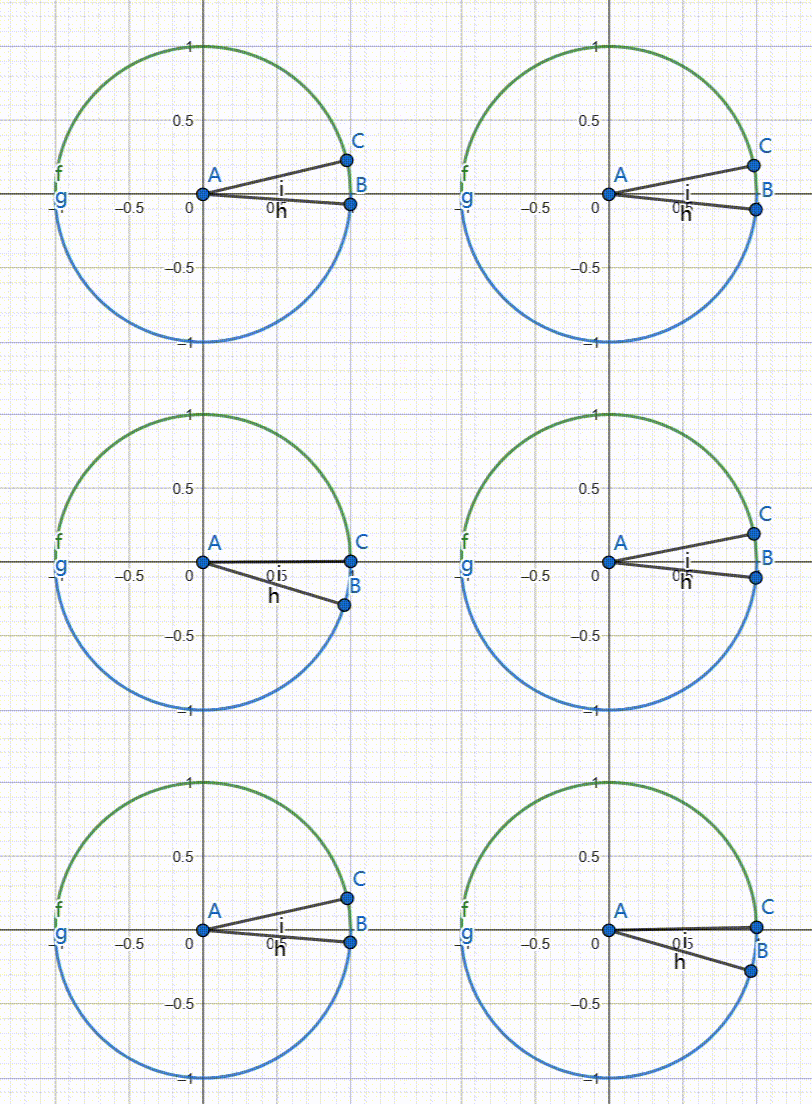
要获取某个子对象对应的旋转角度, 直接拿旋转间隔, 乘其索引, 再转为负数即可. 因为从第一个元素旋转到第二个元素时, 旋转角度是减少的.
public class Carousel : MonoBehavior, IDragHandler, IBeginDragHandler
{
    // 其他字段和属性

    /// <summary>
    /// 从索引获取旋转量
    /// </summary>
    /// <param name="index"></param>
    /// <returns></returns>
    private float GetRadianFromItemIndex(int index)
    {
        var childCount = transform.childCount;
        var radianGap = Mathf.PI * 2 / childCount;

        return -radianGap * index;
    }


    // 其他逻辑
}
- 1
- 2
- 3
- 4
- 5
- 6
- 7
- 8
- 9
- 10
- 11
- 12
- 13
- 14
- 15
- 16
- 17
- 18
- 19
- 20
那么, 选中某个元素, 将其移动到最前方的逻辑, 大概就是这样了, 使用 DOTween 做过渡就可以:
public class Carousel : MonoBehavior, IDragHandler, IBeginDragHandler
{
    float _radianOffset;

    // 其他字段

    /// <summary>
    /// 过渡时间
    /// </summary>
    [field: SerializeField]
    public float TransitionTime { get; set; } = 0.2f;

    // 其他字段和属性

    // 更新物体状态
    private void UpdateObjectStatus() { ... }

    // 从索引获取旋转角度
    private float GetRadianFromItemIndex(int index) { ... }

    public void Select(int index)
    {
        var originRadian = _radianOffset;
        var targetRadian = GetRadianFromItemIndex(index);

        DOTween
            .To(radian =>
            {
                // 设置旋转量并更新物体状态
                _radianOffset = radian;
                UpdateObjectStatus();
            }, originRadian, targetRadian, TransitionTime);
    }

    // 其他逻辑
}
- 1
- 2
- 3
- 4
- 5
- 6
- 7
- 8
- 9
- 10
- 11
- 12
- 13
- 14
- 15
- 16
- 17
- 18
- 19
- 20
- 21
- 22
- 23
- 24
- 25
- 26
- 27
- 28
- 29
- 30
- 31
- 32
- 33
- 34
- 35
- 36
不过我们接下来还需要考虑两件事.
- 如果我当前旋转量是一圈多, 过渡会出问题.
举个例子, 当旋转量是两圈半时, 也就是 5 个 PI, 当我调用 Select(0) 的时候, 它会直接从 5 个 PI 过渡到 0, 在视觉上就是, 这个轮转图转了两圈半, 回到原点. - 如果当前旋转到目标旋转量大于半个圆, 视觉上不好看.
举个例子, 我需要从 180 度旋转到 370 度, 如果直接这么转, 视觉上看起来是它绕了远路, 因为从 180 转到 10 度经过的 170 当然是比 转到 370 经过的 190 度要短的.
所以, 我们需要做两点修改:
- 使当前旋转量不能大于一圈.
- 在进行旋转前, 将目标旋转值改为最短的目标值.
其中第一点非常简单, 只需要在每一次更新物体状态前, 对当前旋转量 _radianOffset 对 PI * 2 进行求余即可.
public class Carousel : MonoBehavior, IDragHandler, IBeginDragHandler
{
    // 字段和属性

    // 更新物体状态
    private void UpdateObjectStatus()
    {
        // 变量初始化

        // 在执行操作前, 保证 _radianOffset 不大于一圈
        _radianOffset %= Mathf.PI * 2;
		for (int i = 0; i < childCount; i++)
		{
            // 更新物体位置以及其他的具体逻辑
		}

        // 更新属性
        SelectedIndex = selectedIndex;
    }


    // 其他逻辑
}
- 1
- 2
- 3
- 4
- 5
- 6
- 7
- 8
- 9
- 10
- 11
- 12
- 13
- 14
- 15
- 16
- 17
- 18
- 19
- 20
- 21
- 22
- 23
第二点, 我们只需要判断旋转差值, 如果大于半圆, 那么加上或者减去一整个圆即可.
public class Carousel : MonoBehavior, IDragHandler, IBeginDragHandler
{
    // 字段和属性

    // 矫正旋转目标
    private void CorrectRotationTarget(float origin, ref float target)
    {
        const float DoublePI = Mathf.PI * 2;

        // 旋转差值
        float diff = (target - origin) % DoublePI;
        if (diff > Mathf.PI)
            diff -= DoublePI;
        else if (diff < -Mathf.PI)
            diff += DoublePI;

        target = origin + diff;
    }


    // 其他逻辑
}
- 1
- 2
- 3
- 4
- 5
- 6
- 7
- 8
- 9
- 10
- 11
- 12
- 13
- 14
- 15
- 16
- 17
- 18
- 19
- 20
- 21
- 22
最后, 我们在松开鼠标, 也就是结束拖拽的时候, 调用 Select 方法, 选择当前最前方物体即可.
public class Carousel : MonoBehavior, IDragHandler, IBeginDragHandler, IEndDragHandler
{
    // 其他字段和属性

    /// <summary>
    /// 启用自动回正
    /// </summary>
    [field: SerializeField]
    public bool EnableAutoCorrection { get; set; } = true;

    // 选择
    public void Select(int index) { ... }

    void IEndDragHandler.OnEndDrag(PointerEventData eventData)
    {
        if (EnableAutoCorrection)
        {
            Select(SelectedIndex);
        }
    }

    // 其他逻辑
}
- 1
- 2
- 3
- 4
- 5
- 6
- 7
- 8
- 9
- 10
- 11
- 12
- 13
- 14
- 15
- 16
- 17
- 18
- 19
- 20
- 21
- 22
- 23
最后, 检查你的代码, 它们大概是这样的:
public class Carousel : MonoBehavior, IDragHandler, IBeginDragHandler, IEndDragHandler
{
    float _radianOffset;

    float _cameraDistance;
    Vector3 _lastMouseWorldPosition;

    public float Size { get; set; } = 5;
    public bool EnableAutoCorrection { get; set; } = true;
    public float TransitionTime { get; set; } = 0.2f;

    public int SelectedIndex { get; private set; }

    void Start() { ... }

    private void UpdateObjectStatus() { ... }
    private void CorrectRotationTarget(float origin, ref float target) { ... }
    private float GetRadianFromItemIndex(int index) { ... }

    public void Select(int index) { ... }

    void IDragHandler.OnDrag(PointerEventData eventData) { .. }
    void IBeginDragHandler.OnBeginDrag(PointerEventData eventData) { ... }
    void IEndDragHandler.OnEndDrag(PointerEventData eventData) { ... }
}
- 1
- 2
- 3
- 4
- 5
- 6
- 7
- 8
- 9
- 10
- 11
- 12
- 13
- 14
- 15
- 16
- 17
- 18
- 19
- 20
- 21
- 22
- 23
- 24
- 25
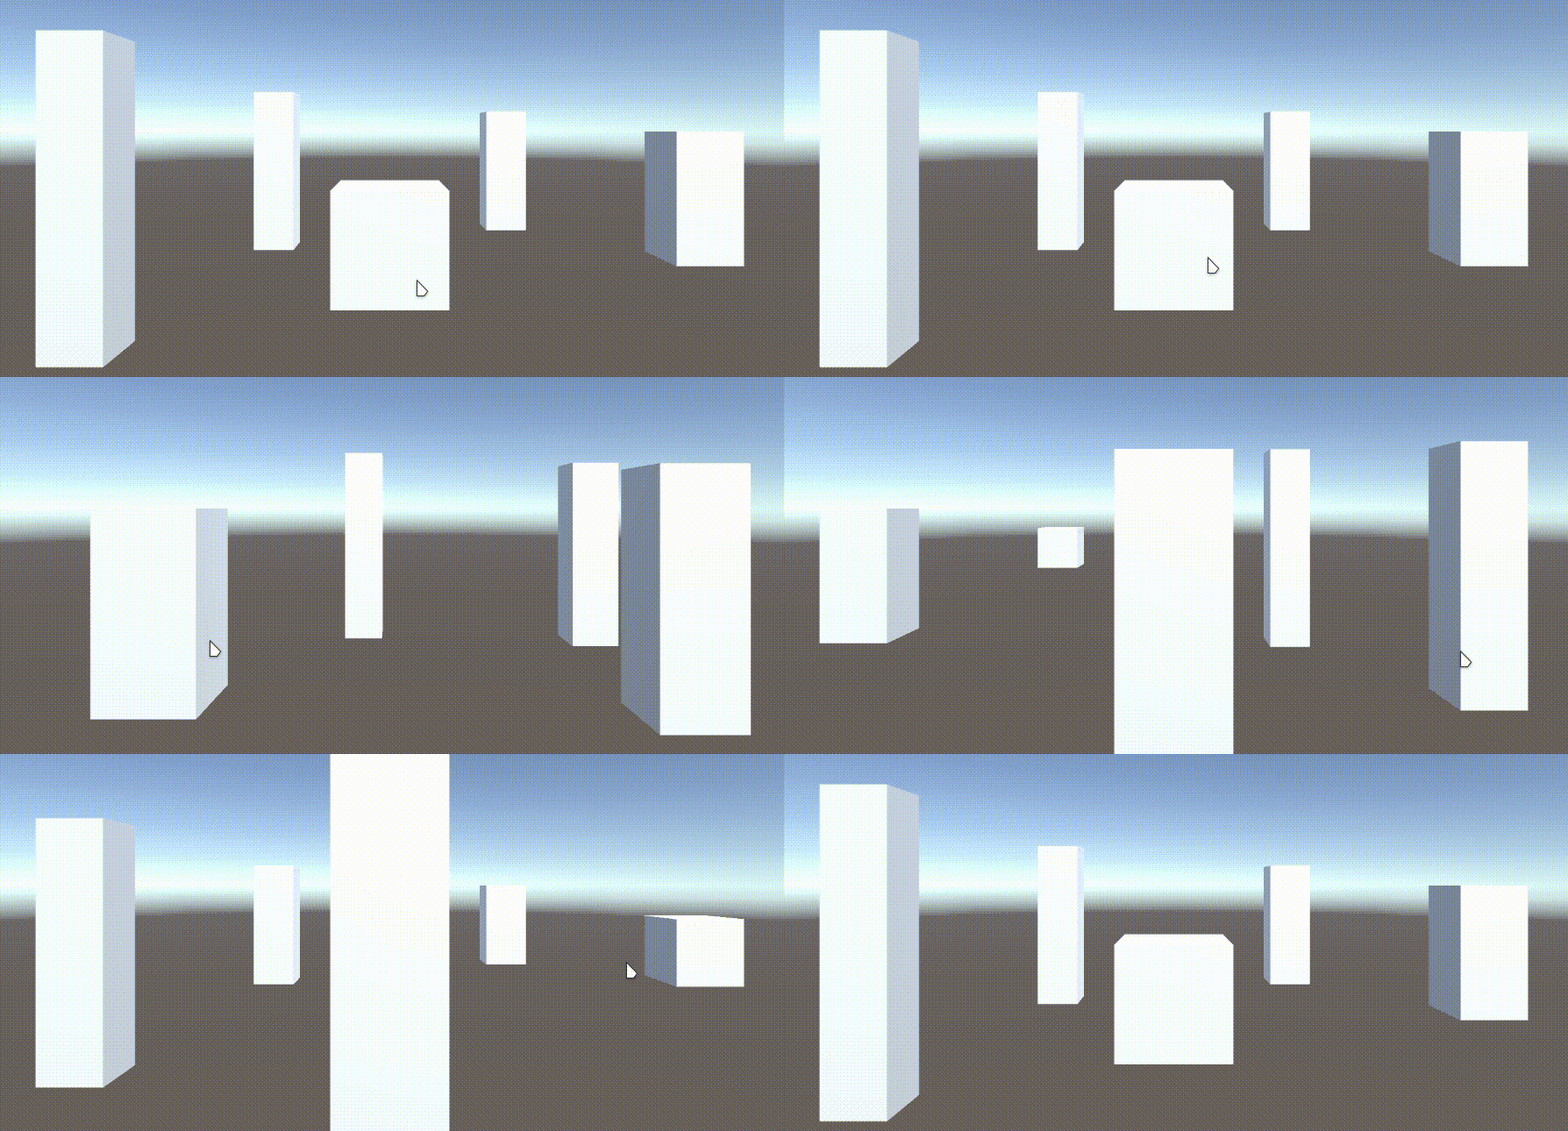
在做完上面一切工作之后, 我们最终会有一个带自动回正的轮转图. 效果如下:
运动惯性
惯性的实现也是很简单的, 我们只需要保存拖拽时的速度, 在松开时使其仍然继续运动, 并不断减小速度就可以.
我们的大概思路如下:
- 使用一个字段保存速度, 一个字段保存当前是否正在被用户拖拽. 向外公开 “旋转阻力” 以允许在检视器中调整阻力.
- 在 Update 中, 如果启用了惯性, 没有被用户拖拽, 并且速度不为 0, 则通过速度对旋转量进行增加, 并更新物体状态. 如果在一次更新中, 速度最终衰减到了 0, 那么则执行自动回正的逻辑.
- 在 Drag 中, 根据当前拖拽的旋转增量以及时间差, 计算并保存旋转速度.
- 在 EndDrag 中, 原本直接调用自动回正的逻辑, 仅在不启用惯性的时候直接执行. 因为如果启动了惯性, 在 Update 中会执行自动回正, 不需要在结束拖拽时执行.
最终, 代码的框架大致如下:
public class Carousel : MonoBehavior, IDragHandler, IBeginDragHandler, IEndDragHandler
{
    // 其他字段与属性

    float _radianVelocity;   // 旋转速度

    bool _dragging;          // 是否正在被拖拽

    /// <summary>
    /// 旋转阻力
    /// </summary>
    [field: SerializeField]
    public float RadianDrag { get; set; } = 10;

    /// <summary>
    /// 启用惯性
    /// </summary>
    [field: SerializeField]
    public bool EnableInertia { get; set; } = true;

    void Update()
    {
        if (EnableInertia && !_dragging && _radianVelocity == 0)
        {
            _radianOffset += _radianVelocity;
            UpdateObjectStatus();

            // 使速度衰减的逻辑 (稍后进行详细的编写)

            // 自动回正
            if (EnableAutoCorrection && _radianVelocity == 0)
            {
                Select(SelectedIndex);
            }
        }
    }

    void IDragHandler.OnDrag(PointerEventData eventData)
    {
        var radius = Size / 2;

        var mousePosition = Input.mousePosition;
        mousePosition.z = _cameraDistance;
        var newMouseWorldPosition = Camera.main.ScreenToWorldPoint(mousePosition);
        var mouseWorldOffset = newMouseWorldPosition - _lastMouseWorldPosition;

        _lastMouseWorldPosition = newMouseWorldPosition;

        var radianChange = mouseWorldOffset.x / radius;

        // 直接以 radianChange 除以 Time.deltaTime 得到速度
        _radianVelocity = radianChange / Time.deltaTime;
        _radianOffset += radianChange;

        UpdateObjectStatus();
    }

    void IBeginDragHandler.OnBeginDrag(PointerEventData eventData)
    {
        // 其他逻辑

        _dragging = true;    // 设置拖拽状态
    }

    void IEndDragHandler.OnEndDrag(PointerEventData eventData)
    {
        _dragging = false;   // 设置拖拽状态

        if (EnableAutoCorrection && !EnableInertia)
        {
            // 自动回正
            Select(SelectedIndex);
        }
    }

    // 其他逻辑
}
- 1
- 2
- 3
- 4
- 5
- 6
- 7
- 8
- 9
- 10
- 11
- 12
- 13
- 14
- 15
- 16
- 17
- 18
- 19
- 20
- 21
- 22
- 23
- 24
- 25
- 26
- 27
- 28
- 29
- 30
- 31
- 32
- 33
- 34
- 35
- 36
- 37
- 38
- 39
- 40
- 41
- 42
- 43
- 44
- 45
- 46
- 47
- 48
- 49
- 50
- 51
- 52
- 53
- 54
- 55
- 56
- 57
- 58
- 59
- 60
- 61
- 62
- 63
- 64
- 65
- 66
- 67
- 68
- 69
- 70
- 71
- 72
- 73
- 74
- 75
- 76
- 77
速度的衰减, 我们这里通过将速度拆解成两个量来做处理, “方向” 和 “大小”. 然后对大小做减法, 最后再重新拼接.
public class Carousel : MonoBehavior, IDragHandler, IBeginDragHandler, IEndDragHandler
{
    // 字段与属性

    void Update()
    {
        if (EnableInertia && !_dragging && _radianVelocity != 0)
        {
            _radianOffset += _radianVelocity * Time.deltaTime;
            UpdateObjectStatus();

            // 拆解
            var radianVelocitySign = Mathf.Sign(_radianVelocity);
            var radianVelocitySize = Mathf.Abs(_radianVelocity);

            // 减小速度
            radianVelocitySize -= RadianDrag * Time.deltaTime;
            if (radianVelocitySize < 0)   // 速度大小不能为负值
                radianVelocitySize = 0;

            // 重新拼接
            _radianVelocity = radianVelocitySign * radianVelocitySize;

            // 自动回正
            if (EnableAutoCorrection && _radianVelocity == 0)
            {
                Select(SelectedIndex);
            }
        }
    }

    // 其他逻辑
}
- 1
- 2
- 3
- 4
- 5
- 6
- 7
- 8
- 9
- 10
- 11
- 12
- 13
- 14
- 15
- 16
- 17
- 18
- 19
- 20
- 21
- 22
- 23
- 24
- 25
- 26
- 27
- 28
- 29
- 30
- 31
- 32
- 33
于是, 我们成功为轮转图添加了惯性功能. 最后检查代码, 它们大概是这样的:
public class Carousel : MonoBehavior, IDragHandler, IBeginDragHandler, IEndDragHandler
{
    float _radianOffset;
    float _radianVelocity;

    float _cameraDistance;
    Vector3 _lastMouseWorldPosition;

    public float Size { get; set; } = 5;
    public float RadianDrag { get; set; } = 10;

    public bool EnableInertia { get; set; } = true;
    public bool EnableAutoCorrection { get; set; } = true;
    public float TransitionTime { get; set; } = 0.2f;

    public int SelectedIndex { get; private set; }

    void Start() { ... }
    void Update() { ... }

    private void UpdateObjectStatus() { ... }
    private void CorrectRotationTarget(float origin, ref float target) { ... }
    private float GetRadianFromItemIndex(int index) { ... }

    public void Select(int index) { ... }

    void IDragHandler.OnDrag(PointerEventData eventData) { .. }
    void IBeginDragHandler.OnBeginDrag(PointerEventData eventData) { ... }
    void IEndDragHandler.OnEndDrag(PointerEventData eventData) { ... }
}
- 1
- 2
- 3
- 4
- 5
- 6
- 7
- 8
- 9
- 10
- 11
- 12
- 13
- 14
- 15
- 16
- 17
- 18
- 19
- 20
- 21
- 22
- 23
- 24
- 25
- 26
- 27
- 28
- 29
- 30
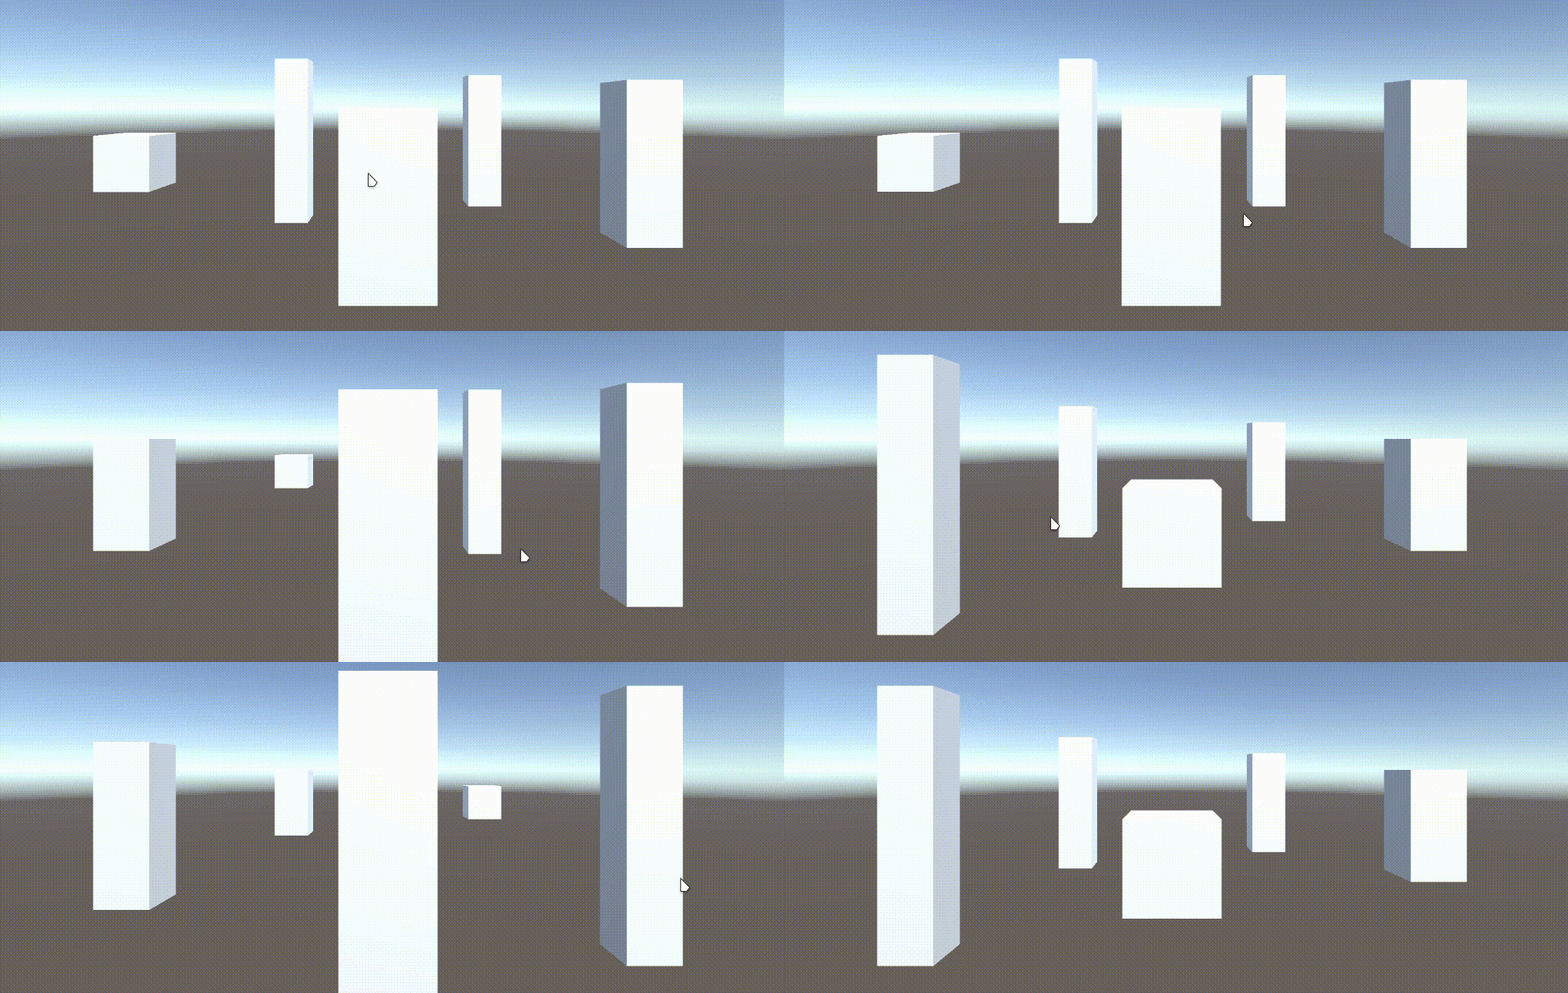
于是, 你就可以得到在文章最开始展示的, 完整轮转图的效果了:
点击选择
最后, 我们希望为轮转图添加鼠标单击选择的功能, 实现起来很方便, 因为我们已经编写好选择某元素的方法 Select 了. 那么, 只需要实现 IPointerClickHandler, 并判断是否点击了某个子元素, 然后调用 Select 方法即可.
public class Carousel : MonoBehavior, IDragHandler, IBeginDragHandler, IEndDragHandler, IPointerClickHandler
{
    // 字段与属性

    /// <summary>
    /// 允许点击选择
    /// </summary>
    [field: SerializeField]
    public bool AllowClickSelection { get; set; } = false;

    void IPointerClickHandler.OnPointerClick(PointerEventData eventData)
    {
        if (!AllowClickSelection)
            return;

        var childCount = transform.childCount;

        for (int i = 0; i < childCount; i++)
        {
            var renderer = transform.GetChild(i);

            if (eventData.pointerPressRaycast.gameObject == renderer.gameObject)
            {
                Select(i);
                break;
            }
        }
    }

    // 其他逻辑
}
- 1
- 2
- 3
- 4
- 5
- 6
- 7
- 8
- 9
- 10
- 11
- 12
- 13
- 14
- 15
- 16
- 17
- 18
- 19
- 20
- 21
- 22
- 23
- 24
- 25
- 26
- 27
- 28
- 29
- 30
- 31
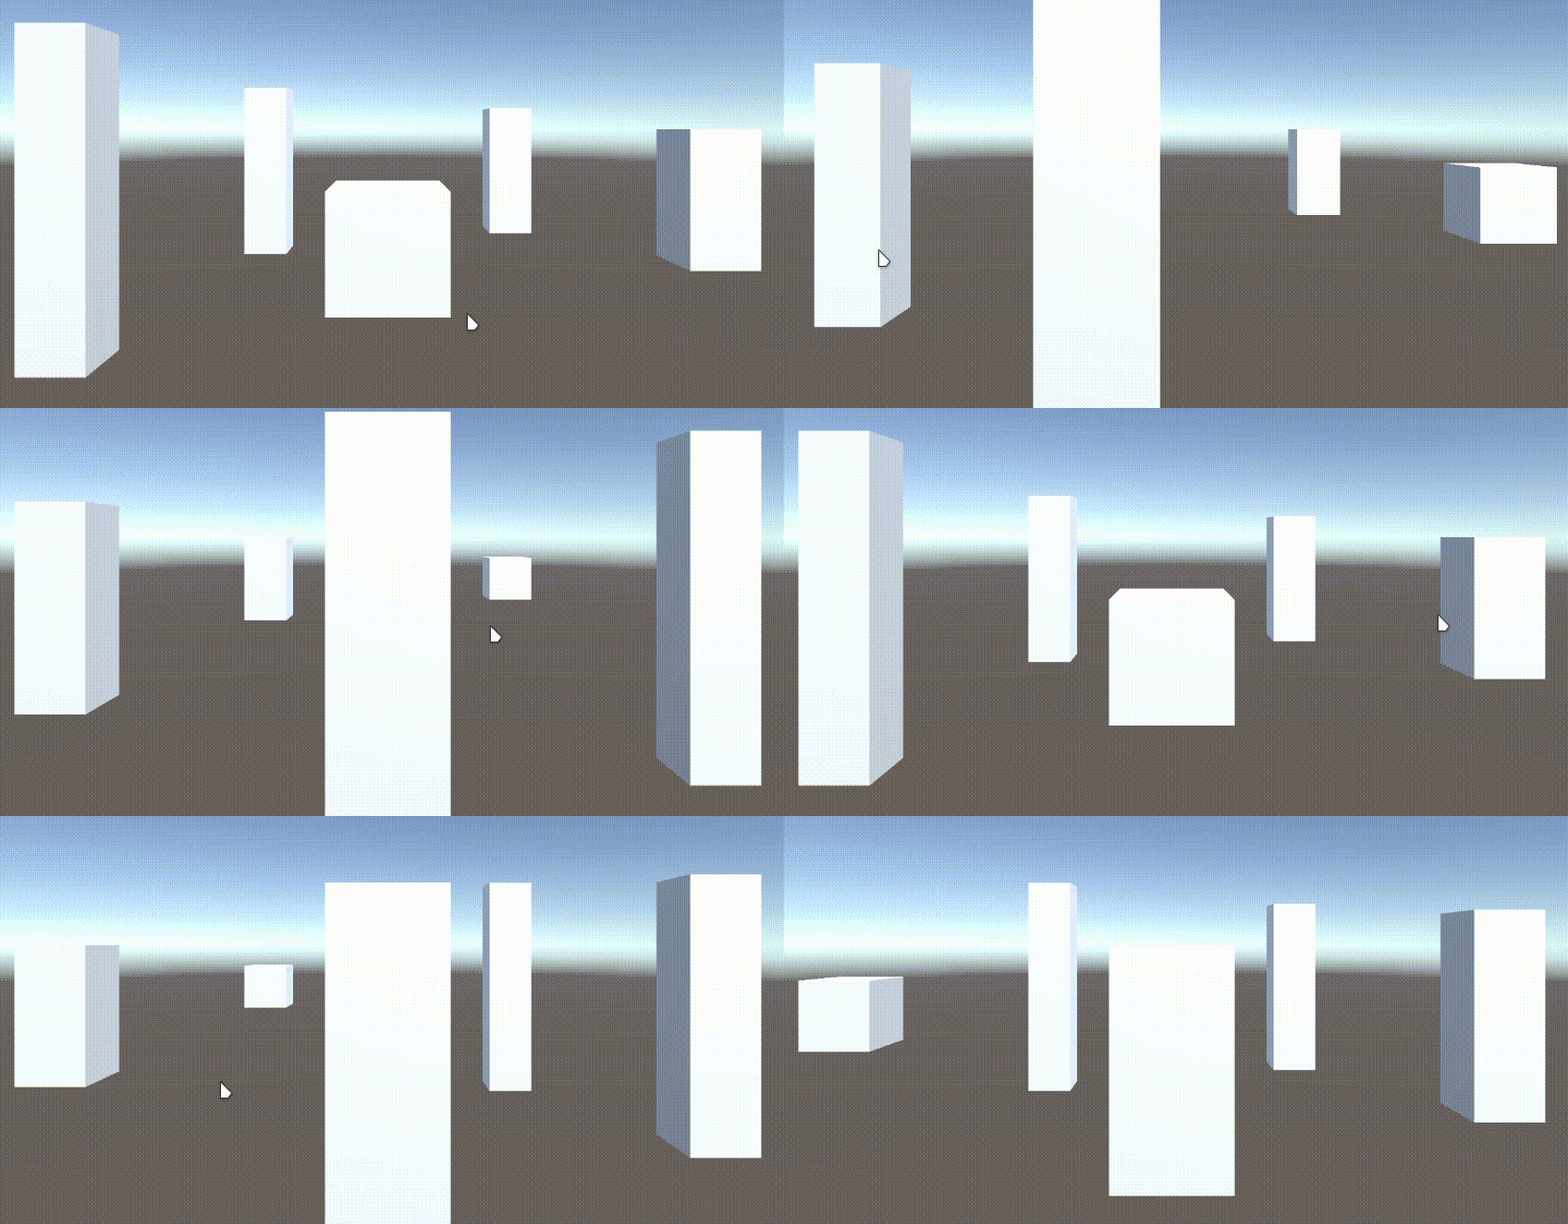
添加完上述代码之后, 我们就得到了可以单击选择的轮转图了.
物体生成
对于 UI 上的轮转图, 我们以展示 Sprite 为例, 为了方便, 我们不需要像原本那样实现在父物体下放置好物体, 而是根据用户指定的 Sprite, 自动生成游戏对象, 自动挂载所需组件, 设置属性.
创建物体
我们打算让脚本向外暴露出一个 Sprite[] 供设置要展示的图片, 那么在接下来的逻辑中, 就需要实现:
- 初始化时, 创建所需的游戏对象, 挂载 Image 组件以供显示图片
- 当外部对图片数组进行赋值时, 重新更新状态, 使显示是正确的
- 由于 Canvas 在 Screen Space - Overlay 模式下不存在近大远小, 所以我们需要提供根据前后顺序, 自动进行缩放的功能
那么, 我们需要做的添加和变更的有这些:
public class UICarousel : MonoBehavior, IDragHandler, IBeginDragHandler, IEndDragHandler, IPointerClickHandler
{
    // 其他字段和属性

    [SerializeField]
    Sprite[] _images;

    [SerializeField]
    private bool _scaleImages = true;

    [SerializeField]
    private float _minScale = 0.3f;

    List<UnityEngine.UI.Image> _imageComponents;

    // 懒加载的, 用于获取 RectTransform 的属性
    RectTransform _selfRectTransform;
    RectTransform SelfRectTransform => _selfRectTransform ??= GetComponent<RectTransform>();


    /// <summary>
    /// 要展示的图片
    /// </summary>
    public Sprite[] Images
    {
        get => _images;
        set
        {
            _images = value;
            UpdateImagesStatus();
        }
    }

    /// <summary>
    /// 图片尺寸 (用于生成 Image 物体设置大小)
    /// </summary>
    [field: SerializeField]
    public Vector2 ImageSize { get; set; } = new Vector2(100, 100);

    /// <summary>
    ///是否根据图像的前后关系调整图像大小  <br/>
    /// 如果是 Overlay, 不存在近大远小, 则需要开启这个, 但是如果是 WorldSpace 的 Canvas 并且设置了缩放使其在场景内, 则不需要启用这个
    /// </summary>
    public bool ScaleImages
    {
        get => _scaleImages;
        set
        {
            _scaleImages = value;
            UpdateImagesStatus();
        }
    }

    /// <summary>
    /// 最小缩放比例 (最后方的图像的缩放系数会是这个值)
    /// </summary>
    public float MinScale
    {
        get => _minScale;
        set
        {
            _minScale = value;
            UpdateImagesStatus();
        }
    }

    void Awake()
    {
        // 初始化
        if (_images is null)
            _images = Array.Empty<Sprite>();

        UpdateRenderers();
    }

    /// <summary>
    /// 根据图像创建 Image 对象, 并自动设置属性
    /// </summary>
    /// <param name="image"></param>
    /// <returns></returns>
    private UnityEngine.UI.Image CreateRendererFor(Sprite image) { ... }

    /// <summary>
    /// 更新 Sprite 的渲染器
    /// </summary>
    private void UpdateRenderers() { ... }

    /// <summary>
    /// 旋转主逻辑
    /// 根据 "旋转偏移量" 设置所有图像的位置, 大小, 以及前后关系
    /// </summary>
    private void UpdateObjectStatus() { ... }

    // 其他逻辑
}
- 1
- 2
- 3
- 4
- 5
- 6
- 7
- 8
- 9
- 10
- 11
- 12
- 13
- 14
- 15
- 16
- 17
- 18
- 19
- 20
- 21
- 22
- 23
- 24
- 25
- 26
- 27
- 28
- 29
- 30
- 31
- 32
- 33
- 34
- 35
- 36
- 37
- 38
- 39
- 40
- 41
- 42
- 43
- 44
- 45
- 46
- 47
- 48
- 49
- 50
- 51
- 52
- 53
- 54
- 55
- 56
- 57
- 58
- 59
- 60
- 61
- 62
- 63
- 64
- 65
- 66
- 67
- 68
- 69
- 70
- 71
- 72
- 73
- 74
- 75
- 76
- 77
- 78
- 79
- 80
- 81
- 82
- 83
- 84
- 85
- 86
- 87
- 88
- 89
- 90
- 91
- 92
- 93
- 94
- 95
根据 Sprite 创建 Image 的逻辑:
public class UICarousel : MonoBehavior, IDragHandler, IBeginDragHandler, IEndDragHandler, IPointerClickHandler
{
    // 字段和属性

    /// <summary>
    /// 根据图像创建 Image 对象, 并自动设置属性
    /// </summary>
    /// <param name="image"></param>
    /// <returns></returns>
    private UnityEngine.UI.Image CreateRendererFor(Sprite image)
    {
        GameObject gameObject = new("Image");
        gameObject.transform.SetParent(transform);

        var rectTransform = gameObject.AddComponent<RectTransform>();
        var renderer = gameObject.AddComponent<UnityEngine.UI.Image>();

        // 设置
        rectTransform.SetSizeWithCurrentAnchors(RectTransform.Axis.Horizontal, ImageSize.x);
        rectTransform.SetSizeWithCurrentAnchors(RectTransform.Axis.Vertical, ImageSize.y);
        renderer.sprite = image;

        return renderer;
    }


    // 其他逻辑
}
- 1
- 2
- 3
- 4
- 5
- 6
- 7
- 8
- 9
- 10
- 11
- 12
- 13
- 14
- 15
- 16
- 17
- 18
- 19
- 20
- 21
- 22
- 23
- 24
- 25
- 26
- 27
- 28
更新 Sprite 渲染器的逻辑(删除或创建 Image):
public class UICarousel : MonoBehavior, IDragHandler, IBeginDragHandler, IEndDragHandler, IPointerClickHandler
{
    // 字段和属性

    /// <summary>
    /// 更新 Sprite 的渲染器
    /// </summary>
    private void UpdateRenderers()
    {
        if (_imageComponents is null)
            _imageComponents = new List<UnityEngine.UI.Image>(GetComponentsInChildren<UnityEngine.UI.Image>());

        if (_imageComponents.Count < _images.Length)
        {
            for (int i = 0; i < _imageComponents.Count; i++)
                _imageComponents[i].sprite = _images[i];
            while (_imageComponents.Count < _images.Length)
                _imageComponents.Add(CreateRendererFor(_images[_imageComponents.Count]));
        }
        else
        {
            for (int i = 0; i < _images.Length; i++)
                _imageComponents[i].sprite = _images[i];
            while (_imageComponents.Count > _images.Length)
            {
                int lastIndex = _imageComponents.Count - 1;

                // destroy the last
                Destroy(_imageComponents[lastIndex].gameObject);

                // remove the last
                _imageComponents.RemoveAt(lastIndex);
            }
        }
    }


    // 其他逻辑
}
- 1
- 2
- 3
- 4
- 5
- 6
- 7
- 8
- 9
- 10
- 11
- 12
- 13
- 14
- 15
- 16
- 17
- 18
- 19
- 20
- 21
- 22
- 23
- 24
- 25
- 26
- 27
- 28
- 29
- 30
- 31
- 32
- 33
- 34
- 35
- 36
- 37
- 38
- 39
UI 特有更新
更新物体状态的主逻辑(移动图片, 缩放图片, 调整图片层级关系):
public class UICarousel : MonoBehavior, IDragHandler, IBeginDragHandler, IEndDragHandler, IPointerClickHandler
{
    // 字段和属性

    /// <summary>
    /// 旋转主逻辑
    /// 根据 "旋转偏移量" 设置所有图像的位置, 大小, 以及前后关系
    /// </summary>
    private void UpdateObjectStatus()
    {
        UpdateRenderers();

        var scaleGap = 1 - MinScale;
        var radianGap = Mathf.PI * 2 / _images.Length;
        var selfSizeDelta = SelfRectTransform.sizeDelta;
        var radius = selfSizeDelta.x / 2;
        var imageCount = _images.Length;
        var halfPi = Mathf.PI / 2;

        var minSin = 1f;
        var selectedImageIndex = -1;

        _radianOffset %= (Mathf.PI * 2);
        for (int i = 0; i < imageCount; i++)
        {
            var scaleShrink = scaleGap * i / (imageCount - 1);
            var renderer = _imageComponents[i];

            float cos = Mathf.Cos(radianGap * i + _radianOffset - halfPi);
            float sin = Mathf.Sin(radianGap * i + _radianOffset - halfPi);
            var x = cos * radius;
            var z = sin * radius;

            if (sin <= minSin)
            {
                selectedImageIndex = i;
                minSin = sin;
            }

            renderer.transform.localPosition = new Vector3(x, 0, z);

            if (ScaleImages)
            {
                var scale = Mathf.Lerp(MinScale, 1, ((-sin) + 1) / 2);
                renderer.transform.localScale = new Vector3(scale, scale, scale);
            }
            else
            {
                renderer.transform.localScale = new Vector3(1, 1, 1);
            }
        }

        // 根据大小, 调整顺序, 因为小的在后面, 所以直接根据大小, 调用调整顺序方法
        foreach (var com in _imageComponents.OrderBy(com => com.rectTransform.localScale.x))
            com.transform.SetAsLastSibling();

        // 记录当前选择索引以及图像
        SelectedIndex = selectedImageIndex;
    }


    // 其他逻辑
}
- 1
- 2
- 3
- 4
- 5
- 6
- 7
- 8
- 9
- 10
- 11
- 12
- 13
- 14
- 15
- 16
- 17
- 18
- 19
- 20
- 21
- 22
- 23
- 24
- 25
- 26
- 27
- 28
- 29
- 30
- 31
- 32
- 33
- 34
- 35
- 36
- 37
- 38
- 39
- 40
- 41
- 42
- 43
- 44
- 45
- 46
- 47
- 48
- 49
- 50
- 51
- 52
- 53
- 54
- 55
- 56
- 57
- 58
- 59
- 60
- 61
- 62
- 63
其中, 缩放图片中用到了 Mathf.Lerp 函数, 在 “比例” 参数中, 传入了 (-sin + 1) / 2 这样的值. 这是因为, 正弦在我们的算法中本来就关系到物体的前后关系, 所以直接对正弦值做处理, 就能得到最终值域为 0 到 1, 可用于 Lerp 的参数了.
sin: 从远到近, 值从 1 到 -1-sin: 从远到近, 值从 -1 到 1-sin + 1: 从远到近, 值从 0 到 2(-sin + 1) / 2: 从远到近, 值从 0 到 1Mathf.Lerp(MinScale, 1, (-sin + 1) / 2): 从远到近, 值从MinScale到 1
而之所以需要调整顺序, 也是因为在 UI 中, 遮挡关系不由 Z 轴决定, 而是由 UI 层级以及它们在面板中的先后关系决定的.
另外, 我们也应该删去对鼠标的坐标转换之类的东西, 因为是 UI 层上的拖拽, 所以在 Drag 中只需要使用事件数据的鼠标移动量就可以了:
public class UICarousel : MonoBehavior, IDragHandler, IBeginDragHandler, IEndDragHandler, IPointerClickHandler
{
    // 字段和属性

    // 删去 _cameraDistance 和 _lastMouseWorldPosition

    /// <summary>
    /// 拖拽时, 计算实际角度偏移量, 并更新图像状态
    /// </summary>
    /// <param name="eventData"></param>
    void IDragHandler.OnDrag(PointerEventData eventData)
    {
        var selfSizeDelta = SelfRectTransform.sizeDelta;
        float normalizedOffset = eventData.delta.x / (selfSizeDelta.x / 2);
        float radianChange = Mathf.Asin(normalizedOffset % 1);

        _radianOffset += radianChange;
        _radianVelocity = radianChange / Time.deltaTime;

        UpdateObjectStatus();
    }

    void IBeginDragHandler.OnBeginDrag(PointerEventData eventData)
    {
        // 删去了坐标转换逻辑

        _dragging = true;
    }


    // 其他逻辑
}
- 1
- 2
- 3
- 4
- 5
- 6
- 7
- 8
- 9
- 10
- 11
- 12
- 13
- 14
- 15
- 16
- 17
- 18
- 19
- 20
- 21
- 22
- 23
- 24
- 25
- 26
- 27
- 28
- 29
- 30
- 31
- 32
最后, 检查代码, 它们应该是大概这样的:
[RequireComponent(typeof(RectTransform))]
public class UICarousel : MonoBehavior, IDragHandler, IBeginDragHandler, IEndDragHandler, IPointerClickHandler
{
    RectTransform _selfRectTransform;

    float _radianOffset;
    float _radianVelocity;

    bool _dragging;

    [SerializeField]
    Sprite[] _images;

    [SerializeField]
    private bool _scaleImages = true;

    [SerializeField]
    private float _minScale = 0.3f;

    List<UnityEngine.UI.Image> _imageComponents;

    RectTransform SelfRectTransform => _selfRectTransform ??= GetComponent<RectTransform>();

    public Sprite[] Images { ... }
    public Vector2 ImageSize { get; set; } = new Vector2(100, 100);
    public float RadianDrag { get; set; } = 10;
    public bool ScaleImages { ... }
    public float MinScale { ... }

    public bool AllowClickSelection { get; set; } = false;
    public bool EnableInertia { get; set; } = true;
    public bool EnableAutoCorrection { get; set; } = true;

    public float TransitionTime { get; set; } = 0.2f;

    public int SelectedIndex { get; private set; }

    void Awake() { ... }
    void Start() { ... }
    void Update() { ... }

    private UnityEngine.UI.Image CreateRendererFor(Sprite image) { ... }
    private void UpdateRenderers() { ... }
    private void UpdateObjectStatus() { ... }
    private void CorrectRotationTarget(float origin, ref float target) { ... }
    private float GetRadianOffsetFromIndex(int index) { ... }

    public void Select(int index) { .... }

    void IDragHandler.OnDrag(PointerEventData eventData) { .. }
    void IBeginDragHandler.OnBeginDrag(PointerEventData eventData) { ... }
    void IEndDragHandler.OnEndDrag(PointerEventData eventData) { ... }
    void IPointerClickHandler.OnPointerClick(PointerEventData eventData) { ... }
}
- 1
- 2
- 3
- 4
- 5
- 6
- 7
- 8
- 9
- 10
- 11
- 12
- 13
- 14
- 15
- 16
- 17
- 18
- 19
- 20
- 21
- 22
- 23
- 24
- 25
- 26
- 27
- 28
- 29
- 30
- 31
- 32
- 33
- 34
- 35
- 36
- 37
- 38
- 39
- 40
- 41
- 42
- 43
- 44
- 45
- 46
- 47
- 48
- 49
- 50
- 51
- 52
- 53
- 54
于是, 最终我们就能得到一个可点选, 带惯性, 带自动回正的 2D 轮转图了.

其他
从效果上来看, 我们编写的轮转图已经完美了, 但仔细看的话, 还是有一些逻辑瑕疵的.
- 即使我拖拽轮转图并停止, 旋转速度的值也有可能不为 0
这就导致当开启惯性的时候, 无论如何, 在松开鼠标的时候, 它都会 “动” 一下. - 当鼠标拖拽到屏幕边缘的时候, 鼠标在移动, 但是屏幕上鼠标的位置不改变
这会导致旋转速度被设为 0, 进而导致, 虽然松开了鼠标, 但是因为没有触发惯性, 因而没有执行自动回正的逻辑. 因为启用惯性时, 只有速度从一个非 0 值变成 0 值, 才会执行自动回正.
这上面的问题, 我懒得改了, 改起来的思路的话, 也很简单, 如下:
- 将速度计算的逻辑扔 Update 里面, 并计算相对上一帧的旋转量, 即可解决问题 1
- 在结束拖拽时, 同时判断速度是否为 0, 如果为 0 就意味着惯性逻辑不执行, 那么这时, 直接执行自动回正逻辑即可.
最后, 关于本文章中脚本的源代码, 直接在 github.com/SlimeNull/UnityTests 中下载即可. 文章中因为涉及到逐步骤以及思路的讲解, 所以代码并不完整. 不过你跟着做的话, 也是能写出来完整的代码的.
使用方式的话, 3D 轮转图是直接挂父对象上, 然后手动创建子对象. 在运行时会自动设置子对象位置. 2D 轮转图的话, 不需要手动创建子对象, 直接在 “检视器” 中设置要展示的图片, 在启动时便会自动创建对象.
文章原始链接: https://slimenull.com/p/20240226141713


