热门标签
热门文章
- 145、实例分割的labelme数据集转coco数据集以及coco数据集转labelme数据集、转paddleSeg数据集_labelme转coco
- 2还在为邮件大附件发送困扰?企业邮件大文件解决方案来了
- 3多模态大模型:技术、应用与前景_多模态模型的应用场景是什么
- 4《大数据最全面试题-Offer直通车》目录
- 5改造winform的listview实现双击修改数据editbox和下拉框选择数据combobox功能_c# listview 双击编辑
- 6K-SVD简述——字典学习,稀疏编码,MOD与之对比(附代码)_k-svd简述——字典学习,稀疏编码
- 7YOLOv8快速复现 训练 SCB-Dataset3-S 官网版本 ultralytics
- 8Springboot集成kafka,更换环境启动项目报Connection to node -1 could not be established. Broker may not be availab_warn [main] o.a.k.c.networkclient [networkclient.j
- 9c++的学习之路:28、哈希表
- 10人工智能大模型之ChatGPT原理解析_chatgpt 强化模型和奖励模型
当前位置: article > 正文
Python编程之文件操作_(type alias) filedescriptororpath: type[int] | typ
作者:盐析白兔 | 2024-05-07 18:48:56
赞
踩
(type alias) filedescriptororpath: type[int] | type[str] | type[bytes] | typ
1. 基本数据结构
1.1. bytes和bytearray
- bytes是一个数据结构类,是描述字节流序列对象,内存分配是连续的,是不可变类型。
- bytearray是一个数据结构类,是描述字节流序列对象,内存分配是连续的,是可变类型。
bytes类型与bytearray类型可以相互转换。
>>> b=b'abc'
>>> type(b)
<class 'bytes'>
>>> b=b"abc"
>>> type(b)
<class 'bytes'>
>>>content = bytes([1, 2, 3, 4])
>>> content
b'\x01\x02\x03\x04'
>>> type(content)
<class 'bytes'>
bytearray(b'\x01\x02\x03\x04')
>>> print(content)
bytearray(b'\x01\x02\x03\x04')
>>> content[1]=5
>>> content
bytearray(b'\x01\x05\x03\x04')
>>> content_array = bytearray(content)
>>> type(content_array)
<class 'bytearray'>
>>> content = bytes(content_array)
>>> type(content)
<class 'bytes'>
- 1
- 2
- 3
- 4
- 5
- 6
- 7
- 8
- 9
- 10
- 11
- 12
- 13
- 14
- 15
- 16
- 17
- 18
- 19
- 20
- 21
- 22
- 23
1.2. str和list
- str是字符串类,可以直接通过’和“来创建,str是字符流对象,内存是连续的,str是不可变类型。
- list是列表类,可以用[]来创建,其内存分配是不连续的,是可变类型。
>>> nums=['ww','22','2s']
>>> nums
['ww', '22', '2s']
>>> type(nums)
<class 'list'>
>>> name = "mike"
>>> type(name)
<class 'str'>
>>> name
'mike'
- 1
- 2
- 3
- 4
- 5
- 6
- 7
- 8
- 9
- 10
- str到list
>>> name_list = list(name)
>>> name_list
['m', 'i', 'k', 'e']
- 1
- 2
- 3
- list到str
>>> nums = [1, 2, 3, 4]
>>> nums_list = [str(x) for x in nums]
>>> nums_list
['1', '2', '3', '4']
>>> str().join(str_nums)
'1234'
- 1
- 2
- 3
- 4
- 5
- 6
1.3. str和bytes比较
str和bytes都是不可变类型,并且都是连续内存。虽然它们的结构是相同的,甚至存储的数据也可以完全一样,但是str是字符流,表现形式是字符串,而bytes是字节流,表现形式是数字序列。encode和decode默认是以utf-8编码来进行转换的,可以指定gbk编码。
>>> name = "mike"
>>> name_bytes = name.encode()
>>> name_bytes
b'mike'
>>> name = name_bytes.decode()
>>> name
'mike'
>>> text = "我是谁"
>>> text.encode('gbk')
b'\xce\xd2\xca\xc7\xcb\xad'
>>> text.encode('gbk')
b'\xce\xd2\xca\xc7\xcb\xad'
>>> text_bytes = text.encode('gbk')
>>> text_bytes
b'\xce\xd2\xca\xc7\xcb\xad'
>>> new_text = text_bytes.decode('gbk')
>>> new_text
'我是谁'
>>> text='1234'
>>> print(bytes(text, 'utf-8'))
b'1234'
- 1
- 2
- 3
- 4
- 5
- 6
- 7
- 8
- 9
- 10
- 11
- 12
- 13
- 14
- 15
- 16
- 17
- 18
- 19
- 20
- 21
1.4. int和bytes的相互转换
# int转bytes
val = 0x123456789abc
bytes_val = val.to_bytes(4, "big")
bytes_val = val.to_bytes(5, "little")
# bytes转int
val = int.from_bytes(bytes_val, "little")
- 1
- 2
- 3
- 4
- 5
- 6
2. 数字与字符串的相互转换
2.1. 数字转换为字符串
数字转换为字符串主要是通过str类的成员函数format或f字符串语法来完成。如果是简单的转换,也可以通过初始化函数来进行转换。
>>> name = 'Peter'
>>> age = 23
>>> print('{} is {} years old'.format(name, age))
Peter is 23 years old
>>> print(f'{name} is {age} years old')
Peter is 23 years old
>>> a = 123.456
>>> f"a if {a:8.2f}"
'a if   123.46'
>>> print(hex(a))
0x1234
>>> a=1234
>>> print(hex(a))
0x4d2
>>> a=1234
>>> print(str(a))
1234
>>> a=0x1234
>>> print(str(a))
4660
- 1
- 2
- 3
- 4
- 5
- 6
- 7
- 8
- 9
- 10
- 11
- 12
- 13
- 14
- 15
- 16
- 17
- 18
- 19
- 20
2.2. 字符串转换为数字
- str到int
>>> phone_number = "13988888888"
>>> int(phone_number, 10)
13988888888
>>> int(phone_number)
13988888888
>>> hex_str = "0x1234"
>>> int(hex_str, 16)
4660
- 1
- 2
- 3
- 4
- 5
- 6
- 7
- 8
3. 文件操作
3.1. 创建删除文件
- 创建文件
os.mknod("test.txt")
open("test.txt", w)
- 1
- 2
- 创建目录
# 创建单目录
os.mkdir("test")
# 创建多层目录
os.makedirs(r"d:\abc\def")
# pathlib创建目录
pathlib.Path("temp/").mkdir(parents=True, exist_ok=True)
- 1
- 2
- 3
- 4
- 5
- 6
- 删除文件
os.remove("test.txt")
- 1
- 删除空文件夹
os.removedirs("test")
os.rmdir("test")
- 1
- 2
- 删除文件夹及其中文件
import shutil
shutil.rmtree('/path/to/your/dir/')
- 1
- 2
3.2. 遍历所有文件及目录
- 遍历所有目录
>>> import pathlib
>>> p = pathlib.Path('.')
>>> [x for x in p.iterdir() if x.is_dir()]
- 1
- 2
- 3
- 遍历所有文件
files = pathlib.Path(".").rglob("*.py")
for file in files:
    print(file)
- 1
- 2
- 3
- 遍历所有文件及目录
p = pathlib.Path('.')
[print(x) for x in p.iterdir()]
- 1
- 2
3.3. 读写文件
- 二进制读写文件
with open("scan.bin", "rb+") as bin_file:
    content = bin_file.read()
    content_array = bytearray(content)
    content_array[2] = 5
    with open("new.bin", "wb") as new_file:
        new_file.write(content_array)
- 1
- 2
- 3
- 4
- 5
- 6
- 文本读写文件
# utf-8编码
with open("test6.py", "r", encoding='utf-8') as file:
    text = file.read()
    print(text)
# gbk编码
with open("a.c", "r", encoding='gb18030') as file:
    text = file.read()
    print(text)
- 1
- 2
- 3
- 4
- 5
- 6
- 7
- 8
- pathlib读写
>>> import pathlib
>>> p = pathlib.Path('a.bin')
>>> p.write_bytes(b'Binary file contents')
20
>>> p.read_bytes()
b'Binary file contents'
>>> p = pathlib.Path('my_text_file.txt')
>>> p.write_text('Text file contents')
18
>>> p.read_text()
'Text file contents'
- 1
- 2
- 3
- 4
- 5
- 6
- 7
- 8
- 9
- 10
- 11
- 按行读取
with open("test6.py", "r", encoding='utf-8') as file:
    print(file.readline()) # 读取第1行
	print(file.readline()) # 读取第2行

# 遍历输出所有文本
with open("test6.py", "r", encoding='utf-8') as file:
    lines = file.readlines()
    [print(line) for line in lines]
- 1
- 2
- 3
- 4
- 5
- 6
- 7
- 8
4. 应用
4.1. 2进制文件转换为C代码数组。
#coding=utf-8
import sys


lines = []
lines.append("#pragma once\n")
lines.append("\n")
lines.append("const static char binArr[] = {\n")

with open(sys.argv[1], "rb") as bin_file:
    content = bin_file.read()
    size = len(content)
    per_line_size = 16
    for n in range(0, size):
        if (0 == n%per_line_size):
            line = ["    "]

        if (n == size-1):
            line.append(f"0x{content[n]:02x}")
            lines.extend(line)
        else:
            line.append(f"0x{content[n]:02x}, ")

        if (15 == n % per_line_size):
            line.append("\n")
            lines.extend(line)
            line.clear()

    with open(sys.argv[2], "w") as file:
        lines.append("};\n");
        file.writelines(lines)
- 1
- 2
- 3
- 4
- 5
- 6
- 7
- 8
- 9
- 10
- 11
- 12
- 13
- 14
- 15
- 16
- 17
- 18
- 19
- 20
- 21
- 22
- 23
- 24
- 25
- 26
- 27
- 28
- 29
- 30
- 31
- 32
- 33
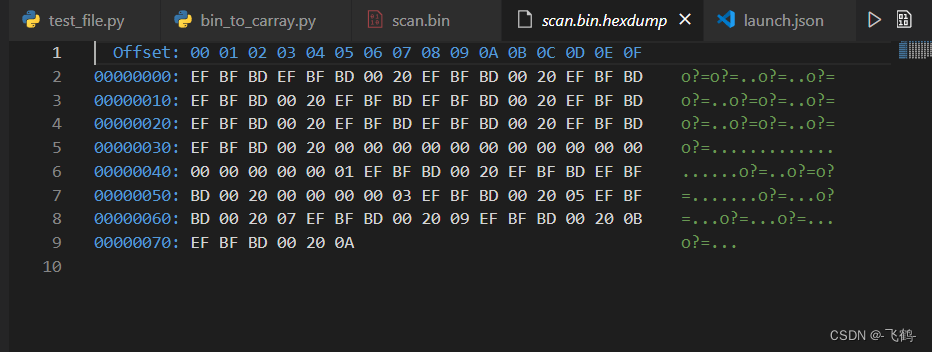
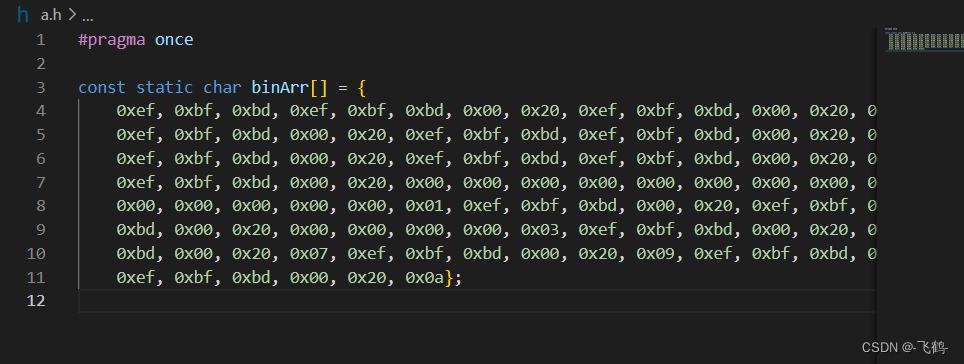
效果如下图:


声明:本文内容由网友自发贡献,不代表【wpsshop博客】立场,版权归原作者所有,本站不承担相应法律责任。如您发现有侵权的内容,请联系我们。转载请注明出处:https://www.wpsshop.cn/w/盐析白兔/article/detail/550680
推荐阅读
相关标签


